Are you looking for a fun and easy way to get crafty with your kids or as a solo project? Look no further than salt dough! This versatile mixture of flour, water, and salt can be shaped into a wide range of creative projects, from ornaments and decorations to keepsakes and functional items. In this article, we’ll explore 20 different salt dough recipes that are perfect for crafty fun. From whimsical fairy houses to beautiful picture frames, and from simple coasters to intricate animal figurines, there’s something for every skill level and interest.
Whether you’re a seasoned crafter or just looking for a fun activity to do with your family, salt dough is an excellent choice. It’s easy to make, inexpensive, and requires minimal equipment – all you need is some flour, water, salt, and any additional materials you’d like to incorporate into your project.
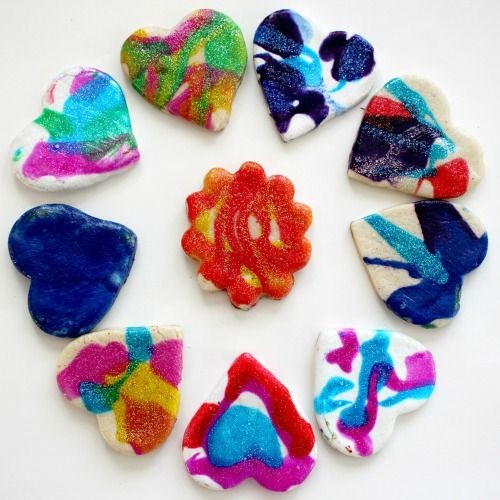
Salt Dough Ornaments
Make unique and personalized ornaments for your home or as gifts with this simple salt dough recipe.
Ingredients:
– 2 cups all-purpose flour
– 1/2 cup fine salt
– 1/4 cup water
– 1 tablespoon white vinegar
– Optional: food coloring, glitter, or other decorations
Instructions:
1. In a large bowl, mix together the flour and salt.
2. Gradually add in the water and vinegar, stirring until a dough forms.
3. Knead the dough on a floured surface until it is smooth and pliable.
4. If desired, add a few drops of food coloring to tint the dough.
5. Roll out the dough to your desired thickness (about 1/8 inch).
6. Use cookie cutters or a glass to create shapes for your ornaments.
7. Allow the ornaments to air dry completely (this may take several days or weeks depending on humidity).
8. Once dry, paint and decorate with glitter or other embellishments.
Cooking Time: None, as these ornaments are air-dried.
Salt Dough Handprint Keepsakes

Create a sentimental keepsake that captures the unique shape and size of your child’s hand with this easy salt dough recipe. Perfect for personalized gifts or treasured family heirlooms.
Ingredients:
– 2 cups all-purpose flour
– 1/2 cup fine salt
– 1/4 cup water
– 1 tablespoon white vinegar
– Food coloring (optional)
Instructions:
1. Preheat oven to 200°F (90°C).
2. In a large bowl, whisk together flour and salt.
3. Gradually add in water and vinegar until a dough forms.
4. Knead the dough for about 5 minutes until smooth.
5. Use food coloring if desired to tint the dough.
6. Press your child’s hand into the dough, making sure to get all fingers and palm covered.
7. Gently remove the hand from the dough and let it air dry completely (or bake at 200°F for 20-30 minutes).
8. Once dry, paint with acrylic or watercolor paints to add color and personalization.
Cooking Time: None required if air drying; approximately 20-30 minutes in oven.
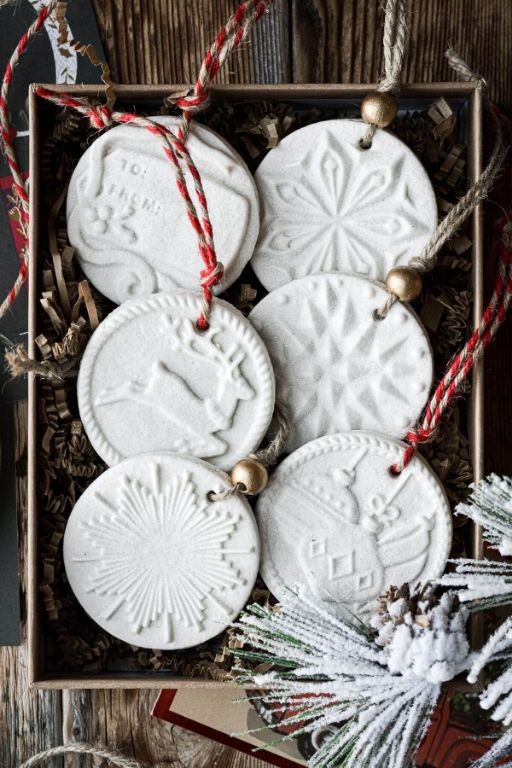
Salt Dough Christmas Decorations

Create a festive touch with these easy-to-make salt dough decorations. Perfect for adding a personal touch to your holiday decor or giving as gifts.
Ingredients:
– 2 cups all-purpose flour
– 1/2 cup fine salt
– 1/4 cup water
– 1/4 cup white vinegar
– Optional: food coloring, glitter, or other embellishments
Instructions:
1. In a large bowl, combine the flour and salt.
2. Gradually add in the water and vinegar, mixing until a dough forms.
3. If desired, add a few drops of food coloring to tint the dough.
4. Knead the dough on a floured surface until smooth.
5. Shape into desired forms (e.g., ornaments, figurines, or decorations).
6. Allow the dough to air dry completely (at least 24 hours).
7. Once dry, paint with acrylic paints and add embellishments if desired.
Cooking Time: None required – let it air dry!
Salt Dough Beads for Jewelry
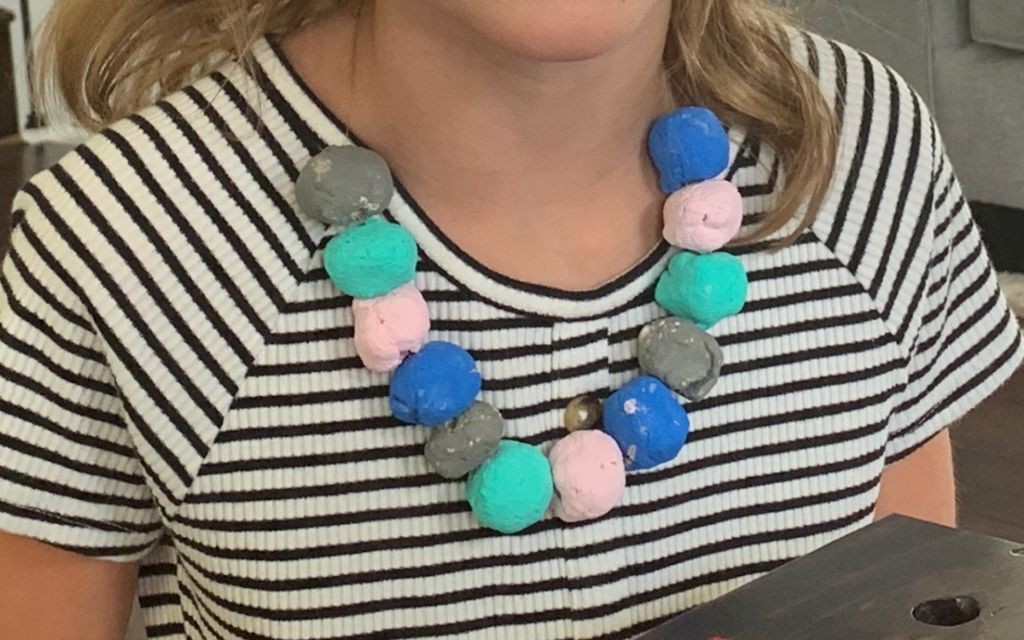
Transform your home into a mini-art studio with this simple recipe for salt dough beads! With just a few ingredients, you can create unique and personalized jewelry pieces that reflect your personal style.
Ingredients:
– 2 cups all-purpose flour
– 1 cup fine salt
– 1/2 cup water
– 1 tablespoon white vinegar
– Food coloring (optional)
– Jewelry findings (stringing material, beads, etc.)
Instructions:
1. Preheat oven to 200°F (90°C).
2. In a large bowl, combine flour and salt.
3. Gradually add in water and mix until a dough forms.
4. Add vinegar and knead until smooth.
5. If desired, add a few drops of food coloring to tint the beads.
6. Roll out the dough to your desired thickness (about 1/8 inch).
7. Use cookie cutters or shapes to create bead designs.
8. Bake for 20-25 minutes or until firm and lightly browned.
9. Allow beads to cool completely before stringing into jewelry pieces.
Cooking Time: 20-25 minutes
Salt Dough Animal Figurines
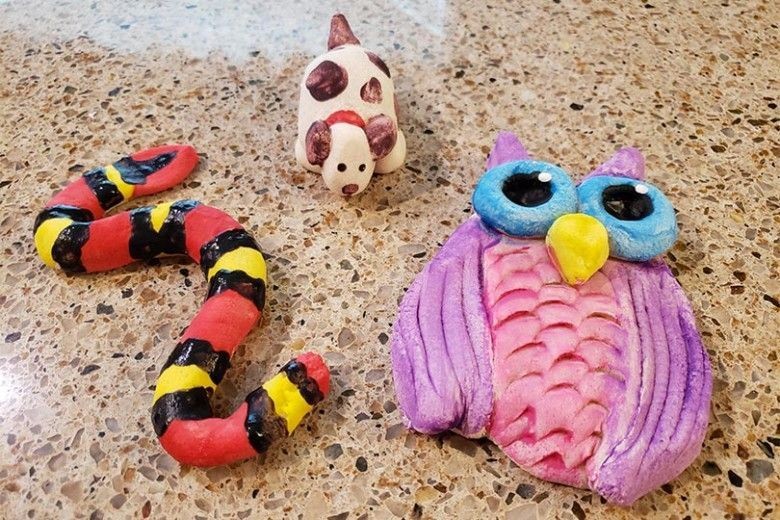
Transform flour, salt, and water into adorable animal figurines perfect for decorating or giving as gifts. This simple recipe requires minimal ingredients and effort, making it a great activity for kids and adults alike.
Ingredients:
– 2 cups all-purpose flour
– 1/2 cup fine salt
– 1/2 cup warm water
– Food coloring (optional)
– Decorations of your choice (e.g., paint, markers, glitter)
Instructions:
1. In a large bowl, mix together flour and salt until well combined.
2. Gradually add in warm water, stirring with a wooden spoon until a dough forms.
3. Knead the dough on a floured surface until smooth and pliable.
4. Shape the dough into desired animal shapes (e.g., cats, dogs, birds).
5. Allow figurines to air dry for 2-3 days or bake in a preheated oven at 200°F (90°C) for 1-2 hours.
6. Once dry, decorate with paint, markers, or glitter.
Cooking Time: None
Salt Dough Picture Frames
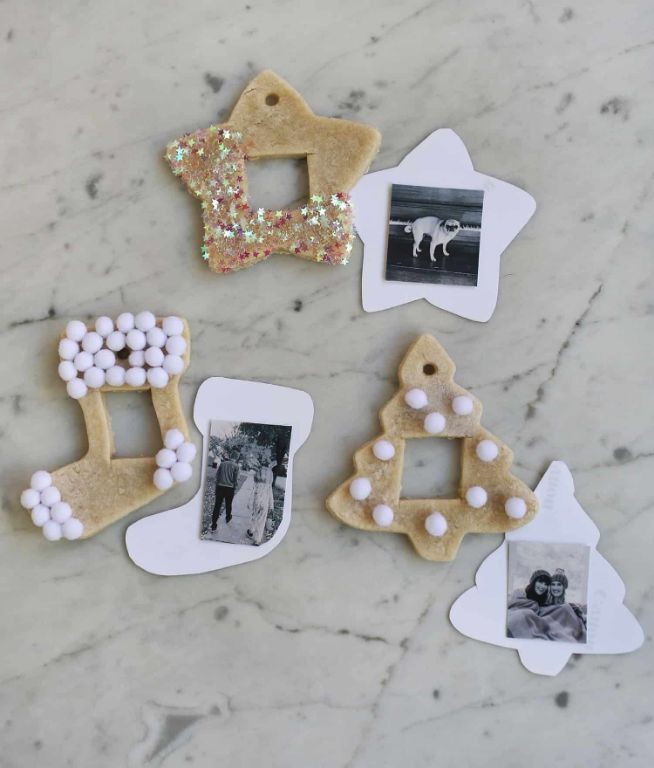
Create beautiful, rustic picture frames using a simple mixture of salt, flour, and water.
Ingredients:
– 2 cups all-purpose flour
– 1 cup salt
– 1/4 cup warm water
– Optional: food coloring, decorative items (e.g., glitter, beads)
Instructions:
1. In a large bowl, combine flour and salt.
2. Gradually add in the warm water, stirring until a dough forms.
3. Knead the dough for about 5 minutes until it becomes smooth and pliable.
4. Divide the dough into desired shapes or sizes for your picture frames.
5. Use a rolling pin to flatten each piece to the desired thickness (about 1/8 inch).
6. Cut out a rectangular shape with scissors, leaving a small border around the edges.
7. Place your photo or decorative items in the frame, and let it dry completely (takes about 24-48 hours).
Cooking Time: None! Allow the frames to air dry.
Salt Dough Coasters
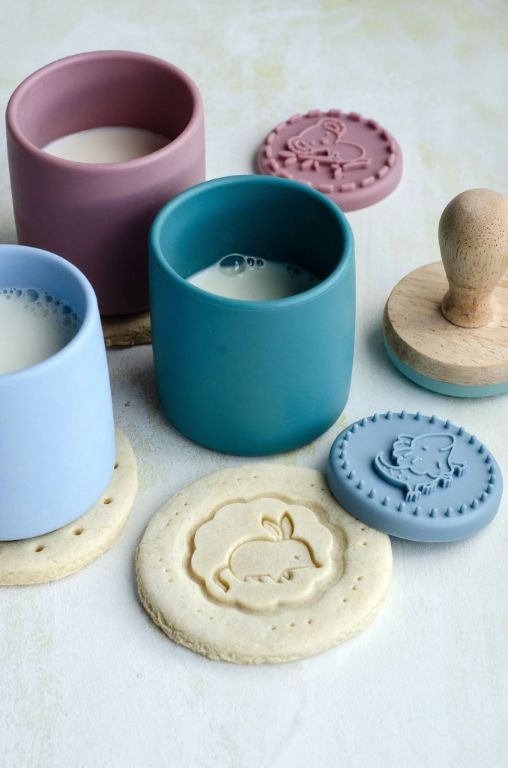
Create beautiful and functional coasters using just a few simple ingredients! This recipe is perfect for DIY enthusiasts and home decor lovers alike.
Ingredients:
• 2 cups all-purpose flour
• 1/2 cup fine salt
• 1/4 cup water
• 2 tablespoons vegetable oil
• Optional: food coloring, decorative items (e.g., glitter, shells)
Instructions:
1. In a large mixing bowl, combine the flour and salt.
2. Gradually add in the water and mix until a dough forms.
3. Add the vegetable oil and continue to mix until smooth.
4. If desired, add a few drops of food coloring to tint the dough.
5. Knead the dough on a floured surface until it becomes pliable.
6. Roll out the dough to about 1/4 inch thickness.
7. Use cookie cutters or a glass to create shapes for your coasters.
8. Allow the coasters to air dry completely (about 24-48 hours).
9. Once dry, lightly sand and apply a clear coat of varnish (optional).
Cooking Time: None! These coasters will take around 24-48 hours to air dry.
Salt Dough Candle Holders
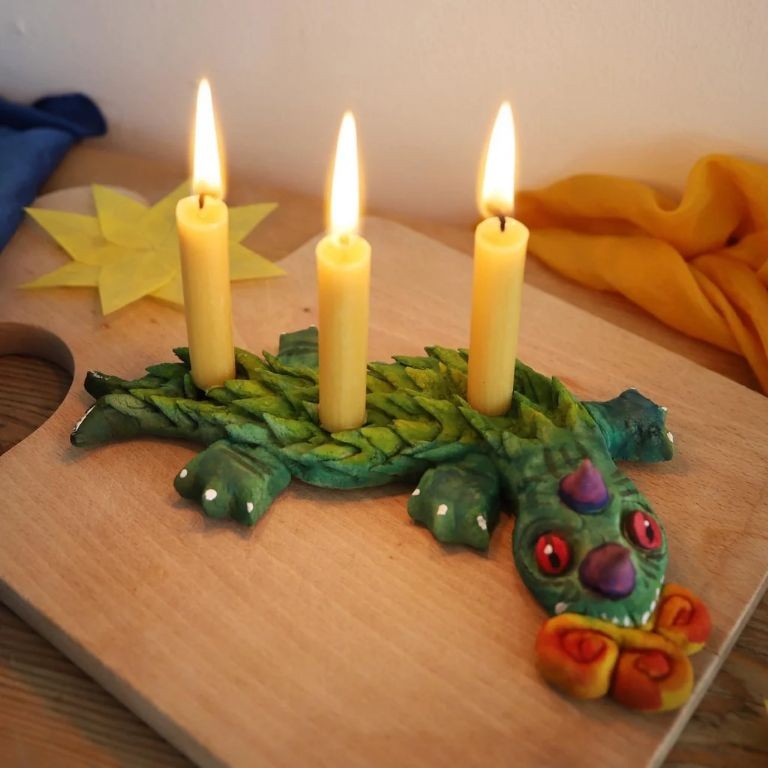
Create beautiful, handmade candle holders with this simple salt dough recipe. Perfect for decorating your home or making a thoughtful gift.
Ingredients:
– 2 cups all-purpose flour
– 1/2 cup fine salt
– 1/4 cup water
– 1 tablespoon white vinegar
– Food coloring (optional)
Instructions:
1. In a large bowl, combine flour and salt.
2. Gradually add in water and mix until a dough forms.
3. Add vinegar and mix well.
4. Knead the dough until smooth and pliable.
5. If desired, add a few drops of food coloring to tint the dough.
6. Roll out the dough to desired thickness for candle holder shape.
7. Use a cookie cutter or shape by hand to create the desired shape.
8. Allow the dough to dry completely (air-dry or bake at 200°F for 1-2 hours).
9. Once dry, paint and decorate with your favorite designs.
10. Place a tea light or votive candle inside and enjoy!
Cooking Time: None (air-drying) or 1-2 hours (baking)
Salt Dough Garland
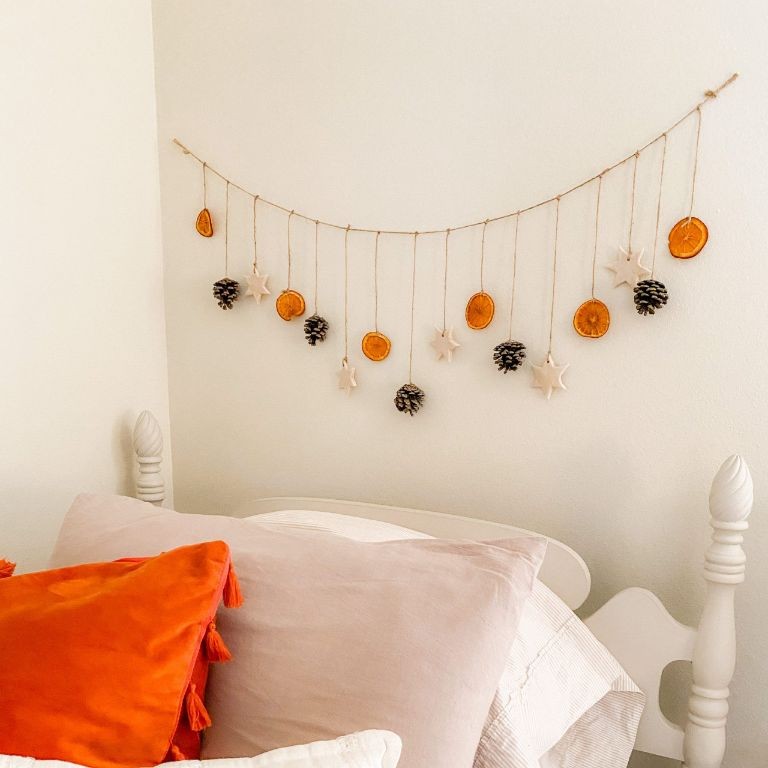
Create a beautiful and fragrant garland using this simple salt dough recipe.
Ingredients:
– 2 cups all-purpose flour
– 1/2 cup fine salt
– 1/4 cup water
– 2 tablespoons vegetable oil
– Optional: food coloring, decorations (e.g., beads, glitter)
Instructions:
1. In a large bowl, whisk together flour and salt.
2. Gradually add in water and mix until a dough forms.
3. Knead the dough for 5-7 minutes until smooth.
4. Divide the dough into 6-8 equal pieces.
5. Roll out each piece into a long rope (about 1/4 inch thick).
6. Cut the rope into desired garland lengths (e.g., 12 inches).
7. If desired, add food coloring or decorations to the dough before shaping.
8. Allow the garland to air dry for 2-3 weeks or bake in a preheated oven at 200°F (90°C) for 1 hour.
Cooking Time: None
Salt Dough Keychains
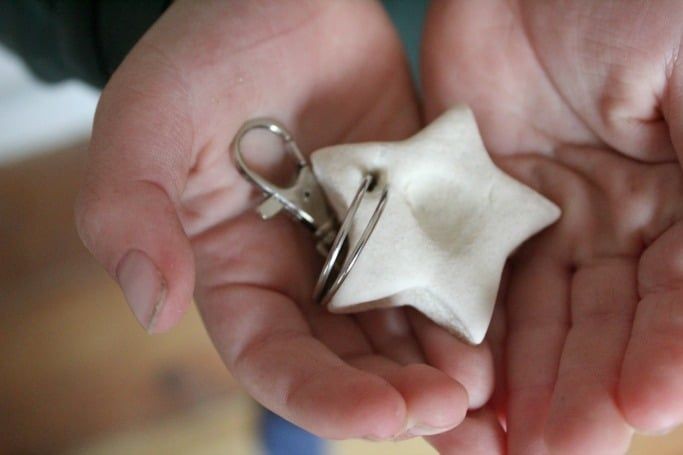
Create unique and personalized keychains using simple salt dough ingredients. Perfect as gifts or for personal use, these keychains are easy to make and can be customized with your name, initials, or a special message.
Ingredients:
– 2 cups all-purpose flour
– 1/2 cup fine salt
– 1/4 cup water
– 1 tablespoon vegetable oil
– Optional: food coloring, decorative items (e.g., beads, sequins)
Instructions:
1. In a large bowl, combine flour and salt.
2. Gradually add in water and mix until a dough forms.
3. Knead the dough on a floured surface until smooth.
4. Shape into small balls or desired keychain shape.
5. Add optional decorations (e.g., beads, sequins) to the center of each ball.
6. Allow the keychains to air dry completely (about 24 hours).
7. Once dry, apply a thin coat of vegetable oil to protect the dough.
Cooking Time: None needed! Just let them air dry.
Salt Dough Magnets
Create adorable magnets with a natural twist using this simple recipe.
Ingredients:
– 2 cups all-purpose flour
– 1/2 cup salt
– 1/4 cup water
– 1 tablespoon vegetable oil
– Optional: food coloring, glitter, or other decorations
Instructions:
1. In a large bowl, mix together flour and salt until well combined.
2. Gradually add in the water, stirring until a dough forms. If too sticky, add a little more flour. If too dry, add a little more water.
3. Knead the dough for about 5 minutes until smooth and pliable.
4. Divide the dough into small portions, enough to shape into desired magnet shapes (e.g., animals, letters, or objects).
5. Shape each portion into the desired shape and use a toothpick or skewer to create a hole at the top for the magnet.
6. Allow the magnets to air dry completely, which may take several days or up to a week depending on humidity.
7. Once dry, insert a small magnet into the hole and your salt dough magnet is ready!
Cooking Time: None required – simply let it air dry.
Salt Dough Bowls
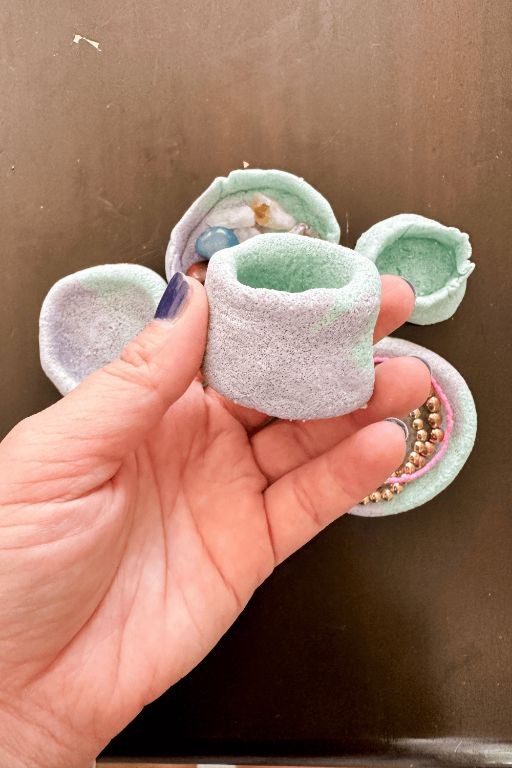
Create unique and personalized bowls using a mixture of flour, salt, and water. This recipe yields a durable and long-lasting material that can be decorated with paint, glaze, or other embellishments.
Ingredients:
– 2 cups all-purpose flour
– 1/2 cup fine salt
– 1/4 cup water
– Optional: food coloring, decorative items (e.g., beads, sequins)
Instructions:
1. In a large mixing bowl, combine flour and salt.
2. Gradually add in water, stirring until a dough forms.
3. Knead the dough for 5-7 minutes until smooth and pliable.
4. Shape the dough into desired bowl shape (e.g., sphere, oval).
5. Allow the bowl to air dry completely (takes about 24 hours).
6. Once dry, you can paint or glaze your bowl with acrylic paints or a clear coat of varnish.
Cooking Time: None
Salt Dough Wall Art
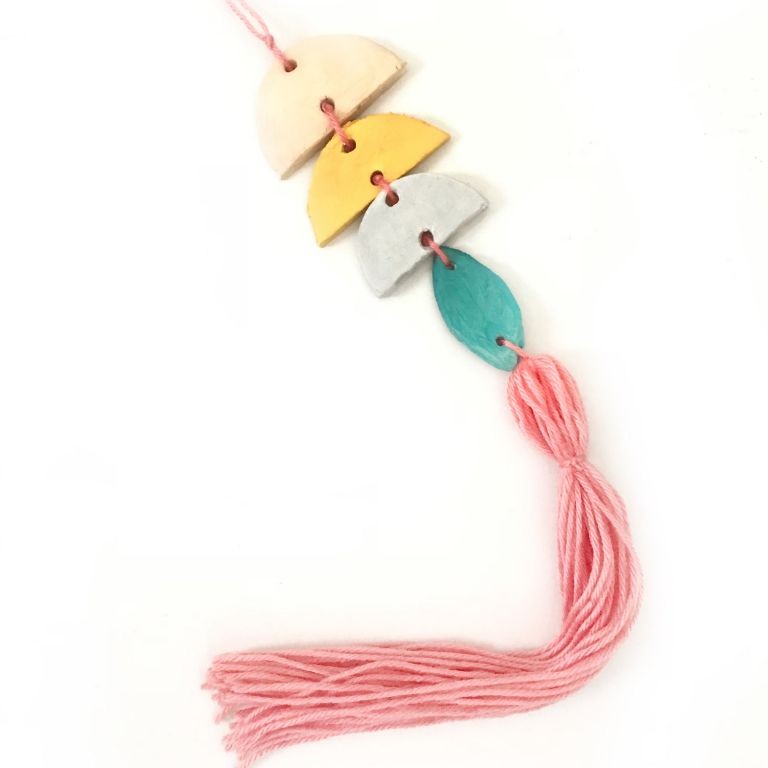
Create a beautiful and unique piece of wall art with this simple salt dough recipe.
Ingredients:
– 2 cups all-purpose flour
– 1/2 cup fine salt
– 1/2 cup water
– Food coloring (optional)
– A surface to work on
– A rolling pin or similar tool
Instructions:
1. In a large bowl, combine the flour and salt.
2. Gradually add in the water, mixing until a dough forms. You may not need all of the water, so add it slowly and be prepared to stop adding water when the dough comes together.
3. If desired, add a few drops of food coloring to tint the dough.
4. Knead the dough on a floured surface until smooth and pliable.
5. Use the rolling pin or similar tool to roll out the dough to your desired thickness (about 1/8 inch).
6. Cut out shapes or designs from the dough, or use cookie cutters for fun shapes.
7. Allow the dough to air dry completely, which may take several days or up to a week depending on humidity and temperature.
Cooking Time:
– Air drying time: 3-7 days
Note: This recipe makes a fairly fragile dough, so handle with care. Once dry, you can varnish or seal the art to protect it from moisture and damage.
Salt Dough Fairy Houses
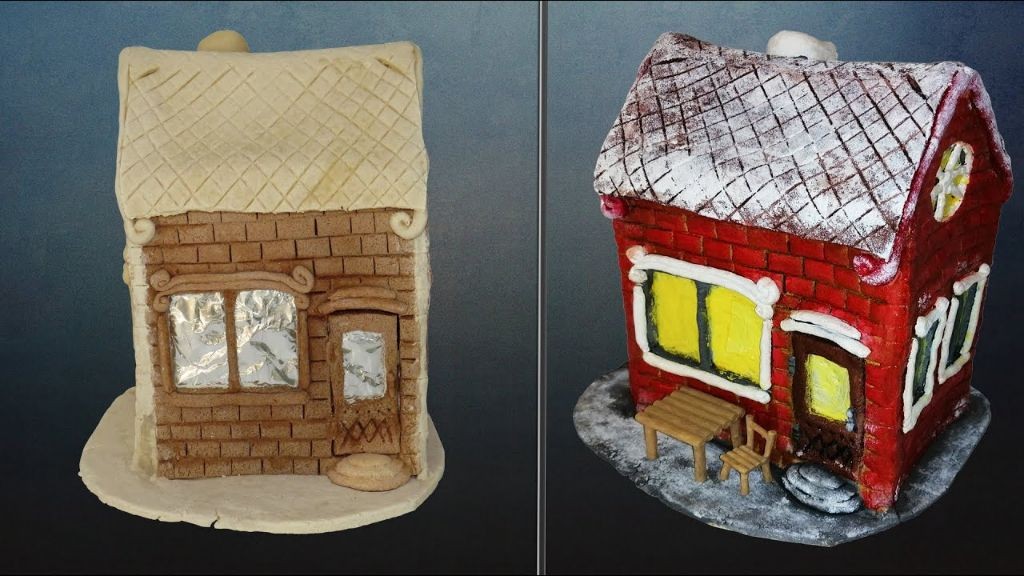
Create enchanting miniature homes with this easy-to-make salt dough recipe, perfect for decorating and displaying your favorite tiny fairy friends.
Ingredients:
– 2 cups all-purpose flour
– 1/2 cup fine salt
– 1/4 cup water
– 1 tablespoon white vinegar
– Food coloring (optional)
– Decorations of your choice (e.g., glitter, beads, leaves)
Instructions:
1. Preheat oven to 200°F (90°C).
2. In a large bowl, whisk together flour and salt.
3. Gradually add in water and vinegar until a dough forms.
4. Knead the dough on a floured surface for about 5 minutes, until smooth.
5. Divide the dough into small portions, depending on the size of fairy houses you want to create.
6. Shape each portion into a desired shape (e.g., house, tree, or animal).
7. Bake for 20-25 minutes, or until the houses are firm and lightly browned.
8. Allow the houses to cool completely before decorating with your preferred materials.
Cooking Time: 20-25 minutes
Salt Dough Holiday Wreaths

Create a unique and fragrant holiday wreath using salt dough, perfect for gifting or decorating your home.
Ingredients:
– 2 cups all-purpose flour
– 1/2 cup fine salt
– 1/4 cup water
– 1 tablespoon white glue
– Optional: decorations such as pinecones, holly berries, and ribbons
Instructions:
1. Preheat oven to 250°F (120°C).
2. In a large bowl, mix together flour and salt.
3. Gradually add in water and white glue until a dough forms.
4. Knead the dough on a floured surface for about 5 minutes.
5. Roll out the dough to desired thickness (about 1/4 inch) and use a cookie cutter or glass to create wreath shapes.
6. Place the shapes on a baking sheet lined with parchment paper.
7. Bake for 20-25 minutes, or until the wreaths are hard and lightly browned.
8. Allow to cool completely before decorating with desired embellishments.
Cooking Time: 20-25 minutes
Salt Dough Gift Tags
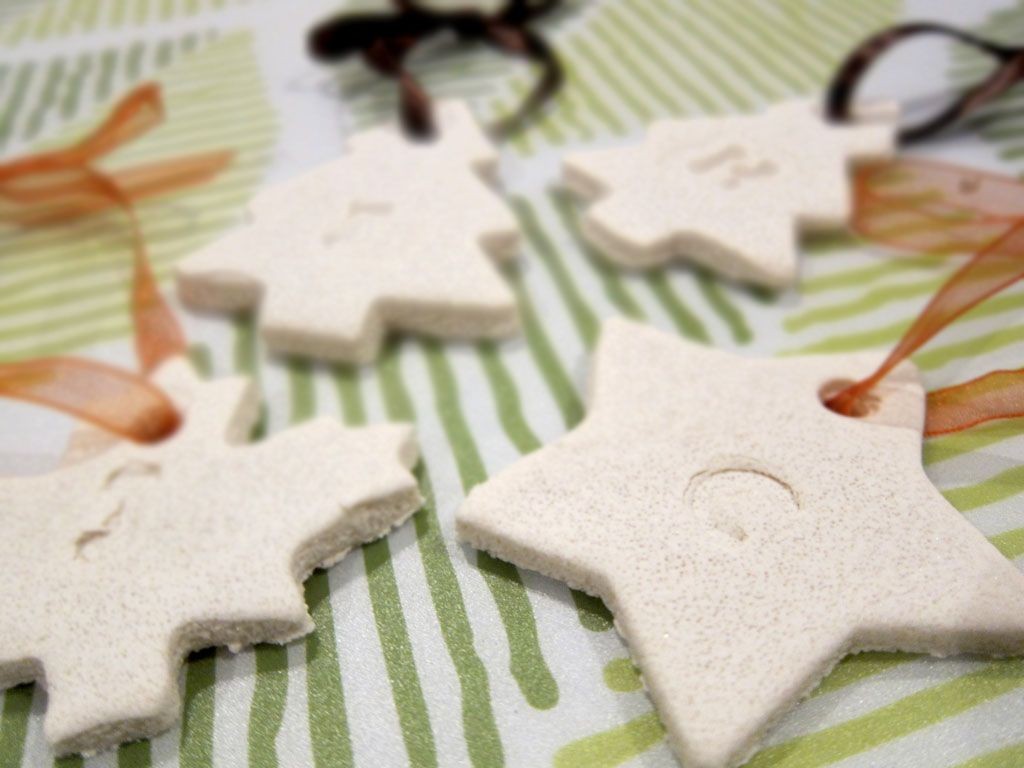
Create personalized gift tags with a homemade touch using this simple recipe.
Ingredients:
– 1 cup all-purpose flour
– 1/2 cup fine salt
– 1/4 cup water
– Optional: food coloring, glitter, or other embellishments
Instructions:
1. In a bowl, mix together the flour and salt until well combined.
2. Gradually add in the water, stirring until a dough forms. If needed, add more water or flour to achieve the right consistency.
3. Knead the dough on a floured surface until smooth.
4. Roll out the dough to desired thickness for your gift tags.
5. Use cookie cutters or a glass to create shapes. You can also freehand designs with a knife or a toothpick.
6. Allow the tags to air dry completely (this may take several hours or overnight).
7. Once dry, you can add embellishments like glitter, stickers, or markers.
Cooking Time: None needed! Let the dough air dry according to your desired level of crispiness.
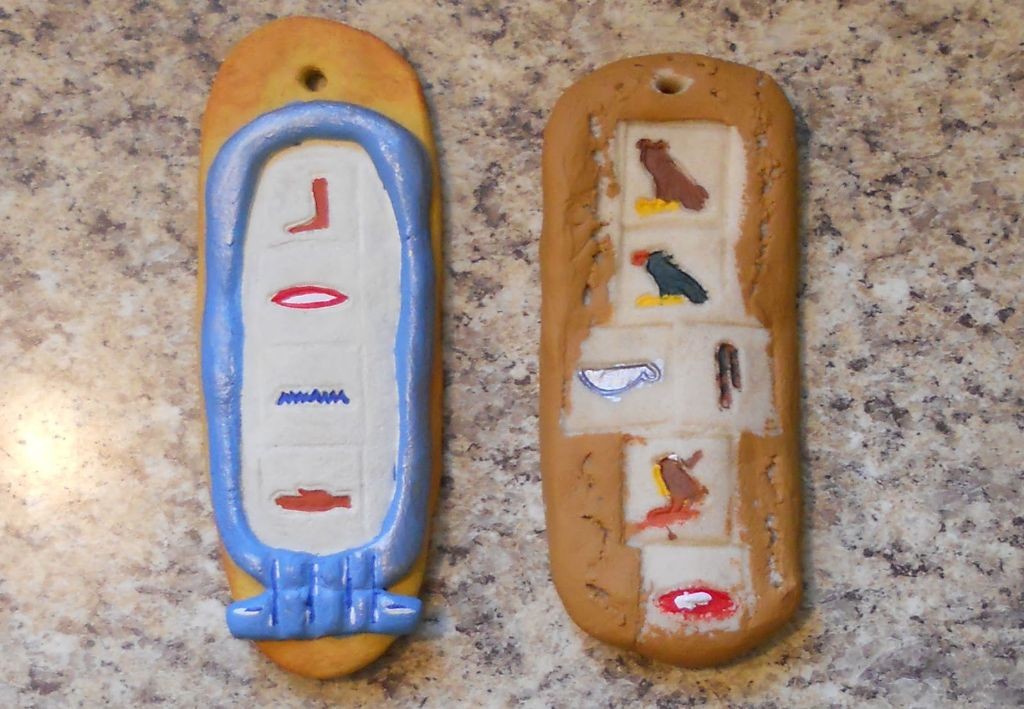
Salt Dough Pendants

Make unique and personalized pendants using natural ingredients like salt, flour, and water. This simple recipe is perfect for crafty people of all ages.
Ingredients:
– 2 cups all-purpose flour
– 1/2 cup fine salt
– 1/4 cup water
– Food coloring (optional)
– Shaped objects or molds (e.g., beads, charms, or pendant-shaped cookie cutters)
Instructions:
1. In a large bowl, mix together the flour and salt.
2. Gradually add in the water, stirring until a dough forms.
3. If desired, add a few drops of food coloring to tint the dough.
4. Knead the dough on a floured surface until it becomes smooth and pliable.
5. Use shaped objects or molds to create your pendant shapes.
6. Allow the pendants to air dry for at least 24 hours or bake in a preheated oven at 200°F (90°C) for 1-2 hours.
7. Once dry, paint or decorate with varnish as desired.
Cooking Time: None
Salt Dough Leaf Imprints
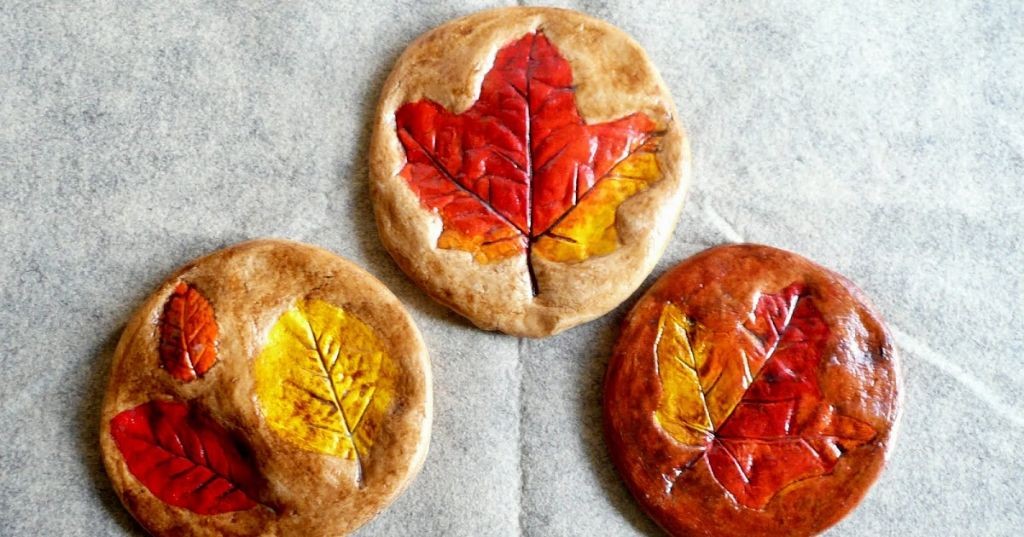
Create beautiful leaf imprints using natural leaves and a simple salt dough mixture.
Ingredients:
– 2 cups all-purpose flour
– 1/2 cup fine salt
– 1/4 cup water
– Leaves of your choice (any shape or size)
Instructions:
1. Preheat oven to 200°F (90°C).
2. In a bowl, mix together flour and salt.
3. Gradually add in water until a dough forms.
4. Press a leaf into the dough, making sure it’s fully coated.
5. Gently lift the leaf off the dough, leaving an impression behind.
6. Repeat with different leaves to create unique designs.
7. Allow the imprints to dry completely (about 2 hours).
8. Once dry, you can paint or decorate the imprints as desired.
Cooking Time: None needed
These salt dough leaf imprints are perfect for nature-inspired crafts and make a beautiful decoration for any room.
Salt Dough Name Plaques
Create personalized name plaques with this easy-to-make salt dough recipe. Perfect for customizing gifts, decorations, or special keepsakes.
Ingredients:
– 2 cups all-purpose flour
– 1 cup fine salt
– 1/2 cup water
– 1 tablespoon cream of tartar
– Food coloring (optional)
– A pinch of glitter or decorative items (optional)
Instructions:
1. In a large bowl, whisk together flour and salt.
2. Gradually add in water, mixing until a dough forms.
3. Add cream of tartar and mix well.
4. Knead the dough on a floured surface for 5-7 minutes, until smooth.
5. Shape the dough into desired shapes or use a cookie cutter to create custom designs.
6. For added color or sparkle, add a few drops of food coloring or sprinkle glitter onto the dough.
7. Place the shaped dough on a baking sheet lined with parchment paper.
8. Allow plaques to air dry completely (this may take several days).
9. Once dry, paint and varnish as desired.
Cooking Time: None (air drying only)
Salt Dough Miniature Food
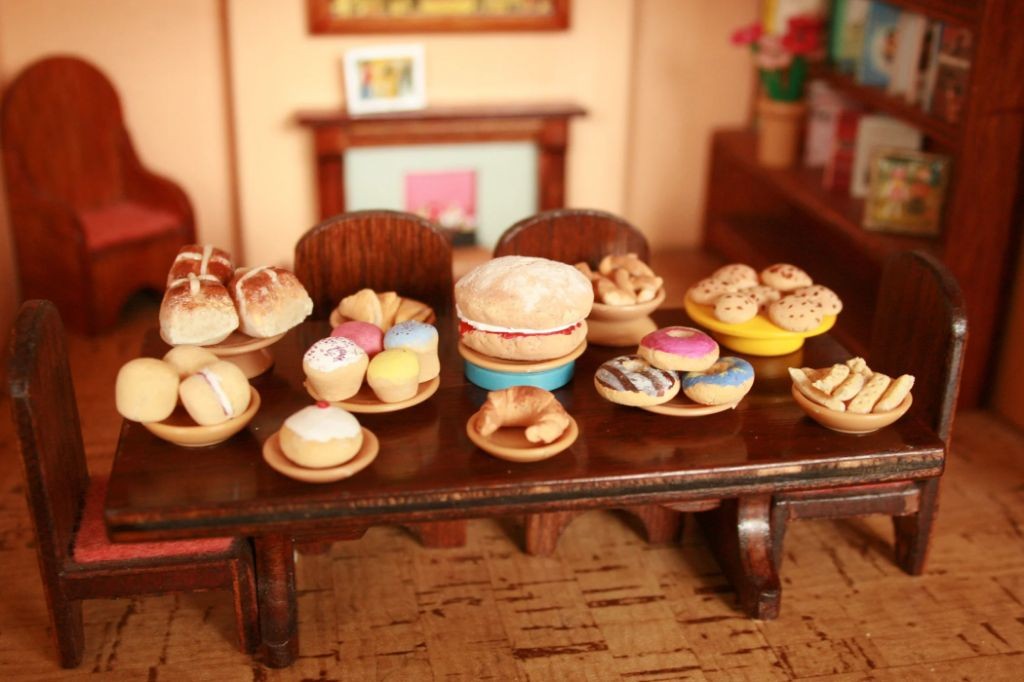
Create adorable miniature food pieces using this simple salt dough recipe. Perfect for dollhouses, dioramas, or just for fun!
Ingredients:
– 2 cups all-purpose flour
– 1/2 cup fine salt
– 1/4 cup water
– 2 tablespoons white glue
– Food coloring (optional)
Instructions:
1. In a large bowl, combine the flour and salt.
2. Gradually add in the water and mix until a dough forms.
3. Add the white glue and knead the dough until it’s smooth and pliable.
4. If desired, add a few drops of food coloring to tint the dough.
5. Shape the dough into small food items (e.g., fruits, vegetables, bread).
6. Allow the miniatures to air dry completely (this may take several days or weeks depending on humidity and thickness).
7. Once dry, paint with acrylic paints for added realism.
Cooking Time: None! The miniatures will air dry naturally.
Enjoy your adorable miniature food creations!
Summary
Get creative with salt dough! From ornaments to decorations, jewelry to home decor, we’ve got 20 unique and fun recipes to try. Make personalized keepsakes with handprints or leaves, create beautiful decorations for Christmas or other holidays, or craft functional items like coasters and candle holders. You can even make miniature food or animal figurines. Whatever your creative style, salt dough is the perfect medium to bring your ideas to life. With these recipes, you’ll have a blast getting crafty and making something special just for you or as a gift.