
Uncover the ultimate collection of American comfort foods that will transform your kitchen into a hub of deliciousness! From quick weeknight dinners to show-stopping holiday feasts, we’ve gathered 20 beloved recipes perfect for every occasion. Get ready to impress your family and friends with these crowd-pleasing dishes that celebrate the very best of American cuisine.
Classic New York Cheesecake
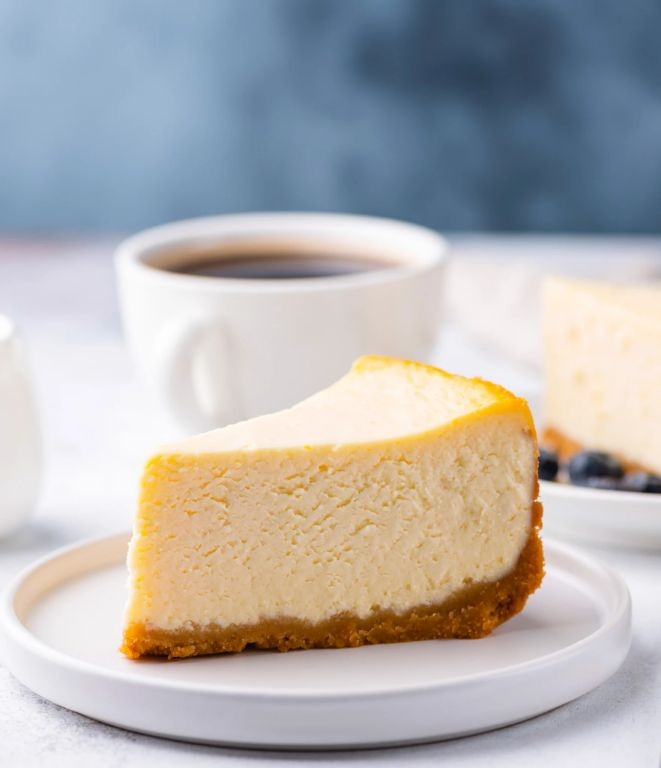
Cradling a slice of this cheesecake feels like holding a piece of quiet afternoon light, the kind that spills across a kitchen counter and makes everything soft around the edges. There’s something deeply comforting about its creamy simplicity, a dessert that asks for nothing more than to be slowly savored.
Ingredients
– About two cups of graham cracker crumbs, just enough to make a sturdy crust
– Half a cup of melted butter, still warm and fragrant
– A generous quarter cup of granulated sugar for the crust
– Four blocks of cream cheese, softened to room temperature
– One and a quarter cups of granulated sugar for the filling
– A full cup of sour cream to add that lovely tang
– Three large eggs, gently beaten
– Two teaspoons of pure vanilla extract, the good kind
– A big pinch of salt to balance the sweetness
Instructions
1. Preheat your oven to 325°F and grab a 9-inch springform pan.
2. Mix the graham cracker crumbs with the melted butter and quarter cup of sugar in a medium bowl until the texture resembles wet sand.
3. Press the crumb mixture firmly into the bottom and about halfway up the sides of the springform pan using the bottom of a measuring cup.
4. Bake the crust for 10 minutes at 325°F until it’s lightly golden and smells toasty.
5. Let the crust cool completely on a wire rack while you prepare the filling.
6. Beat the softened cream cheese with an electric mixer on medium speed for 3 minutes until completely smooth and free of lumps.
7. Gradually add the remaining sugar while continuing to beat for another 2 minutes.
8. Blend in the sour cream, vanilla extract, and salt until just combined.
9. Tip: Add the beaten eggs one at a time, mixing on low speed after each addition until barely incorporated—overmixing introduces too much air.
10. Pour the filling over the cooled crust and smooth the top with a spatula.
11. Tip: Place the springform pan inside a larger baking dish and pour hot water into the outer dish until it reaches halfway up the sides to create a water bath.
12. Bake at 325°F for 1 hour and 15 minutes until the edges are set but the center still jiggles slightly when gently shaken.
13. Turn off the oven, crack the door open, and let the cheesecake cool inside for 1 hour to prevent cracking.
14. Remove from oven and run a knife around the edge to loosen it from the pan.
15. Tip: Refrigerate the cheesecake for at least 8 hours, or preferably overnight, before serving to allow the texture to fully set.
Keeping this cheesecake chilled transforms it into something magical—the dense, velvety texture melts slowly on your tongue while the subtle tang of cream cheese and sour cream dances with the sweet vanilla notes. I love serving thick slices with nothing but a dusting of powdered sugar, though a handful of fresh raspberries scattered beside it makes for a beautiful contrast against the pale creaminess.
Texas-Style BBQ Ribs
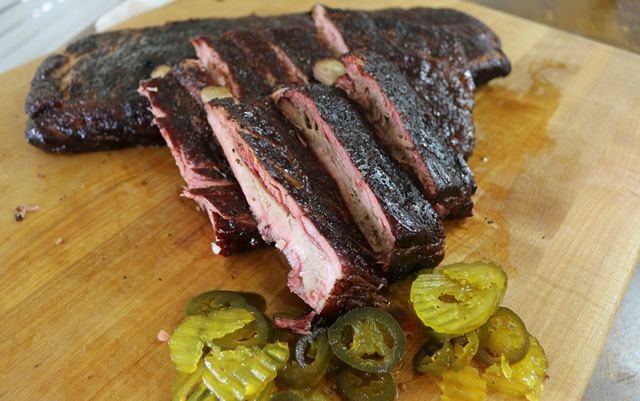
There’s something quietly profound about the way smoke curls around ribs, transforming them into something tender and deeply flavored over hours of patient waiting. Today, I’m sharing my go-to method for Texas-style BBQ ribs, a recipe that feels like a slow, meditative ritual rather than a rushed meal. It’s a process that rewards patience with incredible flavor and fall-off-the-bone texture.
Ingredients
– a couple of racks of pork spare ribs, about 3 pounds total
– a generous 1/4 cup of brown sugar
– 2 tablespoons of paprika
– 1 tablespoon of garlic powder
– 1 tablespoon of onion powder
– 2 teaspoons of black pepper
– 1 teaspoon of cayenne pepper
– 1/2 cup of apple cider vinegar
– a splash of Worcestershire sauce
– 1 cup of your favorite BBQ sauce
Instructions
1. Remove the membrane from the back of each rack of ribs by sliding a butter knife under it and pulling it off with a paper towel for grip.
2. Combine 1/4 cup brown sugar, 2 tablespoons paprika, 1 tablespoon garlic powder, 1 tablespoon onion powder, 2 teaspoons black pepper, and 1 teaspoon cayenne pepper in a small bowl to create the dry rub.
3. Pat the ribs dry with paper towels, then coat them evenly on all sides with the dry rub mixture.
4. Preheat your smoker or grill to 225°F and set it up for indirect heat, placing a water pan in the smoker to help maintain moisture.
5. Place the ribs bone-side down on the grill grates, close the lid, and smoke for 3 hours without opening the smoker to maintain consistent temperature.
6. Mix 1/2 cup apple cider vinegar with a splash of Worcestershire sauce in a spray bottle to create a spritz.
7. After 3 hours, spritz the ribs generously with the vinegar mixture every 45 minutes for the next 2 hours to keep them moist and build bark.
8. Check for doneness by looking for the meat to pull back from the bones about 1/4 inch and testing for tenderness when probed with a thermometer—it should slide in with little resistance.
9. Brush 1 cup of BBQ sauce evenly over both sides of the ribs during the final 30 minutes of cooking to set the glaze.
10. Remove the ribs from the smoker when the internal temperature reaches 195°F and they bend easily when lifted from the center with tongs.
11. Let the ribs rest for 15 minutes wrapped in foil before slicing between the bones to serve.
Smoky and succulent, these ribs have a bark that crackles slightly before giving way to incredibly tender meat. Serving them with pickled red onions and creamy coleslaw creates a beautiful contrast of textures and flavors that makes the meal feel complete. Leftovers, if there are any, make wonderful sandwiches the next day—just pull the meat from the bones and pile it high on a soft bun.
Chicago Deep-Dish Pizza

Often, on quiet afternoons like this, I find myself craving that iconic Chicago deep-dish pizza—the kind with a buttery, flaky crust that cradles layers of cheese and tangy tomato sauce. It’s a comforting, almost meditative process to build it from scratch, each step feeling like a slow, deliberate ritual. There’s something deeply satisfying about pulling that golden, bubbling masterpiece from the oven, filling the kitchen with its rich, savory aroma.
Ingredients
– 3 cups of all-purpose flour
– 1 packet of active dry yeast
– 1 cup of warm water (around 110°F)
– 2 tablespoons of olive oil
– 1 teaspoon of sugar
– 1 teaspoon of salt
– 2 cups of shredded mozzarella cheese
– 1 pound of Italian sausage, crumbled
– 1 can (28 ounces) of crushed tomatoes
– 2 cloves of garlic, minced
– 1 teaspoon of dried oregano
– A sprinkle of grated Parmesan cheese
Instructions
1. In a large bowl, dissolve 1 packet of active dry yeast and 1 teaspoon of sugar in 1 cup of warm water (110°F), and let it sit for 5 minutes until foamy.
2. Stir in 3 cups of all-purpose flour, 2 tablespoons of olive oil, and 1 teaspoon of salt until a shaggy dough forms.
3. Knead the dough on a floured surface for 8 minutes until smooth and elastic.
4. Place the dough in a greased bowl, cover it with a damp cloth, and let it rise in a warm spot for 1 hour until doubled in size.
5. While the dough rises, cook 1 pound of crumbled Italian sausage in a skillet over medium heat for 8–10 minutes until browned, then drain any excess grease.
6. In a saucepan, combine 1 can of crushed tomatoes, 2 minced garlic cloves, and 1 teaspoon of dried oregano, and simmer over low heat for 15 minutes until slightly thickened.
7. Preheat your oven to 425°F and grease a 12-inch deep-dish pizza pan with olive oil.
8. Press the risen dough into the pan, stretching it up the sides to form a thick crust.
9. Layer 2 cups of shredded mozzarella cheese evenly over the dough.
10. Spread the cooked sausage evenly over the cheese layer.
11. Pour the simmered tomato sauce over the sausage, spreading it to the edges.
12. Sprinkle a generous amount of grated Parmesan cheese on top.
13. Bake the pizza at 425°F for 25–30 minutes until the crust is golden brown and the cheese is bubbly.
14. Let the pizza cool in the pan for 10 minutes before slicing to set the layers.
Perfectly baked, this pizza emerges with a crisp, buttery crust that gives way to a molten core of cheese and savory sausage. The tangy tomato sauce cuts through the richness, creating a harmony of textures in every bite. For a cozy twist, serve it with a simple arugula salad dressed in lemon vinaigrette to balance the hearty flavors.
Louisiana Gumbo

Gently, as the autumn leaves begin to turn, my thoughts drift southward to the slow, simmering comfort of a pot of gumbo. There’s something deeply meditative about watching the roux darken, knowing each minute brings you closer to that rich, complex flavor that defines Louisiana cooking. It’s a dish that asks for patience, rewarding you with warmth that settles right into your bones.
Ingredients
– A good glug of vegetable oil
– About ¾ cup of all-purpose flour
– One large yellow onion, chopped
– A couple of celery stalks, diced
– One large green bell pepper, seeded and chopped
– Four cloves of garlic, minced
– One pound of andouille sausage, sliced into rounds
– One pound of raw shrimp, peeled and deveined
– Four cups of chicken broth
– A 14.5-ounce can of diced tomatoes, with their juices
– A couple of bay leaves
– A generous teaspoon of dried thyme
– A good pinch of cayenne pepper
– A big handful of fresh okra, sliced (about a cup’s worth)
– A big scoop of cooked white rice, for serving
– A handful of chopped fresh parsley, for garnish
Instructions
1. Pour a good glug of vegetable oil into a large, heavy-bottomed Dutch oven or stockpot and place it over medium heat.
2. Once the oil is shimmering, sprinkle in about ¾ cup of all-purpose flour and immediately begin whisking to combine it with the oil, forming your roux.
3. Continue whisking the roux constantly for 20 to 25 minutes, until it transforms into a deep, chocolate-brown color, being careful not to let it burn. (Tip: A dark roux is the soul of a great gumbo, so don’t rush this step—low and slow is the way to go.)
4. Add one large chopped yellow onion, a couple of diced celery stalks, and one large chopped green bell pepper (the “holy trinity”) to the pot, stirring to coat them in the roux.
5. Cook the vegetables, stirring often, for about 8 to 10 minutes, until they have softened and the onion turns translucent.
6. Stir in four minced cloves of garlic and cook for just 1 more minute, until the garlic becomes fragrant.
7. Add one pound of sliced andouille sausage to the pot and cook for 4 to 5 minutes, stirring occasionally, until the sausage is lightly browned.
8. Pour in four cups of chicken broth and one 14.5-ounce can of diced tomatoes with their juices, scraping the bottom of the pot to lift any browned bits.
9. Drop in a couple of bay leaves, a generous teaspoon of dried thyme, and a good pinch of cayenne pepper, then give everything a good stir.
10. Bring the gumbo to a boil, then immediately reduce the heat to low, cover the pot, and let it simmer gently for 45 minutes. (Tip: A long, slow simmer allows all the flavors to meld together beautifully.)
11. After 45 minutes, stir in one big handful of sliced fresh okra and continue simmering, uncovered, for another 15 minutes, until the okra is tender. (Tip: Okra not only adds flavor but also helps thicken the gumbo naturally.)
12. Gently stir in one pound of raw, peeled, and deveined shrimp and cook for just 3 to 4 minutes, until the shrimp turn pink and opaque.
13. Remove the pot from the heat and discard the bay leaves.
14. Ladle the hot gumbo over a big scoop of cooked white rice in individual bowls and garnish with a handful of chopped fresh parsley.
Oh, the final texture is a wonderful balance—the broth is rich and velvety from the dark roux, with the okra adding a slight silkiness. Each spoonful brings the smoky heat of andouille, the sweetness of shrimp, and the earthiness of the holy trinity. For a cozy twist, try serving it in a hollowed-out bread bowl on a chilly evening, letting the crust soak up every last drop.
Philly Cheesesteak Sandwich

A quiet afternoon like this makes me think about the simple comforts, the kind that fill your kitchen with warmth and your heart with contentment. There’s something deeply satisfying about the ritual of preparing a Philly cheesesteak sandwich, the way the aromas mingle and promise something truly special.
Ingredients
– A couple of tablespoons of vegetable oil
– One large yellow onion, thinly sliced
– One large green bell pepper, thinly sliced
– A pound of thinly sliced ribeye steak
– A generous pinch of kosher salt
– A few good cracks of black pepper
– A splash of Worcestershire sauce
– Four slices of provolone cheese
– Two soft hoagie rolls
– A couple of tablespoons of butter, softened
Instructions
1. Heat a large cast-iron skillet or griddle over medium-high heat until a drop of water sizzles immediately.
2. Add the vegetable oil and swirl to coat the cooking surface evenly.
3. Place the thinly sliced onion and bell pepper in the skillet, spreading them into a single layer.
4. Cook the vegetables for 8-10 minutes, stirring occasionally, until the onions turn translucent with golden edges and the peppers soften.
5. Push the cooked vegetables to one side of the skillet, creating space for the steak.
6. Add the thinly sliced ribeye steak to the empty side of the skillet, spreading it in a thin layer.
7. Season the steak immediately with kosher salt and black pepper.
8. Cook the steak without moving for 2 minutes to develop a good sear.
9. Flip the steak and continue cooking for another 2 minutes until no pink remains.
10. Mix the steak with the vegetables in the skillet, combining them thoroughly.
11. Drizzle the Worcestershire sauce over the meat and vegetable mixture.
12. Divide the mixture into two equal portions in the skillet.
13. Place two slices of provolone cheese over each portion of the meat mixture.
14. Reduce the heat to low and cover the skillet with a lid for 1-2 minutes until the cheese melts completely.
15. While the cheese melts, spread softened butter on the cut sides of the hoagie rolls.
16. Toast the buttered rolls in a separate skillet over medium heat for 2-3 minutes until golden brown.
17. Scoop the cheesy meat mixture into the toasted hoagie rolls using a spatula.
Soft hoagie rolls give way to tender, juicy steak that practically melts in your mouth, while the sweet onions and crisp-tender peppers provide the perfect counterpoint. Sometimes I’ll serve these with a side of crispy potato chips for that satisfying crunch contrast, or wrap them in parchment paper for a few minutes to let the flavors meld even more beautifully.
California Cobb Salad
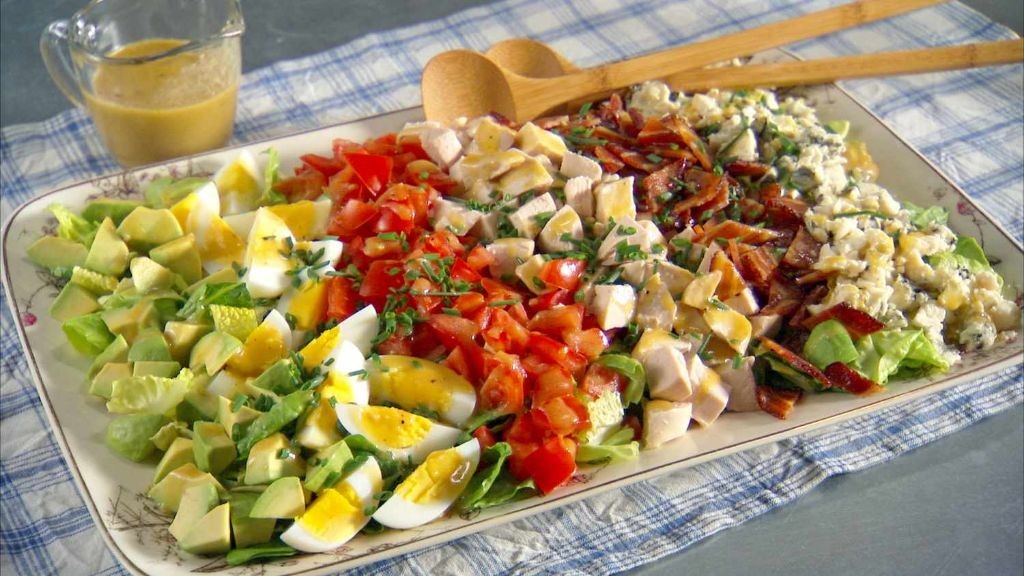
Crisp greens and vibrant colors come together in this California twist on a classic salad, where each ingredient tells a story of sun-drenched afternoons and casual gatherings around the table. Gently layering textures and flavors creates a dish that feels both nourishing and indulgent, perfect for those moments when you want something satisfying yet light. It’s a reminder that simplicity, when done thoughtfully, can be utterly transformative.
Ingredients
– A couple of large eggs
– 6 slices of thick-cut bacon
– 1 head of romaine lettuce, chopped
– 2 cups of shredded rotisserie chicken
– 1 large avocado, sliced
– 1 cup of cherry tomatoes, halved
– 1/2 cup of crumbled blue cheese
– 1/4 cup of red wine vinegar
– 1/2 cup of extra virgin olive oil
– A splash of Dijon mustard
– A pinch of salt and black pepper
Instructions
1. Place the eggs in a saucepan, cover with cold water, and bring to a boil over high heat.
2. Once boiling, remove from heat, cover, and let sit for 10 minutes for perfectly firm yolks.
3. Transfer the eggs to an ice bath for 5 minutes to stop the cooking process, then peel and chop them.
4. Cook the bacon in a skillet over medium heat for 8–10 minutes until crispy and browned, flipping halfway through.
5. Drain the bacon on paper towels, then crumble it into small pieces.
6. Arrange the chopped romaine lettuce as the base in a large serving bowl.
7. Top the lettuce with shredded rotisserie chicken in an even layer.
8. Scatter the chopped hard-boiled eggs over the chicken.
9. Add the crumbled bacon, halved cherry tomatoes, and sliced avocado.
10. Sprinkle the crumbled blue cheese evenly across the top.
11. Whisk together the red wine vinegar, extra virgin olive oil, and Dijon mustard in a small bowl until emulsified.
12. Season the dressing with a pinch of salt and black pepper, then drizzle it over the salad just before serving.
Gently tossing the salad at the table lets the creamy avocado mingle with the crisp bacon and tangy blue cheese, creating a harmony of textures in every bite. The dressing, with its sharp vinegar kick, cuts through the richness, making it ideal for a sunny patio lunch or a quick, elegant dinner. For a fun twist, serve it in individual mason jars for a portable picnic—layering the ingredients keeps everything fresh and vibrant until you’re ready to dig in.
Buffalo Chicken Wings

A quiet afternoon like this always brings me back to those messy, wonderful moments in the kitchen, the kind that end with sticky fingers and happy sighs. Buffalo chicken wings, in all their spicy, tangy glory, feel like a warm hug from the inside out, a simple pleasure that never fails to comfort. There’s something deeply satisfying about the process, from the first sizzle in the oven to that final drizzle of sauce.
Ingredients
– A couple of pounds of chicken wings, split into drumettes and flats
– A good drizzle of vegetable oil, about 2 tablespoons
– A generous sprinkle of kosher salt, roughly 1 teaspoon
– A few cracks of black pepper, maybe ½ teaspoon
– A big splash of Frank’s RedHot sauce, around ½ cup
– A good knob of unsalted butter, about 4 tablespoons
– A tiny splash of white vinegar, just 1 teaspoon
– A pinch of garlic powder, roughly ¼ teaspoon
Instructions
1. Preheat your oven to 400°F and line a large baking sheet with aluminum foil for easy cleanup.
2. Pat the chicken wings completely dry with paper towels to help them crisp up beautifully in the oven.
3. In a large bowl, toss the dried wings with vegetable oil, kosher salt, and black pepper until they’re evenly coated.
4. Arrange the wings in a single layer on the prepared baking sheet, making sure they aren’t touching so they cook evenly.
5. Bake the wings at 400°F for 40 minutes, then flip each one carefully with tongs to ensure both sides get golden and crispy.
6. Continue baking for another 15–20 minutes, until the skin is deeply browned and the internal temperature reaches 165°F on an instant-read thermometer.
7. While the wings bake, melt the unsalted butter in a small saucepan over low heat, stirring gently to avoid browning.
8. Whisk in the Frank’s RedHot sauce, white vinegar, and garlic powder until the mixture is smooth and warmly aromatic.
9. Tip: Let the sauce simmer for 2–3 minutes off the heat to let the flavors meld—it makes all the difference.
10. Transfer the hot baked wings to a clean large bowl and pour the warm sauce over them, tossing gently to coat every piece.
11. Serve the wings immediately while they’re still hot and glistening, perhaps with celery sticks and blue cheese dressing on the side.
Just out of the oven, these wings are a perfect balance—crispy skin giving way to tender, juicy meat, all wrapped in that tangy, buttery heat. I love how the sauce clings to each wing, making every bite a little messy but utterly irresistible. For a fun twist, try serving them over a bed of crisp fries to soak up any extra sauce, turning a snack into a hearty meal.
Boston Baked Beans
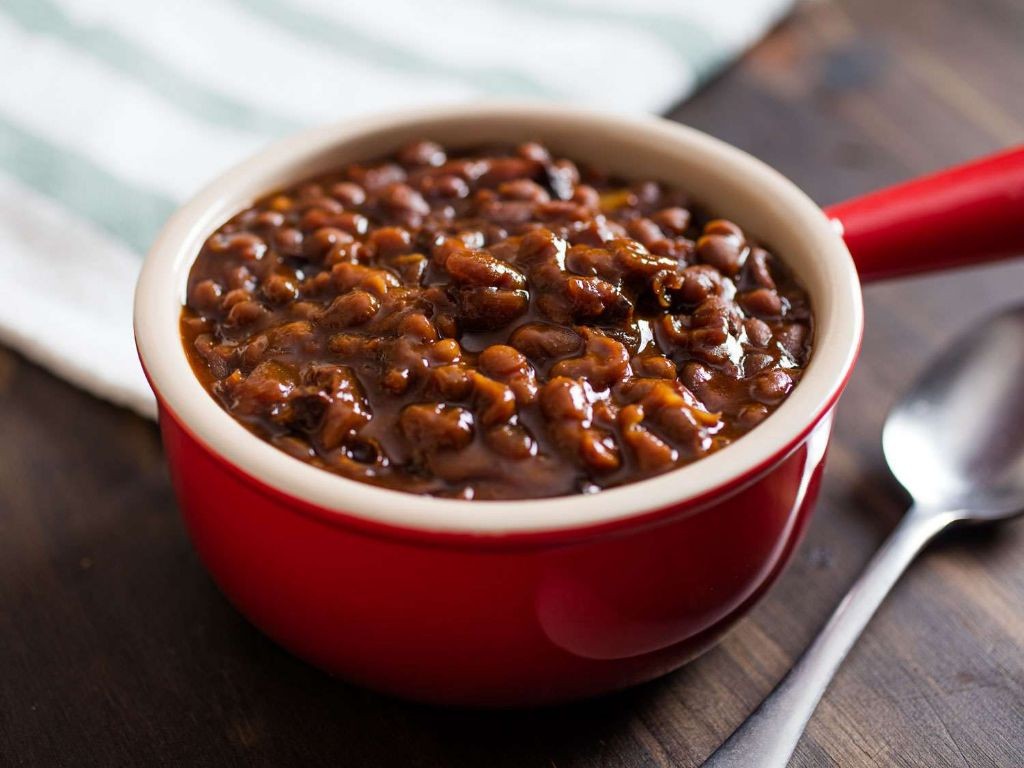
Beneath the crisp autumn air, there’s something deeply comforting about the slow transformation of humble beans into something rich and complex, a quiet alchemy that fills the kitchen with a warmth that feels like home.
Ingredients
– A pound of dried navy beans
– A thick slice of bacon, chopped
– One medium yellow onion, finely diced
– A third of a cup of molasses
– A quarter cup of packed dark brown sugar
– A tablespoon of Dijon mustard
– A teaspoon of salt
– A half teaspoon of black pepper
– A couple of cups of water
Instructions
1. Place the dried navy beans in a large bowl and cover them with several inches of cold water, then let them soak for at least 8 hours or overnight.
2. Drain the soaked beans completely and rinse them under cool running water in a colander.
3. Preheat your oven to 300°F.
4. In a large Dutch oven or oven-safe pot with a tight-fitting lid, cook the chopped bacon over medium heat for about 5-7 minutes until it’s crispy and has rendered its fat.
5. Add the finely diced onion to the pot with the bacon and cook for another 5 minutes, stirring occasionally, until the onion becomes soft and translucent.
6. Stir in the molasses, dark brown sugar, Dijon mustard, salt, and black pepper until everything is well combined into a thick sauce.
7. Add the drained and rinsed beans to the pot and pour in enough water to just cover the beans by about half an inch.
8. Bring the mixture to a gentle simmer on the stovetop over medium-high heat, then immediately cover the pot with its lid.
9. Carefully transfer the covered pot to the preheated oven and bake for 4 hours.
10. After 4 hours, remove the pot from the oven, take off the lid, and give the beans a gentle stir.
11. Tip: If the beans look too watery at this stage, continue baking uncovered for another 30-60 minutes to thicken the sauce to your preferred consistency.
12. Tip: For deeper flavor development, let the baked beans rest at room temperature for 20-30 minutes before serving.
13. Tip: Always check that the beans are tender by tasting one—they should be soft throughout with no hard center.
Gently spoon these beans into a bowl, noticing how the molasses gives them a deep, almost black sheen. The texture is wonderfully soft and creamy, with the occasional bit of bacon adding a salty contrast to the sweet, smoky sauce. They’re perfect piled onto thick toast for a simple supper, or served alongside grilled sausages for a heartier meal.
Mississippi Mud Pie
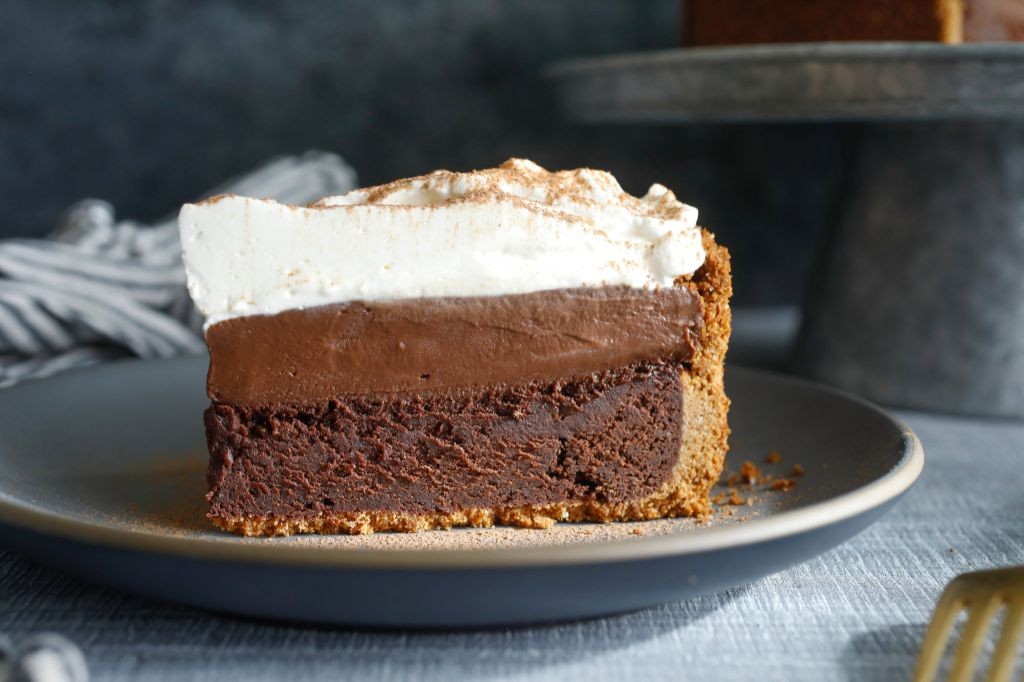
A rich, dark chocolate pie that feels like a warm hug on a chilly afternoon, this Mississippi mud pie brings back memories of rainy days and cozy kitchens. As the chocolate melts into the buttery crust, it creates something truly special that’s worth every indulgent bite.
Ingredients
– A sleeve of chocolate wafer cookies, crushed into fine crumbs
– A stick of unsalted butter, melted
– A cup and a half of semisweet chocolate chips
– A generous splash of heavy cream
– A couple of large eggs, at room temperature
– A half cup of granulated sugar
– A teaspoon of pure vanilla extract
– A pinch of salt
– A dollop of whipped cream for serving
Instructions
1. Preheat your oven to 350°F and grab a 9-inch pie dish.
2. In a medium bowl, mix the chocolate wafer crumbs with the melted butter until the crumbs are evenly coated and hold together when pressed.
3. Press the crumb mixture firmly into the bottom and up the sides of the pie dish, using the back of a spoon to create an even layer.
4. Bake the crust for 8–10 minutes, until it’s lightly fragrant and set, then let it cool completely on a wire rack.
5. In a heatproof bowl set over a saucepan of simmering water, melt the chocolate chips with the heavy cream, stirring gently until smooth and glossy.
6. Remove the bowl from the heat and let the chocolate mixture cool for 5 minutes to avoid scrambling the eggs.
7. Whisk in the eggs one at a time, making sure each is fully incorporated before adding the next.
8. Stir in the sugar, vanilla extract, and salt until the filling is silky and well combined.
9. Pour the filling into the cooled crust and smooth the top with a spatula.
10. Bake for 25–30 minutes, until the edges are set but the center still has a slight wobble when gently shaken.
11. Let the pie cool to room temperature, then refrigerate for at least 4 hours or until fully chilled and firm.
12. Slice and serve each piece with a dollop of whipped cream on top. When you take that first bite, the dense, fudgy texture melts slowly on your tongue, with deep chocolate notes that aren’t overly sweet. For a playful twist, crumble extra cookie crumbs over the whipped cream or pair it with a strong cup of coffee to balance the richness.
Kentucky Bourbon Glazed Ham
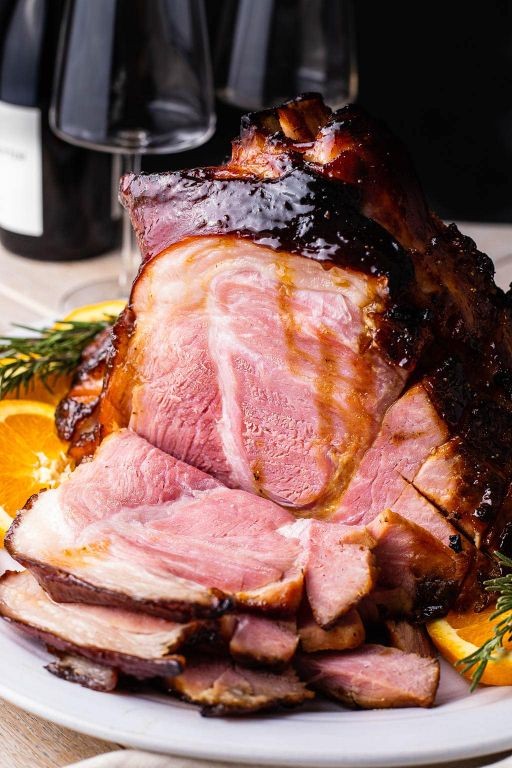
Nostalgia has a way of finding us in the kitchen, especially when the air turns crisp and the holidays draw near. There’s something deeply comforting about preparing a glazed ham, the sweet bourbon scent wrapping around memories of family gathered around the table. It’s a ritual that feels both timeless and deeply personal, a quiet offering of warmth and care.
Ingredients
– one 8-pound fully cooked, bone-in ham
– a generous ¾ cup of brown sugar, packed tight
– a good ½ cup of Kentucky bourbon
– a couple of tablespoons of Dijon mustard
– a splash of apple cider vinegar
– a pinch of ground cloves
– a small handful of whole cloves for studding
Instructions
1. Preheat your oven to 325°F and position a rack in the lower third of the oven.
2. Place the ham, flat side down, in a large roasting pan and use a sharp knife to score the fat in a diamond pattern, about ¼-inch deep.
3. Press a whole clove into the center of each diamond—this allows the glaze to seep into every crevice.
4. In a small saucepan over medium heat, combine the brown sugar, bourbon, Dijon mustard, apple cider vinegar, and ground cloves.
5. Whisk continuously until the sugar dissolves completely and the mixture just begins to simmer, about 3–4 minutes.
6. Remove the glaze from the heat and brush half of it evenly over the entire surface of the ham.
7. Cover the ham loosely with foil and bake for 1 hour and 15 minutes.
8. Remove the foil and brush the ham with the remaining glaze.
9. Increase the oven temperature to 375°F and bake uncovered for another 20–25 minutes, until the glaze is bubbling and deeply caramelized.
10. Let the ham rest on a cutting board for 15 minutes before slicing against the grain.
You’ll find the exterior sticky and crackled with sweetness, while the interior stays remarkably juicy and tender. Yes, the bourbon lends a warm, oaky depth that balances the mustard’s gentle tang, making each slice feel like a celebration. I love serving it thinly sliced over creamy grits or tucked into soft biscuits with a drizzle of the pan juices.
Hawaiian Pineapple Fried Rice

There’s something quietly magical about transforming yesterday’s leftover rice into today’s vibrant comfort food, especially when sweet pineapple and savory ham dance together in the pan. This Hawaiian pineapple fried rice feels like a gentle escape to warmer shores, even on the most ordinary of Tuesdays. It’s a dish that carries the spirit of aloha in every colorful, satisfying bite.
Ingredients
– About 3 cups of cold, cooked white rice (leftover works best!)
– A generous cup of diced ham
– A heaping cup of fresh pineapple chunks
– A couple of large eggs
– Half a yellow onion, finely chopped
– A couple of cloves of garlic, minced
– A splash of soy sauce (about 2 tablespoons)
– A tablespoon of vegetable oil
– A small handful of frozen peas and carrots
– A sprinkle of green onions for garnish
Instructions
1. Heat 1 tablespoon of vegetable oil in a large skillet or wok over medium-high heat until it shimmers.
2. Crack 2 large eggs directly into the hot oil and scramble them quickly with a spatula for about 1 minute until softly set.
3. Tip: Use cold, day-old rice—it fries up fluffier and doesn’t get mushy like freshly cooked rice.
4. Add the finely chopped half onion and minced garlic cloves, stirring constantly for 2–3 minutes until the onion turns translucent and fragrant.
5. Stir in 1 generous cup of diced ham and cook for another 2 minutes until it’s lightly browned at the edges.
6. Add the heaping cup of fresh pineapple chunks and small handful of frozen peas and carrots, cooking for 2 more minutes until the pineapple caramelizes slightly.
7. Tip: Don’t skip browning the pineapple—it deepens the sweetness and adds a lovely caramelized flavor.
8. Crumble in the 3 cups of cold, cooked rice, breaking up any clumps with your spatula, and stir-fry for 3–4 minutes until the rice is heated through and lightly toasted.
9. Drizzle 2 tablespoons of soy sauce evenly over the rice mixture, tossing everything together for 1 minute to coat evenly.
10. Tip: Add the soy sauce around the edges of the pan so it sizzles and reduces slightly before mixing in—this intensifies the umami flavor.
11. Remove the skillet from the heat and garnish with a sprinkle of chopped green onions.
Unbelievably, each spoonful delivers a perfect balance—the rice grains stay separate and slightly chewy, while the sweet pineapple bursts against the salty ham. Try serving it in hollowed-out pineapple halves for a festive touch, or top it with a fried egg for extra richness on lazy evenings.
Alaskan King Crab Legs
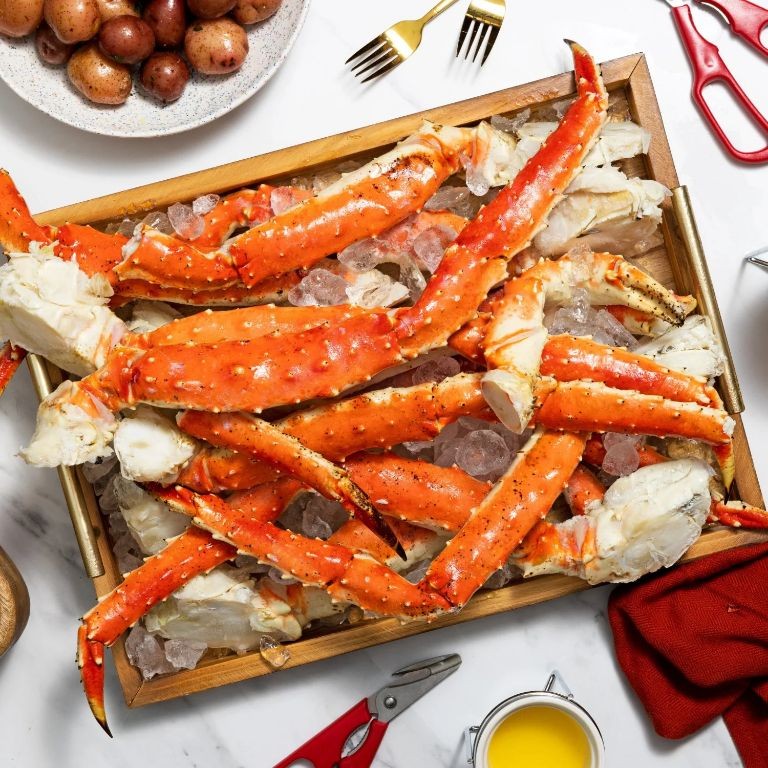
There’s something quietly luxurious about Alaskan king crab legs—their rosy shells holding sweet, tender meat that feels like a gentle reward after a long day. Today, I’m keeping it simple, letting the crab speak for itself with just a few thoughtful touches to highlight its natural briny sweetness.
Ingredients
– A couple of pounds of frozen Alaskan king crab legs, thawed
– A big pot of water (about 8 cups)
– A generous tablespoon of sea salt
– A half-stick of unsalted butter (4 tablespoons)
– A squeeze of fresh lemon juice (about 1 tablespoon)
– A tiny pinch of chopped fresh parsley
Instructions
1. Fill a large stockpot with 8 cups of cold water and stir in 1 tablespoon of sea salt until dissolved.
2. Place the pot over high heat and bring the water to a rolling boil, which should take about 10–12 minutes.
3. Carefully lower the thawed crab legs into the boiling water using tongs to avoid splashes.
4. Set a timer for 5 minutes once the water returns to a boil—this prevents overcooking and keeps the meat tender.
5. While the crab cooks, melt 4 tablespoons of unsalted butter in a small saucepan over low heat for 2–3 minutes until just liquid.
6. Stir 1 tablespoon of fresh lemon juice and a pinch of chopped parsley into the melted butter, then remove from heat.
7. Use tongs to transfer the crab legs to a colander, letting excess water drain for 1 minute.
8. Crack the crab shells gently with a seafood cracker or the back of a heavy knife to expose the meat.
9. Serve the crab legs warm with the lemon-butter sauce for dipping.
Each bite offers a delicate, flaky texture that melts away, with a subtle sweetness balanced by the bright, buttery sauce. Try draping the meat over warm, crusty bread or tossing it into a simple pasta for a cozy twist—it turns an ordinary evening into something softly memorable.
Maryland Crab Cakes

Sometimes, the simplest coastal memories linger longest—like the scent of Old Bay seasoning mingling with sweet crab meat on a breezy afternoon. Maryland crab cakes carry that quiet nostalgia in every tender bite, a humble celebration of the Chesapeake’s generosity. They’re uncomplicated yet deeply satisfying, the kind of dish that feels like a gentle exhale after a long day.
Ingredients
– A pound of fresh lump crab meat, carefully picked over for shells
– A couple of slices of white bread, torn into small crumbs (about 1 cup)
– A generous 1/4 cup of mayonnaise
– One large egg, lightly beaten
– A tablespoon of Dijon mustard
– A teaspoon of Worcestershire sauce
– A squeeze of fresh lemon juice (about 2 teaspoons)
– A tablespoon of Old Bay seasoning
– A pinch of salt and a few cracks of black pepper
– A quarter cup of vegetable oil for pan-frying
Instructions
1. Gently combine the crab meat, bread crumbs, mayonnaise, beaten egg, Dijon mustard, Worcestershire sauce, lemon juice, Old Bay seasoning, salt, and pepper in a large bowl, using your hands to mix just until everything holds together—overmixing can break down the delicate crab lumps.
2. Divide the mixture into 4 equal portions and shape each into a 1-inch-thick patty, pressing firmly enough to hold its shape but lightly to keep the texture airy.
3. Place the formed patties on a parchment-lined baking sheet and refrigerate them for 30 minutes; this chilling step helps the crab cakes firm up and prevents them from falling apart during cooking.
4. Heat the vegetable oil in a large skillet over medium heat until it shimmers (about 350°F), testing readiness by flicking a bread crumb into the oil—if it sizzles immediately, it’s ready.
5. Carefully place the crab cakes in the hot oil, leaving space between them to allow even browning, and pan-fry for 4–5 minutes per side until golden brown and crisp on the exterior.
6. Transfer the cooked crab cakes to a paper towel-lined plate to drain any excess oil, then let them rest for 2–3 minutes before serving to allow the interior to set fully.
7. Keep the skillet heat steady at medium; if the oil smokes, reduce the heat slightly to avoid burning the seasoning while ensuring the centers cook through.
Kindly textured with crisp edges giving way to moist, flaky centers, these crab cakes sing with the bright zing of lemon and the warmth of Old Bay. Try serving them atop a simple arugula salad with a lemon vinaigrette, or tuck them into a soft brioche bun with a dollop of remoulade—each bite feels like a quiet tribute to summer’s fleeting moments.
Tennessee Hot Chicken
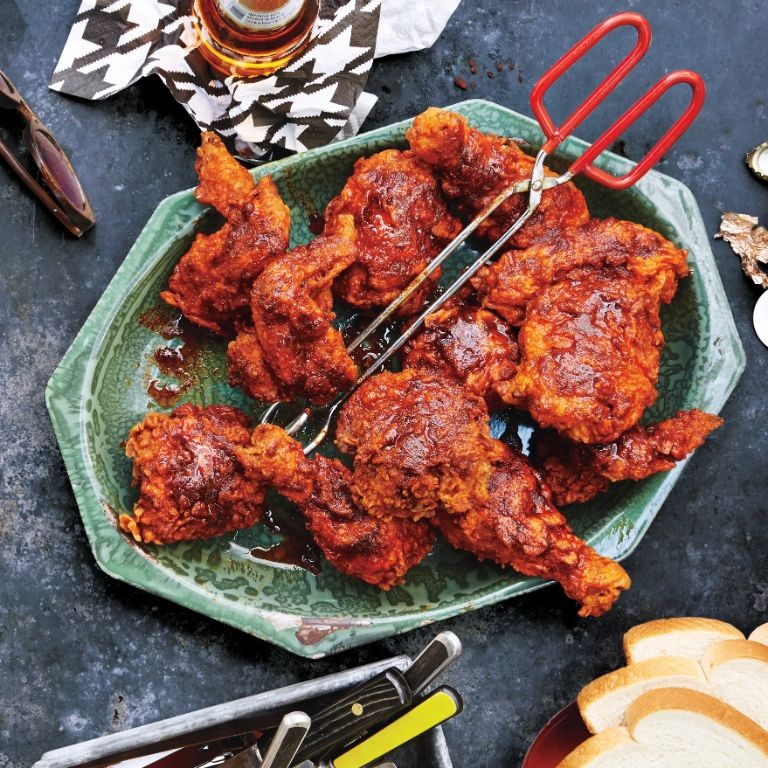
Cradling a piece of Tennessee hot chicken feels like holding a little piece of Nashville in your hands—a messy, glorious, and deeply comforting tradition that warms you from the inside out. It’s the kind of food that demands your full attention, a fiery crunch giving way to the most tender, juicy chicken beneath.
Ingredients
– 4 bone-in, skin-on chicken thighs
– 2 cups of buttermilk
– A couple of tablespoons of your favorite hot sauce
– 1 ½ cups of all-purpose flour
– A good sprinkle of salt and black pepper
– 2 teaspoons of garlic powder
– 2 teaspoons of paprika
– 1 to 2 tablespoons of cayenne pepper, depending on your heat tolerance
– Enough vegetable oil to fill a large, heavy-bottomed pot about 2 inches deep
– A couple of slices of soft white bread
– A handful of dill pickle chips
Instructions
1. Place the chicken thighs in a large bowl and pour the 2 cups of buttermilk and 2 tablespoons of hot sauce over them, ensuring each piece is fully submerged.
2. Cover the bowl and refrigerate for at least 4 hours, or ideally overnight, to tenderize the chicken.
3. In a separate large bowl, whisk together the 1 ½ cups of all-purpose flour, a good sprinkle of salt, black pepper, 2 teaspoons of garlic powder, 2 teaspoons of paprika, and 1 to 2 tablespoons of cayenne pepper until well combined.
4. Remove one chicken thigh from the buttermilk mixture, letting the excess drip off, and dredge it thoroughly in the flour mixture, pressing to adhere.
5. Place the coated chicken on a wire rack and repeat with the remaining thighs.
6. Let the breaded chicken rest on the rack for 15 minutes to help the coating set, which prevents it from falling off during frying.
7. Pour enough vegetable oil into a large, heavy-bottomed pot to reach a depth of 2 inches and heat it over medium-high heat to 350°F, checking with a deep-fry thermometer.
8. Carefully lower two chicken thighs into the hot oil using tongs, frying for 12-14 minutes until the internal temperature reaches 165°F and the exterior is deep golden brown.
9. Remove the chicken and drain on a clean wire rack set over a baking sheet, which keeps it crispy unlike paper towels that can trap steam.
10. Fry the remaining two thighs, reheating the oil back to 350°F between batches.
11. Place a couple of slices of soft white bread on each plate to soak up the spicy oils.
12. Top the bread with a hot chicken thigh and garnish with a handful of dill pickle chips for a cool, tangy contrast.
Vividly crispy and audibly crunchy, the crust shatters to reveal steaming, perfectly cooked chicken that’s wonderfully moist. That initial fiery kick from the cayenne mellows into a warm, lingering heat, beautifully balanced by the cool snap of the pickles and the soft, oil-soaked bread beneath. Try serving it open-faced with a drizzle of honey for a sweet heat that plays wonderfully against the savory spices.
San Francisco Sourdough Bread
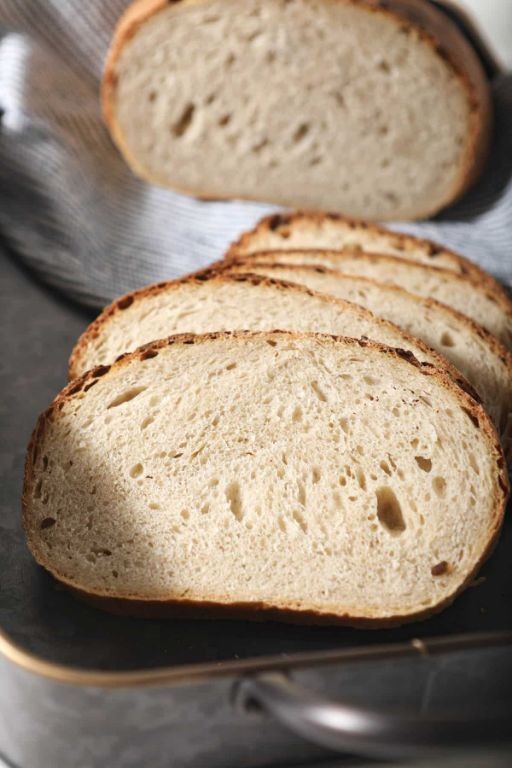
Zestfully remembering my first bite of tangy, crusty sourdough in that foggy bakery near Fisherman’s Wharf still brings a quiet smile. Today, I’m slowly recreating that memory in my own kitchen, letting the dough tell its own time. There’s something deeply comforting about this patient process.
Ingredients
– 3½ cups of bread flour
– 1½ cups of lively sourdough starter
– 1¼ cups of warm water (around 85°F)
– 2 teaspoons of fine sea salt
– A light dusting of rice flour for your work surface
– A splash of olive oil for your bowl
Instructions
1. Combine 3½ cups of bread flour, 1½ cups of sourdough starter, and 1¼ cups of warm water in a large mixing bowl until a shaggy dough forms.
2. Cover the bowl with a damp kitchen towel and let the dough rest for 30 minutes to hydrate the flour.
3. Sprinkle 2 teaspoons of fine sea salt evenly over the dough surface.
4. Wet your hands thoroughly and gently fold the salt into the dough until fully incorporated.
5. Perform a series of stretch-and-folds: grab one edge of the dough, stretch it upward, and fold it over the center, repeating this process four times around the bowl.
6. Cover the bowl again and let the dough rest for 30 minutes.
7. Repeat the stretch-and-fold process three more times at 30-minute intervals.
8. Lightly coat a clean bowl with a splash of olive oil.
9. Transfer the dough to the oiled bowl, cover tightly with plastic wrap, and let it rise at room temperature (70-75°F) for 8-12 hours until nearly doubled in size.
10. Gently turn the dough out onto a surface lightly dusted with rice flour.
11. Shape the dough into a tight round by folding the edges toward the center and creating surface tension.
12. Place the shaped dough seam-side up in a floured proofing basket.
13. Cover the basket with a plastic bag and refrigerate for 12-16 hours to develop flavor.
14. Preheat your oven to 475°F with a Dutch oven inside for 45 minutes.
15. Carefully remove the hot Dutch oven and transfer the chilled dough into it seam-side up.
16. Score the top of the dough with a sharp blade about ½-inch deep.
17. Cover the Dutch oven and bake at 475°F for 30 minutes to create steam.
18. Remove the lid and continue baking for another 20-25 minutes until the crust is deeply golden brown.
19. Transfer the bread to a wire rack and let it cool completely for at least 2 hours before slicing.
Ultimately, that crisp, crackling crust gives way to an airy, chewy crumb with those characteristic irregular holes. Underneath lies that distinct tangy flavor that develops during the long, cold fermentation. Try thick slices toasted with avocado and flaky sea salt, or simply torn warm from the loaf with good butter pooling in its nooks.
Key Lime Pie
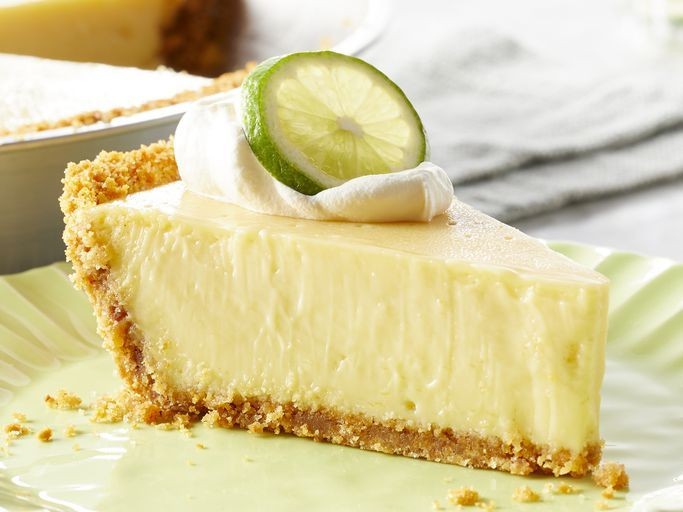
Sometimes the simplest desserts hold the most memories, like the way a slice of key lime pie can transport you back to humid summer evenings and shared laughter around a picnic table. Something about that perfect balance of tart and sweet, cradled in a buttery crust, feels like a quiet celebration. It’s a dessert that asks for little but gives so much in return.
Ingredients
– 1 ½ cups of graham cracker crumbs, just enough to form a sturdy base
– ⅓ cup of granulated sugar, for a touch of sweetness in the crust
– 6 tablespoons of melted unsalted butter, to bind it all together
– 4 large egg yolks, for that rich, velvety custard
– 1 can (14 ounces) of sweetened condensed milk, the secret to its creamy texture
– ½ cup of freshly squeezed key lime juice, about 12-15 little limes for that bright, tangy kick
– A pinch of salt, to balance the flavors
– 1 cup of heavy whipping cream, for a fluffy topping
– 2 tablespoons of powdered sugar, to sweeten the cream just right
Instructions
1. Preheat your oven to 350°F (175°C) to ensure it’s ready when you are.
2. In a medium bowl, combine the graham cracker crumbs, granulated sugar, and melted butter until the mixture resembles wet sand.
3. Tip: Press the crust firmly into a 9-inch pie dish using the bottom of a measuring cup for an even layer that won’t crumble.
4. Bake the crust for 8-10 minutes, until it’s lightly golden and fragrant, then let it cool completely on a wire rack.
5. In a separate bowl, whisk the egg yolks until they’re smooth and pale yellow, about 2 minutes.
6. Pour in the sweetened condensed milk and continue whisking until the mixture is thick and well combined.
7. Gently stir in the key lime juice and a pinch of salt until the filling is smooth and slightly thickened.
8. Tip: Use freshly squeezed juice for the brightest flavor—bottled versions can taste flat.
9. Pour the filling into the cooled crust and spread it evenly with a spatula.
10. Bake the pie for 15-18 minutes, until the edges are set but the center still has a slight jiggle.
11. Let the pie cool to room temperature, then refrigerate it for at least 4 hours, or ideally overnight, to firm up.
12. Tip: Chill the bowl and beaters in the freezer for 10 minutes before whipping the cream to get stiff peaks faster.
13. In that chilled bowl, whip the heavy cream and powdered sugar on medium-high speed until soft peaks form, about 3-4 minutes.
14. Spread or pipe the whipped cream over the chilled pie just before serving. Buttery and crisp, the crust gives way to a silky, tangy filling that melts on the tongue. Serve it chilled with a sprinkle of lime zest or alongside a cup of strong coffee to cut through the sweetness.
Montana Bison Burger
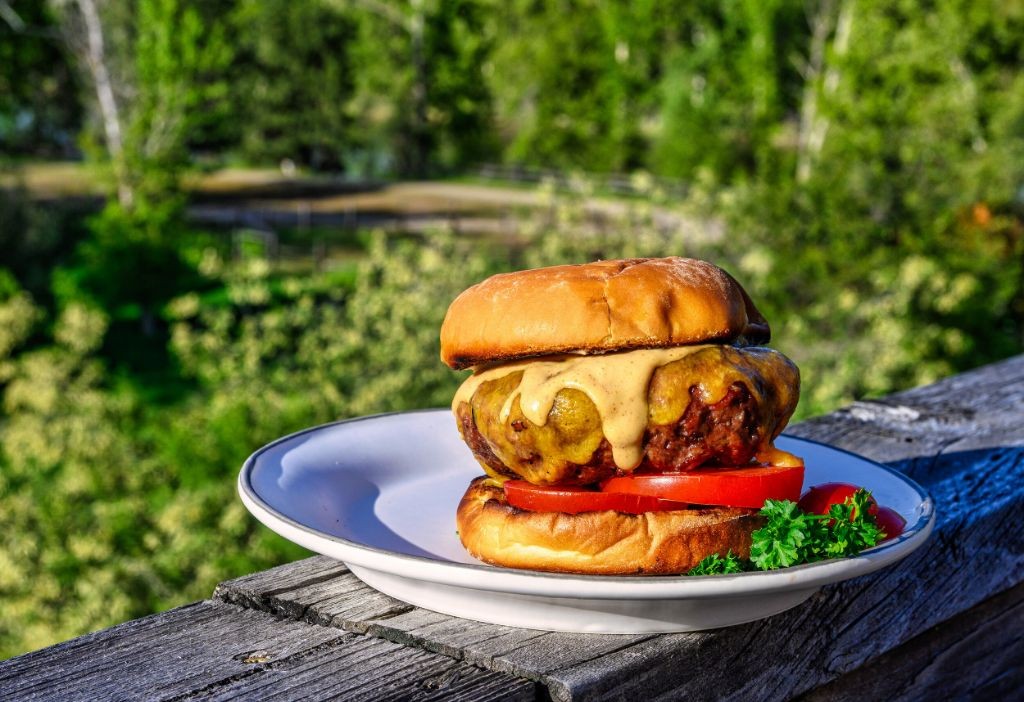
Mellow evenings call for meals that feel like a warm embrace, and this bison burger recipe has become my quiet ritual when the mountains outside my window fade to purple. There’s something grounding about working with these simple ingredients, each step a meditation in creating something deeply satisfying.
Ingredients
– 1 pound ground bison
– 1 large egg
– 1/4 cup breadcrumbs
– 2 tablespoons Worcestershire sauce
– 1 teaspoon garlic powder
– 1/2 teaspoon smoked paprika
– a generous pinch of salt
– a few grinds of black pepper
– 4 burger buns
– 1 tablespoon olive oil
– your favorite burger toppings
Instructions
1. Preheat your grill or skillet to medium-high heat, around 400°F.
2. In a large bowl, gently combine the ground bison, egg, breadcrumbs, Worcestershire sauce, garlic powder, smoked paprika, salt, and pepper using your hands.
3. Divide the mixture into 4 equal portions and form them into patties about 1-inch thick.
4. Use your thumb to make a slight indentation in the center of each patty—this helps them cook evenly without puffing up.
5. Brush the grill grates or skillet with olive oil to prevent sticking.
6. Place the patties on the hot surface and cook for 5-6 minutes without moving them to develop a good sear.
7. Flip the burgers carefully and cook for another 4-5 minutes for medium doneness.
8. Check for doneness by inserting an instant-read thermometer into the thickest part—it should read 160°F for bison.
9. During the last minute of cooking, lightly toast the burger buns on the grill or in a separate pan.
10. Remove everything from heat and let the burgers rest for 3 minutes before assembling.
11. Build your burgers with your preferred toppings and serve immediately.
Letting the burgers rest makes all the difference—the juices redistribute throughout the meat instead of running out onto your plate. That first bite reveals the bison’s lean but remarkably tender texture, with the smoky paprika and Worcestershire creating layers of savory depth that feel both rustic and refined. I love serving these with sweet potato fries and a crisp salad, the rich burger balancing beautifully against brighter accompaniments.
Georgia Peach Cobbler

There’s something quietly magical about how summer’s sweetest peaches transform in the oven, their juices bubbling up through a golden, biscuit-like topping that feels like a warm hug on a plate. This Georgia peach cobbler is the kind of dessert that asks you to slow down, to notice the way the cinnamon speckles the fruit and the crust cracks just so when you spoon into it. It’s a simple pleasure, really, one that holds all the warmth of a Southern afternoon in every bite.
Ingredients
– 4 cups of sliced fresh peaches (about 6 medium ones, peeled and pitted)
– 1 cup of granulated sugar, plus an extra tablespoon for sprinkling
– 1/2 cup of unsalted butter
– 1 cup of all-purpose flour
– 2 teaspoons of baking powder
– a pinch of salt
– 1 cup of whole milk
– a good sprinkle of ground cinnamon
Instructions
1. Preheat your oven to 350°F (175°C).
2. Melt the 1/2 cup of unsalted butter in a 9×13-inch baking dish by placing it in the oven for about 5 minutes, or until fully liquid and slightly bubbly.
3. In a medium bowl, whisk together the 1 cup of all-purpose flour, 2 teaspoons of baking powder, and a pinch of salt until no lumps remain.
4. Pour the 1 cup of whole milk into the flour mixture and stir gently with a wooden spoon until just combined—be careful not to overmix, as this keeps the topping tender.
5. Pour the batter evenly over the melted butter in the baking dish; do not stir.
6. In a separate bowl, toss the 4 cups of sliced fresh peaches with 1 cup of granulated sugar and a good sprinkle of ground cinnamon until the peaches are evenly coated.
7. Spoon the peach mixture over the batter in the baking dish, spreading it out gently.
8. Sprinkle the top with an additional tablespoon of granulated sugar for a crisp, golden finish.
9. Bake for 45–50 minutes, or until the topping is golden brown and a toothpick inserted into the center comes out clean.
10. Let the cobbler cool on a wire rack for at least 15 minutes before serving to allow the juices to thicken slightly.
Nothing compares to that first spoonful breaking through the crisp top into the soft, jammy peaches beneath. The buttery crust soaks up just enough of the sweet syrup, making each bite a balance of texture and warmth. Try serving it still slightly warm with a scoop of vanilla ice cream melting into the crevices, or enjoy it cold the next day when the flavors have deepened even more.
Summary
Kickstart your next meal with these 20 delicious American recipes perfect for any occasion! From weeknight dinners to holiday feasts, there’s something for everyone. We’d love to hear which recipes become your favorites—leave a comment below and don’t forget to share this collection on Pinterest so other home cooks can discover these tasty dishes too!