When it comes to crafting, there’s nothing quite like the versatility and creativity of paper mache. With just a few simple ingredients and some imagination, you can create stunning pieces that are sure to impress. In this article, we’ll explore 18 creative paper mache recipes that will take your crafting skills to the next level. From decorative vases to animal masks for kids, and from science projects to holiday decorations, these recipes offer endless possibilities for creativity.
Classic Flour and Water Paper Mache Paste
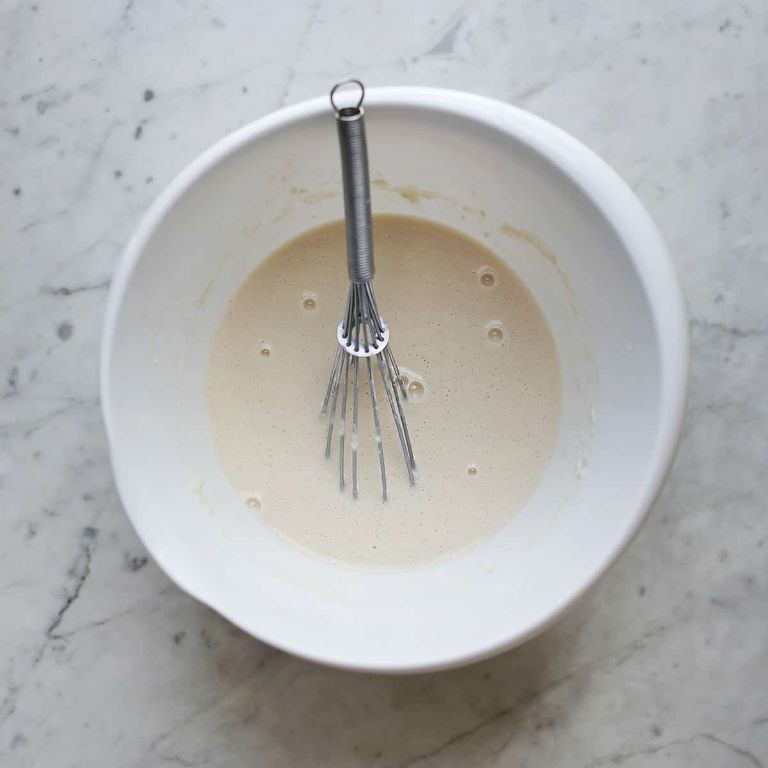
Classic Flour and Water Paper Mache Paste Recipe
This tried-and-true recipe yields a durable and versatile paper mache paste perfect for crafting, DIY projects, and artistic endeavors. With just two simple ingredients, you can create a strong adhesive for bonding paper, fabric, and other materials.
Ingredients:
– 2 tablespoons all-purpose flour
– 1 tablespoon water
Instructions:
1. In a small bowl, whisk together the flour and water until smooth and free of lumps.
2. Continue mixing until the paste reaches your desired consistency. If too thick, add a little more water. If too thin, add a little more flour.
Cooking Time: None (this is a no-cook recipe!)
Tips:
– For best results, use filtered or distilled water to prevent any impurities from affecting the paste’s quality.
– You can adjust the ratio of flour to water to achieve different consistencies and textures.
– This paste dries quickly, so be prepared to work with it within a few hours.
Glue-Based Paper Mache for Stronger Creations
Create durable and long-lasting paper mache creations with this simple recipe.
Ingredients:
– 2 cups all-purpose flour
– 1 cup water
– 1/4 cup white glue (PVA)
– 1 tablespoon glycerin
– Scissors
– Newspaper or paper strips
Instructions:
1. In a large bowl, mix together the flour and water until smooth.
2. Add the white glue and glycerin to the mixture. Stir until well combined.
3. Cut newspaper or paper strips into desired sizes for your project.
4. Apply a thin layer of the glue-based mixture to the paper strip, making sure to cover the entire surface.
5. Place the paper strip onto your creation’s base or shape, smoothing out any wrinkles.
6. Repeat steps 4 and 5 until you have achieved the desired thickness.
Cooking Time: None! This recipe is a wet process, meaning it doesn’t require heat.
Newspaper Strip Paper Mache Bowl
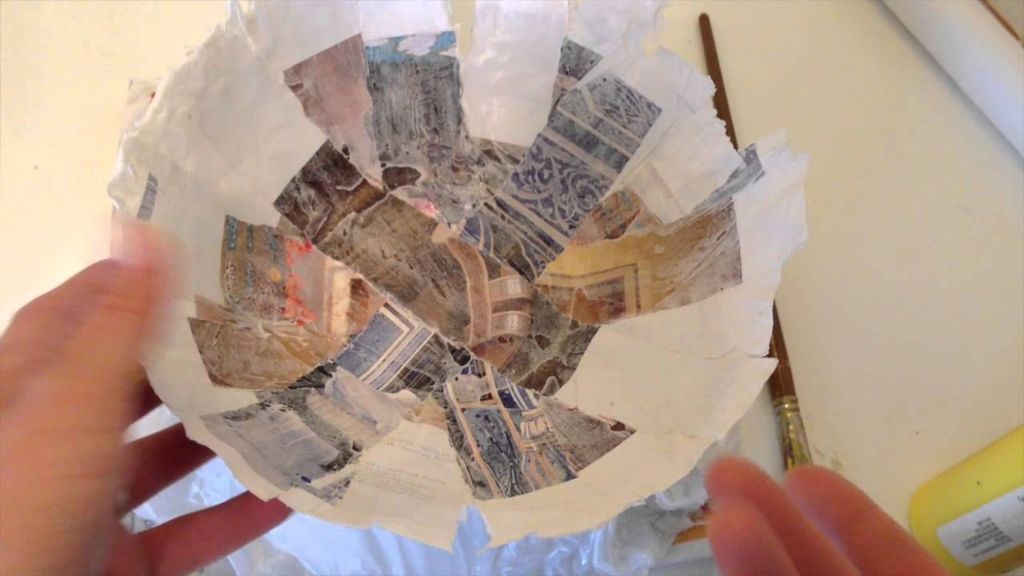
Transform old newspapers into a unique and eco-friendly bowl using the ancient art of paper mache. This recipe yields one medium-sized bowl, perfect for serving snacks or holding small decorative items.
Ingredients:
– 1-2 old newspapers (black ink only)
– 1 tablespoon white glue
– 1 cup water
– Scissors
– A balloon or shape to create the bowl’s form
– Optional: paint and varnish for finishing
Instructions:
1. Tear newspaper strips into 1-inch wide pieces.
2. In a large bowl, mix together glue and water until well combined.
3. Dip each newspaper strip into the glue mixture, coating both sides evenly.
4. Wrap the coated newspaper strips around the balloon or shape to create the bowl’s form, overlapping the strips as you go.
5. Allow the paper mache to dry completely (about 24 hours).
6. Once dry, pop the balloon and remove it from the bowl.
7. Trim any excess paper mache and smooth out the surface.
Cooking Time: None required! This recipe is a craft project.
Paper Mache Piñata with Tissue Paper Decor
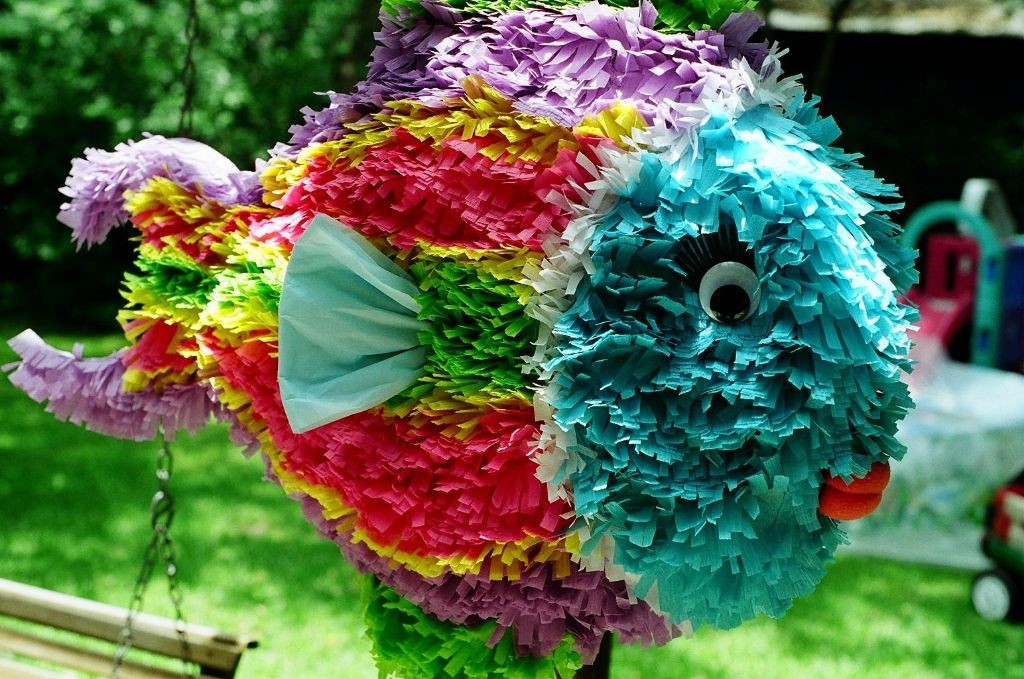
Create a festive and fun piñata perfect for parties or celebrations using paper mache and tissue paper decorations. This easy-to-make treat is sure to delight kids and adults alike!
Ingredients:
– 2 cups water
– 1 cup all-purpose flour
– 1/4 teaspoon white glue
– Newspaper strips (approx. 20-25)
– Tissue paper in desired colors (approx. 10-15 sheets)
– Scissors, bowl, and paintbrush for decorating
Instructions:
1. In a large bowl, mix together water, flour, and glue until smooth.
2. Tear newspaper into strips and dip each strip into the mixture, coating both sides evenly.
3. Wrap the coated newspaper strips around a balloon or a paper mache shape to form the piñata’s shell (approx. 4-5 layers).
4. Allow the piñata to dry completely, either air-drying or using a fan on low speed for faster drying.
5. Cut tissue paper into small squares and apply glue to the back of each square. Attach the tissue paper squares to the piñata, overlapping slightly to create a colorful design.
Cooking Time: None required! Just let the piñata dry and decorate to your heart’s content!
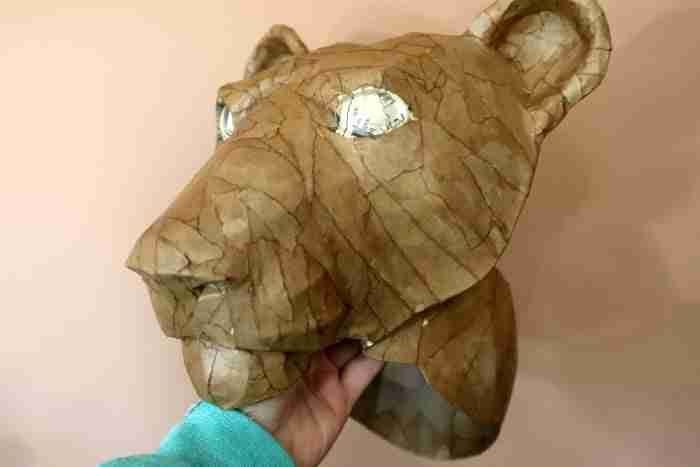
Paper Mache Animal Mask for Kids
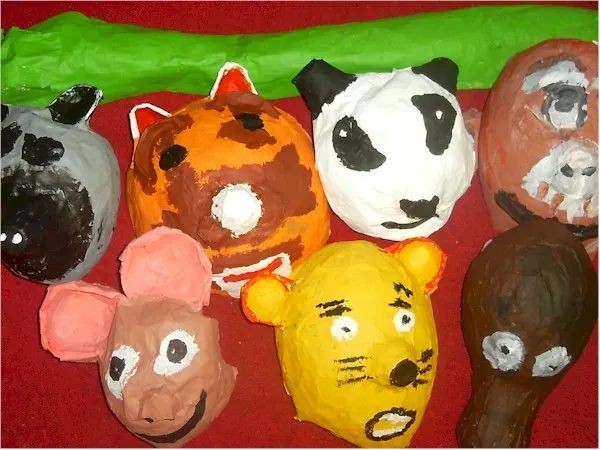
Get creative and make a fun animal mask with your kids! This simple paper mache recipe is perfect for little hands to get involved.
Ingredients:
– 2 cups of water
– 1 cup of all-purpose flour
– 1/2 cup of white glue
– 1 tablespoon of salt
– Newspaper strips or paper towels
– Animal-shaped cookie cutter (optional)
– Paint and decorations (optional)
Instructions:
1. Mix the water, flour, and glue in a bowl until smooth.
2. Add the salt and stir well.
3. Cut the newspaper into strips, about 1 inch wide.
4. Dip each strip into the mixture, coating both sides evenly.
5. Place the coated strip onto a flat surface or an animal-shaped cookie cutter (if using).
6. Repeat step 4-5 until the mask is the desired thickness.
7. Let it dry completely, which may take several hours or overnight.
8. Paint and decorate your mask with markers, glitter, or other materials.
Cooking Time: None! This recipe requires drying time only.
Lightweight Paper Mache Balloon Base
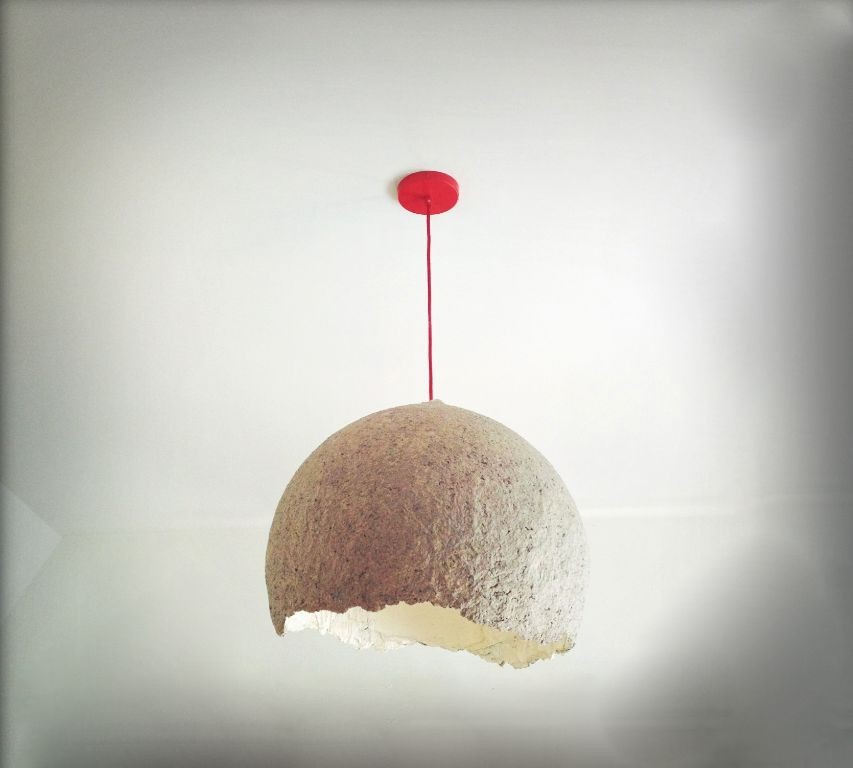
Create a sturdy yet lightweight base for your paper mache creations with this easy recipe. Perfect for making decorative spheres or sculptures, this balloon-based method produces a smooth and even surface.
Ingredients:
– 1 balloon (latex or Mylar), blown up to the desired size
– 2 cups of water
– 1 cup of white glue
– 1/2 cup of shredded newspaper or paper strips
– Optional: decorative materials like paint, glitter, or tissue paper
Instructions:
1. Mix together the water and white glue in a bowl until smooth.
2. Dip a section of shredded newspaper into the mixture and wrap it around the balloon, overlapping the edges as you go.
3. Continue wrapping the balloon with layers of paper and glue mixture, allowing each layer to dry slightly before adding the next.
4. Once the desired thickness is reached (about 1/4 inch), let the paper mache base air-dry completely, which may take several hours or overnight.
Cooking Time: None required! Just let it dry.
Paper Mache Volcano for Science Projects
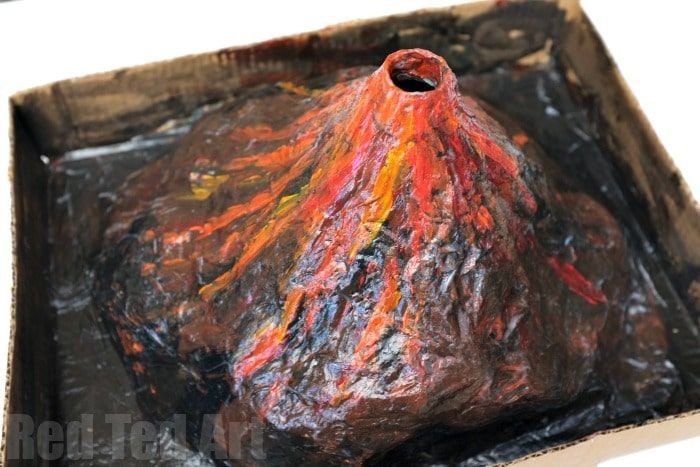
Create a realistic-looking volcano that erupts with baking soda and vinegar for an engaging science project. This recipe is easy to follow and requires minimal materials.
Ingredients:
– 1 cup of all-purpose flour
– 2 tablespoons of water
– 1 tablespoon of white glue
– 1/2 cup of paper mache paste (homemade or store-bought)
– Construction paper (brown or gray) for the volcano’s exterior
– Scissors, a balloon, and a container to create the volcano shape
Instructions:
1. Mix flour, water, and glue in a bowl until you get a thick paste.
2. Cut construction paper into strips and dip them into the paste, coating both sides evenly.
3. Wrap the coated paper strips around the balloon, overlapping each strip as you go, to create the volcano’s shape.
4. Allow the mixture to dry completely (takes about 24 hours).
5. Once dry, pop the balloon and remove it from the inside of the volcano.
6. Mix 2-3 tablespoons of baking soda with a small amount of water to create a thick paste.
7. Pour the baking soda mixture into the volcano’s opening.
8. Add 1-2 tablespoons of vinegar to the volcano and watch as it erupts!
Cooking Time: None required! This is a science project, not a cooking recipe.
Decorative Paper Mache Vase with Paint Finish
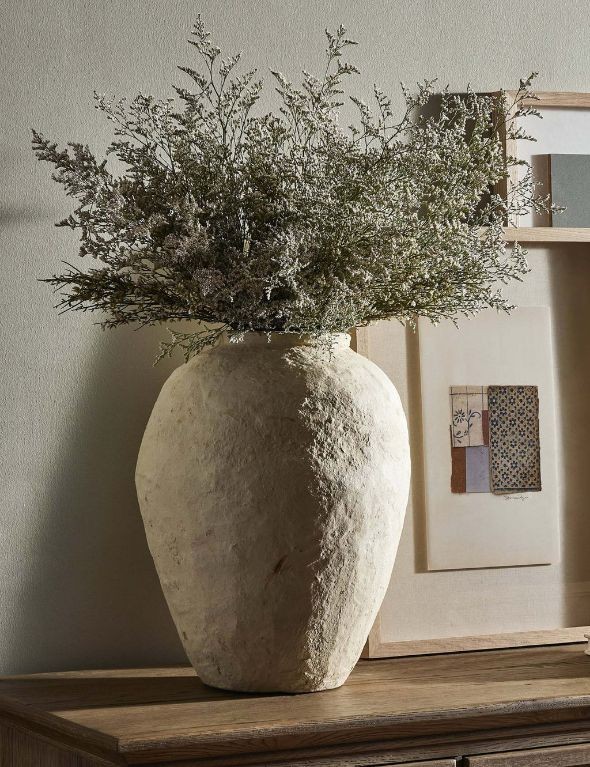
Create a beautiful and unique vase using paper mache techniques and a touch of paint.
Ingredients:
– 2 cups water
– 1 cup flour
– 2 tablespoons white glue
– 1/4 cup torn newspaper or paper strips
– 1 balloon, blown up to desired vase size
– Paint (acrylic or latex) in desired color(s)
– Varnish or clear coat (optional)
Instructions:
1. Mix water and flour until smooth, then add white glue.
2. Tear newspaper into strips and soak them in the mixture for about 5 minutes.
3. Blow up the balloon to the desired vase size.
4. Apply layers of paper mache mixture to the balloon, overlapping strips as you go.
5. Allow each layer to dry completely before adding more (about 30 minutes).
6. Once the final layer is dry, pop the balloon and remove it from the vase.
7. Sand the vase to smooth out any bumps or rough edges.
8. Paint the vase with acrylic or latex paint in desired colors and design.
9. Apply varnish or clear coat if desired for added protection.
Cooking Time: None (this is a crafting project!)
Paper Mache Fairy House with Moss Accents
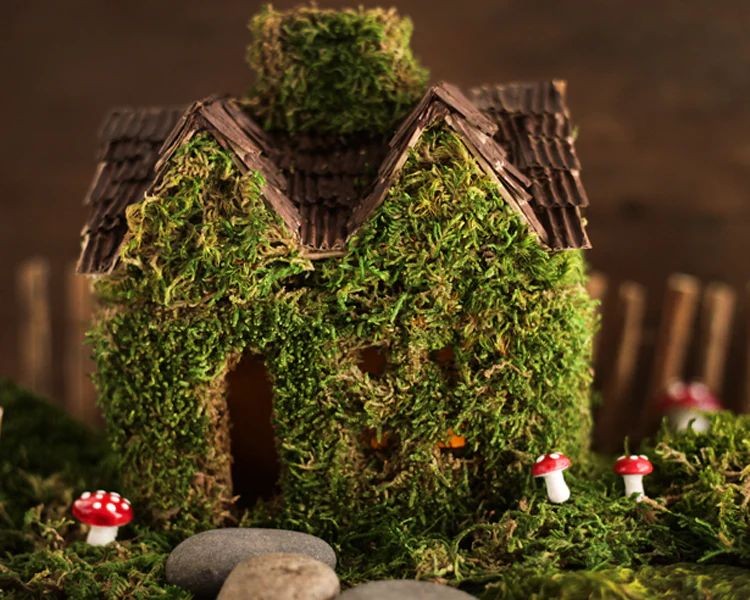
Create a whimsical fairy house with this simple paper mache recipe, adding a touch of greenery with moss accents.
Ingredients:
– 2 cups water
– 1 cup white glue
– 1/2 cup shredded newspaper or cardboard strips
– 1 tablespoon glycerin (optional)
– Moss clippings (various shades and textures)
– Twine or wire for shaping and securing the structure
– Decorative items (small rocks, seashells, etc.)
Instructions:
1. In a large bowl, mix water and glue until well combined.
2. Add shredded newspaper or cardboard strips to the mixture and stir until evenly coated.
3. Apply the paper mache mixture to a wire armature or cardboard base, shaping as desired for your fairy house.
4. Allow each layer to dry completely before adding additional layers (allow at least 30 minutes between coats).
5. Once the final layer is dry, use glycerin (if using) to add a subtle sheen and prevent drying out.
6. Attach moss clippings to the structure using twine or wire, arranging as desired for a whimsical look.
7. Add decorative items as desired.
Cooking Time: None (this recipe is for crafting, not cooking!)
Paper Mache Jewelry Box with Latch
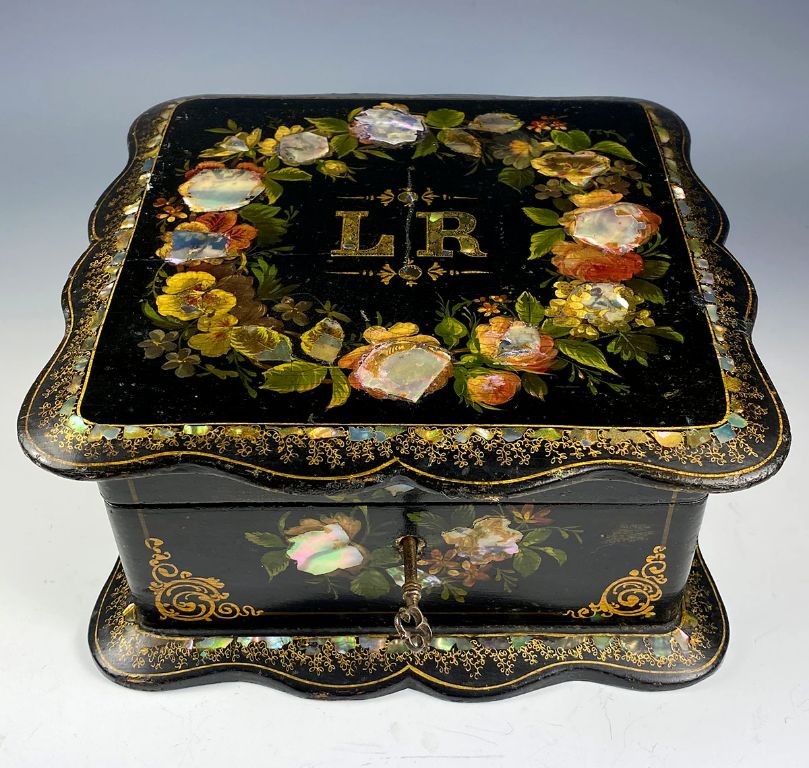
Transform an ordinary space into a unique and elegant storage solution for your treasured belongings with this simple paper mache jewelry box with latch recipe.
Ingredients:
– 2 cups of water
– 1 cup of flour
– 2 tablespoons of white glue
– 1/4 teaspoon of salt
– Newspaper or paper strips for wrapping
– Scissors, paintbrush, and a small paint bottle (optional)
Step-by-Step Instructions:
1. Mix the water, flour, glue, and salt in a bowl until smooth.
2. Tear newspaper into strips and soak them in the mixture for about 10 minutes.
3. Wrap the paper strips around a small box or container to create the jewelry box shape.
4. Let it dry completely, which may take several hours or overnight.
5. Cut a piece of cardboard to fit on top as the lid.
6. Attach a latch using glue and a small metal clip or a decorative pin.
Cooking Time: N/A (this is a crafting project!)
Paper Mache Hot Air Balloon Ornament
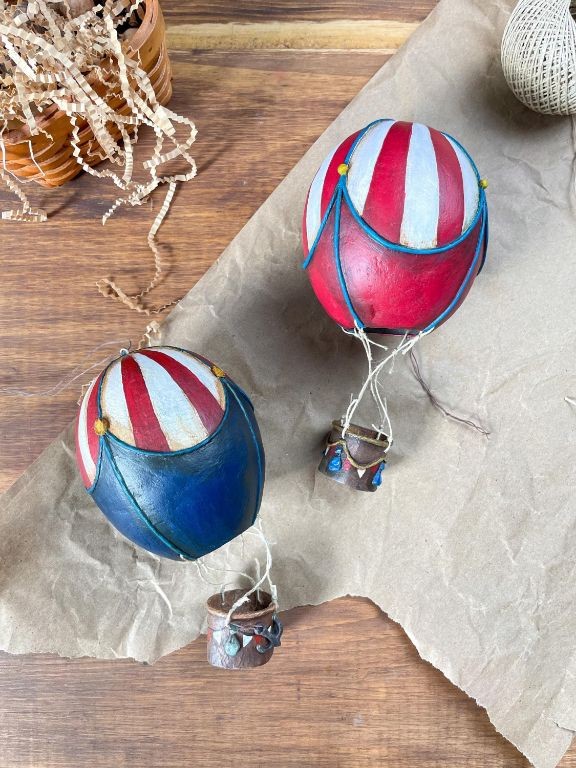
Create a whimsical decoration for your home with this easy-to-make paper mache hot air balloon ornament. With just a few simple materials, you can craft a unique and eye-catching piece that’s perfect for any room.
Ingredients:
– Newspaper or paper strips
– Glue (flour-based or white school glue)
– Water
– Scissors
– Balloon (latex or Mylar) in the desired size and shape
– Paint and varnish (optional)
Instructions:
1. Blow up the balloon to the desired size.
2. Tear newspaper into long strips, about 1-2 inches wide.
3. Mix equal parts glue and water to create a thin paste.
4. Dip a paper strip into the mixture, coating both sides evenly.
5. Wrap the strip around the balloon, overlapping the edges as you go.
6. Continue applying layers of paper, allowing each layer to dry before adding the next.
7. Once the entire balloon is covered in paper mache, pop the balloon and remove it from the sculpture.
8. Paint and varnish the ornament if desired.
Cooking Time: N/A
This project requires some patience as you wait for each layer of paper mache to dry. However, with a few hours’ worth of work, you’ll have a stunning hot air balloon ornament to display in your home.
Paper Mache Dinosaur Sculpture
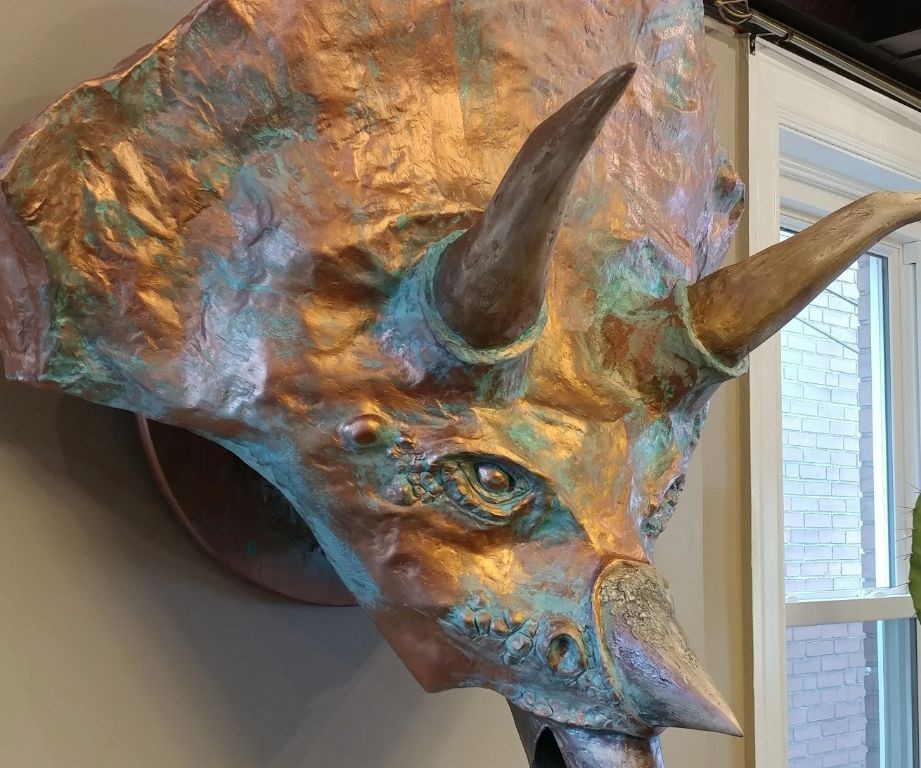
Bring your imagination to life with this fun and creative paper mache project. With just a few simple materials, you’ll be able to create a realistic dinosaur sculpture that’s perfect for display or as a unique gift.
Ingredients:
– 2 cups of water
– 1 cup of flour
– 1/2 cup of white glue
– 1 tablespoon of glycerin (optional)
– Scissors
– A balloon or wire armature to shape the dinosaur
– Newspaper strips or paper pulp for the mache mixture
– Paint and decorations (optional)
Instructions:
1. Mix together the water, flour, and white glue in a bowl until smooth.
2. If desired, add glycerin to help prevent cracking.
3. Cut newspaper strips or tear them into small pieces for the mache mixture.
4. Apply a thin layer of the mache mixture to the balloon or wire armature, then wrap with newspaper strips.
5. Repeat steps 4-5 until the desired thickness is achieved.
6. Allow the sculpture to dry completely (this may take several days).
7. Paint and decorate as desired.
Cooking Time: None! Let your creativity shine by crafting this paper mache dinosaur sculpture.
Paper Mache Easter Eggs with Pastel Colors
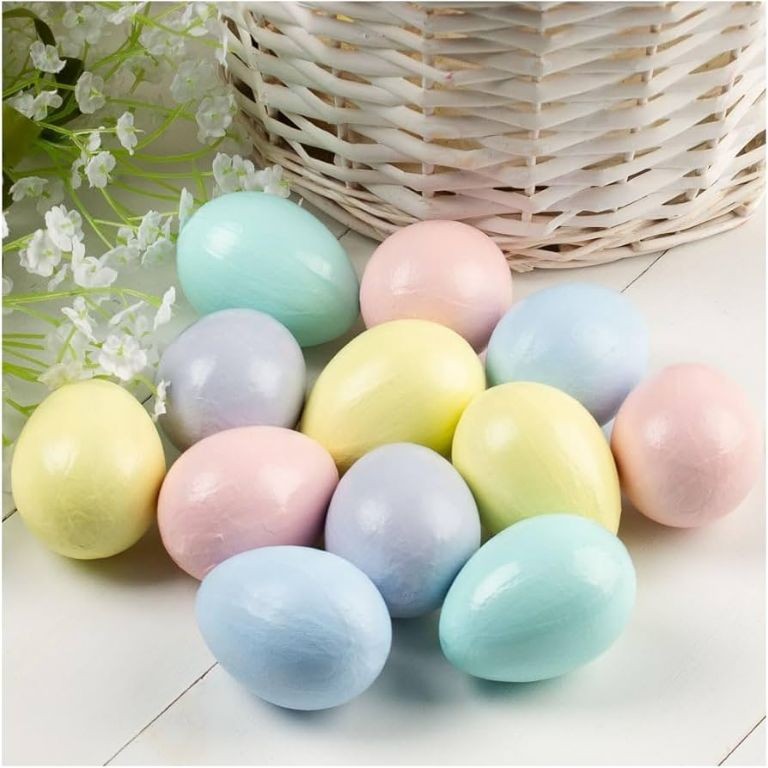
Create adorable and unique Easter eggs using paper mache and pastel colors. This project is perfect for kids and adults alike, making it a fun activity to enjoy together.
Ingredients:
– 2 cups of water
– 1 cup of white glue
– 2 tablespoons of sugar
– 1 teaspoon of borax
– Pastel-colored tissue paper (assorted colors)
– Scissors
– Paintbrushes
– A surface to work on
Step-by-Step Instructions:
1. Mix the water, glue, and sugar in a bowl until well combined.
2. In another bowl, mix 1 cup of warm water with 1 teaspoon of borax. Stir until dissolved.
3. Add the borax mixture to the glue mixture and stir until smooth.
4. Tear pastel-colored tissue paper into small pieces.
5. Dip each piece of tissue paper into the glue mixture, coating both sides evenly.
6. Shape the coated tissue paper into egg shapes on a surface.
7. Allow the eggs to dry completely (about 24 hours).
8. Paint with additional pastel colors if desired.
Cooking Time: None! This is a non-edible craft project.
Paper Mache Halloween Mask with Spooky Details
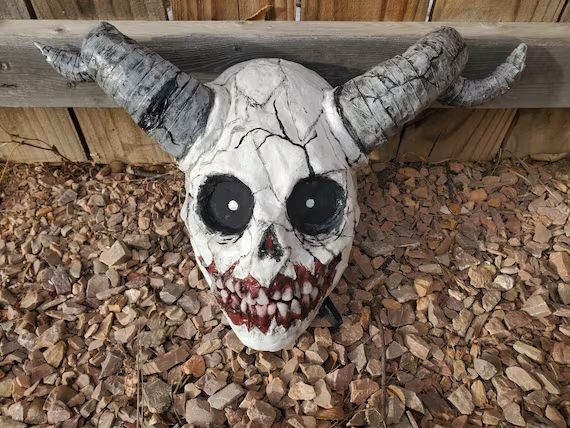
Create a terrifyingly terrific Halloween mask with this simple paper mache recipe. With just a few basic materials, you’ll be crafting a creepy creation that’s sure to send shivers down the spines of your friends and family.
Ingredients:
– 2 cups water
– 1 cup white glue
– 1/2 cup shredded newspaper or tissue paper
– 1 tablespoon flour
– Paint and decorations (optional)
Instructions:
1. Mix together the water, glue, and flour in a bowl until smooth.
2. Tear the newspaper or tissue paper into small pieces and add to the mixture.
3. Stir well to combine.
4. Apply the paper mache mixture to a balloon or a mask shape, building up layers of pulp and allowing each layer to dry before adding more.
5. Once you’ve achieved your desired thickness, pop the balloon (if using) and remove it from the mask.
6. Paint and decorate with spooky details such as eyes, mouths, and fangs.
Cooking Time: None! Just let the paper mache mixture dry completely between layers.
Paper Mache Globe for Geography Lessons
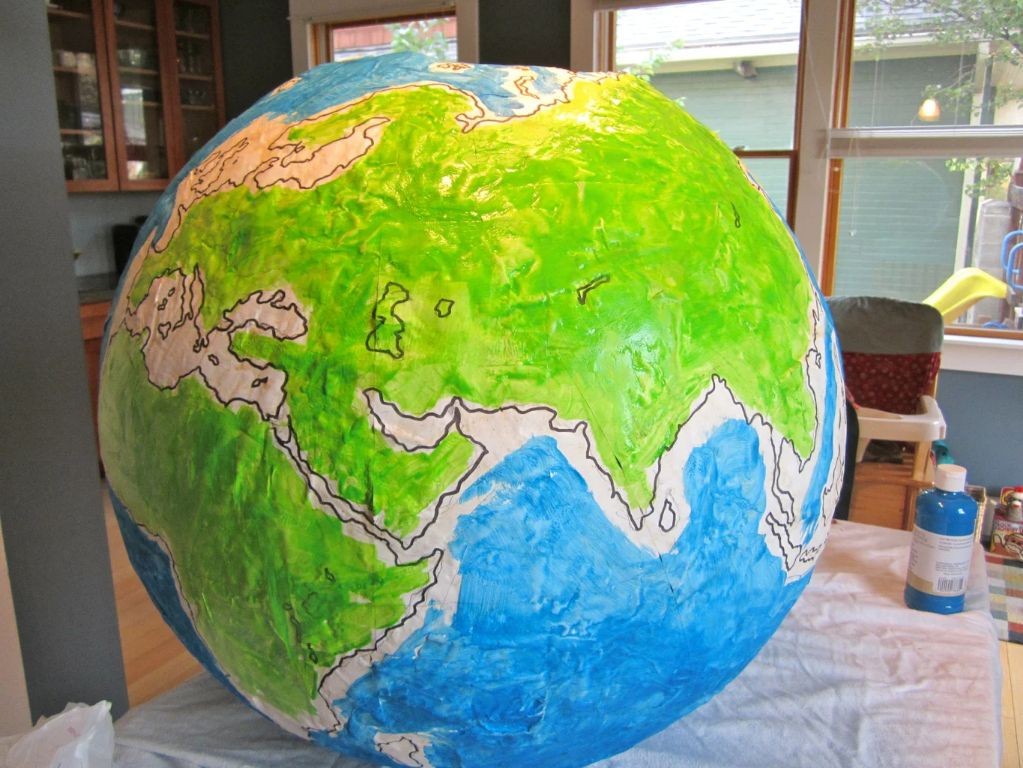
Bring your geography lessons to life with this simple paper mache globe recipe! With just a few basic materials, you can create an interactive and engaging tool for students to learn about different countries and cultures.
Ingredients:
– Balloon (medium-sized)
– Newspaper strips
– White glue
– Water
– Paint (optional)
Instructions:
1. Blow up the balloon to the desired size for your globe.
2. Cut newspaper strips into 1-2 inch wide strips.
3. Mix equal parts white glue and water in a bowl.
4. Dip each newspaper strip into the glue mixture, making sure it’s evenly coated.
5. Wrap the glued newspaper strips around the balloon, overlapping them slightly as you go.
6. Continue wrapping until the entire balloon is covered with 2-3 layers of paper mache.
7. Allow the globe to dry completely (this may take several hours or overnight).
8. If desired, paint the globe with a map-style design or add country names.
Cooking Time: None! This project requires patience and drying time, but no actual cooking is involved.
Paper Mache Fruit Bowl with Realistic Texture
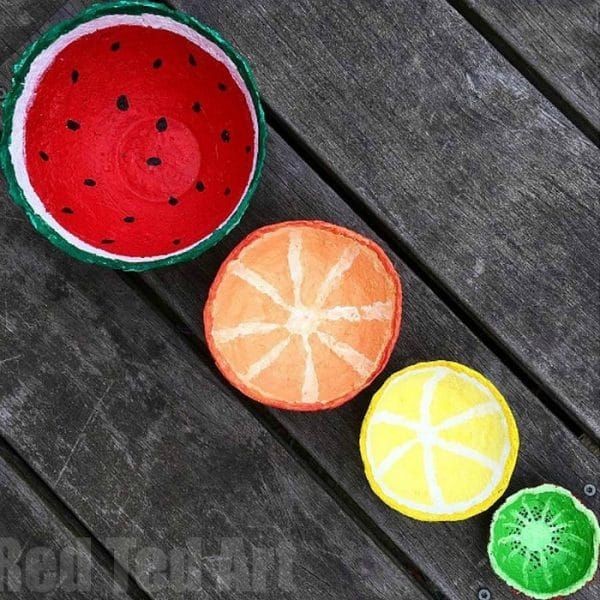
Create a realistic textured fruit bowl using paper mache and a few simple materials. This unique decorative piece is perfect for adding a touch of whimsy to your home decor.
Ingredients:
– 2 cups water
– 1 cup all-purpose flour
– 2 tablespoons white glue
– 1/4 teaspoon salt
– Vegetable oil
– Newspaper or paper strips
– Fruit bowl shape (you can use a balloon or a wire frame)
– Paint and varnish (optional)
Instructions:
1. Mix water, flour, glue, and salt in a bowl until smooth.
2. Tear newspaper into strips and soak them in the mixture for about 30 seconds.
3. Wrap paper strips around the fruit bowl shape, overlapping them to create texture.
4. Allow the paper mache to dry completely (this may take several hours or overnight).
5. Once dry, you can add a coat of paint and varnish to enhance the realistic texture.
Cooking Time: None! This recipe is for crafting and decorating, not cooking.
Paper Mache Wall Art with Geometric Patterns
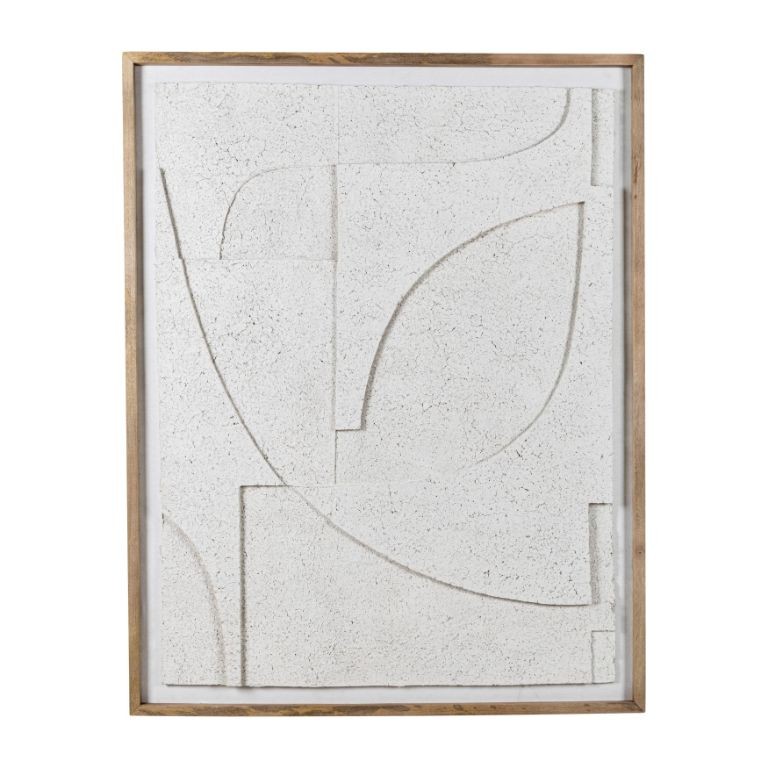
Create a unique piece of art with this simple paper mache recipe featuring geometric patterns. With just a few basic supplies, you’ll have a beautiful and textured wall hanging to add some visual interest to any room.
Ingredients:
– 2 cups all-purpose flour
– 1 cup water
– 1/4 cup white glue
– Scissors
– Paintbrushes (various sizes)
– Geometric pattern template or stencil (optional)
– Newspaper or paper strips for mache mixture
– Wooden or cardboard base (for backing the art piece)
Instructions:
1. Mix flour, water, and glue in a bowl until smooth.
2. Tear newspaper into strips and soak them in the mixture.
3. Apply the mache mixture to a wooden or cardboard base, spreading evenly with a paintbrush.
4. Use scissors to cut out geometric shapes from additional newspaper or paper strips.
5. Arrange and apply the shapes onto the base, overlapping slightly for texture.
6. Allow each layer to dry completely before adding more (cook time: 24 hours).
7. Paint or stain the finished art piece to desired color.
Cook Time: 24 hours
Paper Mache Christmas Ornaments with Glitter
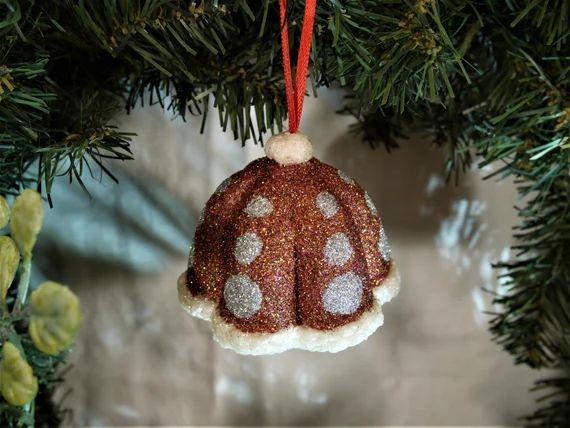
Create unique and sparkly ornaments for your tree or gift-giving with this easy paper mache recipe. By combining simple materials with a dash of glitter, you’ll produce beautiful decorations that add a touch of magic to your holiday season.
Ingredients:
– 1 cup water
– 2 tablespoons white glue
– 1 tablespoon flour
– 1/4 teaspoon salt
– Paper strips (white or colored)
– Glitter (choose your favorite colors and textures)
Instructions:
1. In a bowl, mix together the water, glue, flour, and salt until well combined.
2. Cut the paper into long strips, approximately 1 inch wide.
3. Dip each strip into the mixture, coating both sides evenly.
4. Shape the coated paper into desired ornament shape (e.g., ball, tree, star).
5. Allow ornaments to dry completely, either air-drying or using a hairdryer on low setting.
6. Once dry, brush with clear varnish for added protection and shine.
7. Sprinkle glitter over ornaments for an extra touch of sparkle.
Cooking Time: 2-3 days (drying time)
Summary
Get creative with paper mache! This versatile craft medium can be used to create stunning and unique pieces. In this article, we’ll explore 18 innovative paper mache recipes for making everything from decorative vases to animal masks, piñatas, and more. Learn how to make your own paper mache paste using flour and water or glue-based mixture, and discover the endless possibilities with these easy-to-follow recipes. From science projects to jewelry boxes, and even a fairy house with moss accents, this article will inspire you to get crafty and create something truly special.