Venture into the delicious world of no-cook meals with these 20 refreshing cold sandwich recipes perfect for summer! When the heat is on, nothing beats a cool, satisfying sandwich that comes together in minutes. From classic favorites to creative new combinations, we’ve gathered the best ideas to keep your kitchen cool and your taste buds happy. Get ready to discover your new go-to summer lunch!
Classic Cucumber Tea Sandwich
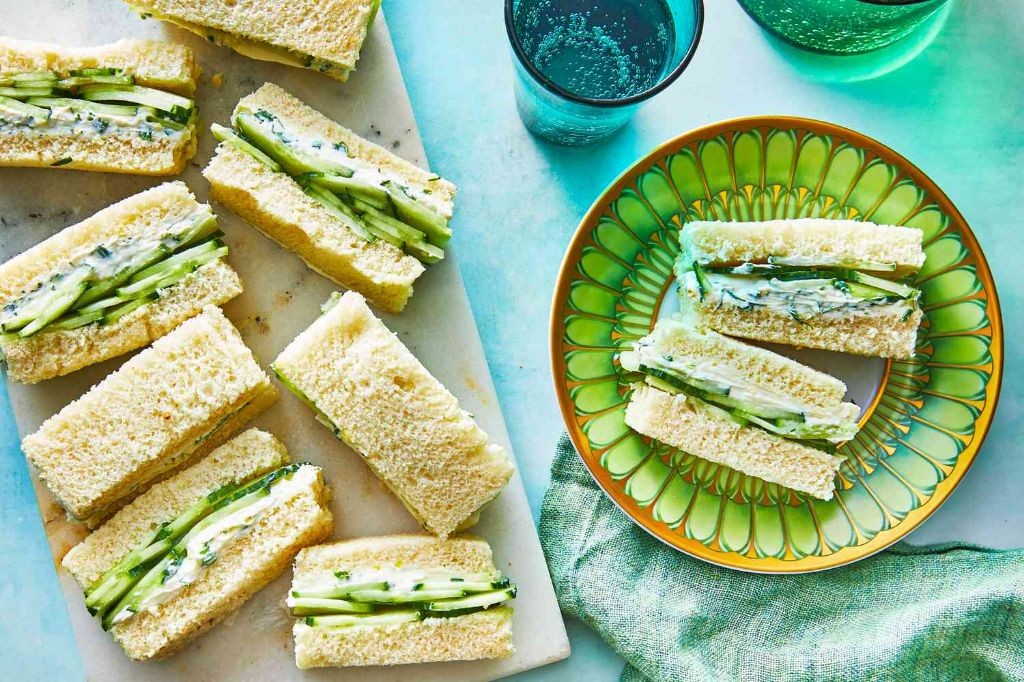
Unmistakably elegant yet delightfully simple, the classic cucumber tea sandwich embodies refined afternoon entertaining. These delicate finger sandwiches feature crisp, paper-thin cucumber slices nestled between creamy, herb-flecked spread on tender white bread. Utterly timeless, they offer a refreshing counterpoint to robust teas and rich pastries during leisurely gatherings.
Ingredients
– 8 slices white sandwich bread
– 1 English cucumber
– 4 ounces cream cheese, softened
– 2 tablespoons mayonnaise
– 1 tablespoon fresh dill, minced
– 1/2 teaspoon lemon juice
– 1/4 teaspoon salt
– 1/8 teaspoon black pepper
Instructions
1. Place cream cheese in a medium bowl and let stand at room temperature for 30 minutes until softened to 68°F.
2. Using a mandoline slicer, slice the English cucumber into 1/8-inch thick rounds to ensure uniform thickness.
3. Arrange cucumber slices in a single layer on paper towels and sprinkle with 1/8 teaspoon salt to draw out excess moisture.
4. Let cucumbers rest for 15 minutes, then pat completely dry with fresh paper towels to prevent soggy sandwiches.
5. Add mayonnaise, dill, lemon juice, remaining salt, and black pepper to the softened cream cheese.
6. Whisk the mixture vigorously for 2 minutes until completely smooth and well combined.
7. Trim crusts from all 8 bread slices using a serrated knife for clean edges.
8. Spread 2 tablespoons of the cream cheese mixture evenly over one side of each bread slice.
9. Arrange cucumber slices in a single, slightly overlapping layer over 4 of the bread slices.
10. Top with remaining bread slices, cream cheese side down, pressing gently to adhere.
11. Cut each sandwich diagonally twice to create 4 triangular quarters.
12. Arrange sandwiches on a serving platter and cover with a damp paper towel.
13. Refrigerate for 30 minutes to allow flavors to meld and sandwiches to firm up.
Exquisitely delicate, these sandwiches offer a satisfying contrast between the creamy herb spread and the cool, crisp cucumber. The tender bread yields gently to reveal refreshing layers that pair beautifully with floral teas or sparkling rosé. For an elegant variation, try substituting watercress for dill or adding a whisper of mint to the spread for additional brightness.
Avocado and Egg Salad Sandwich

Tender, creamy avocado and perfectly cooked eggs unite in this sophisticated yet approachable sandwich that elevates lunchtime to an artful experience. This deceptively simple combination delivers both luxurious texture and bright, fresh flavors that will make you reconsider the humble sandwich entirely. With just a few quality ingredients and careful technique, you can create a meal that feels both indulgent and nourishing.
Ingredients
– 2 large eggs
– 1 ripe avocado
– 2 tbsp mayonnaise
– 1 tsp Dijon mustard
– 1 tbsp fresh lemon juice
– 1/4 tsp kosher salt
– 1/8 tsp black pepper
– 4 slices sourdough bread
– 2 leaves butter lettuce
Instructions
1. Place 2 large eggs in a small saucepan and cover with cold water by 1 inch.
2. Bring the water to a rolling boil over high heat, then immediately remove from heat, cover, and let stand for 10 minutes.
3. Transfer the eggs to an ice water bath and let cool completely for 5 minutes to stop the cooking process.
4. Peel the eggs under cool running water to help remove shells cleanly.
5. Chop the peeled eggs into 1/4-inch pieces using a sharp knife.
6. Cut the ripe avocado in half, remove the pit, and scoop the flesh into a medium bowl.
7. Mash the avocado with a fork until mostly smooth but with some small chunks remaining for texture.
8. Add 2 tablespoons mayonnaise, 1 teaspoon Dijon mustard, and 1 tablespoon fresh lemon juice to the mashed avocado.
9. Gently fold in the chopped eggs until just combined to maintain some texture.
10. Season the mixture with 1/4 teaspoon kosher salt and 1/8 teaspoon black pepper, folding gently to distribute evenly.
11. Toast 4 slices of sourdough bread in a toaster until golden brown and crisp.
12. Place 1 butter lettuce leaf on each of 2 slices of toasted sourdough bread.
13. Divide the avocado-egg mixture evenly between the 2 prepared bread slices.
14. Top each with the remaining slices of toasted sourdough bread and press gently.
15. Cut each sandwich in half diagonally with a serrated knife for clean cuts.
Buttery avocado melts into the creamy egg mixture, creating a rich texture that contrasts beautifully with the crisp sourdough and fresh lettuce. The bright acidity from lemon juice and subtle tang from Dijon mustard cut through the richness, making each bite perfectly balanced. For an elegant presentation, serve these sandwiches on a wooden board with pickled vegetables or enjoy them as the centerpiece of a sophisticated picnic spread.
Mediterranean Veggie Hummus Wrap

Perfectly portable yet sophisticated, the Mediterranean Veggie Hummus Wrap brings sun-drenched flavors to your lunch routine with vibrant vegetables, creamy spreads, and aromatic herbs wrapped in a soft tortilla. This wholesome creation balances tangy feta, crisp cucumbers, and briny olives against a backdrop of smooth hummus and fresh spinach. Each bite delivers a refreshing crunch and Mediterranean zest, making it an ideal meal for busy days or leisurely picnics.
Ingredients
- 1 large whole wheat tortilla
- 1/2 cup hummus
- 1 cup fresh spinach leaves
- 1/2 cup cucumber, thinly sliced
- 1/4 cup red onion, thinly sliced
- 1/4 cup Kalamata olives, pitted and halved
- 1/4 cup crumbled feta cheese
- 2 tbsp fresh lemon juice
- 1 tbsp extra virgin olive oil
- 1 tsp dried oregano
Instructions
- Lay the whole wheat tortilla flat on a clean work surface.
- Spread the hummus evenly over the entire surface of the tortilla, leaving a 1-inch border around the edges to prevent spillage.
- Layer the fresh spinach leaves evenly over the hummus, covering the center portion thoroughly.
- Arrange the thinly sliced cucumber in a single layer over the spinach, distributing it uniformly.
- Scatter the thinly sliced red onion evenly across the cucumber layer.
- Sprinkle the pitted and halved Kalamata olives over the red onion.
- Distribute the crumbled feta cheese evenly over the olive layer.
- Drizzle the fresh lemon juice evenly over the assembled ingredients to brighten the flavors.
- Drizzle the extra virgin olive oil lightly over the entire filling for added richness.
- Sprinkle the dried oregano evenly across the top layer to incorporate Mediterranean aroma.
- Fold the bottom edge of the tortilla up over the filling, then fold the left and right sides inward tightly.
- Roll the wrap firmly from the bottom to the top, applying even pressure to secure the ingredients inside.
- Slice the wrapped tortilla in half diagonally with a sharp serrated knife for clean cuts.
Effortlessly elegant, this wrap offers a delightful contrast of creamy hummus and crisp vegetables, with the briny olives and tangy feta creating a harmonious Mediterranean profile. Serve it immediately for the best texture, or wrap it tightly in parchment paper for a stylish, portable lunch that stays fresh for hours.
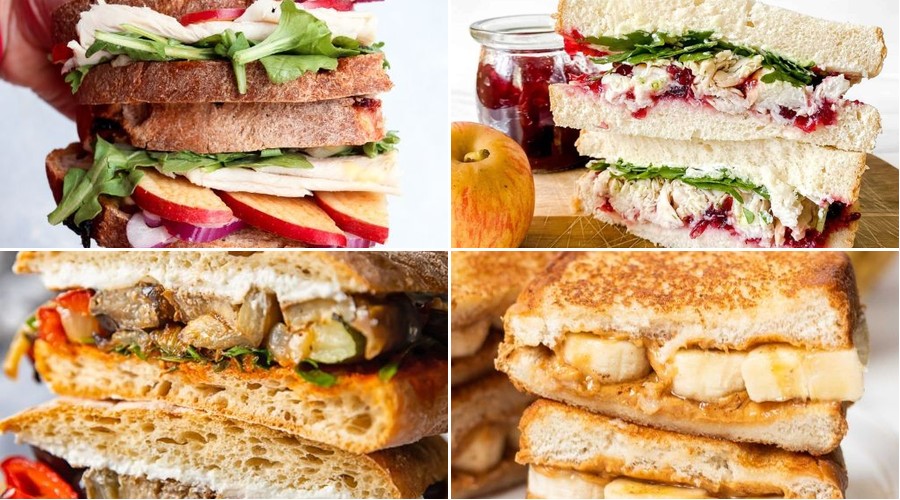
Turkey and Cranberry Cream Cheese Sandwich
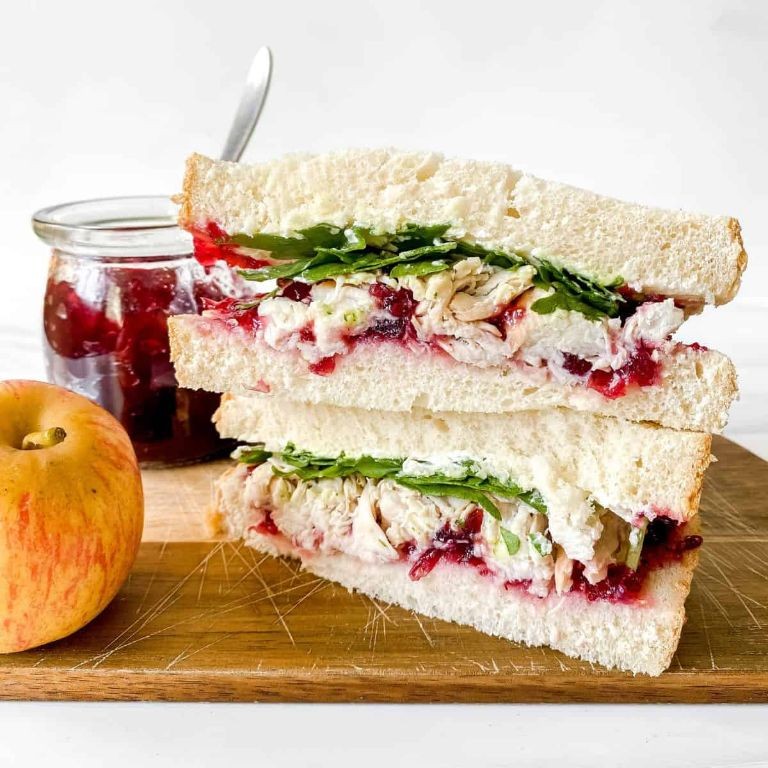
Delightfully bridging the gap between holiday nostalgia and everyday elegance, this sophisticated sandwich transforms classic Thanksgiving flavors into an accessible culinary experience. Perfectly balanced between creamy indulgence and bright acidity, it offers a refined take on familiar comfort that feels both celebratory and effortlessly approachable.
Ingredients
– 8 slices sourdough bread
– 4 tbsp unsalted butter, softened
– 8 oz cream cheese, softened
– 1/2 cup whole-berry cranberry sauce
– 12 oz sliced roasted turkey breast
– 1/4 cup chopped fresh parsley
– 1/2 tsp black pepper
Instructions
1. Spread 1/2 tablespoon softened butter evenly on one side of each sourdough bread slice.
2. Heat a large skillet or griddle over medium heat until a drop of water sizzles immediately upon contact.
3. Place 4 bread slices buttered-side down in the skillet, toasting for 2-3 minutes until golden brown with visible grill marks.
4. Flip bread slices and toast the second side for 1-2 minutes until lightly golden, then transfer to a cutting board.
5. Repeat toasting process with remaining 4 bread slices.
6. Spread 2 ounces softened cream cheese evenly on the unbuttered side of 4 toasted bread slices.
7. Spoon 2 tablespoons whole-berry cranberry sauce over the cream cheese layer, spreading gently to cover while maintaining distinct berry visibility.
8. Arrange 3 ounces sliced roasted turkey breast evenly over the cranberry layer, folding slices to create height and texture.
9. Sprinkle 1 tablespoon chopped fresh parsley and 1/8 teaspoon black pepper evenly over the turkey layer.
10. Top each sandwich with remaining toasted bread slices, buttered-side facing outward.
11. Cut each sandwich diagonally with a serrated knife using a gentle sawing motion to preserve the layered structure.
12. Serve immediately while bread retains its crisp exterior. Keeping the cream cheese at room temperature for 30 minutes before assembling ensures easy spreading without tearing the bread. The diagonal cut not only presents elegantly but also allows equal distribution of fillings in each bite. For optimal texture contrast, assemble the sandwich immediately after toasting while the bread is still warm. Known for its harmonious contrast, the sandwich delivers creamy richness punctuated by tart cranberry bursts against savory turkey, all encased in crisp, buttery sourdough. Consider serving alongside a simple arugula salad dressed with lemon vinaigrette to complement the richness, or pack for an elevated picnic where the flavors meld beautifully during transport.
Caprese Ciabatta with Balsamic Glaze

Kindly consider this elegant twist on Italian classics, where sun-ripened tomatoes and fresh mozzarella meet crusty ciabatta in a symphony of Mediterranean flavors, elevated by a sweet-tart balsamic reduction that glistens like dark amber. This Caprese Ciabatta with Balsamic Glaze transforms simple ingredients into a sophisticated yet approachable dish, perfect for leisurely lunches or impromptu gatherings where quality and presentation shine. Each bite balances creamy, tangy, and herbaceous notes, making it a timeless favorite that feels both rustic and refined.
Ingredients
– 1 loaf ciabatta bread
– 2 large ripe tomatoes
– 8 ounces fresh mozzarella cheese
– 1/4 cup fresh basil leaves
– 2 tablespoons extra virgin olive oil
– 1/4 cup balsamic vinegar
– 1 teaspoon honey
– 1/4 teaspoon sea salt
– 1/4 teaspoon black pepper
Instructions
1. Preheat your oven to 375°F to ensure even toasting of the bread.
2. Slice the ciabatta loaf in half horizontally, creating two even pieces.
3. Place the ciabatta halves cut-side up on a baking sheet and bake for 8-10 minutes until golden and crisp at the edges.
4. While the bread toasts, slice the tomatoes into 1/4-inch thick rounds for uniform layering.
5. Drain the fresh mozzarella and slice it into 1/4-inch thick pieces to match the tomato slices.
6. In a small saucepan, combine the balsamic vinegar and honey over medium heat.
7. Bring the mixture to a simmer, then reduce the heat to low and cook for 5-7 minutes, stirring occasionally, until it thickens to a syrup-like consistency that coats the back of a spoon.
8. Remove the toasted ciabatta from the oven and let it cool for 2 minutes to prevent sogginess.
9. Drizzle 1 tablespoon of olive oil evenly over the cut sides of the ciabatta.
10. Layer the tomato slices neatly over the ciabatta, slightly overlapping them.
11. Place the mozzarella slices on top of the tomatoes, alternating with the tomato layers.
12. Sprinkle the sea salt and black pepper evenly over the assembled ingredients.
13. Tear the fresh basil leaves by hand and scatter them over the top to release their aromatic oils.
14. Drizzle the remaining 1 tablespoon of olive oil over the basil and cheese.
15. Finish by generously drizzling the reduced balsamic glaze in a zigzag pattern across the entire surface.
Just before serving, slice the ciabatta into individual portions, revealing the vibrant layers of red, white, and green. The contrast between the crisp, chewy bread and the juicy, creamy toppings creates a delightful textural experience, while the balsamic glaze adds a glossy, sweet-accented finish that complements the fresh basil. For a creative twist, serve it alongside a crisp arugula salad or pair it with a chilled Prosecco to enhance its Mediterranean charm.
Tuna Salad with Celery and Dill
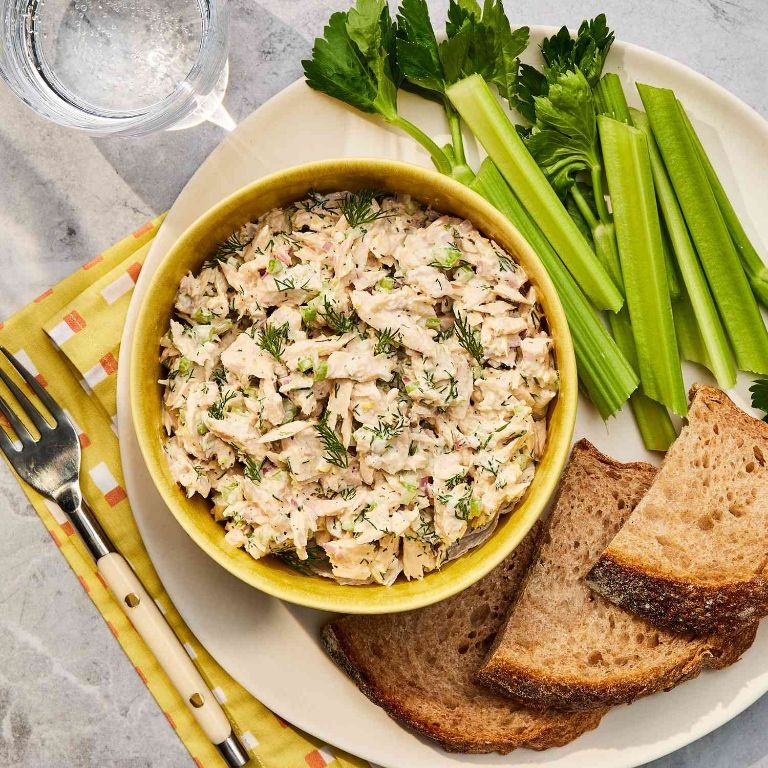
Whisking together the perfect balance of briny tuna and crisp, aromatic vegetables creates a salad that elevates the humble lunch staple into something truly special. With fresh dill lending its delicate herbal notes and celery providing satisfying crunch, this recipe transforms simple ingredients into an elegant, protein-packed dish. Whether served atop greens or between slices of artisanal bread, this tuna salad promises both refinement and comfort in every bite.
Ingredients
- 2 cans (5 oz each) solid white tuna in water, drained
- 1/2 cup mayonnaise
- 1/4 cup finely diced celery
- 2 tablespoons fresh dill, minced
- 1 tablespoon lemon juice
- 1/4 teaspoon black pepper
- 1/4 teaspoon salt
Instructions
- Place drained tuna in a medium mixing bowl and flake thoroughly with a fork until no large chunks remain.
- Add mayonnaise to the tuna and stir gently until the mixture is evenly coated and creamy.
- Fold in the diced celery, distributing it evenly throughout the tuna mixture.
- Sprinkle minced fresh dill over the salad and incorporate gently to preserve its delicate flavor.
- Drizzle lemon juice over the mixture and stir to combine, which will brighten the flavors and prevent discoloration.
- Season with salt and black pepper, mixing thoroughly to ensure even distribution of seasonings.
- Cover the bowl with plastic wrap and refrigerate for at least 30 minutes to allow flavors to meld.
A harmonious blend of textures awaits—the tender flakiness of tuna contrasts beautifully with the crisp celery, while the dill infuses each bite with fresh, aromatic notes. For an elegant presentation, serve chilled on butter lettuce leaves or stuff into ripe avocado halves. This versatile salad also makes exceptional tea sandwiches when spread on thinly sliced whole-grain bread.
Greek Gyro Pita with Tzatziki

Embracing the vibrant spirit of Mediterranean cuisine, this Greek Gyro Pita with Tzatziki offers a harmonious blend of savory, spiced meat wrapped in warm, pillowy pita, all crowned with a cool, creamy yogurt sauce. Each component works in concert to deliver a truly transportive dining experience, perfect for both weeknight dinners and entertaining guests. The careful layering of flavors and textures creates a dish that feels both rustic and refined.
Ingredients
- 1 lb ground lamb
- 1 tsp dried oregano
- 1 tsp garlic powder
- 1/2 tsp ground cumin
- 1/4 tsp cinnamon
- 1/2 tsp salt
- 1/4 tsp black pepper
- 1 tbsp olive oil
- 4 pita bread rounds
- 1 cup plain Greek yogurt
- 1/2 cucumber, grated and squeezed dry
- 1 tbsp fresh dill, minced
- 1 tbsp lemon juice
- 1 garlic clove, minced
- 1/4 tsp salt
- 1 cup shredded lettuce
- 1/2 cup diced tomatoes
- 1/4 cup sliced red onion
Instructions
- Combine 1 lb ground lamb, 1 tsp dried oregano, 1 tsp garlic powder, 1/2 tsp ground cumin, 1/4 tsp cinnamon, 1/2 tsp salt, and 1/4 tsp black pepper in a medium bowl, mixing thoroughly with your hands until the spices are evenly distributed.
- Heat 1 tbsp olive oil in a large skillet over medium-high heat until it shimmers, about 1 minute.
- Add the seasoned lamb mixture to the skillet, breaking it into small crumbles with a wooden spoon.
- Cook the lamb for 8-10 minutes, stirring occasionally, until it is browned and reaches an internal temperature of 160°F.
- While the lamb cooks, prepare the tzatziki by combining 1 cup plain Greek yogurt, 1/2 grated and squeezed dry cucumber, 1 tbsp minced fresh dill, 1 tbsp lemon juice, 1 minced garlic clove, and 1/4 tsp salt in a small bowl, stirring until fully incorporated.
- Warm 4 pita bread rounds in a dry skillet over medium heat for 30 seconds per side, or until soft and pliable.
- Place one warmed pita round on each plate.
- Divide the cooked lamb mixture evenly among the pita rounds, spooning it onto the center of each.
- Top each gyro with 1/4 cup shredded lettuce, 2 tbsp diced tomatoes, and 1 tbsp sliced red onion.
- Drizzle 2 tbsp of the prepared tzatziki sauce over the fillings in each pita.
- Fold the bottom of each pita up over the fillings, then roll the sides inward to form a secure wrap.
Yielding a satisfying contrast of warm, spiced lamb against cool, crisp vegetables and tangy tzatziki, each bite delivers a symphony of textures and flavors. The soft pita encases the filling beautifully, making it ideal for handheld enjoyment without sacrificing elegance. For a stunning presentation, serve these gyros alongside a Greek salad or roasted lemon potatoes to complete the Mediterranean feast.
BLT with Herb Mayo on Sourdough
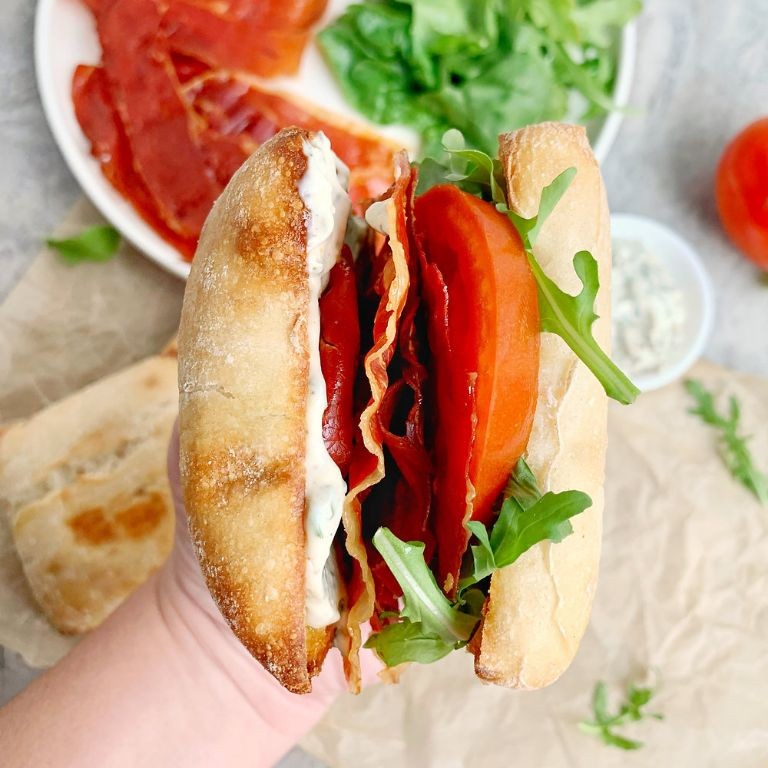
Just when you thought the classic BLT couldn’t be improved, this elevated version on artisanal sourdough with herb-infused mayonnaise transforms the humble sandwich into a culinary masterpiece. Juxtaposing crisp, salty bacon against sweet summer tomatoes and peppery arugula creates a symphony of textures and flavors that dance across the palate. Each component is carefully selected to achieve perfect harmony between richness and freshness.
Ingredients
– 8 slices thick-cut bacon
– 4 slices sourdough bread
– 2 large heirloom tomatoes
– 4 leaves butter lettuce
– 1/2 cup mayonnaise
– 2 tbsp fresh basil
– 1 tbsp fresh chives
– 1 tsp lemon juice
– 1/4 tsp black pepper
– 1/4 tsp salt
Instructions
1. Arrange 8 slices of thick-cut bacon in a single layer on a baking sheet lined with parchment paper.
2. Bake the bacon at 400°F for 18-22 minutes until deeply browned and crispy.
3. Transfer the cooked bacon to a paper towel-lined plate to drain excess grease.
4. Finely chop 2 tablespoons of fresh basil and 1 tablespoon of fresh chives.
5. Combine 1/2 cup mayonnaise, chopped herbs, 1 teaspoon lemon juice, 1/4 teaspoon salt, and 1/4 teaspoon black pepper in a small bowl.
6. Toast 4 slices of sourdough bread in a toaster or skillet until golden brown and crisp.
7. Spread herb mayonnaise generously on all 4 slices of toasted sourdough.
8. Slice 2 large heirloom tomatoes into 1/4-inch thick rounds.
9. Arrange butter lettuce leaves on 2 slices of the mayonnaise-coated bread.
10. Layer tomato slices evenly over the lettuce, seasoning lightly with additional salt if desired.
11. Place 4 slices of cooked bacon over the tomatoes on each sandwich.
12. Top with remaining slices of mayonnaise-coated sourdough, pressing gently to secure.
13. Cut each sandwich diagonally and serve immediately.
Exquisite layers of crisp bacon, juicy tomatoes, and peppery greens create a textural symphony that delights with every bite. The tangy sourdough provides the perfect sturdy foundation, while the herbaceous mayonnaise adds a refreshing brightness that cuts through the richness. For an elegant presentation, serve these sandwiches with crisp sweet potato fries or a simple arugula salad dressed in lemon vinaigrette.
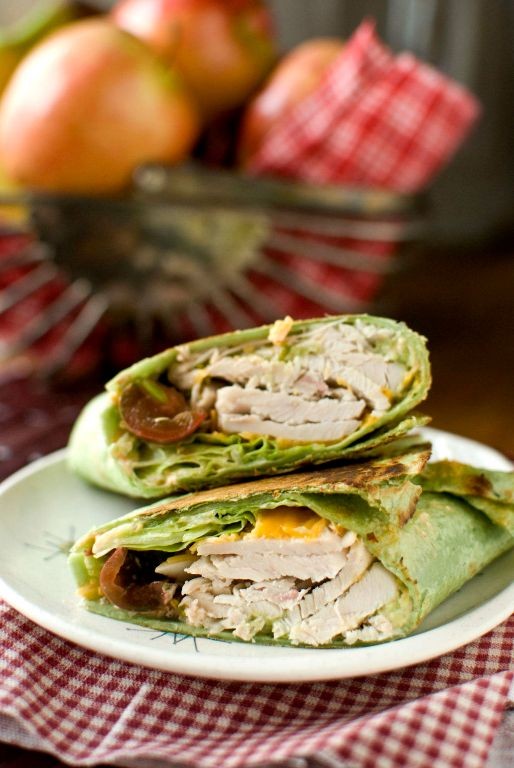
Chicken Caesar Wrap with Romaine
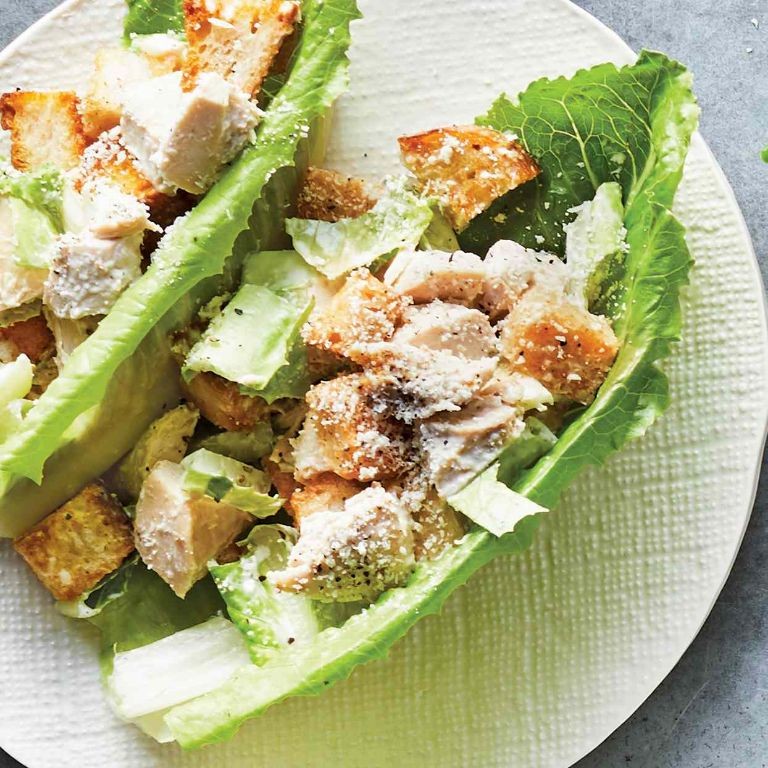
Perfectly portable yet undeniably sophisticated, this Chicken Caesar Wrap elevates lunchtime with crisp romaine hearts, tender grilled chicken, and a creamy homemade dressing. Prepared in mere minutes, it transforms simple ingredients into an elegant handheld meal that satisfies both convenience and culinary standards. The harmonious blend of textures and flavors makes this wrap equally suited for al fresco dining or a refined office lunch.
Ingredients
– 1 lb boneless, skinless chicken breasts
– 1 tbsp olive oil
– 1/2 tsp black pepper
– 1/2 tsp garlic powder
– 1/4 cup mayonnaise
– 2 tbsp grated Parmesan cheese
– 1 tbsp lemon juice
– 1 tsp Dijon mustard
– 1 tsp Worcestershire sauce
– 1 anchovy fillet, minced
– 4 large flour tortillas (10-inch)
– 2 cups chopped romaine lettuce
– 1/4 cup shaved Parmesan cheese
Instructions
1. Pat chicken breasts dry with paper towels and season both sides evenly with black pepper and garlic powder.
2. Heat olive oil in a skillet over medium-high heat until shimmering, about 2 minutes.
3. Place chicken in the skillet and cook for 6-7 minutes per side until internal temperature reaches 165°F and exterior develops golden-brown sear marks.
4. Transfer chicken to a cutting board and let rest for 5 minutes to allow juices to redistribute before slicing.
5. While chicken rests, whisk together mayonnaise, grated Parmesan, lemon juice, Dijon mustard, Worcestershire sauce, and minced anchovy in a small bowl until emulsified.
6. Warm tortillas in a dry skillet over medium heat for 30 seconds per side until pliable but not crisp.
7. Slice rested chicken against the grain into 1/4-inch thick strips.
8. Spread 2 tablespoons of Caesar dressing evenly across the center of each tortilla, leaving 2-inch borders on all sides.
9. Arrange 1/2 cup romaine lettuce over the dressing in a horizontal line.
10. Top lettuce with sliced chicken strips and 1 tablespoon shaved Parmesan per wrap.
11. Fold bottom edge of tortilla over filling, then tightly roll from left to right, tucking ingredients securely as you go.
12. Slice each wrap diagonally through the center at a 45-degree angle to showcase the layered interior.
Ultimately crisp romaine provides refreshing crunch against the savory chicken, while the anchovy-enhanced dressing delivers umami depth that lingers pleasantly. For an elegant presentation, serve these halved wraps standing upright in narrow glasses or arrange them artfully on a platter with lemon wedges and extra shaved Parmesan scattered around the perimeter.
Eggplant and Roasted Pepper Panini

Yielded from the Mediterranean’s sun-drenched gardens, this eggplant and roasted pepper panini transforms humble vegetables into a sophisticated sandwich masterpiece. With layers of smoky roasted peppers, tender grilled eggplant, and melted provolone, it offers a satisfying vegetarian option that doesn’t compromise on flavor or elegance.
Ingredients
– 1 large eggplant
– 2 red bell peppers
– 4 slices sourdough bread
– 4 slices provolone cheese
– 2 tbsp olive oil
– 1 tbsp balsamic vinegar
– 1 garlic clove
– 1/4 tsp salt
– 1/4 tsp black pepper
Instructions
1. Preheat your oven to 425°F and line a baking sheet with parchment paper.
2. Cut the eggplant into 1/2-inch thick rounds and place them in a single layer on the prepared baking sheet.
3. Brush both sides of the eggplant slices with 1 tablespoon of olive oil and sprinkle with salt and black pepper.
4. Roast the eggplant in the preheated oven for 20 minutes, flipping halfway through, until golden brown and tender.
5. While the eggplant roasts, place the whole red bell peppers directly on gas burners over medium-high heat, turning occasionally with tongs until all sides are charred black.
6. Transfer the charred peppers to a bowl, cover with plastic wrap, and let steam for 15 minutes to loosen the skins.
7. Peel the blackened skins from the peppers, remove the seeds and stems, then slice into 1-inch wide strips.
8. In a small bowl, whisk together the remaining 1 tablespoon of olive oil and balsamic vinegar.
9. Rub the garlic clove over one side of each slice of sourdough bread to impart subtle flavor.
10. Brush the garlic-rubbed sides of the bread with the olive oil and balsamic mixture.
11. Layer two slices of bread with roasted eggplant, roasted pepper strips, and two slices of provolone cheese each.
12. Top with the remaining bread slices, oiled sides facing outward.
13. Heat a panini press to 375°F and cook the sandwiches for 5-7 minutes until the bread is crisp and golden and the cheese has completely melted.
Unmistakably satisfying, this panini delivers a delightful contrast between the crisp, grilled sourdough exterior and the soft, melded interior of vegetables and cheese. The smoky sweetness of roasted peppers complements the earthy eggplant beautifully, while the provolone adds a creamy richness that ties everything together. Consider serving it alongside a simple arugula salad dressed with lemon vinaigrette for a complete meal that feels both rustic and refined.
Pesto Mozzarella Tomato Sandwich
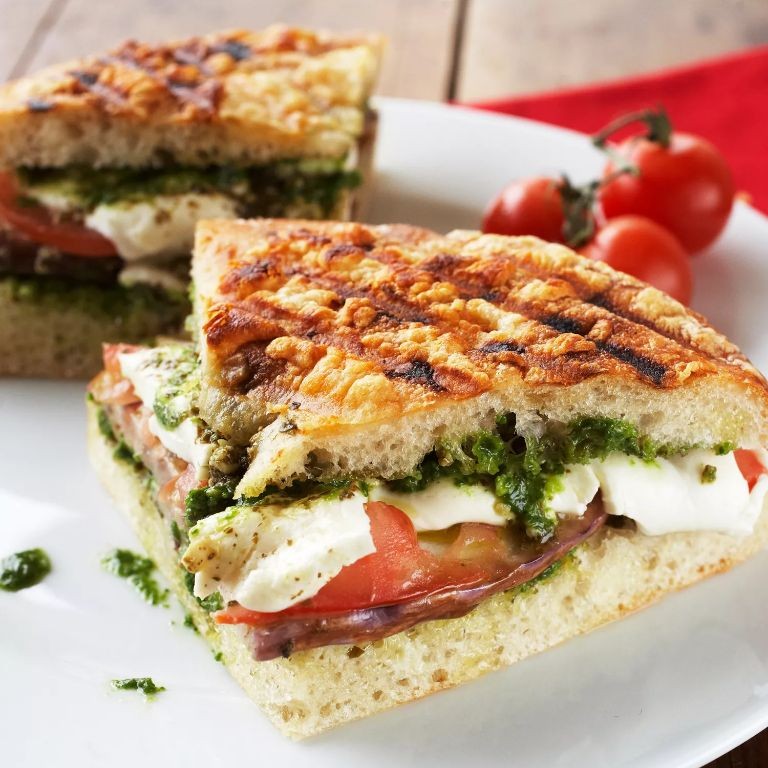
Crafted with vibrant seasonal ingredients, this pesto mozzarella tomato sandwich brings together the quintessential flavors of summer in an elegant handheld meal. The harmonious balance of creamy, tangy, and herbaceous elements creates a sophisticated yet approachable lunch option. Each component is thoughtfully selected to elevate the simple sandwich into something truly memorable.
Ingredients
– 4 slices sourdough bread
– 2 tbsp basil pesto
– 4 oz fresh mozzarella cheese
– 1 large heirloom tomato
– 2 tbsp extra virgin olive oil
– 1/4 tsp kosher salt
Instructions
1. Preheat a non-stick skillet over medium heat.
2. Slice the fresh mozzarella cheese into 1/4-inch thick rounds.
3. Cut the heirloom tomato into 1/2-inch thick slices.
4. Arrange all 4 slices of sourdough bread on a clean work surface.
5. Spread 1/2 tablespoon of basil pesto evenly across each bread slice.
6. Layer mozzarella slices evenly over the pesto on 2 bread slices.
7. Place tomato slices in a single layer over the mozzarella.
8. Sprinkle 1/8 teaspoon of kosher salt evenly over the tomato slices.
9. Top each sandwich with the remaining pesto-covered bread slices.
10. Brush the outer surfaces of both sandwiches with extra virgin olive oil.
11. Place sandwiches in the preheated skillet and cook for 3-4 minutes.
12. Flip sandwiches carefully using a spatula when the bottom bread is golden brown.
13. Cook for another 3-4 minutes until the second side achieves the same golden-brown color.
14. Remove sandwiches from the skillet and let rest for 1 minute before slicing.
15. Cut each sandwich diagonally with a serrated knife.
Finally, the warm, melted mozzarella creates a luxurious creaminess that contrasts beautifully with the juicy tomato and crisp, golden bread. Fresh basil notes from the pesto provide an aromatic complexity that makes this sandwich feel both rustic and refined. For an elegant presentation, serve the diagonal halves standing upright with a simple arugula salad dressed in lemon vinaigrette.
Curried Chickpea Salad Sandwich
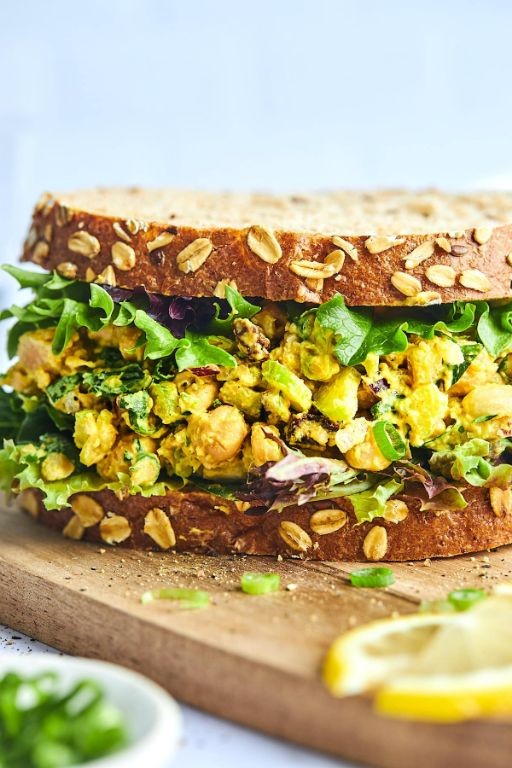
Beyond the ordinary lunchtime fare lies this sophisticated curried chickpea salad sandwich, where creamy textures meet vibrant spices in perfect harmony. Bold curry powder mingles with tender chickpeas and crisp vegetables, creating a filling that transforms simple ingredients into an extraordinary meal. This elegant preparation offers both satisfying nourishment and refined flavor in every bite.
Ingredients
– 2 (15-ounce) cans chickpeas
– 1/2 cup mayonnaise
– 1/4 cup plain Greek yogurt
– 2 tablespoons curry powder
– 1 tablespoon fresh lemon juice
– 1/2 teaspoon salt
– 1/4 teaspoon black pepper
– 1/2 cup finely diced celery
– 1/4 cup finely diced red onion
– 2 tablespoons chopped fresh parsley
– 8 slices whole grain bread
Instructions
1. Drain both cans of chickpeas thoroughly in a colander, then rinse under cold running water for 30 seconds to remove excess sodium.
2. Transfer the rinsed chickpeas to a large mixing bowl and mash with a potato masher until roughly broken down but still textured.
3. Add mayonnaise, Greek yogurt, curry powder, lemon juice, salt, and black pepper to the mashed chickpeas.
4. Stir the mixture vigorously with a rubber spatula for 2 minutes until fully combined and creamy.
5. Fold in the diced celery, red onion, and chopped parsley until evenly distributed throughout the mixture.
6. Taste the salad and adjust seasoning if needed, remembering the flavors will intensify as it rests.
7. Toast 8 slices of whole grain bread in a toaster set to medium-dark setting until golden brown and crisp.
8. Divide the chickpea salad evenly among 4 slices of toasted bread, spreading it to the edges with an offset spatula.
9. Top each prepared slice with the remaining toasted bread slices, pressing down gently to secure the sandwiches.
10. Cut each sandwich diagonally with a serrated knife for clean, professional-looking halves.
Zesty lemon brightens the earthy curry notes while the celery provides satisfying crunch against the creamy chickpea base. Serve these elegant sandwiches on a wooden board with pickled vegetables for contrasting acidity, or pack them for a sophisticated picnic where the flavors continue to develop beautifully.
Ham and Swiss with Honey Mustard

A sophisticated twist on the classic deli sandwich, this Ham and Swiss with Honey Mustard elevates humble ingredients into an elegant lunchtime affair. The harmonious balance of savory smoked ham, nutty Swiss cheese, and sweet-tangy honey mustard creates a symphony of flavors that feels both comforting and refined. This recipe transforms simple components into a warm, melty masterpiece perfect for any occasion.
Ingredients
– 2 slices sourdough bread
– 2 tablespoons honey mustard
– 4 ounces thinly sliced smoked ham
– 2 slices Swiss cheese
– 2 tablespoons unsalted butter, softened
Instructions
1. Spread 1 tablespoon honey mustard evenly on one side of each bread slice.
2. Layer 4 ounces smoked ham evenly over the mustard on one bread slice.
3. Place 2 slices Swiss cheese directly on top of the ham layer.
4. Close the sandwich with the second bread slice, mustard-side facing inward.
5. Spread 1 tablespoon softened butter evenly over the top bread slice.
6. Heat a skillet over medium-low heat for 2 minutes until evenly warm.
7. Place the sandwich buttered-side down in the skillet.
8. Spread the remaining 1 tablespoon butter on the top bread slice while the bottom toasts.
9. Cook for 3-4 minutes until the bottom bread is golden brown and crisp.
10. Carefully flip the sandwich using a spatula.
11. Cook for another 3-4 minutes until the second side is golden brown and the cheese is fully melted.
12. Remove from heat and transfer to a cutting board.
13. Let rest for 1 minute to allow the cheese to set slightly.
14. Cut diagonally with a sharp serrated knife for clean slices.
When served warm, the sandwich offers a delightful contrast of crispy, buttery bread against the tender, savory ham and perfectly melted Swiss cheese. The honey mustard provides a subtle sweetness that cuts through the richness, making each bite beautifully balanced. Consider pairing it with a crisp apple salad or serving it alongside tomato soup for a complete, comforting meal.
Grilled Vegetable and Goat Cheese Baguette

Perfectly charred summer vegetables meet creamy goat cheese in this sophisticated yet approachable sandwich that elevates simple ingredients to gourmet status. The combination of smoky grilled produce and tangy cheese creates a harmonious balance of flavors and textures that will transport you to a sun-drenched Mediterranean terrace with every bite.
Ingredients
- 1 French baguette
- 4 ounces goat cheese
- 1 medium zucchini
- 1 medium yellow squash
- 1 red bell pepper
- 1 small red onion
- 2 tablespoons olive oil
- 1 teaspoon kosher salt
- ½ teaspoon black pepper
- 2 tablespoons balsamic glaze
- ¼ cup fresh basil leaves
Instructions
- Preheat your grill to medium-high heat, approximately 400°F, and brush the grates clean with a grill brush.
- Slice the zucchini and yellow squash lengthwise into ¼-inch thick planks using a sharp chef’s knife.
- Cut the red bell pepper into 1-inch wide strips, removing the seeds and white membranes.
- Slice the red onion into ½-inch thick rounds, keeping the layers intact for easier grilling.
- Brush all vegetable surfaces evenly with olive oil using a pastry brush, ensuring complete coverage.
- Sprinkle the oiled vegetables with kosher salt and black pepper on both sides.
- Place vegetables directly on the preheated grill grates, arranging them in a single layer without overcrowding.
- Grill zucchini and squash for 3-4 minutes per side until they develop distinct grill marks and become tender but not mushy.
- Grill bell pepper strips for 4-5 minutes per side until slightly charred and the skins begin to blister.
- Grill onion rounds for 5-6 minutes per side until softened and showing caramelized edges.
- Transfer all grilled vegetables to a clean platter and let them rest for 5 minutes to allow flavors to meld.
- Slice the French baguette horizontally lengthwise using a serrated bread knife, creating a top and bottom half.
- Spread goat cheese evenly on both cut sides of the baguette, covering the entire surface.
- Arrange the grilled vegetables in an overlapping pattern on the bottom half of the baguette.
- Drizzle balsamic glaze evenly over the vegetable layer using a spoon or squeeze bottle.
- Place fresh basil leaves over the vegetables, distributing them evenly across the sandwich.
- Close the sandwich with the top half of the baguette and press down gently to compact the layers.
- Slice the assembled sandwich into 4 equal portions using a sharp serrated knife, cutting diagonally for presentation.
Layers of smoky grilled vegetables provide satisfying texture against the creamy goat cheese, while the balsamic glaze adds a sweet-tart counterpoint that brightens each component. Serve this elegant sandwich warm alongside a crisp green salad for a complete meal, or cut into smaller portions for sophisticated party appetizers that showcase summer’s bounty at its finest.
Peanut Butter Banana and Honey Sandwich

For those seeking comfort in simplicity, this elevated sandwich transforms humble ingredients into a symphony of textures and flavors that feels both nostalgic and sophisticated. From the creamy richness of peanut butter to the natural sweetness of ripe bananas, each component harmonizes beautifully when prepared with intention. Whether enjoyed as a quick breakfast or an afternoon indulgence, this creation proves that culinary excellence often lies in perfecting the basics.
Ingredients
– 2 slices sandwich bread
– 2 tablespoons creamy peanut butter
– 1 medium ripe banana
– 1 tablespoon honey
– 1 tablespoon unsalted butter
Instructions
1. Place 2 slices of sandwich bread on a clean cutting board.
2. Spread 2 tablespoons of creamy peanut butter evenly across one slice of bread, covering the surface completely.
3. Peel 1 medium ripe banana and slice it into 1/4-inch thick rounds using a sharp knife.
4. Arrange the banana slices in a single layer over the peanut butter-covered bread slice.
5. Drizzle 1 tablespoon of honey evenly over the banana slices, ensuring coverage across the surface.
6. Place the second slice of bread on top to form a sandwich, pressing down gently.
7. Heat a non-stick skillet over medium-low heat for 2 minutes until evenly warmed.
8. Melt 1 tablespoon of unsalted butter in the heated skillet, swirling to coat the surface.
9. Carefully place the assembled sandwich in the skillet and cook for 3-4 minutes until the bottom bread develops a golden-brown crust.
10. Using a spatula, flip the sandwich and cook for another 3-4 minutes until the second side achieves the same golden-brown coloration.
11. Remove the sandwich from the skillet and transfer to a cutting board.
12. Cut the sandwich diagonally into two triangles using a serrated knife for clean slices.
13. Serve immediately while warm. When properly prepared, the sandwich offers a delightful contrast between the crisp, buttery exterior and the soft, warm interior where the peanut butter becomes luxuriously creamy. The honey caramelizes slightly against the warm bananas, creating pockets of intensified sweetness that complement the savory notes of the toasted bread. For an elegant presentation, serve alongside a small bowl of Greek yogurt drizzled with additional honey, creating a balanced breakfast or dessert experience that feels both indulgent and refined.
Spicy Sriracha Turkey and Avocado Wrap
Yield to the vibrant fusion of heat and creaminess in this contemporary wrap that transforms humble ingredients into an extraordinary lunch experience. Your palate will awaken to the harmonious balance of spicy sriracha-glazed turkey against the cool, buttery avocado, all wrapped in a soft tortilla that promises both comfort and sophistication. This recipe elevates weekday dining with its thoughtful layering of textures and bold flavor profile.
Ingredients
– 1 lb ground turkey
– 2 tbsp olive oil
– 3 tbsp sriracha sauce
– 1 tbsp honey
– 1 tsp garlic powder
– 1/2 tsp smoked paprika
– 4 large flour tortillas
– 1 ripe avocado
– 1/2 cup shredded red cabbage
– 1/4 cup Greek yogurt
– 2 tbsp lime juice
– 1/4 cup chopped cilantro
Instructions
1. Heat 2 tablespoons of olive oil in a large skillet over medium-high heat until shimmering.
2. Add 1 pound of ground turkey to the hot skillet, breaking it apart with a wooden spoon into small crumbles.
3. Cook the turkey for 6-8 minutes, stirring occasionally, until no pink remains and the meat develops golden-brown edges.
4. While the turkey cooks, combine 3 tablespoons of sriracha sauce, 1 tablespoon of honey, 1 teaspoon of garlic powder, and 1/2 teaspoon of smoked paprika in a small bowl, whisking until fully incorporated.
5. Reduce the skillet heat to medium and pour the sriracha mixture over the cooked turkey, stirring continuously for 2 minutes until the turkey is evenly coated and the sauce thickens slightly.
6. Warm 4 large flour tortillas in a dry skillet over medium heat for 30 seconds per side, or until pliable and lightly toasted.
7. Mash 1 ripe avocado with 2 tablespoons of lime juice in a separate bowl until smooth but slightly chunky.
8. Spread 2 tablespoons of the avocado mixture evenly across the center of each warmed tortilla, leaving a 1-inch border around the edges.
9. Divide the spicy turkey mixture evenly among the tortillas, spreading it in a horizontal line over the avocado layer.
10. Top each with 2 tablespoons of shredded red cabbage, 1 tablespoon of Greek yogurt, and 1 tablespoon of chopped cilantro.
11. Fold the bottom edge of each tortilla over the filling, then tightly roll from one side to create secure wraps.
12. Slice each wrap diagonally in half at a 45-degree angle for elegant presentation.
Buttery avocado provides a cooling counterpoint to the sriracha’s gentle heat, while the crisp cabbage adds satisfying crunch against the tender turkey. Consider serving these wraps with a side of pickled vegetables or a citrus-dressed slaw to complement the spicy-sweet profile, making them ideal for al fresco dining or sophisticated picnics where bold flavors shine.
Apple Cheddar and Walnut Sandwich
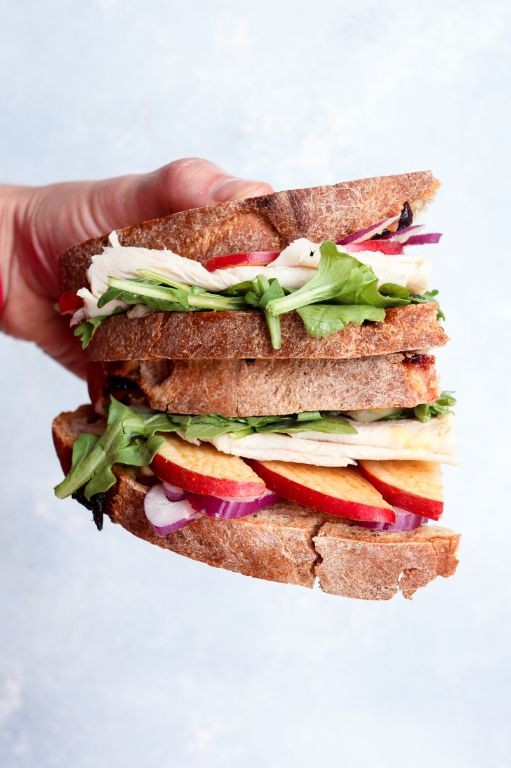
Glistening with autumnal charm, this sophisticated sandwich elevates humble ingredients into a culinary masterpiece where crisp, sweet apples mingle with sharp cheddar and earthy walnuts, all embraced by golden, buttery bread. Perfect for a refined lunch or elegant picnic, each bite delivers a harmonious balance of textures and flavors that celebrates the season’s bounty. The combination creates a satisfying meal that feels both nostalgic and distinctly gourmet.
Ingredients
– 2 slices sourdough bread
– 1 tbsp unsalted butter
– 1/2 medium Honeycrisp apple
– 2 oz sharp white cheddar cheese
– 2 tbsp chopped walnuts
– 1 tsp honey
Instructions
1. Preheat a non-stick skillet over medium-low heat for 3 minutes until evenly heated.
2. Thinly slice the Honeycrisp apple into 1/8-inch thick pieces, removing the core completely.
3. Shred the sharp white cheddar cheese using the large holes of a box grater.
4. Spread 1/2 tablespoon unsalted butter evenly on one side of each sourdough bread slice.
5. Place one bread slice buttered-side down in the preheated skillet.
6. Layer the shredded cheddar cheese evenly over the bread in the skillet.
7. Arrange the apple slices in a single layer over the cheese.
8. Sprinkle the chopped walnuts evenly over the apple layer.
9. Drizzle 1 teaspoon honey in a zigzag pattern over the walnuts.
10. Top with the second bread slice, buttered-side facing up.
11. Cook for 4-5 minutes until the bottom bread is golden brown and crispy.
12. Carefully flip the sandwich using a wide spatula.
13. Cook for another 4-5 minutes until the second side is golden brown and the cheese is fully melted.
14. Remove the sandwich from the skillet and let it rest for 2 minutes on a cutting board.
15. Cut the sandwich diagonally with a serrated knife for clean slices.
Kaleidoscopic in its appeal, the sandwich offers a delightful crunch from the walnuts against the creamy melted cheddar, while the thinly sliced apples provide both crisp texture and sweet contrast. Serve it warm alongside a crisp autumn salad or pair with a glass of chilled apple cider for a complete seasonal experience that highlights the beautiful interplay between sweet and savory elements.
Shrimp and Mango Salad Roll
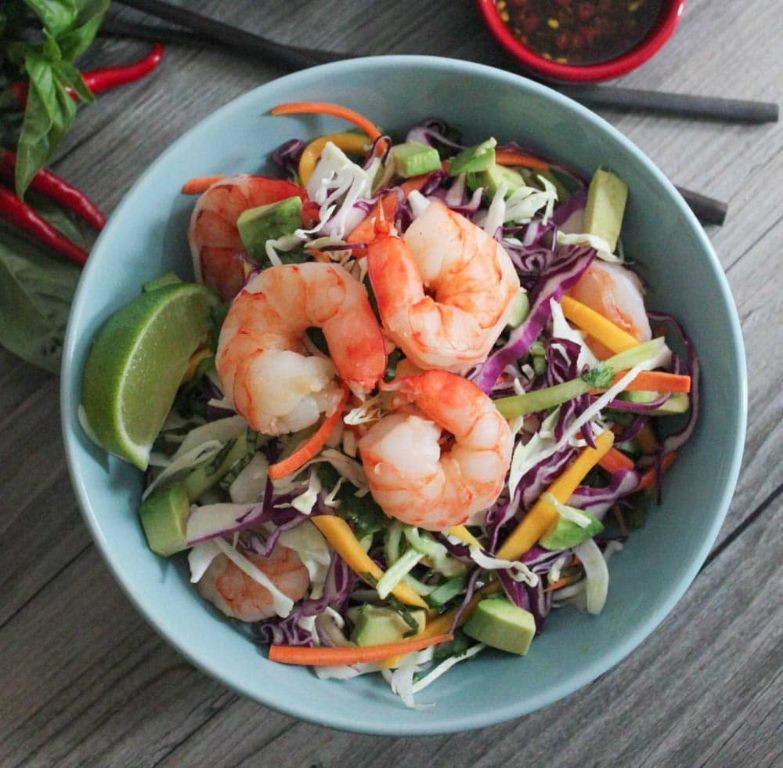
Elegant yet refreshing, these shrimp and mango salad rolls offer a vibrant fusion of tropical sweetness and savory seafood. Delicate rice paper wrappers envelop plump shrimp, juicy mango, and crisp vegetables, creating a light dish perfect for warm weather entertaining. The combination of textures and flavors makes these rolls both visually stunning and delightfully satisfying.
Ingredients
- 8 rice paper wrappers
- 1 lb large shrimp, peeled and deveined
- 1 ripe mango, peeled and julienned
- 2 cups shredded romaine lettuce
- 1 cup fresh mint leaves
- 1 cup fresh cilantro leaves
- 1/2 cup shredded carrot
- 1/4 cup rice vinegar
- 2 tbsp fish sauce
- 1 tbsp lime juice
- 1 tsp sugar
- 1/4 tsp red pepper flakes
Instructions
- Bring a medium pot of water to a rolling boil over high heat.
- Add shrimp and cook for exactly 2-3 minutes until they turn pink and opaque.
- Immediately transfer cooked shrimp to an ice water bath using a slotted spoon to stop the cooking process.
- Pat shrimp completely dry with paper towels, then slice each shrimp in half lengthwise.
- Fill a large, shallow bowl with warm water at approximately 110°F.
- Dip one rice paper wrapper into the warm water for 10 seconds until pliable but still slightly firm.
- Lay the softened wrapper flat on a clean, damp kitchen towel.
- Arrange 3-4 shrimp halves in a horizontal line across the center of the wrapper.
- Top shrimp with 1/4 cup shredded romaine lettuce, making sure to spread it evenly.
- Add 2-3 mango strips, 1 tablespoon shredded carrot, and several mint and cilantro leaves.
- Fold the bottom edge of the wrapper over the filling, then tightly fold in both sides.
- Roll upward firmly but gently to create a tight cylinder, pressing to seal the edge.
- Repeat the process with remaining wrappers and filling ingredients.
- Whisk together rice vinegar, fish sauce, lime juice, sugar, and red pepper flakes in a small bowl until sugar dissolves completely.
- Serve rolls immediately with the prepared dipping sauce.
Delicate and refreshing, these rolls offer a satisfying crunch from the vegetables against the tender shrimp and sweet mango. The rice paper provides a chewy contrast that yields beautifully with each bite, while the herbaceous notes from mint and cilantro brighten the overall flavor profile. For an elegant presentation, slice rolls diagonally and arrange them artfully on a platter with the dipping sauce in individual ramekins.
Roast Beef and Horseradish on Rye
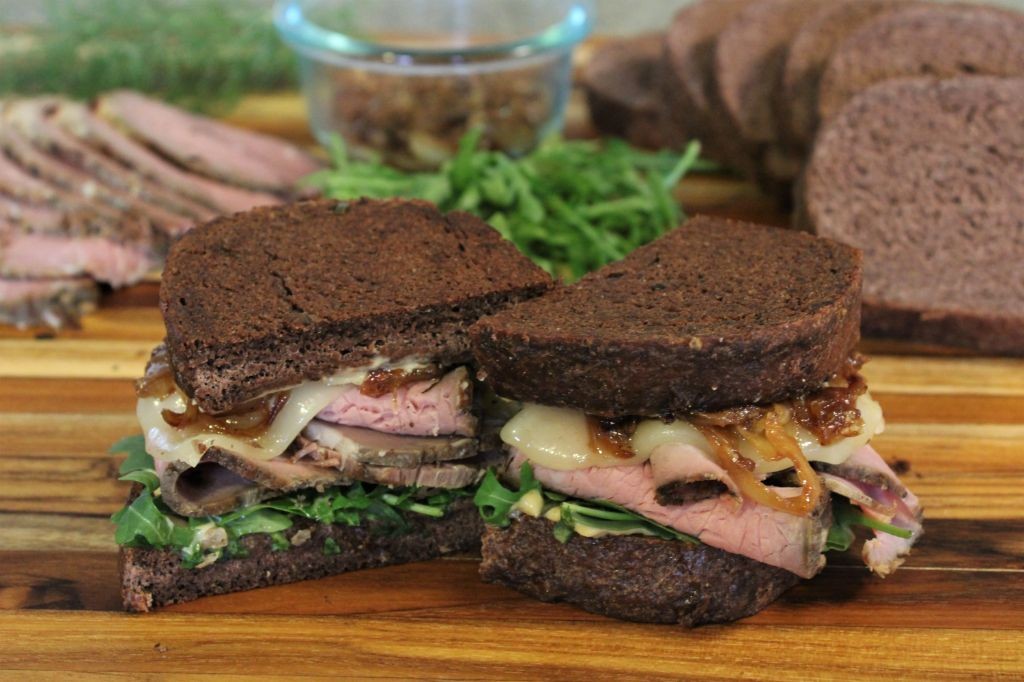
Crafted with precision and tradition, this roast beef and horseradish on rye sandwich elevates humble ingredients into an artful lunchtime masterpiece. The marriage of thinly sliced, perfectly roasted beef against the sharp bite of horseradish cream creates a symphony of flavors that dance across the palate, all cradled between slices of sturdy, nutty rye bread that provides the ideal textural foundation for this classic combination.
Ingredients
– 2 pounds beef eye of round roast
– 1 tablespoon olive oil
– 1 teaspoon kosher salt
– ½ teaspoon black pepper
– 2 cloves garlic, minced
– ½ cup sour cream
– 2 tablespoons prepared horseradish
– 8 slices rye bread
Instructions
1. Preheat your oven to 450°F and position a rack in the center of the oven.
2. Pat the beef roast completely dry with paper towels to ensure proper browning.
3. Rub the olive oil evenly over all surfaces of the roast.
4. Combine the kosher salt, black pepper, and minced garlic in a small bowl.
5. Press the seasoning mixture firmly onto all sides of the beef roast.
6. Place the seasoned roast on a wire rack set inside a roasting pan.
7. Roast at 450°F for 15 minutes to develop a deep, caramelized crust.
8. Reduce the oven temperature to 325°F without opening the oven door.
9. Continue roasting until the internal temperature reaches 135°F on an instant-read thermometer, approximately 45-60 minutes.
10. Transfer the roast to a cutting board and let it rest for 15 minutes to allow juices to redistribute.
11. While the beef rests, combine the sour cream and prepared horseradish in a small bowl.
12. Stir the horseradish cream mixture until fully incorporated and smooth.
13. Thinly slice the rested beef against the grain into ¼-inch thick slices.
14. Lightly toast the rye bread slices until golden brown and crisp around the edges.
15. Spread 2 tablespoons of horseradish cream evenly on one side of each bread slice.
16. Layer 4-5 slices of roast beef evenly over the horseradish cream on 4 bread slices.
17. Top with the remaining bread slices, horseradish side facing inward.
18. Cut each sandwich diagonally and serve immediately. Marvel at how the tender, medium-rare beef melts against the sharp horseradish cream, while the sturdy rye bread provides the perfect structural integrity. The contrasting textures create a sophisticated eating experience that makes this sandwich equally suited for an elegant picnic or a refined office lunch, with the peppery rye seeds adding subtle crunch to each satisfying bite.
Summary
Embrace the ease of summer with these 20 refreshing cold sandwich recipes! Perfect for picnics, lunches, or a quick, cool meal without heating up the kitchen. We hope you find some new favorites—give them a try and let us know which ones you love in the comments below! Don’t forget to share this roundup on Pinterest to inspire other home cooks. Happy sandwich-making!