Brunch just got better with these 20 fluffy egg recipes that will transform your weekend mornings into pure delight. Whether you’re craving light-as-air omelets, pillowy scrambles, or elegant soufflés, we’ve gathered the most irresistible dishes to impress family and friends. Get ready to elevate your brunch game with these simple yet spectacular creations that promise to make every bite a celebration!
Spinach and Feta Scrambled Eggs

Now, I have to confess—I used to be strictly a sweet breakfast person until I discovered this savory scramble that changed my morning routine forever. There’s something magical about how the creamy feta melts into fluffy eggs with those vibrant spinach ribbons running through every bite. I actually came up with this recipe during a busy workweek when I needed something quick but satisfying enough to power me through back-to-back meetings.
Ingredients
– 4 large eggs (I prefer room temperature eggs here—they fluff up so much better)
– 1 cup fresh spinach, roughly chopped (I always grab an extra handful because it wilts down so much)
– 1/3 cup crumbled feta cheese (the block kind you crumble yourself has better texture, trust me)
– 1 tablespoon extra virgin olive oil (my go-to for that fruity background note)
– 1/4 teaspoon kosher salt (I’m generous with it since feta is already salty)
– 1/8 teaspoon black pepper, freshly ground (my pepper mill lives on the counter for moments like this)
– 1 tablespoon unsalted butter (because everything’s better with butter, right?)
Instructions
1. Crack 4 large eggs into a medium bowl and whisk vigorously for 30 seconds until fully combined and slightly frothy.
2. Heat 1 tablespoon extra virgin olive oil in a nonstick skillet over medium heat for 2 minutes until shimmering.
3. Add 1 cup chopped fresh spinach and sauté for 1 minute until just wilted but still bright green.
4. Reduce heat to medium-low and add 1 tablespoon unsalted butter, swirling until melted and foamy.
5. Pour whisked eggs into the skillet and let them set undisturbed for 20 seconds before stirring.
6. Gently push eggs from edges toward center with a spatula every 15 seconds for soft curds.
7. When eggs are 70% cooked (still wet but holding shape), sprinkle 1/3 cup crumbled feta evenly across surface.
8. Continue folding for 30 more seconds until feta begins melting into creamy pockets.
9. Season with 1/4 teaspoon kosher salt and 1/8 teaspoon black pepper during final folds.
10. Remove from heat immediately when eggs are glossy but not runny—they’ll continue cooking off heat. During those hectic mornings, I love how the creamy feta creates little salty pockets against the tender eggs, while the spinach adds just enough earthiness to balance everything out. Drizzle with hot sauce or pile onto toasted sourdough for the ultimate breakfast sandwich situation—it’s become my secret weapon for impressing weekend guests too.
Shakshuka with Poached Eggs in Spicy Tomato Sauce

My kitchen always smells incredible when I’m making this dish—it’s become my go-to weekend brunch that feels both comforting and exciting. There’s something magical about watching eggs poach directly in that vibrant tomato sauce, and it always reminds me of the cozy café where I first tried shakshuka during a rainy New York morning.
Ingredients
– 2 tablespoons extra virgin olive oil (my go-to for that fruity depth)
– 1 medium yellow onion, diced (I like mine finely chopped for even cooking)
– 1 red bell pepper, diced (the sweetness balances the spice perfectly)
– 3 garlic cloves, minced (fresh is best—I press mine right before adding)
– 1 teaspoon smoked paprika (this adds that wonderful smoky undertone)
– 1/2 teaspoon cumin (toasted whole seeds ground fresh if I have time)
– 1/4 teaspoon red pepper flakes (adjustable, but I like it with a kick)
– 1 (28-ounce) can crushed tomatoes (San Marzano are my favorite for sweetness)
– 4 large eggs (I prefer room temperature—they incorporate better)
– 1/4 cup fresh parsley, chopped (sprinkled at the end for freshness)
– Salt to taste (I use about 3/4 teaspoon, but start with less)
Instructions
1. Heat 2 tablespoons extra virgin olive oil in a large skillet over medium heat until shimmering.
2. Add diced yellow onion and red bell pepper, cooking for 8 minutes until softened and lightly golden.
3. Stir in minced garlic and cook for 1 minute until fragrant—watch closely to prevent burning.
4. Sprinkle in 1 teaspoon smoked paprika, 1/2 teaspoon cumin, and 1/4 teaspoon red pepper flakes, toasting for 30 seconds to bloom the spices.
5. Pour in the 28-ounce can of crushed tomatoes, stirring to combine all ingredients.
6. Simmer the sauce uncovered for 15 minutes, stirring occasionally, until slightly thickened.
7. Create 4 small wells in the sauce using the back of a spoon for the eggs.
8. Crack 1 room temperature egg into each well, being careful not to break the yolks.
9. Cover the skillet and cook for 6-8 minutes until egg whites are set but yolks are still runny.
10. Remove from heat and sprinkle with 1/4 cup chopped fresh parsley and salt to taste. Creamy yolks mingle with the smoky, spicy tomato base in the most delightful way—each bite is a perfect balance of rich and bright. I love serving it directly from the skillet with crusty bread for dipping, and sometimes I’ll add crumbled feta for extra tang.
Cheesy Bacon and Egg Breakfast Casserole

Crisp autumn mornings like this one have me craving something hearty and comforting straight from the oven. There’s nothing quite like the aroma of cheesy bacon and eggs baking together to start the day right—this casserole has become my absolute go-to for weekend brunches and holiday mornings alike.
Ingredients
– 6 large eggs (I prefer room temperature eggs here—they incorporate more smoothly)
– 8 slices thick-cut bacon (the smokier the better in my book)
– 1 cup whole milk (I’ve found whole milk gives the creamiest texture)
– 2 cups shredded cheddar cheese (I always grab the sharp variety for maximum flavor)
– 4 cups cubed day-old bread (this is my secret—stale bread absorbs the egg mixture perfectly)
– 1/2 cup chopped yellow onion (my grandma always said this adds the perfect savory note)
– 1 tbsp olive oil (extra virgin olive oil is my go-to for sautéing)
– 1 tsp salt (I use fine sea salt for even distribution)
– 1/2 tsp black pepper (freshly ground makes all the difference)
Instructions
1. Preheat your oven to 350°F and grease a 9×13 inch baking dish with cooking spray.
2. Chop the bacon into 1/2-inch pieces using kitchen shears—this creates perfect bite-sized bacon throughout.
3. Heat 1 tablespoon olive oil in a large skillet over medium heat until shimmering.
4. Cook the bacon pieces for 6-8 minutes until crispy and browned, stirring occasionally.
5. Transfer the cooked bacon to a paper towel-lined plate using a slotted spoon, leaving 1 tablespoon bacon drippings in the skillet.
6. Add the chopped onion to the hot skillet and sauté for 4-5 minutes until translucent and fragrant.
7. In a large mixing bowl, whisk together the 6 eggs, 1 cup whole milk, 1 teaspoon salt, and 1/2 teaspoon black pepper until fully combined and slightly frothy.
8. Tip: Whisk the eggs vigorously for at least 1 minute—this creates tiny air bubbles that make the casserole light and fluffy.
9. Add the 4 cups cubed bread to the egg mixture and gently fold until all pieces are coated.
10. Let the bread soak in the egg mixture for 10 minutes—this ensures every cube absorbs the custard evenly.
11. Stir in the cooked bacon, sautéed onions, and 1 1/2 cups shredded cheddar cheese, reserving 1/2 cup for topping.
12. Tip: Mix gently to avoid breaking the bread cubes—you want to maintain some texture.
13. Pour the mixture into the prepared baking dish and spread evenly with a spatula.
14. Sprinkle the remaining 1/2 cup cheddar cheese over the top in an even layer.
15. Bake at 350°F for 35-40 minutes until the top is golden brown and the center is set.
16. Tip: Check for doneness by inserting a knife in the center—it should come out clean with no liquid egg mixture.
17. Remove from oven and let rest for 5 minutes before serving.
Zesty and satisfying, this casserole emerges from the oven with a golden, cheesy crust giving way to a creamy, custardy interior. The smoky bacon provides salty bursts while the onions add subtle sweetness throughout. I love serving it straight from the baking dish with fresh fruit on the side—it makes for such a beautiful, communal breakfast spread that always disappears quickly.
Smoked Salmon and Scrambled Egg Bagel
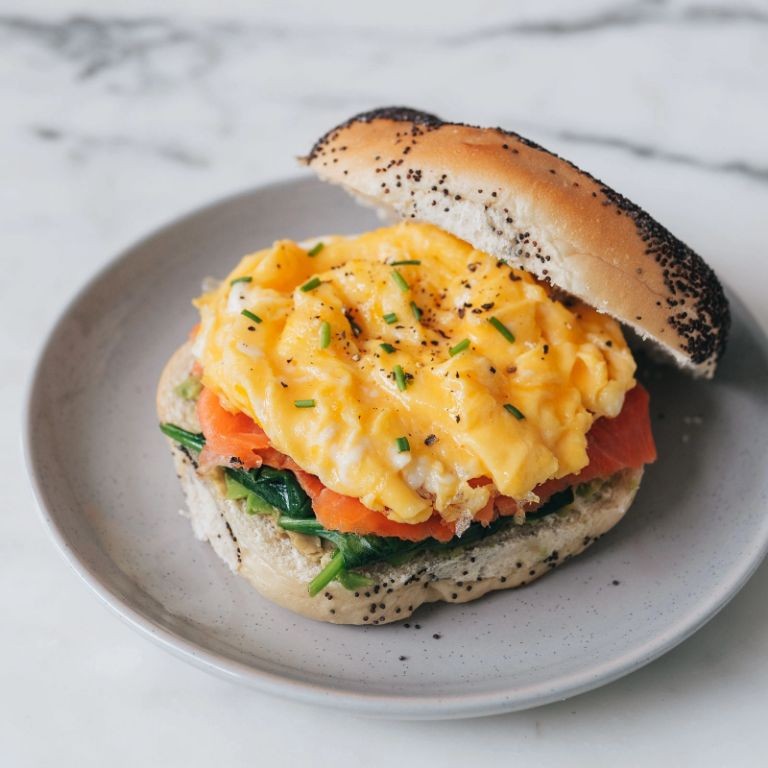
Nothing beats that perfect weekend brunch moment when you can take your time creating something special. I first fell in love with this smoked salmon and scrambled egg bagel during a lazy Sunday when my fridge was nearly empty but I had these key ingredients staring back at me. Now it’s my go-to when I want something fancy-feeling without the fuss.
Ingredients
– 2 fresh everything bagels (I grab mine from the local bakery for that perfect chew)
– 4 large eggs at room temperature (they scramble so much fluffier this way)
– 2 tablespoons whole milk (my secret for extra creamy eggs)
– 1 tablespoon unsalted butter (European-style is my preference for its rich flavor)
– 4 ounces cold-smoked salmon slices (I splurge on the wild-caught kind when I can)
– 2 tablespoons cream cheese, softened (Philadelphia brand has the perfect spreadable texture)
– 1 tablespoon fresh dill, chopped (nothing beats the fragrance of fresh herbs)
– 1/4 cup red onion, thinly sliced (soaked in ice water for 5 minutes to mellow the bite)
– 1 tablespoon capers (I love the briny pop they add)
Instructions
1. Preheat your oven to 350°F and place the bagels directly on the middle rack.
2. Bake the bagels for 8 minutes until they’re warm and slightly crispy on the outside.
3. While the bagels bake, crack 4 room-temperature eggs into a medium bowl.
4. Add 2 tablespoons of whole milk to the eggs and whisk vigorously for 30 seconds until fully combined and slightly frothy.
5. Heat a non-stick skillet over medium-low heat for 2 minutes until evenly warm.
6. Add 1 tablespoon of unsalted butter to the skillet and swirl until melted and foamy.
7. Pour the egg mixture into the skillet and let it sit undisturbed for 20 seconds.
8. Using a rubber spatula, gently push the eggs from the edges toward the center every 15 seconds for 2-3 minutes until soft curds form.
9. Remove the skillet from heat when the eggs are still slightly wet but not runny.
10. Remove the warm bagels from the oven and slice them in half horizontally.
11. Spread 1 tablespoon of softened cream cheese evenly on the bottom half of each warm bagel.
12. Divide the warm scrambled eggs evenly between the two bottom bagel halves.
13. Arrange 2 ounces of cold-smoked salmon slices over the eggs on each bagel.
14. Sprinkle 1/2 tablespoon of fresh chopped dill over the salmon on each bagel.
15. Top with 2 tablespoons of thinly sliced red onion divided between both bagels.
16. Scatter 1/2 tablespoon of capers over each assembled bagel.
17. Place the top bagel halves over the fillings and press gently to secure.
The creamy, fluffy eggs contrast beautifully with the silky smoked salmon, while the everything bagel adds that satisfying crunch and seasoning in every bite. I sometimes serve these open-faced with extra dill sprigs for a prettier presentation when I have guests. They’re equally fantastic cut into quarters for easy sharing at brunch gatherings.
Mushroom and Gruyère Cheese Omelette

Perfectly fluffy and packed with earthy flavor, this mushroom and Gruyère omelette has become my go-to weekend breakfast after discovering it at a cozy Vermont bed and breakfast last fall. I love how the nutty cheese melts into the savory mushrooms, creating a comforting dish that feels both elegant and completely approachable.
Ingredients
- 3 large eggs (I prefer room temperature eggs here for maximum fluffiness)
- 1 cup sliced cremini mushrooms (baby bellas work beautifully for their meaty texture)
- 1/2 cup shredded Gruyère cheese (the nutty flavor is essential – don’t substitute!)
- 2 tablespoons unsalted butter (divided – extra virgin olive oil is my go-to for sautéing, but butter gives better flavor here)
- 1 tablespoon whole milk (just a splash makes the eggs incredibly tender)
- 1/4 teaspoon kosher salt (I always use Diamond Crystal for its perfect texture)
- 1/8 teaspoon freshly ground black pepper
- 1 tablespoon chopped fresh chives (from my windowsill herb garden when possible)
Instructions
- Heat a 10-inch nonstick skillet over medium heat for 2 minutes until evenly warm.
- Add 1 tablespoon butter and swirl until melted and foamy, about 30 seconds.
- Add sliced mushrooms and cook undisturbed for 3 minutes to develop golden color.
- Flip mushrooms and cook another 3 minutes until tender and evenly browned.
- Transfer mushrooms to a plate and wipe skillet clean with a paper towel.
- In a medium bowl, whisk eggs, milk, salt, and pepper for exactly 45 seconds until fully combined and slightly frothy.
- Return skillet to medium-low heat and add remaining 1 tablespoon butter.
- Pour egg mixture into skillet and let set for 15 seconds without stirring.
- Using a silicone spatula, gently push cooked edges toward center while tilting pan to distribute uncooked eggs, repeating for 1 minute until top is mostly set but still slightly wet.
- Sprinkle cooked mushrooms evenly over one half of the omelette.
- Top mushrooms with shredded Gruyère cheese, leaving a 1-inch border around the edge.
- Cook undisturbed for 30 seconds until cheese begins to melt but eggs remain tender.
- Carefully fold the empty half of the omelette over the filling using your spatula.
- Slide omelette onto a warm plate and let rest for 1 minute before slicing.
- Sprinkle with fresh chives and serve immediately.
Key to this omelette’s magic is the contrast between the creamy, melted Gruyère and the earthy mushroom filling, all wrapped in tender, golden eggs. The resting minute allows the cheese to become perfectly gooey without overcooking the delicate eggs. I love serving this with toasted sourdough to soak up every last bit, though it’s equally wonderful alongside a simple arugula salad for a light lunch.
Breakfast Burrito with Scrambled Eggs and Sausage

Mornings in our house are always a mad dash, but this breakfast burrito has become my secret weapon for keeping everyone fed and happy. I perfected this recipe during those chaotic school-day scrambles when I needed something hearty that could be made ahead and reheated beautifully. Nothing beats wrapping your hands around this warm, satisfying bundle to start the day right.
Ingredients
– 4 large flour tortillas (10-inch size – I find these hold everything perfectly without tearing)
– 6 large eggs (I always use room temperature eggs for fluffier scrambling)
– 1/2 pound breakfast sausage (my family prefers mild, but spicy works great too)
– 1 cup shredded cheddar cheese (freshly grated melts so much better than pre-shredded)
– 1 medium potato, diced into 1/2-inch cubes (Yukon Gold are my favorite for their creamy texture)
– 1/2 cup diced onion (I like yellow onion for its sweet flavor when cooked)
– 1 tablespoon olive oil (extra virgin is my kitchen staple)
– 1/4 cup milk (whole milk makes the eggs extra creamy)
– Salt and black pepper (I’m generous with both)
Instructions
1. Heat 1 tablespoon olive oil in a large skillet over medium-high heat until it shimmers.
2. Add diced potato and cook for 8-10 minutes, stirring occasionally, until golden brown and fork-tender.
3. Add diced onion to the skillet and cook for 3-4 minutes until softened and translucent.
4. Push potato and onion mixture to one side of the skillet and add breakfast sausage, breaking it up with a spatula.
5. Cook sausage for 5-6 minutes, crumbling it as it browns, until no pink remains.
6. While sausage cooks, whisk together 6 eggs, 1/4 cup milk, 1/2 teaspoon salt, and 1/4 teaspoon black pepper in a medium bowl until frothy.
7. Reduce heat to medium-low and pour egg mixture over the sausage and potato mixture.
8. Gently scramble the eggs using a spatula, making slow, sweeping motions for 3-4 minutes until soft curds form.
9. Remove skillet from heat when eggs are just set but still moist and stir in 1 cup shredded cheddar cheese.
10. Warm 4 flour tortillas in a dry skillet over medium heat for 20-30 seconds per side until pliable.
11. Divide the egg and sausage mixture evenly among the center of each warmed tortilla.
12. Fold the bottom edge of each tortilla up over the filling, then fold in the sides and roll tightly away from you to form burritos.
Nothing beats the contrast of the fluffy scrambled eggs against the crispy potatoes and savory sausage in every bite. I love wrapping these in foil and tucking them into lunch boxes, or serving them with a side of fresh salsa for dipping. The cheese melts into every nook and cranny, making each mouthful perfectly gooey and satisfying.
Egg and Chorizo Hash with Sweet Potatoes

Vividly colorful and bursting with flavor, this egg and chorizo hash with sweet potatoes has become my go-to weekend brunch staple. I first discovered this combination when trying to use up leftover sweet potatoes after Thanksgiving, and now it’s a year-round favorite that always satisfies hungry guests. There’s something magical about how the spicy chorizo mingles with the sweet potatoes and runny egg yolks that makes every bite feel like a celebration.
Ingredients
– 1 lb fresh Mexican chorizo (I always remove the casings for better browning)
– 2 medium sweet potatoes, peeled and diced into ½-inch cubes (about 3 cups)
– 1 large yellow onion, chopped (I prefer the sweetness of yellow over white onions here)
– 4 large eggs (room temperature eggs fry more evenly)
– 2 tbsp extra virgin olive oil (my go-to for everything)
– ½ tsp smoked paprika (it adds that wonderful smoky depth)
– Fresh cilantro for garnish (I’m generous with it because the bright flavor cuts through the richness)
Instructions
1. Heat 2 tablespoons of olive oil in a large cast-iron skillet over medium-high heat until shimmering, about 2 minutes.
2. Add the diced sweet potatoes and cook for 8-10 minutes, stirring occasionally, until they develop golden-brown edges and are fork-tender.
3. Push sweet potatoes to one side of the skillet and add the chorizo, breaking it up with a wooden spoon into small crumbles.
4. Cook chorizo for 5-6 minutes until fully browned and crispy, stirring frequently to prevent burning.
5. Add chopped onion to the skillet and cook for 4-5 minutes until translucent and fragrant.
6. Sprinkle smoked paprika over the mixture and stir everything together until well combined.
7. Create 4 small wells in the hash mixture using the back of a spoon, making sure the wells reach the bottom of the skillet.
8. Crack one egg into each well, being careful not to break the yolks.
9. Reduce heat to medium-low, cover the skillet with a lid, and cook for 4-5 minutes until egg whites are fully set but yolks remain runny.
10. Remove from heat and garnish generously with fresh cilantro.
Zesty and satisfying, the crispy chorizo provides a wonderful contrast to the creamy sweet potatoes, while the runny egg yolks create a luxurious sauce that ties everything together. I love serving this directly from the skillet with warm tortillas for scooping up every last bit, or topping it with sliced avocado for extra creaminess that complements the spicy notes perfectly.
Baked Eggs in Avocado with Parmesan

Yesterday morning, I was craving something simple yet satisfying for breakfast—something that felt fancy but required minimal effort. That’s when I remembered this baked eggs in avocado recipe that never fails to impress, especially when I’m hosting brunch for friends who appreciate a good, healthy twist on classic comfort food.
Ingredients
– 2 ripe avocados (I always give them a gentle squeeze to check—they should yield slightly but not feel mushy)
– 4 large eggs (I prefer room temperature eggs here because they bake more evenly and help the avocado stay warm throughout)
– 1/4 cup grated Parmesan cheese (the freshly grated kind melts so much better than pre-shredded, in my opinion)
– 1 tbsp extra virgin olive oil (this is my go-to for drizzling—it adds a lovely richness)
– 1/2 tsp smoked paprika (I love the subtle smokiness it brings, but you could swap for regular paprika if that’s what you have)
– Salt and black pepper (I use about 1/4 tsp of each, but adjust based on your preference)
Instructions
1. Preheat your oven to 400°F (200°C) and line a baking sheet with parchment paper to prevent sticking.
2. Cut each avocado in half lengthwise and remove the pit carefully using a spoon.
3. Scoop out about 1 tablespoon of flesh from the center of each avocado half to create a larger well for the egg—this helps prevent overflow during baking.
4. Place the avocado halves cut-side up on the prepared baking sheet, ensuring they sit flat (if they wobble, trim a thin slice from the bottom to stabilize them).
5. Crack one egg into each avocado half, being careful not to break the yolk.
6. Drizzle the extra virgin olive oil evenly over the eggs and avocado edges.
7. Sprinkle the grated Parmesan cheese on top of each egg, covering the surface lightly.
8. Season with salt, black pepper, and smoked paprika, distributing the spices evenly.
9. Bake in the preheated oven for 12–15 minutes, or until the egg whites are fully set but the yolks are still slightly runny when gently jiggled.
10. Remove from the oven using oven mitts and let cool for 2 minutes before serving.
The creamy avocado softens just enough to contrast beautifully with the firm egg whites and gooey yolk. This dish feels indulgent yet light, and I love serving it alongside toasted sourdough slices for scooping up every last bit—it’s a guaranteed crowd-pleaser that looks as good as it tastes.
French Toast with Cinnamon and Maple Syrup

Kind of like a cozy hug on a plate, this French toast recipe has been my Sunday morning ritual for years—there’s something magical about how cinnamon and maple syrup transform simple bread into pure comfort. I actually learned this version from my grandmother, who insisted the secret was in the patience while soaking.
Ingredients
– 4 thick slices of brioche bread (I grab day-old brioche—it soaks up the custard without getting soggy)
– 2 large eggs (I always use room temperature eggs here; they blend more smoothly with the milk)
– 1/2 cup whole milk (for richness, though I’ve swapped in almond milk when I’m out)
– 1 tablespoon granulated sugar (just a touch to balance the spices)
– 1 teaspoon ground cinnamon (I add an extra pinch if I’m feeling festive)
– 1/2 teaspoon vanilla extract (pure vanilla is my go-to for that warm aroma)
– 2 tablespoons unsalted butter (for frying; I keep it cold until the pan heats up)
– Maple syrup for serving (I drizzle generously—it’s the star!)
Instructions
1. Crack the 2 large eggs into a shallow bowl and whisk vigorously for 30 seconds until frothy.
2. Pour in the 1/2 cup whole milk, 1 tablespoon granulated sugar, 1 teaspoon ground cinnamon, and 1/2 teaspoon vanilla extract, then whisk for another 45 seconds until fully combined—no streaks should remain.
3. Place one slice of brioche bread into the egg mixture and let it soak for 30 seconds; flip it and soak the other side for another 30 seconds (tip: don’t oversoak or it might fall apart).
4. Repeat step 3 with the remaining 3 slices of brioche bread, arranging them on a plate as you go.
5. Heat a non-stick skillet or griddle over medium heat (350°F if using a thermometer) and add 1 tablespoon of unsalted butter, swirling to coat the surface evenly.
6. Once the butter melts and starts to bubble lightly (about 1 minute), place 2 soaked bread slices in the skillet.
7. Cook for 3–4 minutes until the bottom is golden brown with crisp edges (lift a corner to check).
8. Flip the slices using a spatula and cook the other side for another 3–4 minutes until equally golden.
9. Transfer the cooked French toast to a warm plate and repeat steps 5–8 with the remaining 1 tablespoon butter and 2 bread slices.
10. Serve immediately, drizzling maple syrup over the top while hot.
Let me tell you, that first bite delivers a crisp exterior giving way to a custardy center, with cinnamon warmth melting into the sweet maple syrup. For a fun twist, I sometimes top it with fresh berries or a dusting of powdered sugar—it turns an ordinary morning into something special.
Eggs Florentine with Creamy Spinach

Gosh, I still remember the first time I tried Eggs Florentine at that little brunch spot in Portland – the creamy spinach made all the difference! Now I make my own version every Sunday when I want something fancy but comforting. There’s just something about those runny yolks mixing with the spinach that feels like a warm hug.
Ingredients
– 4 large eggs (I prefer room temp eggs here – they poach more evenly)
– 2 cups fresh spinach (I grab the pre-washed bags to save time)
– 1/2 cup heavy cream (the good stuff makes all the difference)
– 1/4 cup grated Parmesan cheese (I always use the real deal, not the green can)
– 2 English muffins (toasted until golden brown)
– 1 tbsp unsalted butter (my grandma always said butter makes everything better)
– 1/4 tsp freshly grated nutmeg (just a hint – it’s my secret weapon)
– 1/8 tsp cayenne pepper (for a subtle kick)
– 1 tbsp white vinegar (for perfect poached eggs every time)
Instructions
1. Fill a medium saucepan with 3 inches of water and bring to a gentle simmer over medium heat (you should see small bubbles but no rolling boil).
2. Add 1 tablespoon white vinegar to the simmering water (this helps the egg whites coagulate faster for neater poached eggs).
3. Crack one egg into a small ramekin and gently slide it into the water, repeating with remaining eggs while maintaining space between them.
4. Poach eggs for exactly 3 minutes for runny yolks, using a slotted spoon to occasionally nudge them off the bottom.
5. While eggs poach, melt 1 tablespoon unsalted butter in a large skillet over medium heat until foamy.
6. Add 2 cups fresh spinach and cook for 2 minutes until wilted but still bright green, stirring constantly.
7. Pour in 1/2 cup heavy cream and bring to a gentle bubble, stirring with a wooden spoon.
8. Stir in 1/4 cup grated Parmesan cheese until melted and smooth, about 1 minute.
9. Add 1/4 teaspoon freshly grated nutmeg and 1/8 teaspoon cayenne pepper, stirring to combine.
10. Split and toast 2 English muffins until golden brown with visible crisp edges.
11. Remove poached eggs with a slotted spoon and drain on paper towels for 15 seconds.
12. Place toasted English muffin halves on plates and top each with equal portions of creamy spinach.
13. Carefully place one poached egg on top of each spinach-covered muffin half.
Let me tell you – that moment when you cut into the egg and the yolk rivers through the creamy spinach is pure magic. The English muffin provides the perfect sturdy base that soaks up all the saucy goodness without getting soggy. Sometimes I’ll add crispy pancetta on top for extra texture, but honestly, it’s perfect just as it is.
Quiche Lorraine with Crispy Bacon

Nothing says comfort quite like a classic Quiche Lorraine, especially when it’s loaded with crispy bacon that crackles with every bite. I first fell in love with this dish during a cozy brunch at my aunt’s house—the rich, savory aroma filling her kitchen instantly became one of my favorite food memories. Now, I make it regularly for lazy weekends or when I want to impress guests without too much fuss.
Ingredients
- 1 9-inch refrigerated pie crust (I always keep one in the freezer for last-minute cravings)
- 6 slices thick-cut bacon (the extra smokiness really makes a difference)
- 1 cup heavy cream (don’t skimp here—it creates that luxurious texture)
- 4 large eggs (I prefer room temperature eggs here for smoother blending)
- 1/2 cup shredded Gruyère cheese (its nutty flavor is essential for authenticity)
- 1/4 tsp freshly grated nutmeg (just a hint—it brightens the whole dish)
- 1/4 tsp black pepper (freshly cracked adds a subtle kick)
- 1/8 tsp salt (adjust based on your bacon’s saltiness)
Instructions
- Preheat your oven to 375°F and place a baking sheet on the middle rack to heat up—this helps crisp the bottom crust.
- Unroll the pie crust and press it into a 9-inch pie dish, crimping the edges decoratively.
- Prick the bottom and sides of the crust all over with a fork to prevent puffing.
- Bake the empty crust for 10 minutes until lightly golden; this “blind baking” step ensures it stays flaky.
- While the crust bakes, cook the bacon in a skillet over medium heat for 8–10 minutes until deeply crispy.
- Transfer the bacon to a paper towel-lined plate to drain excess grease, then crumble it into small pieces.
- In a medium bowl, whisk together the heavy cream, eggs, nutmeg, pepper, and salt until fully combined and frothy.
- Sprinkle the crumbled bacon and shredded Gruyère evenly over the pre-baked crust.
- Carefully pour the egg mixture over the bacon and cheese, filling just to the top edge.
- Bake the quiche on the preheated baking sheet for 35–40 minutes, until the center is set and the top is golden brown.
- Let the quiche cool on a wire rack for at least 15 minutes before slicing—patience here prevents a soggy bottom!
Delightfully creamy with a satisfying crunch from the bacon, this quiche emerges with a golden, flaky crust that holds its shape perfectly. The Gruyère melts into velvety pockets, while the nutmeg adds a warm, aromatic note that balances the richness. Serve it warm with a simple arugula salad dressed in lemon vinaigrette, or slice it cold for a picnic—it’s just as delicious either way.
Egg and Cheese Breakfast Sandwich on Brioche

Craving something warm and satisfying this morning, I found myself dreaming about the perfect breakfast sandwich – the kind that makes you want to get out of bed. There’s something magical about that combination of fluffy eggs, melty cheese, and buttery brioche that just starts the day right, especially on chilly November mornings like this one.
Ingredients
- 2 large brioche buns (I always look for the ones with that golden, slightly sweet crust)
- 4 large eggs (I prefer room temperature eggs here – they cook more evenly and create that perfect fluffy texture)
- 2 slices of sharp cheddar cheese (the good melty kind that stretches for miles)
- 2 tablespoons unsalted butter (because everything’s better with real butter)
- 1/4 teaspoon kosher salt (I keep a little bowl nearby for easy pinching)
- 1/8 teaspoon black pepper (freshly ground makes all the difference)
Instructions
- Slice your brioche buns in half horizontally and set them aside on a clean cutting board.
- Heat a non-stick skillet over medium heat for 2 minutes until it’s properly warmed up – this prevents sticking and ensures even cooking.
- Place the brioche bun halves cut-side down in the dry skillet and toast for 1-2 minutes until golden brown with visible grill marks.
- Remove the toasted buns from the skillet and transfer them to a plate.
- Add 1 tablespoon of butter to the same skillet and let it melt completely, swirling to coat the entire surface.
- Crack all 4 eggs into a small bowl and whisk vigorously for 30 seconds until completely uniform and slightly frothy.
- Pour the whisked eggs into the buttered skillet and let them cook undisturbed for 45 seconds to set the bottom layer.
- Using a spatula, gently push the cooked edges toward the center while tilting the skillet to distribute the uncooked eggs – repeat this motion every 30 seconds for about 2 minutes total cooking time.
- Sprinkle the kosher salt and black pepper evenly over the nearly-set eggs.
- Place both slices of cheddar cheese in the center of the egg mixture and let them melt for 1 minute until completely gooey.
- Divide the cheesy egg mixture in half with your spatula and carefully lift each portion onto the bottom halves of your toasted brioche buns.
- Top each sandwich with the remaining brioche bun halves and press down gently to help everything stick together.
- Spread the remaining 1 tablespoon of butter on the outside of both sandwiches for that perfect golden crust.
- Return the assembled sandwiches to the skillet and cook over medium heat for 1-2 minutes per side until the exteriors are crisp and deeply golden brown.
And there you have it – the most glorious breakfast sandwich that’s somehow both elegant and completely comforting. That first bite reveals layers of creamy, cheesy eggs cradled by the sweet, buttery brioche, with just enough crispness to make each mouthful interesting. Absolutely perfect alongside a strong cup of coffee or sliced into quarters for a brunch spread that’ll impress even your pickiest breakfast guests.
Tomato and Basil Frittata

Perfect for those lazy weekend mornings when you want something special but don’t want to fuss too much in the kitchen, this tomato and basil frittata has become my go-to brunch staple. I first started making it during summer visits to my aunt’s house, where her garden overflowed with basil and cherry tomatoes that begged to be used in something simple yet satisfying.
Ingredients
- 6 large eggs (I prefer room temperature eggs here as they whip up fluffier)
- 1 cup cherry tomatoes, halved (the sweet little ones from my farmer’s market are perfect)
- 1/4 cup fresh basil leaves, chopped (don’t skimp – fresh makes all the difference)
- 1/2 cup shredded mozzarella cheese (the whole milk kind melts so beautifully)
- 2 tablespoons extra virgin olive oil (my go-to for that fruity aroma)
- 1/4 cup diced yellow onion (I always have one hanging out in my pantry)
- 1/4 teaspoon salt (I use fine sea salt for even distribution)
- 1/8 teaspoon black pepper (freshly ground if you have it)
Instructions
- Preheat your oven to 375°F and position the rack in the center.
- Heat 2 tablespoons of olive oil in a 10-inch oven-safe skillet over medium heat for 1 minute until shimmering.
- Add diced onion and cook for 3-4 minutes, stirring occasionally, until translucent and fragrant.
- Add halved cherry tomatoes and cook for 2 minutes until they just begin to soften and release their juices.
- While vegetables cook, crack 6 eggs into a medium bowl and whisk vigorously for 30 seconds until pale yellow and frothy.
- Stir in salt, black pepper, chopped basil, and shredded mozzarella into the egg mixture until well combined.
- Pour the egg mixture evenly over the vegetables in the hot skillet, using a spatula to distribute ingredients.
- Cook undisturbed on the stovetop for 3 minutes until the edges begin to set and pull away from the pan.
- Transfer the skillet to the preheated oven and bake for 12-14 minutes until the center is fully set and doesn’t jiggle when shaken.
- Remove from oven and let rest for 2 minutes before slicing into wedges.
So wonderfully fluffy and packed with the classic Italian combination of sweet tomatoes and aromatic basil, this frittata makes any morning feel special. I love serving it with a simple arugula salad for a complete meal, or cutting it into smaller squares for a brunch party – it’s always the first dish to disappear!
Eggs in Purgatory with Spicy Marinara

Now, if there’s one dish that perfectly captures those cozy weekend mornings when you want something comforting but don’t want to spend hours in the kitchen, it’s Eggs in Purgatory. I first discovered this recipe during a particularly lazy Sunday when my pantry was nearly bare, and it’s been my go-to ever since for its incredible simplicity and bold flavors that wake up your taste buds without overwhelming them.
Ingredients
– 2 tablespoons extra virgin olive oil (my go-to for that fruity depth)
– 3 cloves garlic, minced (fresh is key here—I always keep a head on my counter)
– 1/4 teaspoon red pepper flakes (adjust if you’re sensitive to heat, but I love the kick)
– 1 (28-ounce) can crushed tomatoes (I prefer San Marzano for their sweet-tart balance)
– 1 teaspoon dried oregano (rubbed between my palms to release the oils)
– 4 large eggs (I use room temperature ones for more even cooking)
– 1/4 cup grated Parmesan cheese (freshly grated melts so much better)
– 2 tablespoons chopped fresh parsley (from my little herb garden)
– 4 slices crusty bread, toasted (sourdough is my favorite for dipping)
Instructions
1. Heat 2 tablespoons extra virgin olive oil in a 10-inch skillet over medium heat until shimmering, about 2 minutes.
2. Add 3 cloves minced garlic and 1/4 teaspoon red pepper flakes, stirring constantly for 30 seconds until fragrant but not browned.
3. Pour in 1 (28-ounce) can crushed tomatoes and 1 teaspoon dried oregano, stirring to combine.
4. Simmer the sauce uncovered for 8–10 minutes, stirring occasionally, until slightly thickened and bubbling gently.
5. Crack 4 large eggs directly into the sauce, spacing them evenly apart.
6. Cover the skillet and cook for 5–7 minutes until the egg whites are fully set but yolks are still runny.
7. Sprinkle 1/4 cup grated Parmesan cheese and 2 tablespoons chopped fresh parsley over the top.
8. Serve immediately with 4 slices toasted crusty bread for dipping.
You’ll love how the creamy, runny egg yolks mingle with the spicy, tangy marinara—it’s like a warm hug in a skillet. I sometimes top it with extra red pepper flakes for more heat or serve it alongside a simple arugula salad to balance the richness.
Breakfast Pizza with Sunny-Side-Up Eggs
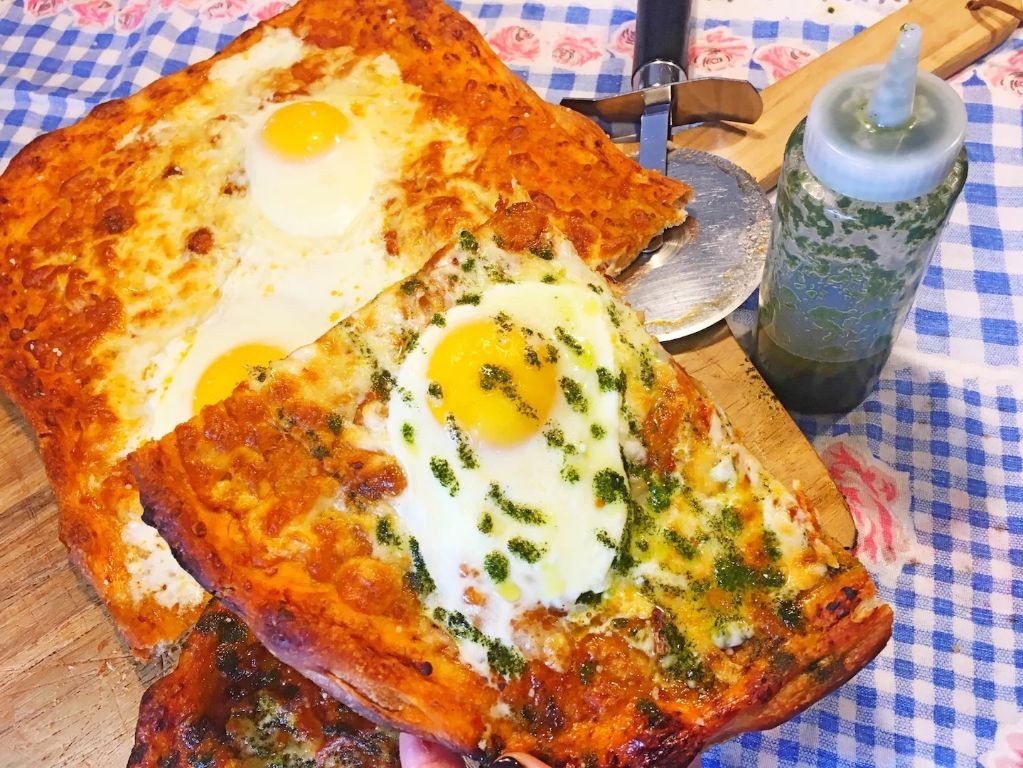
A breakfast pizza that actually gets my family out of bed on weekend mornings—this sunny-side-up egg version has become our new Saturday tradition after my husband declared it “better than bacon.” I love how the runny yolks create their own sauce when you slice into it.
Ingredients
– 1 lb pizza dough (I always let mine rest at room temp for 30 minutes—it makes stretching so much easier)
– 2 tbsp extra virgin olive oil (my go-to for that fruity aroma)
– 1 cup shredded mozzarella cheese (I prefer whole milk for better melt)
– 4 large eggs (room temperature eggs cook more evenly, trust me)
– ¼ cup grated Parmesan cheese (the good stuff from the refrigerated section)
– 2 tbsp chopped fresh chives (from my little kitchen herb garden)
– ½ tsp red pepper flakes (because everything needs a little heat)
– ½ tsp kosher salt (I find it sticks to the crust better than table salt)
Instructions
1. Preheat your oven to 475°F with a pizza stone or baking sheet inside for 30 minutes.
2. Stretch the pizza dough into a 12-inch circle on a floured surface.
3. Brush the entire surface with olive oil, going all the way to the edges.
4. Sprinkle mozzarella cheese evenly over the dough, leaving a 1-inch border.
5. Carefully transfer the pizza to the preheated stone or baking sheet.
6. Bake for 8 minutes until the crust is puffed and the cheese is melted.
7. Remove the pizza from the oven using a pizza peel or large spatula.
8. Crack 4 eggs onto the pizza, spacing them evenly apart.
9. Sprinkle Parmesan cheese, red pepper flakes, and kosher salt over everything.
10. Return the pizza to the oven and bake for 4-6 minutes until egg whites are set but yolks are still runny.
11. Remove the pizza from the oven and let it rest for 2 minutes.
12. Sprinkle fresh chives over the top before slicing.
Keeping that perfect runny yolk intact while slicing takes practice, but when you nail it, the golden river that flows across the cheesy canvas is pure breakfast magic. I sometimes serve this with a simple arugula salad right on top for a complete meal that feels both indulgent and balanced.
Egg and Asparagus Tart with Puff Pastry

Oh my goodness, this egg and asparagus tart has become my absolute go-to for spring brunches ever since I accidentally created it during last year’s Easter gathering when I ran out of quiche ingredients! There’s something magical about how the creamy eggs and crisp asparagus nestle into that flaky puff pastry that just makes everyone feel fancy without the fuss.
Ingredients
– 1 sheet frozen puff pastry (I always keep a box in the freezer for emergencies like unexpected guests)
– 1 pound fresh asparagus spears (look for those vibrant green stalks with tight tips – they snap so satisfyingly)
– 4 large eggs (I prefer room temperature eggs here because they incorporate more smoothly)
– 1/2 cup heavy cream (this is what gives it that luxurious, custardy texture)
– 1/2 cup shredded Gruyère cheese (the nutty flavor pairs perfectly with asparagus)
– 1/4 cup grated Parmesan cheese (I always use the good stuff from the cheese counter)
– 2 tablespoons extra virgin olive oil (my go-to for roasting vegetables)
– 1 teaspoon Dijon mustard (just a hint adds wonderful depth)
– 1/2 teaspoon garlic powder
– 1/4 teaspoon black pepper (freshly cracked makes all the difference)
– 1/4 teaspoon salt
Instructions
1. Thaw the frozen puff pastry sheet according to package directions until it’s pliable but still cold.
2. Preheat your oven to 400°F and line a baking sheet with parchment paper.
3. Unfold the puff pastry onto the prepared baking sheet and prick the entire surface with a fork, leaving a 1-inch border untouched around the edges.
4. Bake the pastry for 10 minutes until it’s puffed and lightly golden.
5. While the pastry bakes, trim the tough ends from the asparagus spears by snapping them where they naturally break.
6. Toss the asparagus with 1 tablespoon of olive oil and arrange them in a single layer on a separate baking sheet.
7. Roast the asparagus at 400°F for 8 minutes until bright green and slightly tender but still crisp.
8. In a medium bowl, whisk together the eggs, heavy cream, Dijon mustard, garlic powder, salt, and pepper until completely smooth.
9. Press down the center of the partially baked puff pastry with the back of a spoon to create a well for the filling.
10. Spread the remaining 1 tablespoon of olive oil evenly over the pressed-down area.
11. Sprinkle the shredded Gruyère cheese evenly over the oiled pastry surface.
12. Arrange the roasted asparagus spears in a single layer over the cheese, alternating directions for visual appeal.
13. Slowly pour the egg mixture over the asparagus, being careful not to overflow the pastry edges.
14. Sprinkle the grated Parmesan cheese evenly over the entire tart.
15. Bake at 400°F for 20-25 minutes until the eggs are set and the pastry edges are deep golden brown.
16. Let the tart rest for 5 minutes before slicing to allow the filling to firm up.
As you slice into this beauty, notice how the flaky pastry shatters while the egg filling remains wonderfully creamy. The asparagus provides that fresh, grassy contrast to the rich cheeses, making each bite perfectly balanced. I love serving this warm with a simple arugula salad tossed in lemon vinaigrette – the peppery greens cut through the richness beautifully.
Greek Yogurt Scrambled Eggs with Dill

A few weeks ago, I was rushing to make breakfast before a work call and accidentally added Greek yogurt to my eggs instead of milk—and wow, what a happy accident that turned out to be! This creamy, protein-packed scramble has become my weekday go-to, especially when I want something satisfying but don’t have much time.
Ingredients
– 3 large eggs (I prefer room temperature eggs here—they blend more smoothly with the yogurt) – 1/4 cup plain Greek yogurt (I always use full-fat for maximum creaminess) – 1 tablespoon unsalted butter (extra for a rich, golden finish) – 1 tablespoon fresh dill, chopped (from my little herb garden—dried works in a pinch, but fresh is worth it!) – 1/4 teaspoon kosher salt (I find it dissolves better than table salt) – 1/8 teaspoon black pepper (freshly ground for a bright kick)
Instructions
1. Crack 3 large eggs into a medium bowl. 2. Add 1/4 cup plain Greek yogurt to the eggs. 3. Whisk the eggs and yogurt together vigorously for about 30 seconds until fully combined and slightly frothy—this ensures a uniform, creamy texture. 4. Heat a non-stick skillet over medium-low heat (around 300°F) for 2 minutes. 5. Add 1 tablespoon unsalted butter to the skillet and swirl until melted and foamy. 6. Pour the egg mixture into the skillet and let it sit undisturbed for 20 seconds to set the bottom slightly. 7. Gently push the eggs from the edges toward the center with a spatula every 15 seconds, creating soft curds. 8. Continue cooking for 3–4 minutes until the eggs are mostly set but still slightly wet—they’ll finish cooking off the heat. 9. Sprinkle in 1 tablespoon fresh dill, 1/4 teaspoon kosher salt, and 1/8 teaspoon black pepper. 10. Fold everything together gently for another 30 seconds, then immediately remove from heat. Don’t overcook—the residual heat will perfect the texture. Delightfully creamy with a subtle tang from the yogurt, these eggs are fluffy yet rich, and the fresh dill adds a garden-fresh brightness. I love serving them over toasted sourdough with a sprinkle of flaky sea salt, or folded into a warm tortilla for a quick breakfast wrap.
Egg and Sausage Breakfast Muffins

Mornings in our house are always a mad dash, but these egg and sausage breakfast muffins have become my secret weapon for keeping everyone fed and happy. I started making them back when my toddler decided 6 AM was party time, and now they’re a weekly staple that even my picky eater devours. They’re perfect for grab-and-go mornings or lazy weekend brunches when you want something satisfying without the fuss.
Ingredients
– 1 pound breakfast sausage (I always go for the maple-flavored kind—it adds the perfect sweet-savory balance)
– 6 large eggs (I let mine sit out for 15 minutes to reach room temp—they incorporate better that way)
– 1/4 cup whole milk (my grandma swore by whole milk for the creamiest texture)
– 1/2 cup shredded cheddar cheese (I’m partial to sharp cheddar for that extra flavor punch)
– 1/4 cup finely chopped bell pepper (any color works, but I love the pop of red)
– 1/4 cup finely chopped onion
– 1/2 teaspoon garlic powder
– 1/2 teaspoon black pepper
– 1/4 teaspoon salt
– Cooking spray (I use the butter-flavored kind for that golden crust)
Instructions
1. Preheat your oven to 350°F and generously spray a 12-cup muffin tin with cooking spray—don’t skip the spraying or you’ll have a sticky situation!
2. Heat a large skillet over medium-high heat and cook the breakfast sausage for 6-8 minutes, breaking it into small crumbles with a wooden spoon until it’s browned and no longer pink.
3. Transfer the cooked sausage to a paper towel-lined plate using a slotted spoon to drain excess grease.
4. In a large mixing bowl, whisk together the 6 eggs and 1/4 cup whole milk for exactly 1 minute until they’re fully combined and slightly frothy—this incorporates air for fluffier muffins.
5. Stir in the shredded cheddar cheese, chopped bell pepper, chopped onion, garlic powder, black pepper, and salt until everything is evenly distributed.
6. Fold in the cooked sausage crumbles gently to avoid overmixing.
7. Divide the egg mixture evenly among the 12 prepared muffin cups, filling each about 3/4 full—I use a 1/4 cup measuring cup for perfect portioning.
8. Bake at 350°F for 20-22 minutes until the tops are golden and a toothpick inserted in the center comes out clean.
9. Let the muffins cool in the pan for 5 minutes before carefully removing them with a butter knife—this resting time helps them set properly.
10. Serve warm or store in an airtight container for up to 4 days. Knowing these will keep their moist, tender texture even after reheating makes my meal prep so much easier. They’re fantastic sliced in half and toasted with a smear of avocado, or my personal favorite—sandwiched between an English muffin with a dash of hot sauce for the ultimate breakfast sandwich upgrade.
Summary
Our fluffy egg recipes offer endless brunch inspiration for your weekend gatherings. From classic favorites to creative twists, there’s something delicious for every home cook. We’d love to hear which recipes become your go-to brunch stars—drop a comment with your favorites below! Don’t forget to pin this article to your Pinterest boards to save these delightful ideas for future brunch planning.