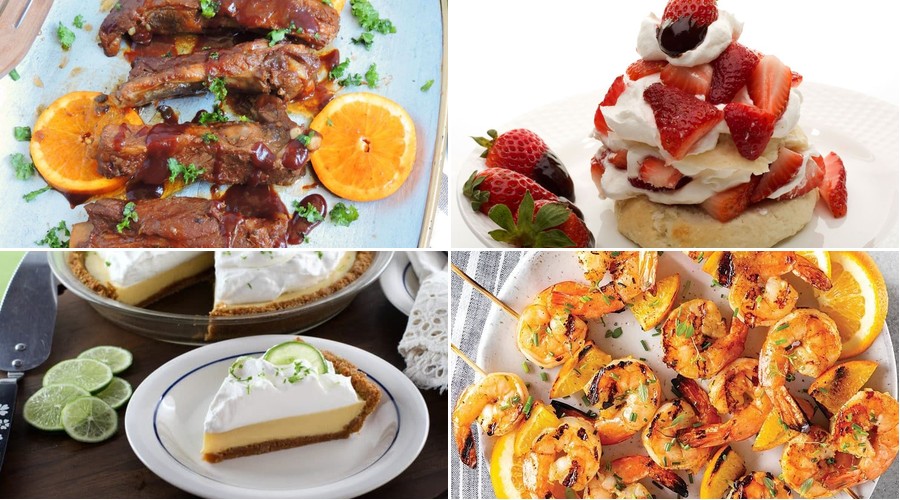
Vibrant, sun-kissed flavors await in these 18 zesty fresh-from-Florida recipes! From tangy citrus salads to succulent seafood dishes, each bite captures the essence of sunshine state cooking. Whether you’re craving quick weeknight dinners or impressive weekend feasts, this collection brings tropical flair right to your kitchen. Ready to add some Florida freshness to your menu? Let’s dive into these delicious recipes!
Florida Citrus Grilled Shrimp Skewers
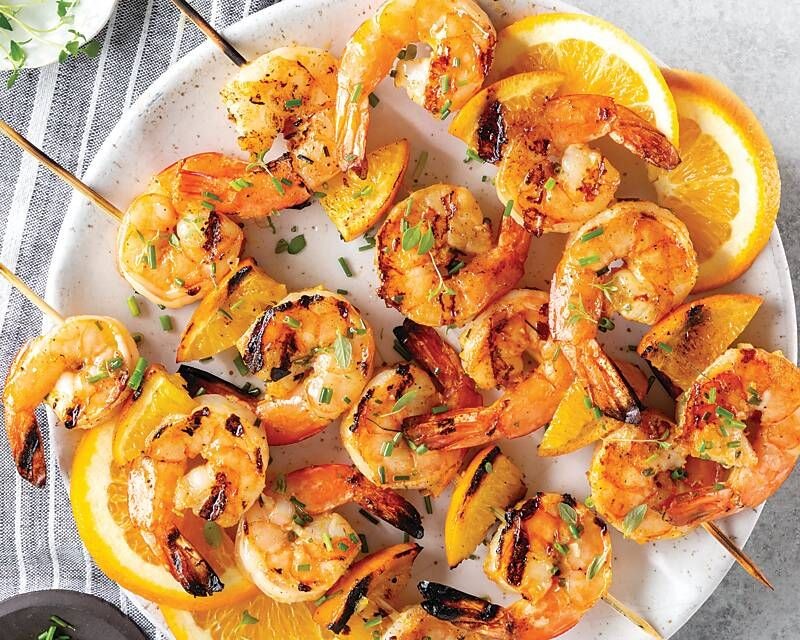
Craving something fresh and vibrant? These Florida citrus grilled shrimp skewers deliver bright, tangy flavor with minimal effort. Perfect for weeknight dinners or backyard gatherings.
Ingredients
– 1 lb large shrimp, peeled and deveined (I always buy wild-caught for better flavor)
– 1/4 cup fresh orange juice (squeezed from 2 medium oranges)
– 2 tbsp fresh lime juice (about 1 large lime)
– 2 tbsp extra virgin olive oil (my go-to for marinades)
– 2 garlic cloves, minced (freshly minced makes all the difference)
– 1 tsp smoked paprika (adds that subtle smoky depth)
– 1/2 tsp salt (I use fine sea salt for even distribution)
– 1/4 tsp black pepper (freshly ground if possible)
– 8 wooden skewers (soaked in water for 30 minutes to prevent burning)
Instructions
1. Soak 8 wooden skewers in water for 30 minutes to prevent burning on the grill.
2. Whisk together 1/4 cup orange juice, 2 tbsp lime juice, 2 tbsp olive oil, 2 minced garlic cloves, 1 tsp smoked paprika, 1/2 tsp salt, and 1/4 tsp black pepper in a medium bowl.
3. Pat 1 lb shrimp dry with paper towels to help the marinade adhere better.
4. Add shrimp to the marinade and toss to coat completely.
5. Cover the bowl and refrigerate for exactly 20 minutes (no longer, or the citrus will start to cook the shrimp).
6. Preheat your grill to medium-high heat (400°F) while shrimp marinates.
7. Thread 4-5 shrimp onto each soaked skewer, leaving small gaps between them.
8. Place skewers on the hot grill and cook for 2 minutes undisturbed to develop grill marks.
9. Flip skewers and cook for another 2-3 minutes until shrimp turn pink and opaque.
10. Remove skewers from grill immediately to prevent overcooking.
Here’s why these skewers shine: the shrimp stay juicy with a perfect char, while the citrus marinade caramelizes into a tangy glaze. Serve them over cilantro lime rice or alongside grilled corn for a complete Florida-inspired meal that transports you straight to sunshine state vibes.
Key Lime Pie with Fresh Whipped Cream
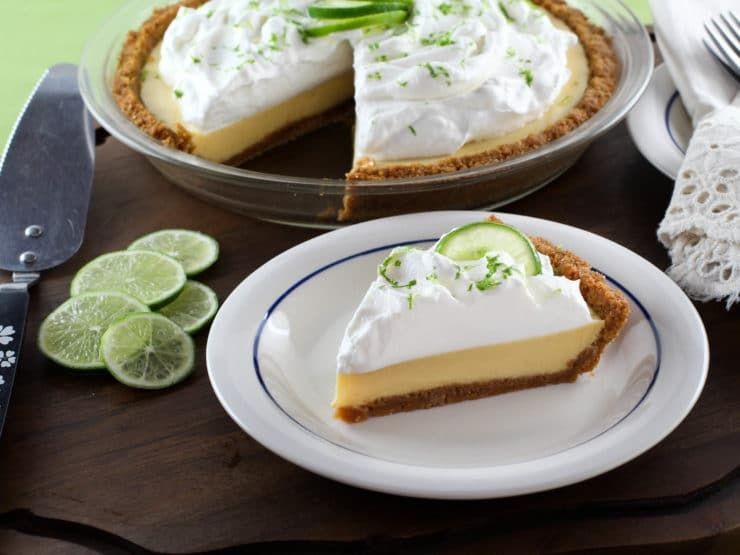
Baking this key lime pie feels like capturing Florida sunshine in a crust. Bright, tart filling balances perfectly with sweet graham cracker base. Fresh whipped cream cuts through the citrus for ultimate refreshment.
Ingredients
– 1½ cups graham cracker crumbs (I prefer the honey-flavored ones for extra sweetness)
– ⅓ cup granulated sugar
– 6 tablespoons melted unsalted butter (use the good stuff—it makes the crust extra crisp)
– 4 large egg yolks (room temperature blends smoother)
– 14 oz sweetened condensed milk (don’t substitute—this creates the signature creamy texture)
– ½ cup fresh key lime juice (bottled works, but fresh gives brighter flavor)
– 1 tablespoon key lime zest (microplane zester gets the finest peel)
– 1 cup heavy whipping cream (chill bowl and beaters for best results)
– 2 tablespoons powdered sugar
Instructions
1. Preheat oven to 350°F.
2. Combine graham cracker crumbs, granulated sugar, and melted butter in medium bowl.
3. Press mixture firmly into 9-inch pie plate using flat-bottomed cup.
4. Bake crust for 8 minutes until lightly browned.
5. Cool crust completely on wire rack, about 20 minutes.
6. Whisk egg yolks in separate bowl until pale yellow, about 2 minutes.
7. Add sweetened condensed milk and whisk until fully incorporated.
8. Stir in key lime juice and zest until smooth.
9. Pour filling into cooled crust.
10. Bake at 350°F for 15 minutes until center barely jiggles.
11. Cool pie on wire rack for 1 hour.
12. Refrigerate pie for at least 4 hours until completely set.
13. Beat chilled heavy cream with powdered sugar until stiff peaks form.
14. Spread whipped cream over chilled pie.
Velvety filling contrasts with crunchy crust in every bite. The tart lime flavor lingers pleasantly without overwhelming. Serve chilled slices with extra lime wedges for squeezing over top.
Grilled Grouper with Mango Salsa
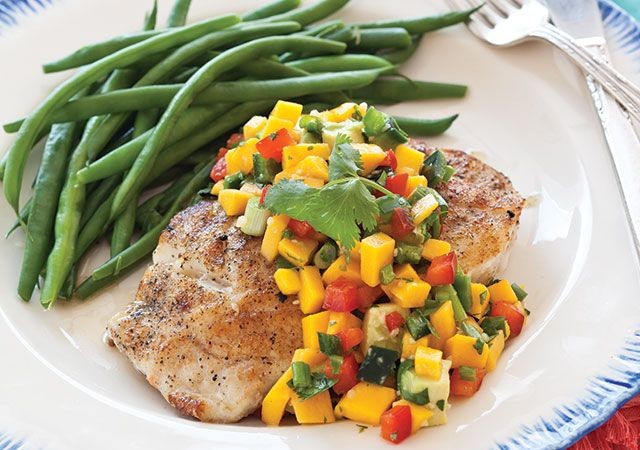
Kick off grilling season with this vibrant dish that balances smoky fish with sweet, zesty salsa. Grilled grouper gets a tropical twist from fresh mango salsa, making it perfect for summer evenings. The contrast of flavors and textures will have everyone asking for seconds.
Ingredients
– 2 grouper fillets (6 oz each), I always pat them dry thoroughly for better searing
– 1 ripe mango, diced (choose one that gives slightly when pressed)
– 1/4 cup red onion, finely chopped
– 1 jalapeño, seeded and minced – remove the ribs if you prefer less heat
– 2 tbsp fresh lime juice, freshly squeezed makes all the difference
– 2 tbsp chopped cilantro, I use the stems too for extra flavor
– 1 tbsp extra virgin olive oil, my go-to for high-heat grilling
– 1 tsp smoked paprika
– 1/2 tsp garlic powder
– 1/2 tsp salt
– 1/4 tsp black pepper
Instructions
1. Preheat your grill to medium-high heat, around 400°F.
2. Pat grouper fillets completely dry with paper towels.
3. Brush both sides of fillets with olive oil.
4. Combine smoked paprika, garlic powder, salt, and black pepper in a small bowl.
5. Rub spice mixture evenly over both sides of each fillet.
6. Place grouper on hot grill, skin-side down if applicable.
7. Grill for 4-5 minutes until grill marks appear and fish releases easily.
8. Flip fillets carefully using a thin spatula.
9. Grill for another 3-4 minutes until fish flakes easily with a fork.
10. While fish grills, dice mango into 1/2-inch cubes.
11. Finely chop red onion and seeded jalapeño.
12. Combine mango, red onion, jalapeño, cilantro, and lime juice in a medium bowl.
13. Stir salsa gently to combine without crushing mango pieces.
14. Remove grouper from grill when internal temperature reaches 145°F.
15. Let fish rest for 2 minutes before serving.
16. Top grilled grouper with generous spoonfuls of mango salsa.
The firm, flaky texture of the grouper holds up beautifully against the juicy mango salsa. Serve it over cilantro-lime rice or with grilled corn for a complete meal that tastes like summer on a plate. The smoky char from the grill pairs perfectly with the salsa’s bright, tropical flavors.
Fresh Florida Orange Glazed Chicken

Perfect for busy weeknights, this orange glazed chicken brings Florida sunshine to your dinner table. The sweet-tangy glaze caramelizes beautifully while keeping the chicken juicy. You’ll have this impressive dish ready in under 30 minutes.
Ingredients
– 1.5 lbs boneless, skinless chicken thighs (I find thighs stay juicier than breasts)
– 1 cup fresh Florida orange juice (squeeze it yourself for the best flavor)
– 1/4 cup honey (local raw honey adds wonderful depth)
– 2 tbsp soy sauce (I always use low-sodium to control saltiness)
– 2 tbsp olive oil (extra virgin is my go-to for better flavor)
– 3 garlic cloves, minced (freshly minced makes all the difference)
– 1 tsp grated ginger (keep frozen ginger for easy grating)
– 1/2 tsp red pepper flakes (adjust to your heat preference)
– 2 tbsp cornstarch (this creates the perfect glaze consistency)
– 1/4 cup cold water (cold prevents lumps in the slurry)
– 2 green onions, sliced (for that fresh finish)
Instructions
1. Pat chicken thighs completely dry with paper towels. 2. Season both sides of chicken generously with salt and pepper. 3. Heat olive oil in large skillet over medium-high heat until shimmering. 4. Place chicken in skillet and cook undisturbed for 6 minutes until golden brown. 5. Flip chicken and cook additional 5 minutes until other side is browned. 6. Transfer chicken to plate and reduce heat to medium. 7. Add minced garlic and grated ginger to skillet, cooking 30 seconds until fragrant. 8. Pour in orange juice, honey, soy sauce, and red pepper flakes. 9. Whisk cornstarch with cold water until smooth in small bowl. 10. Slowly whisk cornstarch slurry into skillet sauce. 11. Bring sauce to simmer, stirring constantly until thickened, about 2 minutes. 12. Return chicken to skillet, spooning glaze over each piece. 13. Simmer chicken in glaze for 3 minutes until internal temperature reaches 165°F. 14. Remove skillet from heat and let rest 2 minutes before serving. 15. Garnish with sliced green onions. Just cooked through, the chicken remains incredibly tender while the sticky glaze forms a glossy coating. Serve over jasmine rice to soak up every drop of the citrus sauce, or slice it for vibrant salad topping.
Stone Crab Claws with Mustard Sauce
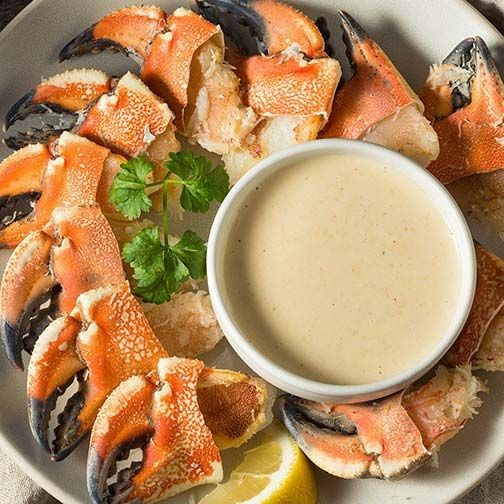
Every Floridian knows stone crab season is pure coastal luxury. Extract sweet, tender meat from those iconic black-tipped claws—it’s worth the effort. Elevate them with this zesty mustard sauce that cuts through the richness perfectly.
Ingredients
- 2 pounds fresh stone crab claws, pre-cooked and chilled (I always ask the fishmonger to crack them slightly for easier eating)
- 1/2 cup mayonnaise (Duke’s is my Southern staple for its tang)
- 2 tbsp Dijon mustard (the grainy texture makes all the difference)
- 1 tbsp fresh lemon juice (squeezed right before mixing to keep it bright)
- 1 tsp Worcestershire sauce (Lea & Perrins adds that umami depth)
- 1/4 tsp smoked paprika (for a subtle smoky kick)
- 1/8 tsp cayenne pepper (just enough heat to tingle)
- 2 tbsp chopped fresh parsley (flat-leaf holds up better than curly)
Instructions
- Place all crab claws in a single layer on a large baking sheet.
- Fill a large pot with 1 inch of water and bring to a rolling boil over high heat.
- Set a steamer basket inside the pot, ensuring it sits above the water line.
- Arrange crab claws in the steamer basket in one even layer—don’t overcrowd.
- Cover the pot tightly with a lid and steam for 5–7 minutes until claws are heated through to 145°F internally.
- Tip: Use a meat thermometer to check the thickest part of a claw—overcooking makes the meat rubbery.
- While claws steam, whisk mayonnaise, Dijon mustard, lemon juice, Worcestershire sauce, smoked paprika, and cayenne in a medium bowl until fully combined.
- Stir in chopped parsley just until distributed—overmixing can make the sauce thin.
- Tip: Chill the sauce for 10 minutes in the freezer if serving immediately; it thickens slightly and clings better to the crab.
- Transfer steamed claws to a serving platter using kitchen tongs.
- Serve warm claws with mustard sauce on the side for dipping.
- Tip: Provide crab crackers and small forks—the shell fragments can be sharp.
Velvety sauce clings to each succulent claw, balancing briny sweetness with mustard’s sharp bite. Serve them piled high over crushed ice with extra lemon wedges for squeezing. Leftover sauce? It’s fantastic on grilled fish or as a burger spread tomorrow.
Avocado and Grapefruit Salad
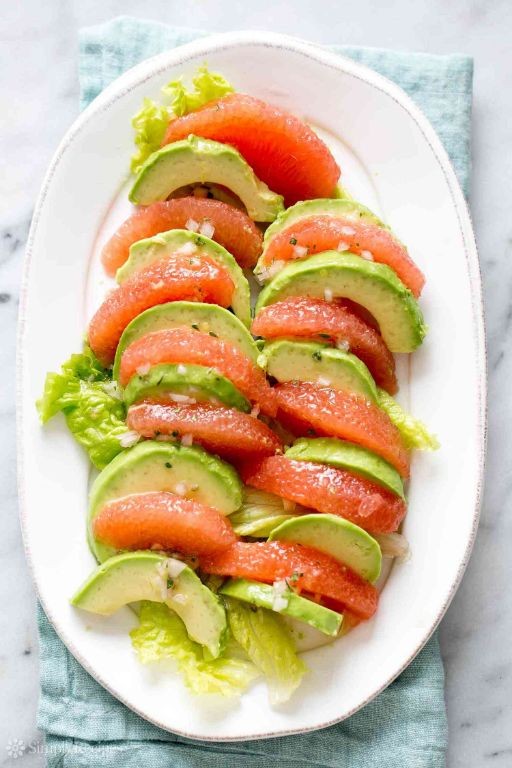
Kick off your meal with this vibrant avocado and grapefruit salad that balances creamy and citrusy notes perfectly. It comes together in minutes but delivers restaurant-quality freshness. This is my go-to when I need something light yet satisfying.
Ingredients
– 2 ripe avocados, sliced (I look for ones that yield slightly to gentle pressure)
– 1 large grapefruit, segmented (ruby red is my favorite for its sweetness)
– 1/4 cup thinly sliced red onion
– 2 tbsp extra virgin olive oil (the good stuff makes a difference here)
– 1 tbsp honey
– 1/4 cup chopped fresh mint leaves
– 1/4 cup crumbled feta cheese (I prefer the block kind I crumble myself)
– 1/4 cup toasted pecans
Instructions
1. Cut each avocado in half, remove the pit, and slice the flesh into 1/2-inch thick slices while still in the skin.
2. Scoop out avocado slices with a large spoon and arrange them on a serving platter.
3. Cut off both ends of the grapefruit and stand it upright on a cutting board.
4. Use a sharp knife to remove the peel and white pith in vertical strips, following the fruit’s curve.
5. Hold the peeled grapefruit over a bowl and cut between membranes to release segments, catching any juice.
6. Arrange grapefruit segments between the avocado slices on the platter.
7. Thinly slice red onion into 1/8-inch pieces and scatter over the salad.
8. Whisk together olive oil and honey in a small bowl until fully combined.
9. Drizzle the dressing evenly over the arranged salad components.
10. Toast pecans in a dry skillet over medium heat for 3-4 minutes, shaking frequently until fragrant.
11. Sprinkle toasted pecans, crumbled feta, and chopped mint over the salad.
12. Serve immediately to prevent avocado browning. Generous textures make this salad special—creamy avocado against juicy grapefruit bursts with crunchy pecans throughout. Great alongside grilled chicken or served in lettuce cups for a low-carb option.
Conch Fritters with Key Lime Aioli

Ready for a taste of the tropics? These conch fritters deliver that classic Florida Keys flavor with minimal fuss. Crispy outside, tender inside, they’re perfect for casual entertaining or a weeknight treat.
Ingredients
– 1 pound fresh conch meat, chopped (frozen works too, just thaw completely)
– 1 cup all-purpose flour (I like King Arthur for consistent results)
– 1/2 cup cornmeal for that essential crunch
– 2 large eggs, room temperature for better emulsification
– 1/4 cup whole milk
– 1/4 cup mayonnaise (Duke’s is my Southern go-to)
– 2 tablespoons fresh key lime juice
– 1 teaspoon key lime zest
– 1/2 cup finely diced bell pepper
– 1/4 cup finely diced onion
– 2 cloves garlic, minced
– 1 teaspoon baking powder
– 1/2 teaspoon smoked paprika
– Vegetable oil for frying (about 2 cups)
– Salt to season throughout
Instructions
1. Pat the chopped conch meat completely dry with paper towels.
2. Whisk together flour, cornmeal, baking powder, and smoked paprika in a large bowl.
3. In a separate bowl, beat eggs until uniform in color.
4. Add milk to the eggs and whisk until fully incorporated.
5. Pour the wet ingredients into the dry ingredients and mix until just combined.
6. Fold in conch meat, bell pepper, onion, and garlic.
7. Let the batter rest for 15 minutes at room temperature.
8. Heat vegetable oil to 350°F in a heavy-bottomed pot.
9. Use a small cookie scoop to drop tablespoon-sized portions of batter into the hot oil.
10. Fry fritters for 3-4 minutes until golden brown, flipping halfway through.
11. Remove fritters with a slotted spoon and drain on a wire rack.
12. Combine mayonnaise, key lime juice, and zest in a small bowl for the aioli.
13. Whisk the aioli vigorously until smooth and creamy.
14. Season the aioli with salt until properly balanced.
Don’t skip the resting time—it allows the cornmeal to hydrate properly for better texture. These fritters should be served immediately while still crackling-hot from the fryer. The contrast between the crispy exterior and tender conch interior is what makes them special, especially when dipped in that bright, tangy aioli.
Florida Strawberry Shortcake
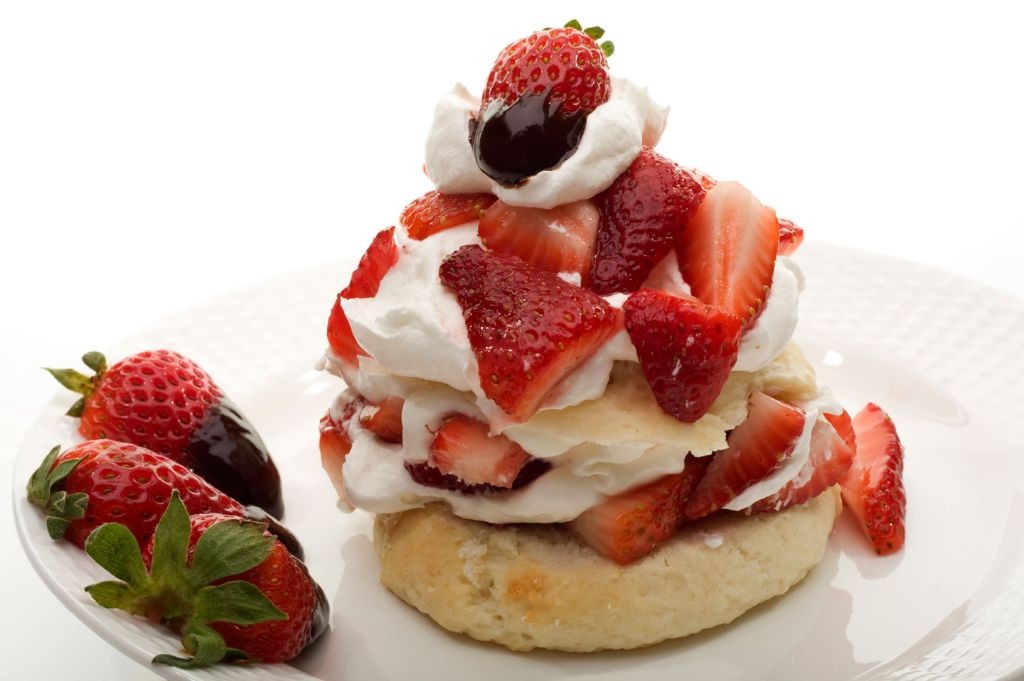
Savor the taste of Florida sunshine with this classic strawberry shortcake. Fresh berries meet tender biscuits for a dessert that’s both simple and stunning. It’s the perfect treat for spring gatherings or a sweet weeknight indulgence.
Ingredients
– 2 cups all-purpose flour (I always spoon and level for accuracy)
– 1/4 cup granulated sugar (a little extra sweetness never hurts)
– 1 tbsp baking powder (make sure it’s fresh for maximum rise)
– 1/2 tsp salt (I prefer fine sea salt for even distribution)
– 1/2 cup cold unsalted butter, cubed (keep it chilled until the last second)
– 2/3 cup whole milk (cold milk makes the biscuits extra flaky)
– 1 lb fresh Florida strawberries, hulled and sliced (look for deep red, fragrant berries)
– 1/4 cup granulated sugar for berries (this draws out their natural juices beautifully)
– 1 cup heavy whipping cream (chill the bowl and beaters for best results)
– 2 tbsp powdered sugar (sift it to avoid lumps in the cream)
– 1 tsp vanilla extract (pure vanilla gives the cream a warm, rich flavor)
Instructions
1. Preheat your oven to 425°F and line a baking sheet with parchment paper.
2. Whisk together flour, 1/4 cup granulated sugar, baking powder, and salt in a large bowl.
3. Cut in cold butter cubes using a pastry cutter until the mixture resembles coarse crumbs.
4. Pour in cold milk and stir just until a shaggy dough forms—do not overmix.
5. Turn dough onto a floured surface and gently pat into a 1-inch thick rectangle.
6. Cut dough into 6 rounds using a 3-inch biscuit cutter, pressing straight down without twisting.
7. Place biscuits 2 inches apart on the prepared baking sheet.
8. Bake for 12–15 minutes until golden brown and firm to the touch.
9. While biscuits bake, toss sliced strawberries with 1/4 cup granulated sugar in a medium bowl.
10. Let berries sit at room temperature for 15 minutes until juicy and slightly softened.
11. Chill a mixing bowl and beaters in the freezer for 10 minutes before whipping cream.
12. Beat heavy cream, powdered sugar, and vanilla on medium-high speed until stiff peaks form.
13. Split warm biscuits horizontally using a serrated knife for a clean cut.
14. Spoon macerated strawberries and their juices over the bottom biscuit halves.
15. Top strawberries with a generous dollop of whipped cream.
16. Place biscuit tops over the cream and serve immediately.
Here, the contrast of warm, crumbly biscuits with cool, juicy strawberries is pure bliss. For a fun twist, layer everything in mason jars for a portable picnic dessert. The cream melts just slightly into the berries, creating a sauce that’s impossible to resist.
Blackened Mahi-Mahi Tacos
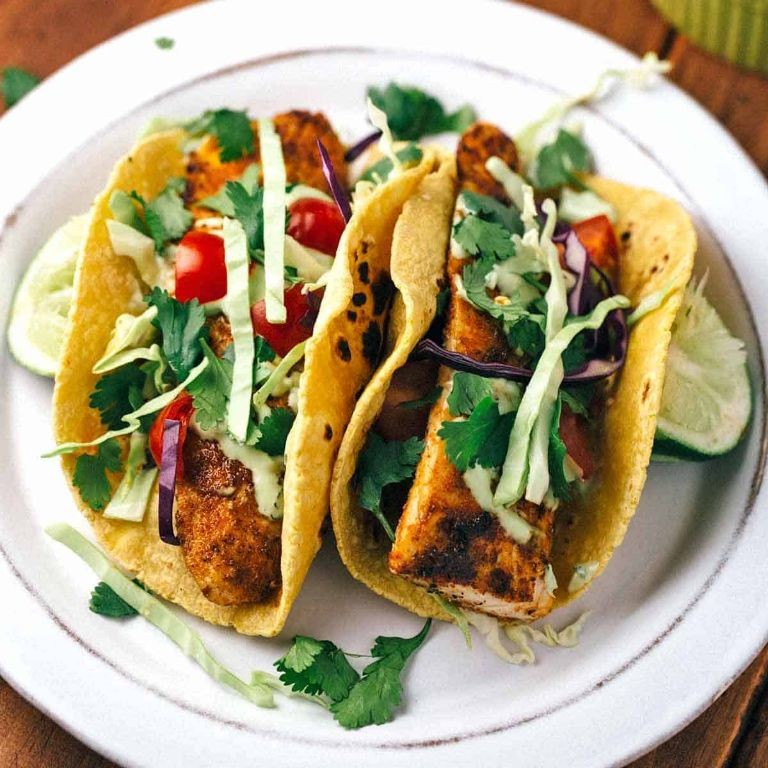
Tender mahi-mahi gets a spicy crust in these quick tacos. They come together fast for weeknight dinners. The blackening seasoning adds serious flavor without much effort.
Ingredients
– 1 lb mahi-mahi fillets, about 1-inch thick (fresh works best for texture)
– 2 tbsp blackening seasoning (I make extra to keep on hand)
– 2 tbsp olive oil (extra virgin is my go-to for high heat)
– 8 small corn tortillas (warmed tortillas don’t crack)
– 1 cup shredded purple cabbage (for crunch and color)
– 1/2 cup cilantro leaves (fresh makes all the difference)
– 1 lime, cut into wedges (don’t skip the squeeze at the end)
– 1/4 cup sour cream (full-fat gives creamier results)
Instructions
1. Pat mahi-mahi fillets completely dry with paper towels.
2. Rub blackening seasoning evenly over all sides of each fillet.
3. Heat olive oil in a large cast-iron skillet over medium-high heat until shimmering, about 2 minutes.
4. Place seasoned fillets in the hot skillet without crowding.
5. Cook for 4 minutes until a dark crust forms on the bottom.
6. Flip fillets using a thin spatula to maintain the crust.
7. Cook for another 3-4 minutes until fish flakes easily with a fork.
8. Remove fish from skillet and let rest on a cutting board for 2 minutes.
9. Warm corn tortillas directly over a gas flame for 15 seconds per side, or in a dry skillet.
10. Flake mahi-mahi into large chunks using two forks.
11. Divide fish evenly among warmed tortillas.
12. Top each taco with shredded purple cabbage and cilantro leaves.
13. Drizzle with sour cream using a squeeze bottle or spoon.
14. Serve immediately with lime wedges on the side.
Flaky mahi-mahi contrasts with the crisp cabbage in every bite. The blackened crust delivers subtle heat that balances the cool sour cream. For a fun twist, set up a taco bar with extra toppings like pickled onions or avocado slices.
Tomato and Sweet Onion Salad with Fresh Basil

A perfectly simple salad that lets summer produce shine. This tomato and sweet onion combination needs minimal fuss to deliver maximum flavor. Always use the ripest tomatoes you can find for best results.
Ingredients
– 4 large ripe tomatoes (I hunt for heirlooms at the farmer’s market)
– 1 medium sweet onion (Vidalias are my absolute favorite here)
– 1/2 cup fresh basil leaves (tear them right before using for maximum aroma)
– 3 tablespoons extra virgin olive oil (this is where quality really matters)
– 1 tablespoon red wine vinegar
– 1 teaspoon kosher salt (I prefer the larger crystals for better texture)
– 1/2 teaspoon freshly ground black pepper
Instructions
1. Core all 4 tomatoes and slice them into 1/4-inch thick rounds.
2. Peel the sweet onion and slice it into very thin rings using a mandoline for even thickness.
3. Arrange tomato slices in a single layer on a large serving platter.
4. Scatter the onion rings evenly over the tomato slices.
5. Tear the basil leaves by hand directly over the salad to prevent bruising.
6. Drizzle the extra virgin olive oil evenly across the entire salad.
7. Sprinkle the red wine vinegar over the tomatoes and onions.
8. Season with kosher salt, making sure to distribute it evenly.
9. Finish with freshly ground black pepper, using a pepper mill for best flavor.
10. Let the salad rest at room temperature for 15 minutes before serving to allow flavors to meld.
Unbelievably crisp and refreshing, this salad delivers sweet onion crunch against juicy tomato flesh. The basil adds that essential herbal freshness that ties everything together. Serve it alongside grilled chicken or pile it on crusty bread for an instant bruschetta upgrade.
Grilled Lobster Tail with Garlic Butter
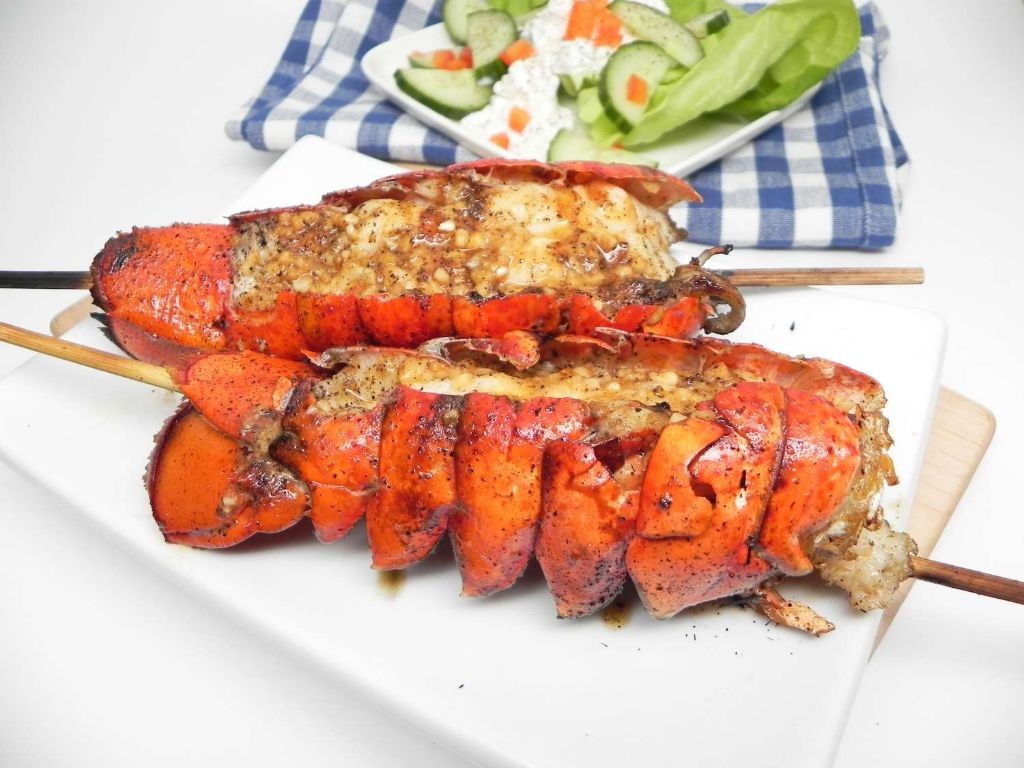
Forget complicated seafood dishes—grilled lobster tail delivers restaurant-quality results with minimal effort. Fresh lobster tails need just garlic butter and proper grilling technique to shine. Follow these precise steps for perfectly cooked, succulent lobster every time.
Ingredients
– 4 (6-8 oz) lobster tails, thawed if frozen (I always check for firm, translucent flesh)
– 1/2 cup unsalted butter (European-style butter makes the sauce extra rich)
– 4 garlic cloves, minced (fresh garlic beats jarred for maximum flavor)
– 2 tbsp fresh lemon juice (squeeze it right before using)
– 1 tsp smoked paprika (this adds subtle smokiness that complements the grill)
– 1/4 tsp cayenne pepper (adjust based on your heat preference)
– 2 tbsp chopped fresh parsley (flat-leaf holds up better than curly)
– Kosher salt to season (I prefer larger crystals for better control)
Instructions
1. Preheat your grill to medium-high heat, approximately 400°F, and oil the grates thoroughly to prevent sticking.
2. Use kitchen shears to cut through the top shell of each lobster tail lengthwise, stopping at the tail fin.
3. Gently pry the shell open and lift the meat through the slit, keeping it attached at the base.
4. Place the lobster meat on top of the shells and brush all surfaces with 2 tablespoons of melted butter.
5. Season the exposed meat generously with kosher salt and smoked paprika.
6. Grill the lobster tails meat-side down for 5-6 minutes until lightly charred and opaque around the edges.
7. Flip the tails and grill shell-side down for 4-5 minutes until the internal temperature reaches 140°F.
8. Meanwhile, melt the remaining butter in a small saucepan over medium heat.
9. Add minced garlic and cook for 1 minute until fragrant but not browned.
10. Remove from heat and stir in lemon juice, cayenne pepper, and chopped parsley.
11. Transfer grilled lobster tails to a serving platter and drizzle with the garlic butter sauce.
The grilled lobster emerges tender with slight smokiness, while the garlic butter adds rich, savory notes. Serve immediately with crusty bread to soak up the extra sauce, or pair with grilled asparagus for a complete meal.
Florida Peach and Blueberry Cobbler
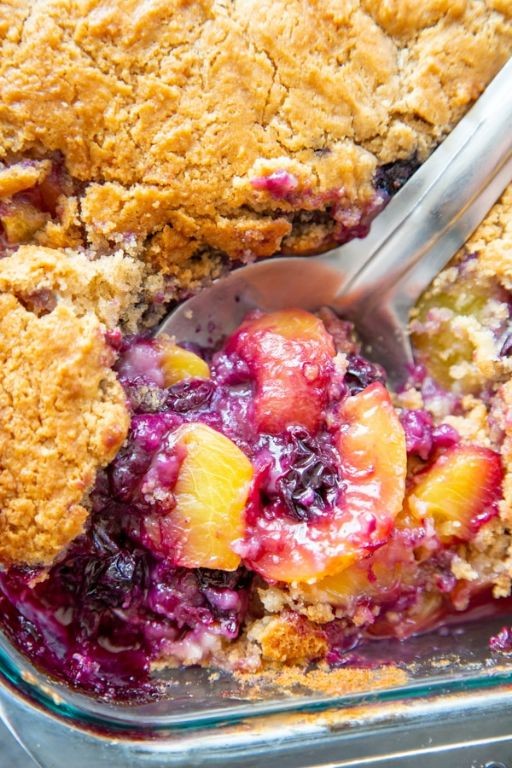
A perfect summer dessert that transforms juicy peaches and plump blueberries into a warm, bubbling treat. This cobbler comes together quickly with a tender, biscuit-like topping that soaks up all the fruity juices. You’ll want to serve it straight from the oven while it’s still warm.
Ingredients
- 4 cups sliced fresh peaches (I leave the skins on for extra texture)
- 2 cups fresh blueberries (frozen work too, no need to thaw)
- 1 cup granulated sugar (divided—½ cup for fruit, ½ cup for topping)
- 1 cup all-purpose flour (spoon and level for accuracy)
- 1 tsp baking powder (make sure it’s fresh for maximum rise)
- ¼ tsp salt (I use fine sea salt for even distribution)
- 1 cup whole milk (room temp blends smoother)
- ½ cup unsalted butter (melted, and I always use extra for greasing)
- 1 tbsp lemon juice (freshly squeezed brightens the fruit)
- 1 tsp vanilla extract (pure vanilla makes a difference)
Instructions
- Preheat your oven to 375°F and grease a 9×13-inch baking dish with extra butter.
- In a large bowl, toss the sliced peaches and blueberries with ½ cup sugar and 1 tbsp lemon juice until evenly coated.
- Spread the fruit mixture evenly in the prepared baking dish.
- In a separate bowl, whisk together 1 cup flour, ½ cup sugar, 1 tsp baking powder, and ¼ tsp salt.
- Pour in 1 cup milk and ½ cup melted butter, stirring just until combined—don’t overmix.
- Drop spoonfuls of the batter evenly over the fruit layer, leaving some gaps for steam to escape.
- Bake for 40–45 minutes, until the topping is golden brown and fruit is bubbling at the edges.
- Let the cobbler cool for 10–15 minutes before serving to allow the juices to thicken slightly.
You’ll love the contrast between the soft, jammy fruit and the slightly crisp topping. Serve it warm with a scoop of vanilla ice cream for that classic hot-and-cold combo. Leftovers reheat beautifully—just pop a portion in the oven at 350°F for 10 minutes.
Cuban Sandwich with Mojo-Marinated Pork
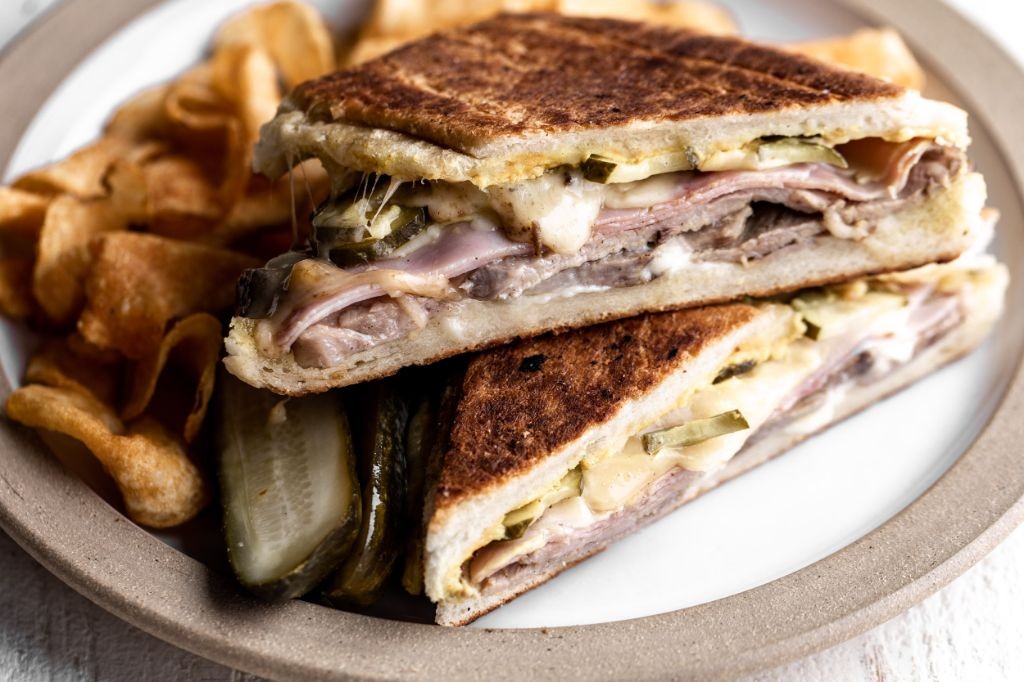
Rarely does a sandwich deliver such perfect harmony of textures and flavors. This Cuban sandwich brings together mojo-marinated pork, tangy pickles, and melted Swiss cheese in a pressed masterpiece that’s worth every minute of prep. Trust me, once you taste that crispy, melty bite, you’ll understand the hype.
Ingredients
– 2 lbs pork shoulder, sliced thin—I find thinner slices absorb the marinade better
– 1/2 cup fresh orange juice, squeezed from about 2 medium oranges for maximum brightness
– 1/4 cup fresh lime juice, use bottled in a pinch but fresh is ideal
– 4 garlic cloves, minced finely—don’t skimp, it’s the soul of the mojo
– 1 tsp dried oregano, I prefer Mexican oregano for its earthy kick
– 1/2 cup extra virgin olive oil, my go-to for rich flavor
– 1 loaf Cuban bread, about 12 inches long, or a sturdy French baguette if you can’t find it
– 4 slices Swiss cheese, thinly sliced so it melts evenly
– 4 slices ham, high-quality deli ham works best here
– 8 dill pickle slices, I like them crisp and cold for contrast
– 2 tbsp yellow mustard, classic and tangy
– 2 tbsp unsalted butter, softened for easy spreading
Instructions
1. Combine orange juice, lime juice, minced garlic, dried oregano, and olive oil in a large bowl.
2. Add pork slices to the marinade, ensuring each piece is fully coated.
3. Cover the bowl and refrigerate for at least 4 hours, or overnight for deeper flavor—marinating longer tenderizes the pork beautifully.
4. Preheat your oven to 375°F.
5. Arrange marinated pork slices in a single layer on a baking sheet.
6. Roast pork for 25 minutes, until internal temperature reaches 145°F and edges are lightly browned.
7. Let pork rest for 5 minutes to retain juices before assembling.
8. Slice Cuban bread horizontally, leaving one edge attached like a hinge.
9. Spread yellow mustard evenly on the bottom half of the bread.
10. Layer roasted pork slices over the mustard.
11. Add ham slices on top of the pork.
12. Place Swiss cheese slices over the ham.
13. Arrange dill pickle slices in a single layer over the cheese.
14. Close the sandwich and spread softened butter on the outside of both bread halves.
15. Heat a panini press or large skillet over medium heat.
16. Press the sandwich for 4-5 minutes, until bread is golden brown and cheese is fully melted—if using a skillet, weigh it down with another pan for even pressure.
17. Slice the sandwich diagonally and serve immediately.
Juicy, tender pork mingles with the sharpness of pickles and gooey Swiss in every bite. The crisp exterior gives way to a warm, layered interior that’s downright addictive. Try serving it with plantain chips for a crunchy side, or cut into smaller portions for a game-day spread that disappears fast.
Fresh Coconut Shrimp with Pineapple Dip
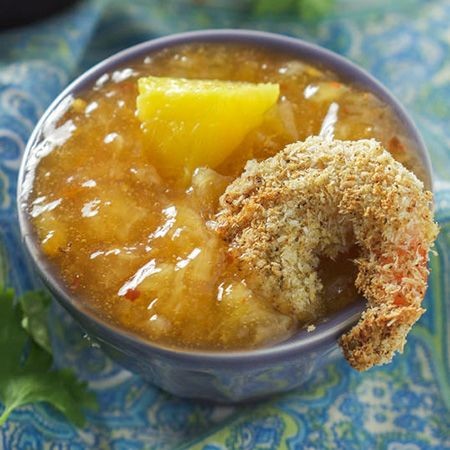
Every summer cookout needs that one standout appetizer that disappears first. This coconut shrimp delivers that crispy, tropical crunch everyone craves, with a pineapple dip that balances sweet and tangy perfectly.
Ingredients
– 1 lb large raw shrimp, peeled and deveined (I leave the tails on for easy handling)
– 1 cup all-purpose flour
– 2 large eggs, beaten (room temperature eggs coat better)
– 1 cup panko breadcrumbs
– 1 cup sweetened shredded coconut
– 1/2 tsp garlic powder
– 1/2 tsp paprika
– Vegetable oil for frying (about 2 cups)
– 1 cup crushed pineapple, drained well
– 1/2 cup Greek yogurt
– 1 tbsp honey
– 1 tsp lime juice
– 1/4 tsp chili flakes (optional, for a subtle kick)
Instructions
1. Pat the shrimp completely dry with paper towels to ensure the coating sticks.
2. Set up three shallow bowls: place flour in the first, beaten eggs in the second, and mix panko, shredded coconut, garlic powder, and paprika in the third.
3. Dredge each shrimp in flour, shaking off any excess.
4. Dip the floured shrimp into the beaten eggs, letting excess drip off.
5. Press the shrimp firmly into the coconut-panko mixture, coating evenly on all sides.
6. Place breaded shrimp on a parchment-lined baking sheet in a single layer.
7. Heat vegetable oil in a deep skillet to 350°F, using a thermometer for accuracy.
8. Fry shrimp in batches for 2–3 minutes until golden brown, flipping once halfway.
9. Remove shrimp with a slotted spoon and drain on a wire rack over paper towels.
10. For the dip, combine crushed pineapple, Greek yogurt, honey, lime juice, and chili flakes in a small bowl.
11. Stir the dip until smooth and refrigerate until ready to serve.
Dive into these shrimp while they’re hot—the coconut coating stays remarkably crisp against the juicy shrimp. The pineapple dip cuts through the richness with its bright, creamy tang. Serve them stacked high on a platter with extra lime wedges for squeezing.
Spicy Florida Orange BBQ Ribs
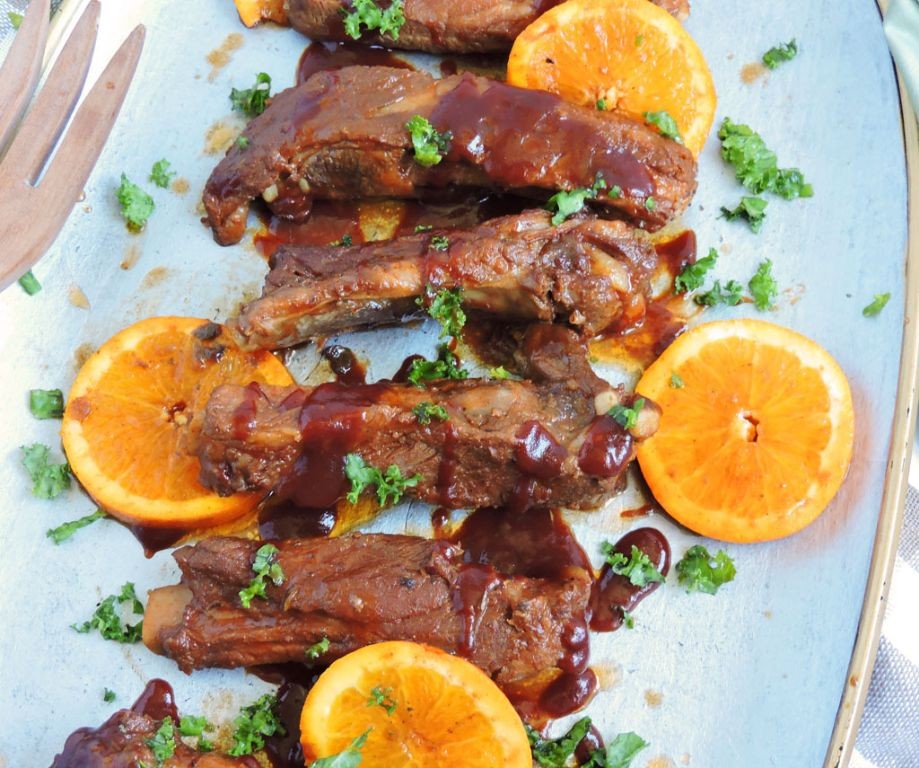
Mouthwatering ribs get a Florida twist with zesty orange and spicy kick. These fall-off-the-bone beauties combine sweet citrus with smoky heat. Perfect for weekend grilling or game day feasts.
Ingredients
– 2 racks baby back ribs (I always remove the membrane for better flavor penetration)
– 1 cup Florida orange juice (fresh squeezed makes all the difference)
– 1/2 cup ketchup (I prefer the thicker, less sweet variety)
– 1/4 cup apple cider vinegar
– 2 tbsp brown sugar
– 2 tbsp hot sauce (my go-to is Crystal for that Louisiana heat)
– 1 tbsp smoked paprika
– 1 tsp garlic powder
– 1 tsp cayenne pepper (adjust based on your heat tolerance)
– 1/2 tsp black pepper
– 1/2 tsp salt
Instructions
1. Preheat your oven to 275°F.
2. Remove the silver skin membrane from the back of each rib rack using a paper towel for better grip.
3. Combine orange juice, ketchup, vinegar, brown sugar, hot sauce, paprika, garlic powder, cayenne, black pepper, and salt in a medium saucepan.
4. Bring the sauce mixture to a simmer over medium heat, stirring constantly.
5. Reduce heat to low and cook the sauce for 15 minutes until slightly thickened.
6. Place ribs on a foil-lined baking sheet, meaty side up.
7. Brush half of the orange BBQ sauce evenly over both sides of the ribs.
8. Wrap the ribs tightly in foil, creating a sealed packet.
9. Bake at 275°F for 2.5 hours until the meat pulls back from the bones about 1/4 inch.
10. Remove ribs from oven and carefully open the foil packet.
11. Increase oven temperature to 400°F.
12. Brush the remaining sauce over the ribs.
13. Return uncovered ribs to the oven for 15 minutes until the sauce caramelizes and forms a sticky glaze.
14. Remove from oven and let rest for 10 minutes before slicing between the bones.
Fantastic ribs feature tender meat that literally falls off the bone with minimal effort. The Florida orange cuts through the richness while the spicy kick lingers pleasantly. Serve these with coleslaw and cornbread to balance the heat, or chop the meat for incredible sandwich fillings.
Tropical Fruit Salad with Honey-Lime Dressing
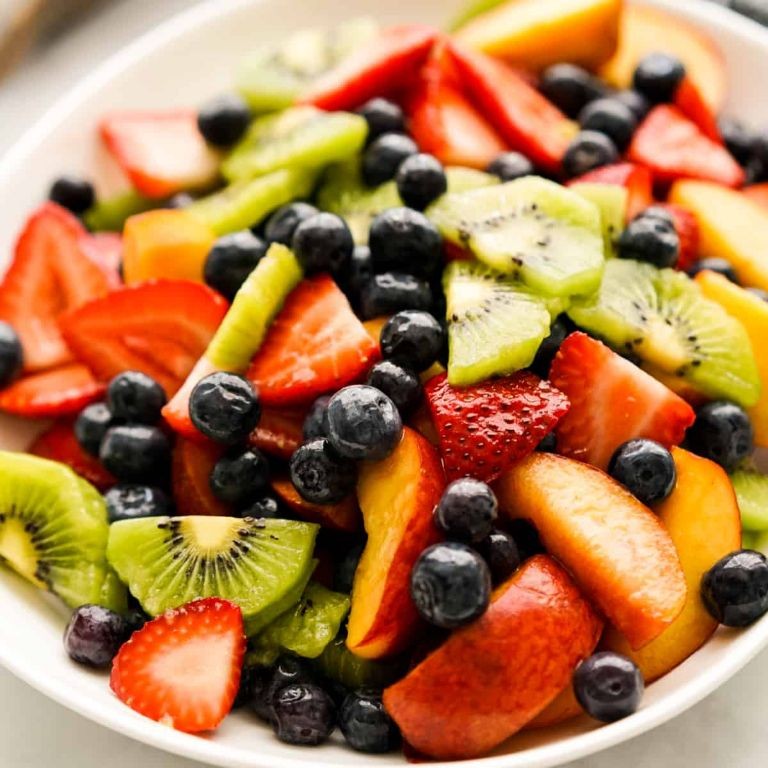
Dazzling tropical flavors come together in this vibrant fruit salad that’s perfect for any occasion. During summer gatherings, this always disappears first from my table. The honey-lime dressing adds just the right balance of sweet and tangy.
Ingredients
– 2 cups fresh pineapple chunks (I prefer cutting my own for maximum freshness)
– 2 cups cubed mango (ripe but firm works best)
– 1 cup sliced kiwi (about 3 medium kiwis, peeled)
– 1 cup sliced strawberries (hulled and quartered)
– 1/4 cup fresh lime juice (squeezed from about 2 limes)
– 2 tbsp honey (local raw honey is my favorite)
– 1 tbsp fresh mint leaves (chopped, plus extra for garnish)
– Pinch of sea salt (this really makes the flavors pop)
Instructions
1. Combine pineapple chunks, cubed mango, sliced kiwi, and quartered strawberries in a large mixing bowl.
2. Whisk together fresh lime juice, honey, and sea salt in a small bowl until fully combined.
3. Pour the honey-lime dressing over the mixed fruits in the large bowl.
4. Gently toss the fruits with the dressing using a large spoon until evenly coated.
5. Chop fresh mint leaves and sprinkle them over the dressed fruit salad.
6. Toss the salad one more time to distribute the mint throughout.
7. Cover the bowl with plastic wrap and refrigerate for 30 minutes to allow flavors to meld.
8. Remove from refrigerator and transfer to serving bowl.
9. Garnish with additional fresh mint leaves before serving.
Perfectly chilled and refreshing, this salad offers a delightful contrast between sweet tropical fruits and zesty lime. The honey dressing creates a beautiful glaze that clings to each piece of fruit. Try serving it alongside grilled chicken or as a topping for vanilla ice cream for an unexpected twist.
Fresh Corn and Crab Chowder
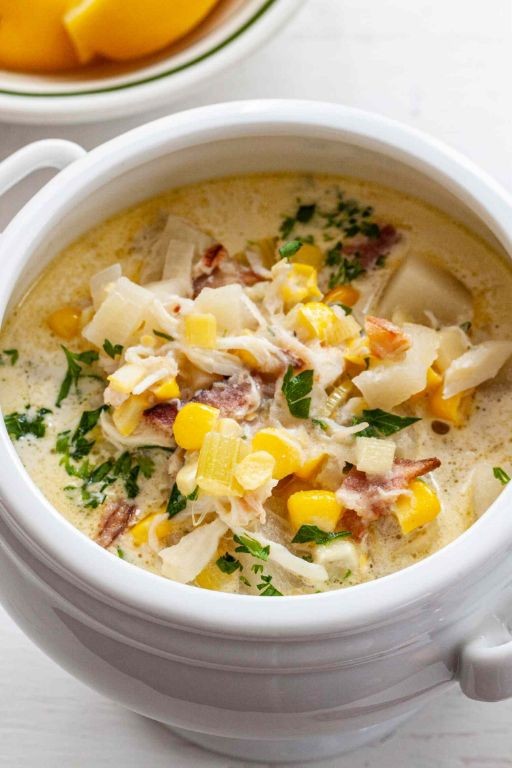
Nourishing and comforting, this chowder celebrates sweet summer corn and delicate crab. Nothing beats the combination of fresh corn kernels and lump crab meat in a creamy base. Perfect for transitioning from summer to fall when corn is at its peak.
Ingredients
– 4 slices thick-cut bacon, chopped (I prefer applewood-smoked for extra flavor)
– 1 large yellow onion, diced small
– 2 cloves garlic, minced (fresh is essential here)
– 4 cups fresh corn kernels (about 6 ears, frozen works in a pinch)
– 1 lb lump crab meat, picked through for shells
– 4 cups whole milk (2% makes it thinner)
– 1 cup heavy cream
– 2 medium russet potatoes, peeled and diced into ½-inch cubes
– 3 tbsp unsalted butter
– 1 tsp Old Bay seasoning
– ½ tsp smoked paprika
– Fresh parsley for garnish
– Salt and black pepper
Instructions
1. Cook chopped bacon in a large Dutch oven over medium heat until crispy, about 8 minutes.
2. Remove bacon with a slotted spoon, leaving 2 tablespoons of drippings in the pot.
3. Add diced onion to the bacon drippings and cook until translucent, about 5 minutes.
4. Stir in minced garlic and cook for 1 minute until fragrant.
5. Add diced potatoes and fresh corn kernels to the pot.
6. Pour in whole milk and heavy cream, then bring to a gentle simmer.
7. Reduce heat to low and cook until potatoes are tender when pierced with a fork, about 15 minutes.
8. Stir in unsalted butter until melted and incorporated.
9. Add Old Bay seasoning and smoked paprika, then season with salt and black pepper.
10. Gently fold in lump crab meat and cook until just heated through, about 3 minutes.
11. Ladle chowder into bowls and top with crispy bacon and fresh parsley.
Unbelievably creamy with pops of sweet corn and tender potato chunks throughout. The crab remains delicate while the smoky bacon adds crunch to each spoonful. Serve with crusty bread for dipping or top with extra Old Bay for those who love more spice.
Summary
Brimming with vibrant Florida flavors, these 18 zesty recipes bring sunshine to your kitchen! We hope you’ll whip up these delicious dishes and share which ones become your family favorites in the comments below. Don’t forget to pin your must-try recipes to Pinterest so you can easily find them again—and share the Florida freshness with friends!