Delicious, portable, and endlessly versatile—hand pies are the ultimate solution for busy home cooks craving comfort food on the go. Whether you’re packing lunches, planning picnics, or simply satisfying a savory or sweet craving, these little pockets of joy are perfect for every occasion. Ready to find your new favorite? Dive into our roundup of 20 irresistible hand pie recipes that promise to delight your taste buds!
Classic Apple Hand Pies with Cinnamon Sugar
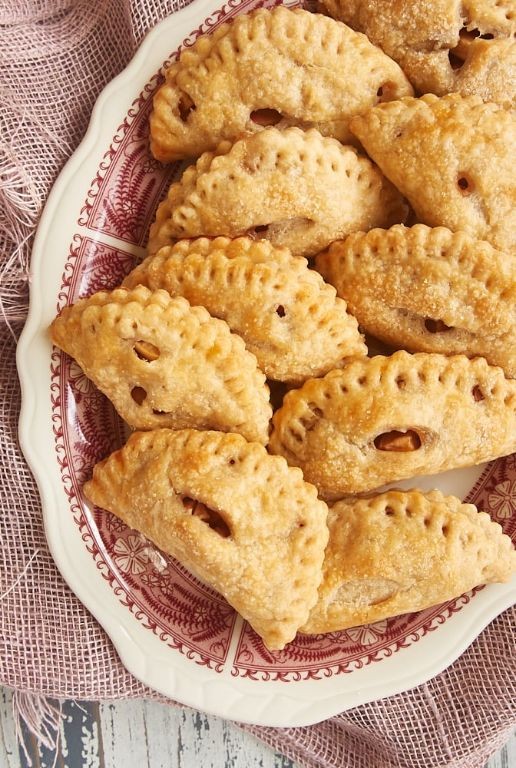
Once upon a crisp autumn afternoon, when the air carries that familiar chill and the last apples hang heavy on the branches, there’s a quiet comfort in turning simple ingredients into something warm and handheld. These little pies capture the essence of fall in each flaky, cinnamon-kissed bite, perfect for savoring slowly with a cup of tea while watching golden leaves dance outside the window.
Ingredients
– 2 cups all-purpose flour, plus extra for dusting
– 1/2 teaspoon salt
– 3/4 cup cold unsalted butter, cubed (keep refrigerated until use)
– 6-8 tablespoons ice water, added gradually
– 2 medium apples, peeled and finely diced (about 2 cups)
– 1/4 cup granulated sugar
– 1 teaspoon ground cinnamon
– 1 tablespoon all-purpose flour (for filling)
– 1 tablespoon milk or heavy cream (for brushing)
– 2 tablespoons granulated sugar mixed with 1/2 teaspoon cinnamon (for sprinkling)
Instructions
1. Combine 2 cups flour and 1/2 teaspoon salt in a large bowl.
2. Cut in 3/4 cup cold cubed butter using a pastry cutter or two forks until mixture resembles coarse crumbs with pea-sized butter pieces.
3. Sprinkle 6 tablespoons ice water over flour mixture while stirring with a fork until dough just comes together, adding remaining water 1 tablespoon at a time if needed.
4. Gently knead dough into a ball on a lightly floured surface, being careful not to overwork it.
5. Divide dough in half, flatten each half into a 1-inch thick disc, wrap tightly in plastic wrap, and refrigerate for exactly 30 minutes.
6. While dough chills, combine diced apples, 1/4 cup sugar, 1 teaspoon cinnamon, and 1 tablespoon flour in a medium bowl, tossing until apples are evenly coated.
7. Preheat oven to 375°F and line a baking sheet with parchment paper.
8. Roll one dough disc on a floured surface to 1/8-inch thickness, then cut into 6 circles using a 4-inch round cutter.
9. Place 2 tablespoons apple filling in the center of each dough circle, leaving 1/2-inch border around edges.
10. Brush edges of each circle lightly with water using a pastry brush.
11. Fold dough over filling to create half-moon shapes, pressing edges firmly together with your fingers.
12. Crimp edges securely with a fork to seal completely, preventing filling from leaking during baking.
13. Arrange hand pies on prepared baking sheet, leaving 2 inches between each for even browning.
14. Brush tops lightly with milk or cream using a pastry brush.
15. Sprinkle cinnamon sugar mixture generously over each hand pie.
16. Cut three small slits in the top of each pie with a sharp knife to allow steam to escape.
17. Bake at 375°F for 22-25 minutes until crust is golden brown and filling is bubbling through slits.
18. Transfer hand pies to a wire rack and cool for 15 minutes before serving.
Momentarily, that first bite reveals layers of flaky pastry giving way to tender, cinnamon-spiced apples that still maintain a slight texture. The sugar crust adds a delicate crunch that contrasts beautifully with the soft interior, making these hand pies wonderful served warm with a scoop of vanilla ice cream melting into the flaky layers, or simply enjoyed as they are while still slightly warm to the touch.
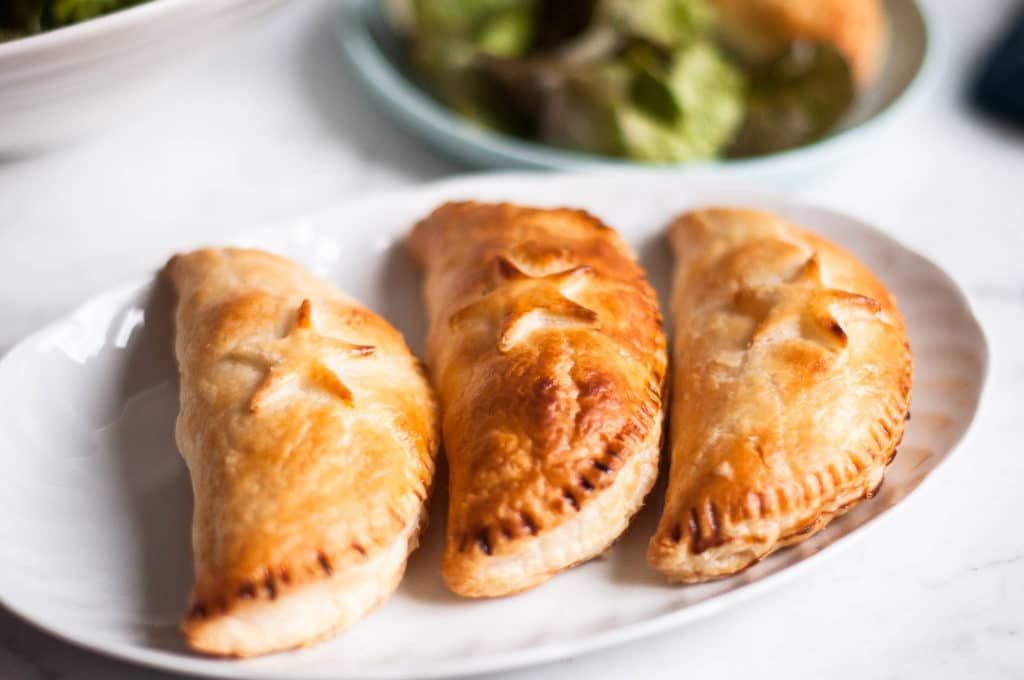
Savory Beef and Cheese Hand Pies
Zigzagging through my thoughts today, I find myself drawn to the comforting memory of savory hand pies, those golden parcels that hold warmth and nostalgia in every flaky bite. There’s something quietly magical about how simple ingredients transform into portable meals that feel like edible hugs, perfect for chilly afternoons or packed lunches that whisper of home.
Ingredients
– 1 lb ground beef (85% lean works well for flavor)
– 1 medium yellow onion, finely diced (about 1 cup)
– 2 cloves garlic, minced
– 1 tbsp olive oil (or any neutral oil)
– 1 tsp Worcestershire sauce
– 1/2 tsp smoked paprika
– 1/4 tsp black pepper, freshly ground
– 1/2 cup shredded cheddar cheese
– 1 package (14 oz) refrigerated pie crusts, thawed if frozen
– 1 large egg, beaten with 1 tbsp water for egg wash
Instructions
1. Heat olive oil in a large skillet over medium heat until shimmering, about 1 minute.
2. Add diced onion and cook for 4–5 minutes until translucent and fragrant, stirring occasionally to prevent burning.
3. Stir in minced garlic and cook for 30 seconds until aromatic but not browned.
4. Add ground beef, breaking it apart with a spatula, and cook for 6–8 minutes until no pink remains.
5. Drain excess fat from the skillet using a spoon, tilting the pan carefully.
6. Sprinkle smoked paprika and black pepper over the beef mixture, stirring to coat evenly.
7. Drizzle Worcestershire sauce into the skillet and cook for 1 minute to blend flavors.
8. Remove skillet from heat and fold in shredded cheddar cheese until just melted.
9. Unroll pie crusts on a lightly floured surface and cut each into 4 equal wedges using a sharp knife or pizza cutter.
10. Spoon 2 tablespoons of filling onto one half of each wedge, leaving a 1/2-inch border around the edges.
11. Brush edges of each wedge with egg wash using a pastry brush to help seal.
12. Fold the empty half of each wedge over the filling, pressing edges firmly with a fork to crimp.
13. Transfer hand pies to a parchment-lined baking sheet, spacing them 1 inch apart.
14. Brush tops with remaining egg wash and cut 2–3 small slits in each for steam to escape.
15. Bake at 400°F for 18–20 minutes until crusts are golden brown and flaky.
Just out of the oven, these hand pies offer a delightful contrast: shatteringly crisp crusts giving way to a juicy, savory filling where the beef’s richness mingles with sharp cheddar. I love serving them slightly warm with a dollop of cool sour cream or packing them for picnics where their portable charm feels like a secret shared between friends.
Blueberry Lemon Hand Pies with Glaze

Cradling a warm pastry in my hands always feels like holding a small piece of comfort, especially when it’s one of these blueberry lemon hand pies. There’s something quietly magical about how the sweet berries and bright citrus mingle inside a flaky crust, creating little pockets of joy that fit perfectly in your palm. Making them feels like a slow, deliberate act of kindness for yourself or someone you love.
Ingredients
– 2 cups all-purpose flour, plus extra for dusting
– 1/2 teaspoon salt
– 3/4 cup cold unsalted butter, cubed
– 1/4 cup ice water, adding more if needed
– 1 cup fresh blueberries, frozen work well too
– 2 tablespoons granulated sugar
– 1 teaspoon lemon zest
– 1 tablespoon lemon juice
– 1 large egg, lightly beaten for egg wash
– 1/2 cup powdered sugar for glaze
– 1-2 tablespoons milk for glaze, adjusting consistency
Instructions
1. Combine 2 cups all-purpose flour and 1/2 teaspoon salt in a large bowl.
2. Cut 3/4 cup cold cubed butter into the flour mixture using a pastry cutter until pea-sized crumbs form.
3. Gradually add 1/4 cup ice water, mixing just until the dough comes together, being careful not to overwork it.
4. Divide the dough into two equal discs, wrap tightly in plastic wrap, and refrigerate for 30 minutes until firm.
5. While dough chills, combine 1 cup blueberries, 2 tablespoons granulated sugar, 1 teaspoon lemon zest, and 1 tablespoon lemon juice in a separate bowl.
6. Lightly mash about one-third of the blueberries with a fork to help release their natural juices.
7. Preheat your oven to 375°F and line a baking sheet with parchment paper.
8. Roll out one disc of chilled dough on a floured surface to 1/8-inch thickness.
9. Cut the dough into 4-inch circles using a round cutter or bowl.
10. Place about 1 tablespoon of the blueberry filling in the center of each circle.
11. Brush the edges of each circle lightly with beaten egg using a pastry brush.
12. Fold each circle in half over the filling and press edges firmly together with your fingers.
13. Crimp the sealed edges with a fork to create a decorative pattern and prevent leaking.
14. Transfer the hand pies to the prepared baking sheet, spacing them about 1 inch apart.
15. Brush the tops of each hand pie with the remaining beaten egg wash.
16. Cut 2-3 small slits in the top of each pie to allow steam to escape during baking.
17. Bake at 375°F for 18-22 minutes until the crust is golden brown and flaky.
18. While pies bake, whisk together 1/2 cup powdered sugar and 1 tablespoon milk until smooth for the glaze.
19. Add more milk, one teaspoon at a time, if the glaze seems too thick for drizzling.
20. Remove baked hand pies from the oven and let cool on the baking sheet for 5 minutes.
21. Transfer the slightly warm hand pies to a wire rack set over parchment paper.
22. Drizzle the glaze over the cooled hand pies using a spoon or piping bag.
23. Let the glaze set for 10-15 minutes before serving.
Buttery flakes give way to that burst of warm, jammy blueberries brightened by lemon’s gentle zing. The simple glaze adds just enough sweetness to balance the tart filling, making these hand pies perfect for packing in lunchboxes or serving with afternoon tea. I love them still slightly warm, when the crust shatters delicately with each bite.
Pumpkin Spice Hand Pies with Cream Cheese Frosting
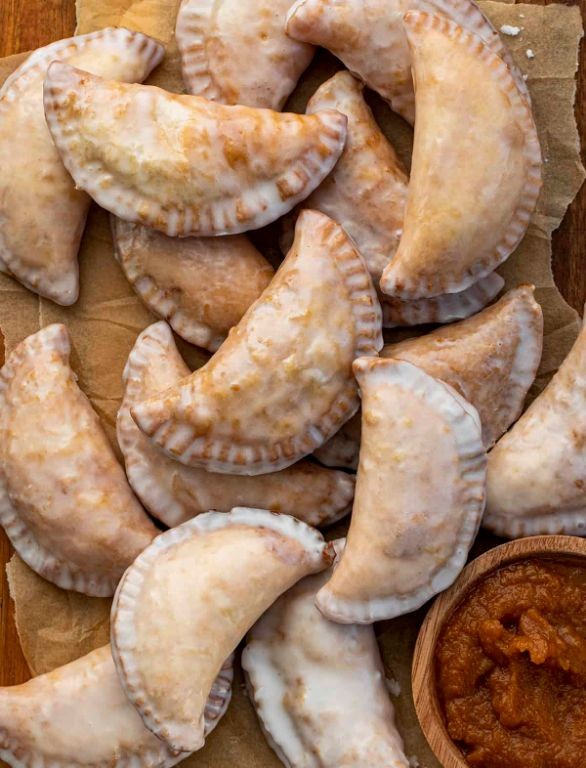
Folding the dough between my fingers, I remember how autumn arrives not with a shout, but with the quiet rustle of pastry and the warm scent of spices drifting through the kitchen. These little hand pies hold the coziness of the season in each flaky, spiced bite, a gentle comfort for crisp afternoons.
Ingredients
– 2 cups all-purpose flour, plus extra for dusting
– 1/2 cup cold unsalted butter, cubed (keep chilled until use)
– 1/4 cup ice water, or as needed to bring dough together
– 1 cup pumpkin puree (not pumpkin pie filling)
– 1/4 cup brown sugar, packed
– 1 tsp pumpkin pie spice, or adjust to preference
– 1/4 tsp salt, for balance
– 1 large egg, beaten for egg wash
– 4 oz cream cheese, softened to room temperature
– 1/2 cup powdered sugar, sifted to avoid lumps
– 1 tbsp milk, or more for desired frosting consistency
Instructions
1. Combine 2 cups flour and 1/4 tsp salt in a large bowl.
2. Cut in 1/2 cup cold cubed butter using a pastry cutter or your fingertips until the mixture resembles coarse crumbs.
3. Gradually add 1/4 cup ice water, stirring until the dough just comes together—avoid overmixing for a flaky crust.
4. Shape the dough into a disk, wrap in plastic, and refrigerate for 30 minutes to relax the gluten.
5. In a separate bowl, mix 1 cup pumpkin puree, 1/4 cup brown sugar, and 1 tsp pumpkin pie spice until smooth.
6. Roll out the chilled dough on a floured surface to 1/8-inch thickness.
7. Cut the dough into 3-inch circles using a round cutter or glass.
8. Place 1 tablespoon of the pumpkin filling in the center of half the dough circles.
9. Brush the edges of the filled circles with beaten egg to help seal.
10. Top each with another dough circle and press the edges firmly with a fork to crimp.
11. Brush the tops of all hand pies with the remaining beaten egg for a golden finish.
12. Bake at 375°F for 18–20 minutes, until the crust is golden brown and flaky.
13. While the pies cool, beat 4 oz softened cream cheese, 1/2 cup powdered sugar, and 1 tbsp milk until smooth and spreadable.
14. Drizzle or spread the cream cheese frosting over the cooled hand pies.
Velvety spiced pumpkin melts into the crisp, buttery layers, while the tangy frosting cuts through the sweetness. Serve them warm with a mug of chai or pack them for a picnic—they’re little pockets of autumn you can carry anywhere.
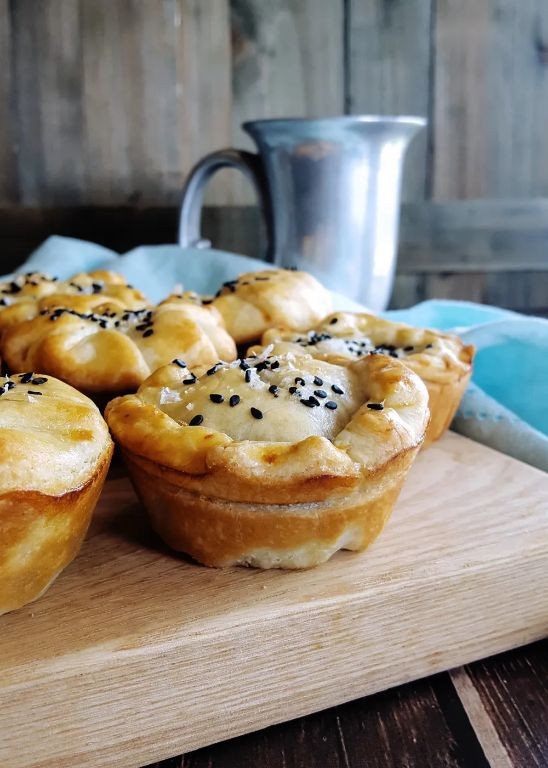
Chicken Pot Pie Hand Pies

Comfort comes in many forms, but few things feel quite as nurturing as holding a warm, flaky pastry filled with savory goodness. These chicken pot pie hand pies capture that familiar coziness in a perfectly portable package, ideal for quiet afternoons when you need a moment of gentle satisfaction. They’re like little edible hugs, simple to make yet deeply rewarding.
Ingredients
– 2 cups cooked, shredded chicken (rotisserie chicken works well for convenience)
– 1 cup frozen mixed vegetables (peas, carrots, corn, and green beans blend nicely)
– 1/2 cup diced yellow onion (sauté until soft for sweeter flavor)
– 1/4 cup unsalted butter (or dairy-free alternative if preferred)
– 1/4 cup all-purpose flour (spoon and level for accuracy)
– 1 1/2 cups chicken broth (low-sodium lets you control seasoning)
– 1/3 cup heavy cream (or whole milk for a lighter option)
– 1 tsp dried thyme (crush between fingers to release aroma)
– 1/2 tsp garlic powder (fresh minced garlic also works)
– 1 package (14 oz) refrigerated pie crusts (thawed if frozen)
– 1 large egg (lightly beaten with 1 tbsp water for egg wash)
– 1/2 tsp salt (adjust based on broth saltiness)
– 1/4 tsp black pepper (freshly cracked adds brightness)
Instructions
1. Preheat your oven to 400°F and line a baking sheet with parchment paper.
2. Melt the butter in a large skillet over medium heat until foamy.
3. Add the diced onion and cook for 4-5 minutes, stirring occasionally, until translucent and fragrant.
4. Sprinkle the flour over the onions and butter, whisking continuously for 1 minute to form a pale golden roux.
5. Gradually pour in the chicken broth while whisking constantly to prevent lumps.
6. Stir in the heavy cream, dried thyme, garlic powder, salt, and black pepper.
7. Cook the sauce for 3-4 minutes, whisking frequently, until it thickens enough to coat the back of a spoon.
8. Add the shredded chicken and frozen vegetables, stirring gently to coat evenly.
9. Remove the skillet from heat and let the filling cool for 10 minutes to prevent soggy crusts.
10. Unroll the pie crusts on a lightly floured surface and cut each into 4 equal wedges using a sharp knife or pizza cutter.
11. Spoon 3 tablespoons of filling onto the center of each crust wedge, leaving a 1/2-inch border.
12. Brush the edges of each crust with the egg wash using a pastry brush.
13. Fold each crust over the filling to form a triangle, pressing the edges firmly with your fingers.
14. Crimp the sealed edges with a fork to ensure they’re fully closed.
15. Brush the tops of the hand pies with the remaining egg wash for a golden finish.
16. Cut three small slits in the top of each hand pie with a knife to allow steam to escape.
17. Arrange the hand pies on the prepared baking sheet, spacing them 1 inch apart.
18. Bake for 18-20 minutes, or until the crusts are puffed and deep golden brown.
19. Transfer the hand pies to a wire rack to cool for 5 minutes before serving.
Each bite reveals a flaky, buttery crust that shatters delicately, giving way to a creamy, herb-kissed filling studded with tender chicken and vegetables. Enjoy them warm with a simple side salad for a balanced meal, or pack them for a picnic where their portable charm truly shines.
Strawberry Rhubarb Hand Pies
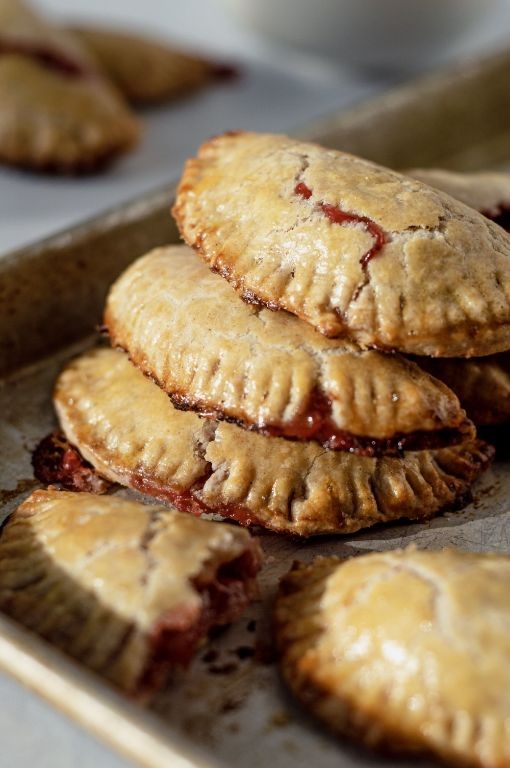
Folding the dough between my fingers, I remember how these little pies first came to me during a rainy afternoon—the way the tart rhubarb and sweet strawberries create pockets of comfort that fit perfectly in your palm, warm from the oven and tender with memories.
Ingredients
– 2 cups all-purpose flour (plus extra for dusting)
– 1/2 cup cold unsalted butter, cubed (keep chilled until use)
– 1/4 cup ice water (add gradually as needed)
– 1 cup diced rhubarb (fresh or frozen, thawed)
– 1 cup chopped strawberries (hulled and roughly chopped)
– 1/4 cup granulated sugar (adjust for sweetness preference)
– 1 tbsp lemon juice (freshly squeezed for brightness)
– 1 tsp vanilla extract (pure for best flavor)
– 1 egg, beaten (for egg wash, optional but recommended)
– Coarse sugar for sprinkling (or substitute with turbinado sugar)
Instructions
1. Combine flour and cold butter in a large bowl, using a pastry cutter or your fingertips to work the butter into pea-sized crumbs.
2. Gradually add ice water, 1 tablespoon at a time, mixing just until the dough comes together without overworking it.
3. Shape the dough into a disc, wrap tightly in plastic wrap, and chill in the refrigerator for at least 30 minutes to prevent shrinkage during baking.
4. While dough chills, mix rhubarb, strawberries, granulated sugar, lemon juice, and vanilla extract in a separate bowl, stirring gently to coat the fruit evenly.
5. Preheat oven to 375°F and line a baking sheet with parchment paper to avoid sticking.
6. Roll out the chilled dough on a lightly floured surface to 1/8-inch thickness, using a floured rolling pin to prevent tearing.
7. Cut the dough into 4-inch circles using a round cutter or inverted bowl, re-rolling scraps as needed.
8. Spoon about 2 tablespoons of the fruit mixture onto the center of each dough circle, leaving a 1/2-inch border around the edges.
9. Brush the edges of the dough with beaten egg to help seal the pies, then fold each circle in half over the filling.
10. Crimp the edges firmly with a fork to create a tight seal, preventing leaks during baking.
11. Brush the tops of the hand pies with the remaining egg wash and sprinkle generously with coarse sugar for a sparkling finish.
12. Cut 2-3 small slits in the top of each pie with a sharp knife to allow steam to escape and avoid bursting.
13. Bake for 20-25 minutes, or until the crust is golden brown and the filling bubbles slightly through the slits.
14. Cool the pies on a wire rack for at least 10 minutes before serving to let the filling set. Crisp, buttery layers give way to a jammy, tangy-sweet center that pairs beautifully with a dollop of whipped cream or a quiet moment by the window, their rustic charm inviting you to savor each flaky bite slowly.
Peach Cobbler Hand Pies

Softly, as the afternoon light filters through my kitchen window, I find myself drawn to the simple comfort of turning summer’s sweetest fruit into something warm and handheld—a gentle reminder that some of the best moments are the ones we can hold in our hands.
Ingredients
- 2 cups all-purpose flour, plus extra for dusting
- 1/2 cup unsalted butter, chilled and cubed (or vegan butter for dairy-free)
- 1/4 cup ice water, adding more if needed
- 2 cups fresh peaches, peeled and diced (frozen work too, thawed and drained)
- 1/4 cup granulated sugar, plus extra for sprinkling
- 1 tsp ground cinnamon
- 1 large egg, beaten (or milk for egg-free)
Instructions
- Combine 2 cups flour and 1/2 cup chilled butter in a bowl, using a pastry cutter until the mixture resembles coarse crumbs.
- Gradually add 1/4 cup ice water, mixing just until the dough comes together, being careful not to overwork it to keep the crust tender.
- Divide the dough into two equal discs, wrap in plastic, and chill in the refrigerator for 30 minutes to prevent shrinking during baking.
- In a separate bowl, toss 2 cups diced peaches with 1/4 cup sugar and 1 tsp cinnamon until evenly coated, letting it sit for 10 minutes to release juices.
- Roll out one dough disc on a floured surface to 1/8-inch thickness, then cut into 4-inch circles using a cookie cutter or bowl.
- Spoon about 2 tablespoons of the peach mixture onto the center of each dough circle, leaving a 1/2-inch border around the edges.
- Brush the edges of the dough with the beaten egg to help seal the pies, then fold each circle over the filling to form a half-moon shape.
- Press the edges firmly with a fork to crimp and seal, ensuring no filling leaks out during baking.
- Place the hand pies on a parchment-lined baking sheet, brush the tops with the remaining beaten egg, and sprinkle lightly with sugar.
- Bake at 375°F for 18–22 minutes, or until the crust is golden brown and the filling is bubbly, rotating the sheet halfway for even browning.
- Transfer the pies to a wire rack and let cool for 10 minutes before serving to allow the filling to set.
Heavenly warm from the oven, these hand pies offer a flaky, buttery crust that shatters delicately with each bite, giving way to a juicy, cinnamon-kissed peach filling. For a cozy twist, serve them alongside a scoop of vanilla bean ice cream, letting the cold creaminess melt into the warm spices, or pack them for a picnic where their portable sweetness feels like a secret shared between friends.
Spinach and Feta Hand Pies
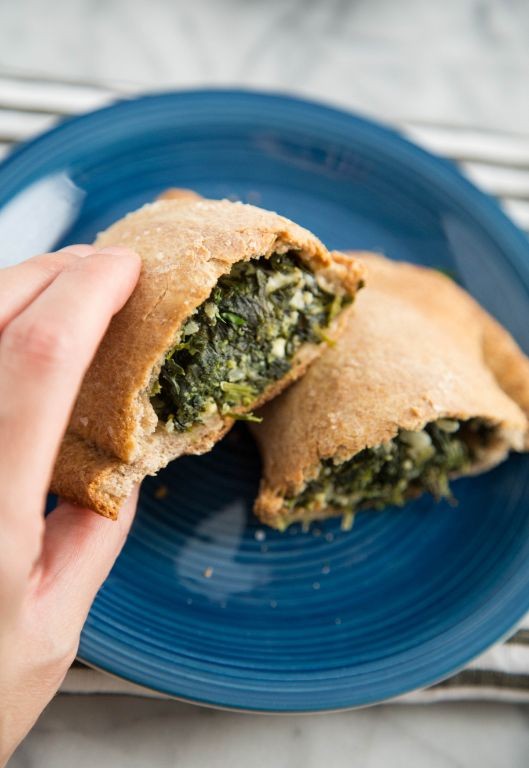
Nostalgia has a way of settling in the kitchen, where the simple act of folding dough around filling feels like wrapping comfort in a flaky embrace. These spinach and feta hand pies are my quiet afternoon companions, their savory warmth a gentle reminder of unhurried moments and the joy of creating something by hand.
Ingredients
– 2 cups all-purpose flour, plus extra for dusting
– 1/2 cup cold unsalted butter, cubed (keep chilled until use)
– 1/3 cup ice water, or as needed to bring dough together
– 1 large egg, lightly beaten (for egg wash)
– 10 oz frozen chopped spinach, thawed and squeezed dry
– 1 cup crumbled feta cheese
– 1/4 cup finely chopped yellow onion
– 1 tbsp olive oil, or any neutral oil
– 1/2 tsp dried dill, or 1 tbsp fresh dill
– 1/4 tsp black pepper
– 1/4 tsp salt, adjust to taste
Instructions
1. Combine 2 cups all-purpose flour and 1/4 tsp salt in a large bowl.
2. Add 1/2 cup cold cubed butter to the flour mixture, using your fingers or a pastry cutter to work it in until pea-sized crumbs form.
3. Gradually drizzle in 1/3 cup ice water, stirring with a fork until the dough just comes together, adding more water 1 tbsp at a time if needed.
4. Turn the dough onto a lightly floured surface and gently knead it 2-3 times until smooth.
5. Shape the dough into a disk, wrap it in plastic wrap, and refrigerate for 30 minutes to relax the gluten and prevent shrinkage.
6. While the dough chills, heat 1 tbsp olive oil in a skillet over medium heat.
7. Sauté 1/4 cup chopped yellow onion for 3-4 minutes until softened and translucent.
8. Add 10 oz thawed, squeezed-dry spinach to the skillet and cook for 2 minutes, stirring to combine.
9. Transfer the spinach mixture to a bowl and let it cool for 5 minutes to prevent melting the butter in the dough.
10. Stir in 1 cup crumbled feta, 1/2 tsp dried dill, and 1/4 tsp black pepper until evenly mixed.
11. Preheat your oven to 375°F and line a baking sheet with parchment paper.
12. Roll the chilled dough on a floured surface to 1/8-inch thickness.
13. Cut the dough into 6-inch circles using a bowl or cutter, re-rolling scraps as needed.
14. Place 2 heaping tbsp of spinach-feta filling in the center of each dough circle.
15. Brush the edges of each circle with lightly beaten egg wash to help seal.
16. Fold the dough over the filling to form a half-moon shape, pressing the edges firmly together.
17. Crimp the edges with a fork to ensure a tight seal and prevent leaking.
18. Brush the tops of the hand pies with the remaining egg wash for a golden finish.
19. Cut 2-3 small slits in the top of each pie to allow steam to escape during baking.
20. Bake at 375°F for 22-25 minutes until the crust is golden brown and flaky.
21. Let the hand pies cool on the baking sheet for 5 minutes before serving.
Flaky and golden, these hand pies offer a satisfying crunch that gives way to the creamy, tangy filling within. I love serving them slightly warm with a dollop of Greek yogurt for dipping, or packing them cold for a picnic where their portable shape feels just right nestled among wildflowers and quiet conversation.
Chocolate Hazelnut Hand Pies
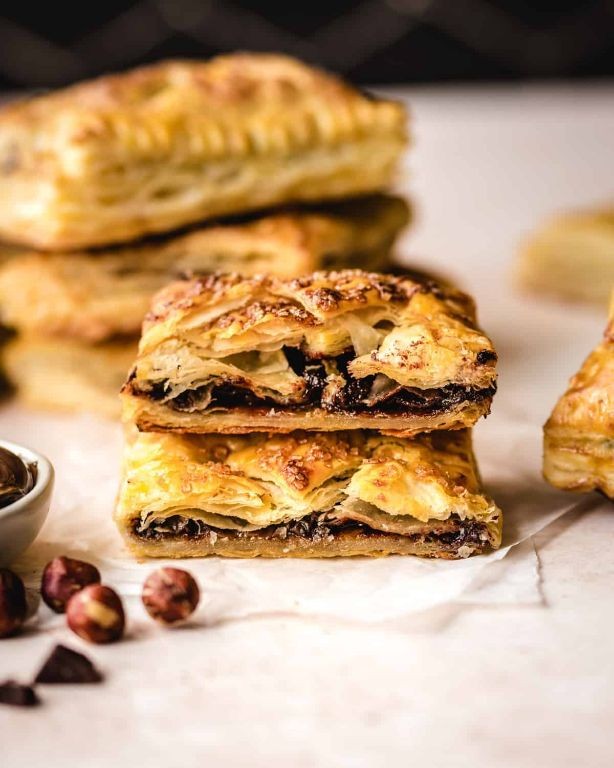
Perhaps there’s something quietly comforting about holding warmth in your hands, about the way flaky pastry gives way to molten chocolate, about creating little pockets of joy that require no plates or ceremony. These chocolate hazelnut hand pies are my autumn ritual, a simple pleasure that fills the kitchen with the scent of toasted nuts and melting chocolate.
Ingredients
- 2 cups all-purpose flour, plus extra for dusting
- 1/2 cup cold unsalted butter, cubed (keep refrigerated until use)
- 1/4 cup ice water, or more as needed
- 1/2 cup chocolate hazelnut spread
- 1 egg, beaten (for egg wash)
- 1 tbsp coarse sugar, for sprinkling
Instructions
- Combine flour and cold butter in a large bowl, using your fingers to work the butter into pea-sized crumbs.
- Gradually add ice water, 1 tablespoon at a time, mixing until the dough just comes together without being sticky.
- Turn dough onto a lightly floured surface and gently knead 2-3 times until smooth, being careful not to overwork it.
- Divide dough into 8 equal portions and roll each into a 5-inch circle about 1/8-inch thick.
- Place 1 tablespoon chocolate hazelnut spread in the center of each circle, leaving a 1/2-inch border clear.
- Brush the edges with beaten egg using a pastry brush, which helps create a secure seal.
- Fold each circle in half over the filling, pressing edges firmly together with your fingers.
- Crimp the sealed edges with a fork, creating decorative ridges that prevent leaking.
- Transfer pies to a parchment-lined baking sheet and refrigerate for 15 minutes to prevent spreading.
- Brush the tops with remaining egg wash and sprinkle generously with coarse sugar.
- Bake at 375°F for 18-20 minutes until golden brown and flaky.
- Cool on the baking sheet for 5 minutes before transferring to a wire rack.
Resist eating them immediately if you can—that first bite reveals layers that shatter delicately, giving way to the warm, oozing center where chocolate and hazelnut mingle like old friends. I sometimes dust them with powdered sugar while still warm or serve alongside a small bowl of vanilla ice cream for dipping, the cold against the heat creating perfect contrast.
Caramelized Onion and Goat Cheese Hand Pies
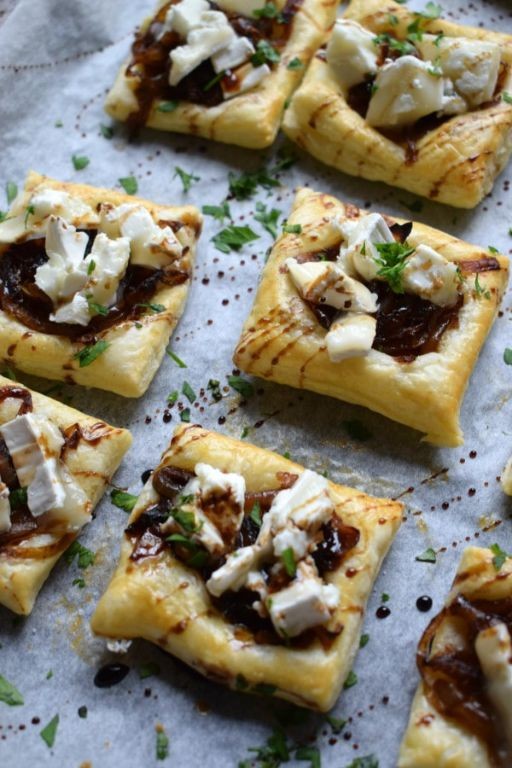
Just now, as the afternoon light slants across my kitchen counter, I find myself thinking about how some foods feel like quiet conversations—these hand pies, with their gentle balance of sweet and tangy, are exactly that kind of whisper. They’re simple, yet deeply comforting, the sort of thing you might make when you need a moment to yourself, your hands busy with dough while your thoughts drift.
Ingredients
– 2 large yellow onions, thinly sliced (they caramelize better when cut evenly)
– 1 tbsp olive oil (or any neutral oil)
– 1/4 tsp salt (adjust to taste)
– 1/4 tsp black pepper
– 4 oz goat cheese, crumbled (soft, room-temperature cheese spreads easier)
– 1 sheet frozen puff pastry, thawed (follow package instructions for thawing)
– 1 egg, beaten (for egg wash, to help browning)
Instructions
1. Heat olive oil in a large skillet over medium-low heat until it shimmers, about 2 minutes.
2. Add sliced onions and sprinkle with salt and pepper, stirring to coat evenly.
3. Cook onions, stirring occasionally, for 30–35 minutes until they turn a deep golden brown and smell sweet—avoid high heat to prevent burning.
4. Remove skillet from heat and let onions cool completely to room temperature, about 15 minutes; this prevents the pastry from getting soggy.
5. Preheat oven to 400°F and line a baking sheet with parchment paper.
6. Unfold the thawed puff pastry sheet on a lightly floured surface and roll it gently to smooth any seams.
7. Cut the pastry into 4 equal squares using a sharp knife or pizza cutter for clean edges.
8. Spoon 2 tablespoons of cooled caramelized onions onto the center of each pastry square, leaving a 1/2-inch border around the edges.
9. Top onions with 1 ounce of crumbled goat cheese per square, distributing it evenly.
10. Brush the pastry edges lightly with beaten egg wash to help seal the pies.
11. Fold each square into a triangle, pressing the edges firmly with your fingers to seal.
12. Crimp the edges with a fork to create a tight seal and prevent filling from leaking.
13. Brush the tops of the hand pies with remaining egg wash for a golden finish.
14. Bake for 18–20 minutes until the pastry is puffed and deep golden brown, rotating the sheet halfway for even baking.
15. Let hand pies cool on the baking sheet for 5 minutes before serving. Underneath that flaky, golden crust, you’ll find the onions have melted into a jammy sweetness, while the goat cheese adds a creamy tang that lingers. Try serving them warm with a drizzle of honey for a touch of extra warmth, or pack one for a quiet picnic where the flavors can truly shine.
Banana Cream Hand Pies
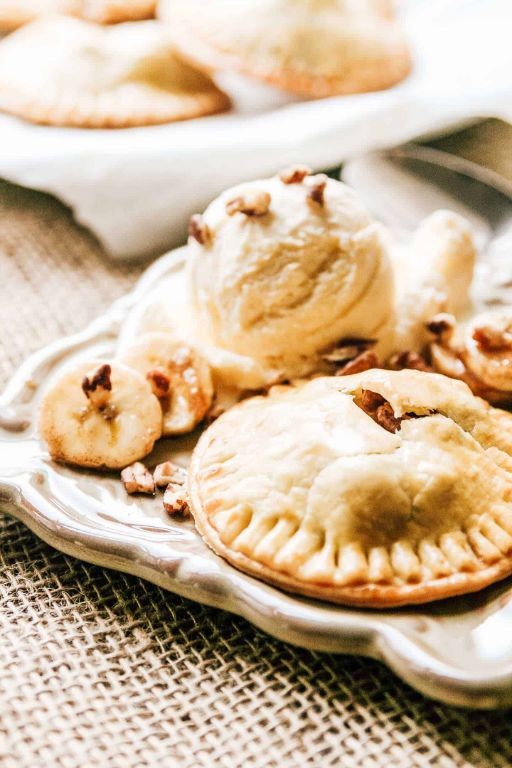
Gently, as the afternoon light fades, I find myself craving something sweet yet simple, something that holds memories in its flaky layers and soft, creamy center. These banana cream hand pies are my quiet answer to that longing, a portable treat that feels both nostalgic and perfectly present. They require little fuss but reward you with warm, comforting bites that melt on the tongue.
Ingredients
– 2 cups all-purpose flour, plus extra for dusting
– 1/2 cup cold unsalted butter, cubed (or shortening for a flakier crust)
– 1/4 cup ice water, adding more if needed
– 2 ripe bananas, mashed (spotty ones are sweeter)
– 1/4 cup granulated sugar
– 1/2 tsp vanilla extract
– 1 large egg, beaten (for egg wash)
– 1 tbsp coarse sugar, for sprinkling
Instructions
1. In a large bowl, whisk together 2 cups all-purpose flour and 1/4 teaspoon salt until evenly combined.
2. Add 1/2 cup cold, cubed unsalted butter to the flour mixture, and use a pastry cutter or your fingertips to work it in until the mixture resembles coarse crumbs with pea-sized butter pieces.
3. Gradually drizzle in 1/4 cup ice water, stirring with a fork until the dough just comes together; if it feels dry, add more water 1 tablespoon at a time.
4. Turn the dough out onto a lightly floured surface, and gently knead it 2-3 times until it forms a cohesive ball.
5. Divide the dough in half, shape each half into a disk, wrap tightly in plastic wrap, and refrigerate for at least 30 minutes to chill thoroughly.
6. While the dough chills, mash 2 ripe bananas in a medium bowl until smooth with a few small lumps for texture.
7. Stir 1/4 cup granulated sugar and 1/2 teaspoon vanilla extract into the mashed bananas until fully incorporated; set aside.
8. Preheat your oven to 375°F (190°C) and line a baking sheet with parchment paper.
9. On a floured surface, roll out one disk of dough to 1/8-inch thickness, then use a 4-inch round cutter to cut out circles, re-rolling scraps as needed.
10. Place about 1 tablespoon of the banana filling in the center of each dough circle, leaving a 1/2-inch border around the edges.
11. Brush the edges of the dough with beaten egg wash to help seal the pies.
12. Fold the dough over the filling to form a half-moon shape, and press the edges firmly with a fork to crimp and seal completely.
13. Transfer the hand pies to the prepared baking sheet, and brush the tops lightly with the remaining egg wash.
14. Sprinkle each pie with coarse sugar for a sparkling, crisp finish.
15. Use a sharp knife to cut 2-3 small slits in the top of each pie to allow steam to escape during baking.
16. Bake at 375°F for 18-22 minutes, or until the crust is golden brown and flaky.
17. Let the pies cool on the baking sheet for 5 minutes before transferring to a wire rack to cool completely.
Yielded from the oven, these hand pies offer a delicate crunch that gives way to a lush, banana-sweet filling, with vanilla whispers tying it all together. You might serve them slightly warm with a dusting of powdered sugar, or pack them for a picnic where their portable charm truly shines.
Pulled Pork BBQ Hand Pies
Just yesterday, I found myself standing at the kitchen counter, flour dusting my wrists like early winter snow, thinking about how some of the coziest meals come wrapped in their own little packages. These hand pies cradle slow-cooked memories within flaky crusts, perfect for chilly evenings when you want to hold warmth right in your hands.
Ingredients
– 2 cups all-purpose flour, plus extra for dusting
– 1/2 cup cold unsalted butter, cubed small
– 1/3 cup ice water, or just enough to bring dough together
– 1 1/2 cups pulled pork, shredded (use leftover or store-bought)
– 1/4 cup BBQ sauce, plus extra for brushing
– 1 egg, beaten (for egg wash)
– 1/2 tsp salt, adjust to taste
Instructions
1. Combine 2 cups flour and 1/2 tsp salt in a large bowl.
2. Cut in 1/2 cup cold butter using a pastry cutter until mixture resembles coarse crumbs.
3. Gradually add 1/3 cup ice water, stirring until dough just comes together.
4. Turn dough onto a floured surface and gently knead 3-4 times until smooth.
5. Wrap dough in plastic and refrigerate for 30 minutes to prevent shrinkage during baking.
6. Preheat oven to 375°F and line a baking sheet with parchment paper.
7. Roll chilled dough to 1/8-inch thickness on a floured surface.
8. Cut dough into 6-inch circles using a bowl or cutter.
9. Mix 1 1/2 cups pulled pork with 1/4 cup BBQ sauce in a separate bowl.
10. Place 2 tablespoons pork mixture in the center of each dough circle.
11. Brush edges of dough circles with beaten egg using a pastry brush.
12. Fold dough over filling and press edges firmly with a fork to seal.
13. Brush tops of hand pies with remaining beaten egg for golden color.
14. Cut 2-3 small slits in the top of each pie to allow steam to escape.
15. Bake at 375°F for 20-25 minutes until crust is golden brown and flaky.
16. Cool on baking sheet for 5 minutes before serving.
Flaky golden crust gives way to tender, smoky pork that’s been hugged by sweet barbecue sauce, creating pockets of pure comfort. I love serving these still warm from the oven with extra sauce for dipping, watching steam curl upward like little invitations to pause and savor.
Cherry Almond Hand Pies
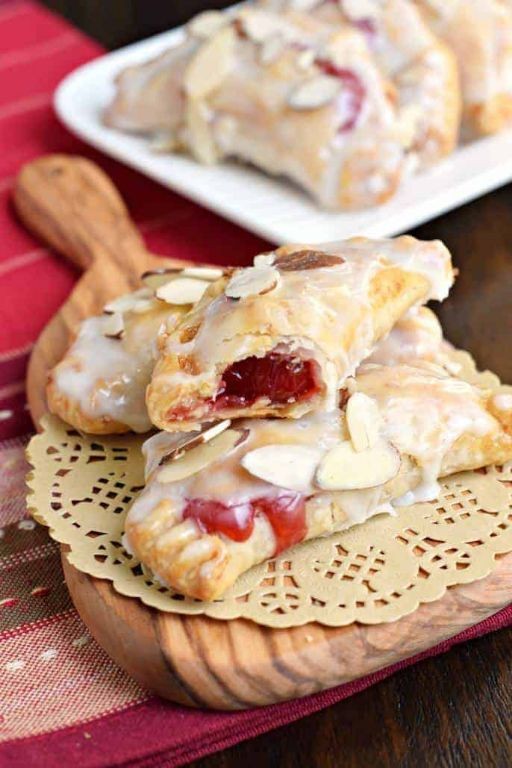
Folding the dough between my fingers, I remember how these cherry almond hand pies first came to me—a rainy afternoon, the kitchen window steamed, and that longing for something sweet and handheld that felt like a secret just for me.
Ingredients
– 2 cups all-purpose flour, plus extra for dusting
– 1/2 cup cold unsalted butter, cubed (keep chilled until use)
– 1/4 cup ice water, add more if dough feels dry
– 1 cup pitted cherries, fresh or frozen (thaw if frozen)
– 1/4 cup granulated sugar, adjust for sweetness preference
– 1 tsp almond extract, or vanilla for a different flavor
– 1 egg, lightly beaten for egg wash
– 2 tbsp sliced almonds, for topping
Instructions
1. Combine 2 cups all-purpose flour and 1/2 cup cold cubed butter in a large bowl, using a pastry cutter or fingers to work butter into pea-sized crumbs.
2. Gradually add 1/4 cup ice water, mixing until dough just comes together; if it feels dry, add more water 1 tbsp at a time.
3. Turn dough onto a floured surface, knead gently 2–3 times until smooth, then shape into a disk, wrap in plastic, and chill for 30 minutes in refrigerator.
4. While dough chills, mix 1 cup pitted cherries, 1/4 cup granulated sugar, and 1 tsp almond extract in a bowl, mashing cherries slightly to release juices.
5. Preheat oven to 375°F and line a baking sheet with parchment paper.
6. Roll chilled dough on floured surface to 1/8-inch thickness, then cut into 4-inch circles using a cutter or bowl.
7. Spoon 2 tbsp cherry filling onto one half of each dough circle, leaving a 1/2-inch border around edges.
8. Fold dough over filling, press edges with a fork to seal, and brush tops with beaten egg wash for golden color.
9. Sprinkle 2 tbsp sliced almonds over pies, then bake for 20–25 minutes until crust is golden and filling bubbles.
10. Cool on baking sheet for 10 minutes before handling.Each bite reveals a flaky crust that shatters softly, giving way to the tart-sweet cherries and warm almond notes; serve them still slightly warm with a dusting of powdered sugar or alongside a cup of herbal tea for a quiet moment of indulgence.
Sweet Potato Marshmallow Hand Pies
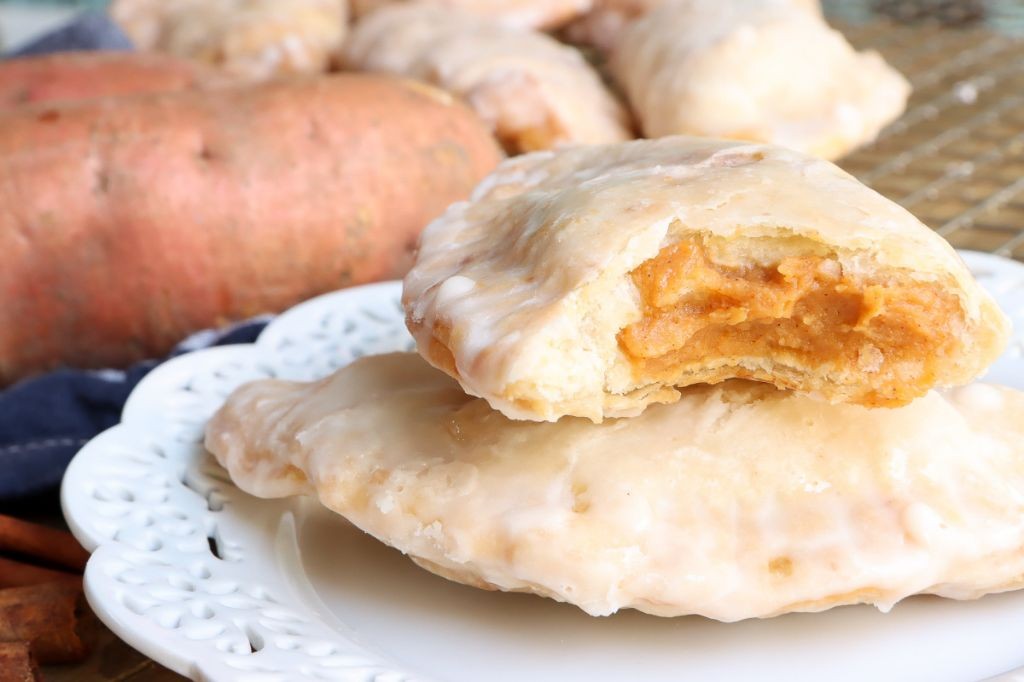
Dusk settles outside my kitchen window, and I find myself reaching for the familiar comfort of sweet potatoes and pastry, remembering how these little hand pies first came to me on a crisp autumn afternoon much like this one.
Ingredients
– 2 cups mashed sweet potatoes (roasted until tender for deeper flavor)
– 1/2 cup mini marshmallows (regular marshmallows chopped work too)
– 1/4 cup brown sugar (light or dark, depending on preference)
– 1 teaspoon cinnamon (plus extra for dusting)
– 1/4 teaspoon nutmeg (freshly grated if possible)
– 1 package refrigerated pie crust (or homemade if you have time)
– 1 egg, beaten (for egg wash)
– 2 tablespoons granulated sugar (for sprinkling)
Instructions
1. Preheat your oven to 375°F and line a baking sheet with parchment paper.
2. In a medium bowl, combine mashed sweet potatoes, mini marshmallows, brown sugar, cinnamon, and nutgently until fully incorporated.
3. Unroll one pie crust onto a lightly floured surface and use a 4-inch round cutter to create 6 circles.
4. Place 1 tablespoon of the sweet potato mixture in the center of each circle, leaving a 1/2-inch border around the edges.
5. Brush the edges of each circle with beaten egg using a pastry brush.
6. Fold each circle in half over the filling, pressing the edges together firmly with your fingers.
7. Crimp the edges with a fork to create a tight seal that prevents leaking during baking.
8. Transfer the hand pies to the prepared baking sheet, spacing them 2 inches apart.
9. Brush the tops of each hand pie with the remaining egg wash.
10. Sprinkle granulated sugar evenly over all the hand pies.
11. Bake for 18-22 minutes, until the crust turns golden brown and you see marshmallow peeking through the seams.
12. Let the hand pies cool on the baking sheet for 10 minutes before serving. Oozing with caramelized marshmallow and spiced sweet potato, these hand pies offer a flaky crust that gives way to a warm, creamy center. They’re perfect nestled in a napkin for chilly evening walks or served with a drizzle of caramel sauce for a more indulgent treat.
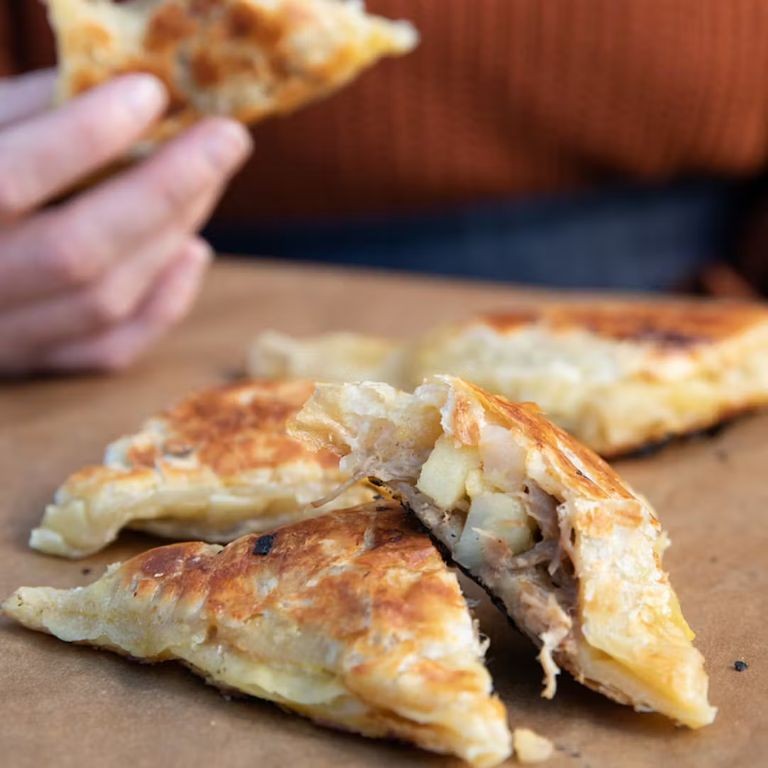
Ham and Cheese Hand Pies
Years ago, I first tasted these little pockets of comfort at a roadside farm stand, the flaky pastry giving way to that perfect salty-sweet combination that still makes me pause mid-bite. There’s something quietly ceremonial about preparing them now, a slow unfolding of dough and memory in my own kitchen. Each fold feels like returning to a simpler version of myself, one who understands that the best meals are often held in the palm of your hand.
Ingredients
- 2 cups all-purpose flour, plus extra for dusting
- 1/2 cup cold unsalted butter, cubed (keep refrigerated until use)
- 1/2 cup whole milk, or substitute with buttermilk for tang
- 1 large egg, lightly beaten for egg wash
- 1 cup diced ham, about 1/4-inch pieces
- 1 cup shredded sharp cheddar cheese
- 1 tbsp Dijon mustard, or whole grain mustard for texture
- 1/2 tsp black pepper, freshly ground if possible
- 1/4 tsp garlic powder
Instructions
- Preheat your oven to 375°F and line a baking sheet with parchment paper.
- Combine 2 cups flour and 1/2 teaspoon salt in a large mixing bowl.
- Add 1/2 cup cold cubed butter to the flour mixture.
- Use your fingertips to rub the butter into the flour until the mixture resembles coarse crumbs with some pea-sized butter pieces remaining.
- Gradually add 1/2 cup whole milk, stirring with a fork until a shaggy dough forms.
- Turn the dough out onto a lightly floured surface and gently knead just until it comes together, about 30 seconds.
- Roll the dough into a 1/4-inch thick rectangle using a floured rolling pin.
- Cut the dough into 6 equal rectangles using a sharp knife or pastry wheel.
- Spread about 1/2 teaspoon Dijon mustard evenly over each dough rectangle, leaving a 1/2-inch border around the edges.
- Divide 1 cup diced ham evenly among the dough rectangles, placing it over the mustard.
- Sprinkle 1 cup shredded cheddar cheese evenly over the ham on each rectangle.
- Season the filling with 1/2 teaspoon black pepper and 1/4 teaspoon garlic powder.
- Brush the exposed edges of each rectangle with the beaten egg using a pastry brush.
- Fold each rectangle in half to form a square pocket, pressing the edges firmly together with your fingers.
- Crimp the edges of each hand pie with a fork to seal completely.
- Transfer the hand pies to the prepared baking sheet, spacing them about 2 inches apart.
- Brush the tops of each hand pie with the remaining beaten egg.
- Cut three small slits in the top of each hand pie with a sharp knife to allow steam to escape.
- Bake at 375°F for 20-25 minutes, until the pastry is golden brown and flaky.
- Remove from oven and let cool on the baking sheet for 5 minutes before serving.
Using cold butter ensures the pastry bakes up flaky rather than tough, creating those delicate layers that shatter with each bite. Cutting steam vents prevents the hand pies from bursting open during baking, keeping all that savory filling contained. Letting them rest briefly after baking allows the cheese to set slightly, making them easier to handle while still wonderfully warm. Under that golden, crisp exterior lies a steamy pocket where the sharp cheddar melts into the salty ham, creating little rivers of flavor that pool in the flaky layers. I love serving these nestled in a linen-lined basket for picnics, or simply eating them standing at the counter while the warmth still radiates through my palms.
Raspberry White Chocolate Hand Pies

Zestful moments in the kitchen often arrive unexpectedly, like today when the afternoon light spills across the counter and I find myself reaching for flour and berries, drawn to the quiet comfort of making something sweet and handheld. Raspberry white chocolate hand pies feel like little envelopes of warmth, their flaky crusts holding bursts of tart and creamy filling that melt together in each bite.
Ingredients
– 2 cups all-purpose flour, plus extra for dusting (or substitute with pastry flour for extra tenderness)
– 1/2 cup unsalted butter, cold and cubed (keep refrigerated until use)
– 1/4 cup granulated sugar, plus 1 tbsp for sprinkling
– 1/4 tsp salt
– 1/4 cup ice water, or more as needed
– 1 cup fresh or frozen raspberries (thawed if frozen)
– 1/2 cup white chocolate chips
– 1 large egg, beaten (for egg wash)
Instructions
1. Combine 2 cups all-purpose flour, 1/4 cup granulated sugar, and 1/4 tsp salt in a large bowl.
2. Add 1/2 cup cold, cubed unsalted butter to the flour mixture.
3. Use a pastry cutter or your fingertips to work the butter into the flour until the mixture resembles coarse crumbs with some pea-sized butter pieces remaining.
4. Gradually drizzle in 1/4 cup ice water, stirring with a fork until the dough just comes together; add more water 1 tbsp at a time if needed, but avoid overmixing.
5. Turn the dough out onto a lightly floured surface and gently shape it into a disc.
6. Wrap the dough disc tightly in plastic wrap and refrigerate for at least 30 minutes, or until firm.
7. Preheat your oven to 375°F and line a baking sheet with parchment paper.
8. In a small bowl, gently mix 1 cup raspberries and 1/2 cup white chocolate chips, being careful not to crush the berries.
9. Roll the chilled dough out on a floured surface to 1/8-inch thickness.
10. Use a 4-inch round cutter to cut out circles from the dough, re-rolling scraps as needed.
11. Place 1 tbsp of the raspberry-white chocolate mixture in the center of each dough circle.
12. Brush the edges of the dough circles lightly with beaten egg using a pastry brush.
13. Fold each circle in half over the filling to form a half-moon shape.
14. Press the edges firmly together with your fingers to seal.
15. Crimp the sealed edges with a fork to ensure they are fully closed.
16. Brush the tops of the hand pies with the remaining beaten egg.
17. Sprinkle 1 tbsp granulated sugar evenly over the tops of the hand pies.
18. Cut 2-3 small slits in the top of each hand pie with a sharp knife to allow steam to escape.
19. Arrange the hand pies on the prepared baking sheet, spacing them about 1 inch apart.
20. Bake at 375°F for 18-22 minutes, or until the crust is golden brown and the filling is bubbling slightly.
21. Transfer the hand pies to a wire rack to cool for at least 10 minutes before serving. Just out of the oven, the pastry shatters into buttery flakes against the gooey, jam-like center, where bright raspberry tang meets the mellow sweetness of melted white chocolate. Joyfully, these hand pies pair wonderfully with a drizzle of extra melted chocolate or a dusting of powdered sugar for a simple, elegant touch.
Mexican Street Corn Hand Pies

Often I find myself wandering back to those warm evenings at the taco truck, the air thick with the scent of grilled corn and lime. These hand pies capture that memory, folding the vibrant, creamy chaos of Mexican street corn into a neat, golden pastry pocket. They are a quiet comfort, a handheld piece of summer you can carry with you.
Ingredients
– 1 package (14.1 oz) refrigerated pie crusts, thawed if frozen
– 2 cups frozen corn kernels, thawed
– 1/2 cup mayonnaise
– 1/4 cup crumbled cotija cheese
– 2 tbsp fresh lime juice
– 1 tsp chili powder
– 1/4 cup finely chopped fresh cilantro
– 1 large egg, beaten with 1 tbsp water for egg wash
Instructions
1. Preheat your oven to 400°F and line a large baking sheet with parchment paper.
2. In a medium bowl, combine the thawed corn kernels, mayonnaise, crumbled cotija cheese, fresh lime juice, chili powder, and chopped cilantro until well mixed.
3. Unroll the first pie crust onto a lightly floured surface and use a 4-inch round cutter to cut out 6 circles.
4. Place about 2 tablespoons of the corn filling in the center of each circle, leaving a 1/2-inch border around the edges.
5. Brush the edges of each circle lightly with the egg wash using a pastry brush.
6. Carefully fold one side of the dough over the filling to create a half-moon shape, pressing the edges together firmly.
7. Use the tines of a fork to crimp the sealed edges of each hand pie, which helps prevent the filling from leaking during baking.
8. Transfer the assembled hand pies to the prepared baking sheet, arranging them about 1 inch apart.
9. Brush the tops of each hand pie generously with the remaining egg wash.
10. Bake for 18-22 minutes, or until the pastry is puffed and deeply golden brown all over.
11. Let the hand pies cool on the baking sheet for at least 5 minutes before serving, as the filling will be very hot.
Heavenly is the crackle of that flaky crust giving way to the sweet, creamy corn within, a little spicy and wonderfully tangy. They are perfect just as they are, still warm from the oven, though a drizzle of crema or a sprinkle of extra chili powder makes them feel like a special occasion.
Lemon Meringue Hand Pies

Musing on the quiet comfort of rainy afternoons, I find myself drawn to the simple joy of handheld desserts that carry both nostalgia and sunshine. These lemon meringue hand pies capture that perfect balance of tart and sweet, wrapped in a flaky crust that crumbles with each thoughtful bite.
Ingredients
– 2 cups all-purpose flour, plus extra for dusting
– 1/2 teaspoon salt
– 1 cup cold unsalted butter, cubed (keep chilled until use)
– 1/4 cup ice water, adding more if needed
– 1/2 cup granulated sugar
– 3 tablespoons cornstarch
– 1/4 teaspoon salt
– 1 cup water
– 3 large egg yolks, lightly beaten
– 1/2 cup fresh lemon juice (about 3-4 lemons)
– 2 tablespoons unsalted butter
– 1 teaspoon lemon zest
– 3 large egg whites, at room temperature
– 1/4 teaspoon cream of tartar
– 1/2 cup granulated sugar
Instructions
1. Combine 2 cups flour and 1/2 teaspoon salt in a large bowl.
2. Cut 1 cup cold cubed butter into the flour mixture using a pastry cutter until pea-sized crumbs form.
3. Gradually add 1/4 cup ice water, mixing with a fork until dough just comes together.
4. Divide dough in half, shape into discs, wrap in plastic, and refrigerate for 30 minutes.
5. Whisk together 1/2 cup sugar, 3 tablespoons cornstarch, and 1/4 teaspoon salt in a saucepan.
6. Gradually whisk in 1 cup water until smooth.
7. Cook over medium heat, stirring constantly, until mixture thickens and bubbles, about 5-7 minutes.
8. Remove from heat and slowly whisk in 3 beaten egg yolks.
9. Return to heat and cook for 2 more minutes, stirring constantly.
10. Remove from heat and stir in 1/2 cup lemon juice, 2 tablespoons butter, and 1 teaspoon lemon zest until smooth.
11. Transfer filling to a bowl, press plastic wrap directly on surface, and chill for 1 hour.
12. Preheat oven to 375°F and line a baking sheet with parchment paper.
13. Roll one dough disc to 1/8-inch thickness on a floured surface.
14. Cut into 4-inch circles using a cookie cutter or glass.
15. Place 1 tablespoon chilled filling in the center of each circle.
16. Brush edges with water, fold dough over filling, and crimp edges with a fork.
17. Cut three small slits in the top of each hand pie for steam to escape.
18. Bake for 18-20 minutes until golden brown.
19. While pies bake, beat 3 egg whites and 1/4 teaspoon cream of tartar with an electric mixer on medium speed until foamy.
20. Gradually add 1/2 cup sugar, 1 tablespoon at a time, beating on high until stiff peaks form.
21. Transfer meringue to a piping bag fitted with a star tip.
22. Remove hand pies from oven and let cool for 5 minutes.
23. Pipe meringue onto each hand pie in decorative swirls.
24. Return to oven and bake for 5-7 minutes until meringue tips are lightly browned.
25. Let cool completely on a wire rack before serving.
Flaky pastry gives way to a burst of bright lemon that dances across the tongue, while the toasted meringue adds cloud-like sweetness. I love serving these still slightly warm, where the contrast between crisp crust and creamy filling feels most alive, perhaps with a dusting of powdered sugar for snowy mornings.
Bacon Egg and Cheese Breakfast Hand Pies

Wandering through the quiet kitchen this morning, I found myself craving something warm and handheld, something that would cradle the soul as much as it fills the belly. There’s a gentle comfort in creating these little parcels, each one a self-contained breakfast world. The process itself feels like a slow, deliberate meditation, folding and sealing simple ingredients into something greater than their parts.
Ingredients
- 1 package (14.1 oz) refrigerated pie crusts, thawed (or homemade if you have extra time)
- 6 large eggs, lightly beaten (room temperature blends more smoothly)
- 6 slices thick-cut bacon, cooked crisp and crumbled (reserve 1 tbsp bacon fat)
- 1 cup shredded sharp cheddar cheese
- 2 tbsp whole milk (for richer browning)
- 1/4 tsp black pepper (freshly cracked adds more aroma)
Instructions
- Preheat your oven to 400°F and line a baking sheet with parchment paper.
- Unroll both pie crusts on a lightly floured surface and use a 4-inch round cutter to create 8 circles, re-rolling scraps as needed.
- Whisk the eggs with black pepper in a medium bowl until fully combined and slightly frothy.
- Heat the reserved bacon fat in a nonstick skillet over medium heat until it shimmers, about 1 minute.
- Pour the egg mixture into the skillet and scramble by pushing cooked edges toward the center with a spatula every 20 seconds.
- Remove the eggs from heat when they are softly set but still moist, about 3-4 minutes total.
- Place 4 pie crust circles on the prepared baking sheet and divide the scrambled eggs evenly among them, leaving a 1/2-inch border.
- Sprinkle crumbled bacon and cheddar cheese over the eggs on each crust circle.
- Brush the edges of the filled circles with milk using a pastry brush.
- Top each with remaining pie crust circles and press edges firmly together with your fingers.
- Crimp the sealed edges with a fork to create a tight seal and prevent leaking.
- Cut three small slits in the top of each hand pie with a sharp knife for steam ventilation.
- Brush the tops and edges lightly with remaining milk for a golden finish.
- Bake for 18-20 minutes until the crust is deeply golden and flaky.
- Transfer hand pies to a wire rack and let cool for 5 minutes before handling.
Flaky golden crust gives way to a cloud of softly set eggs, their richness cut by the salty crispness of bacon and the gentle sharpness of cheddar. These hand pies feel wonderfully substantial when warm, the layers distinct yet harmoniously melded. I love wrapping one in a clean kitchen towel for a cozy breakfast in the garden, where the steam rises to meet the cool morning air.
Key Lime Hand Pies with Graham Cracker Crust
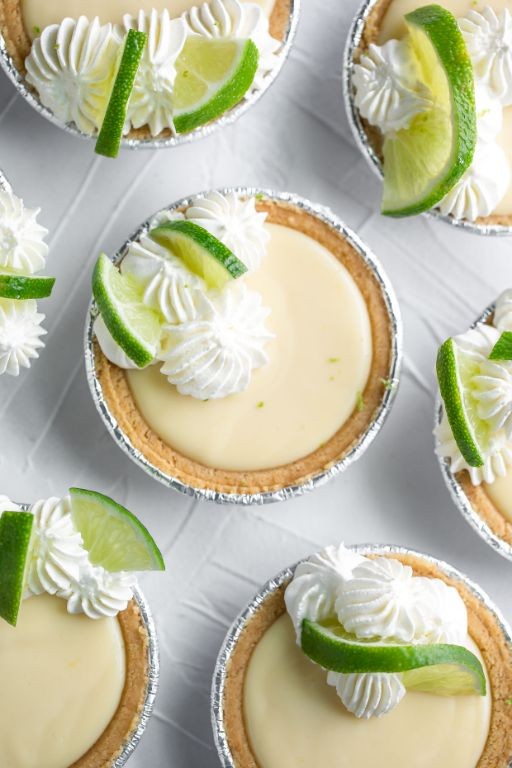
Gently, the memory of Florida sunshine and tart citrus comes back to me, folded into these little handheld treasures that capture vacation in every bite. There’s something quietly comforting about working the dough, filling each pocket with that vibrant lime curd, and watching them turn golden in the oven. It feels like preserving a moment of summer, no matter the season outside.
Ingredients
– 2 cups all-purpose flour (plus extra for dusting)
– 1/2 cup cold unsalted butter, cubed (keep cold until use)
– 1/4 cup ice water (add more if dough feels dry)
– 1/2 cup graham cracker crumbs (about 4 full sheets, crushed fine)
– 1/4 cup granulated sugar (adjust slightly for sweetness preference)
– 1/4 tsp salt (enhances flavor balance)
– 2 large egg yolks (reserve whites for egg wash if desired)
– 1/2 cup key lime juice (freshly squeezed or bottled)
– 1 can (14 oz) sweetened condensed milk (don’t substitute with evaporated milk)
– 1 tsp vanilla extract (pure for best flavor)
– 1 egg white, lightly beaten (for sealing and shine)
– Coarse sugar, for sprinkling (optional, adds crunch)
Instructions
1. In a large bowl, whisk together flour, graham cracker crumbs, granulated sugar, and salt until fully combined.
2. Add cold, cubed butter to the flour mixture, and use a pastry cutter or your fingertips to work it in until the mixture resembles coarse crumbs with some pea-sized butter pieces remaining.
3. Drizzle in ice water and vanilla extract, then stir with a fork just until the dough begins to clump together; avoid overmixing to keep the crust tender.
4. Turn the dough out onto a lightly floured surface, gently knead it 2–3 times to bring it together, then shape into a disc, wrap in plastic, and refrigerate for 30 minutes.
5. While the dough chills, make the filling by whisking sweetened condensed milk, key lime juice, and egg yolks in a medium bowl until smooth and slightly thickened; set aside.
6. Preheat oven to 375°F and line a baking sheet with parchment paper.
7. On a floured surface, roll the chilled dough to 1/8-inch thickness, then use a 4-inch round cutter to cut out circles, re-rolling scraps as needed.
8. Place a heaping tablespoon of lime filling in the center of each dough circle, leaving a 1/2-inch border clear around the edges.
9. Brush the edges lightly with beaten egg white to help seal, then fold each circle in half over the filling, pressing edges firmly with your fingers.
10. Crimp the sealed edges with a fork to ensure they’re tightly closed and won’t leak during baking.
11. Transfer hand pies to the prepared baking sheet, brush tops with remaining egg white, and sprinkle with coarse sugar if using.
12. Cut 2–3 small slits in the top of each pie with a sharp knife to allow steam to escape and prevent bursting.
13. Bake at 375°F for 18–22 minutes, or until the crust is golden brown and the filling is set but slightly jiggly in the center.
14. Cool on the baking sheet for 10 minutes, then transfer to a wire rack to cool completely. Using a sharp knife for slits helps maintain a clean appearance and even baking. Undeniably, the first bite reveals a crisp, buttery crust that gives way to the creamy, tangy lime center—a perfect balance of sweet and tart. These hand pies are lovely warm with a dusting of powdered sugar, or chilled for a firmer, refreshing treat that feels like a secret escape.
Summary
Ultimately, these 20 hand pie recipes offer endless possibilities for delicious, portable meals and treats. We hope you find inspiration to bake up something wonderful for your next gathering or cozy night in. Don’t forget to share which recipes become your favorites in the comments below and pin this article to your Pinterest boards for easy reference!