Are you tired of the same old sandwich routine? We’ve gathered 20 delicious, healthy recipes that will transform your meals from boring to brilliant. Whether you need a quick lunch, satisfying dinner, or portable breakfast, these creative sandwiches prove that healthy eating can be incredibly tasty. Get ready to discover your new favorite combinations that will make every meal something to look forward to!
Avocado and Chickpea Smash Sandwich
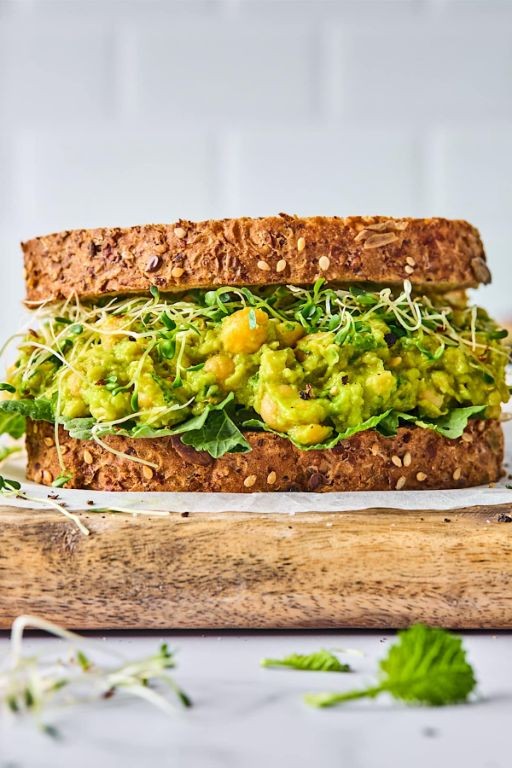
Gently, sometimes the simplest meals become the most comforting, the ones we return to when we need something nourishing that feels like a quiet embrace. This avocado and chickpea smash is one of those recipes for me, a humble assembly that transforms everyday ingredients into something deeply satisfying. It’s a peaceful ritual, a moment to slow down and create something good for both body and soul.
Ingredients
– 1 large, perfectly ripe Hass avocado
– 1 (15-ounce) can of chickpeas, drained and rinsed
– 2 tablespoons of rich extra virgin olive oil
– 1 tablespoon of freshly squeezed lemon juice
– 1/4 cup of finely chopped red onion
– 2 tablespoons of finely chopped fresh cilantro
– 1/4 teaspoon of finely ground sea salt
– 1/8 teaspoon of freshly cracked black pepper
– 4 slices of hearty whole-grain bread
Instructions
1. Place the drained and rinsed chickpeas into a medium mixing bowl.
2. Use a potato masher or fork to thoroughly mash the chickpeas until no whole beans remain, creating a coarse, textured base.
3. Halve the large, ripe Hass avocado, remove the pit, and scoop the green flesh into the bowl with the mashed chickpeas.
4. Add the 2 tablespoons of rich extra virgin olive oil and 1 tablespoon of freshly squeezed lemon juice to the bowl.
5. Mash everything together with the potato masher or fork until the avocado is creamy and the mixture is well combined but still retains some texture.
6. Fold in the 1/4 cup of finely chopped red onion and 2 tablespoons of finely chopped fresh cilantro until evenly distributed.
7. Season the mixture with 1/4 teaspoon of finely ground sea salt and 1/8 teaspoon of freshly cracked black pepper, stirring gently to incorporate.
8. Toast the 4 slices of hearty whole-grain bread in a toaster or oven until golden brown and crisp, about 3-4 minutes at 375°F if using an oven.
9. Divide the avocado and chickpea smash evenly between two slices of the toasted bread.
10. Top with the remaining two slices of toast to form sandwiches, pressing down lightly.
Freshly made, the sandwich offers a wonderful contrast of creamy avocado and chickpea smash against the crisp, nutty whole-grain toast. The bright acidity from the lemon and the sharp bite of red onion cut through the richness beautifully. For a delightful variation, try serving the smash open-faced on toasted sourdough and topped with a sprinkle of microgreens for an extra layer of flavor and color.
Grilled Chicken and Spinach Wrap
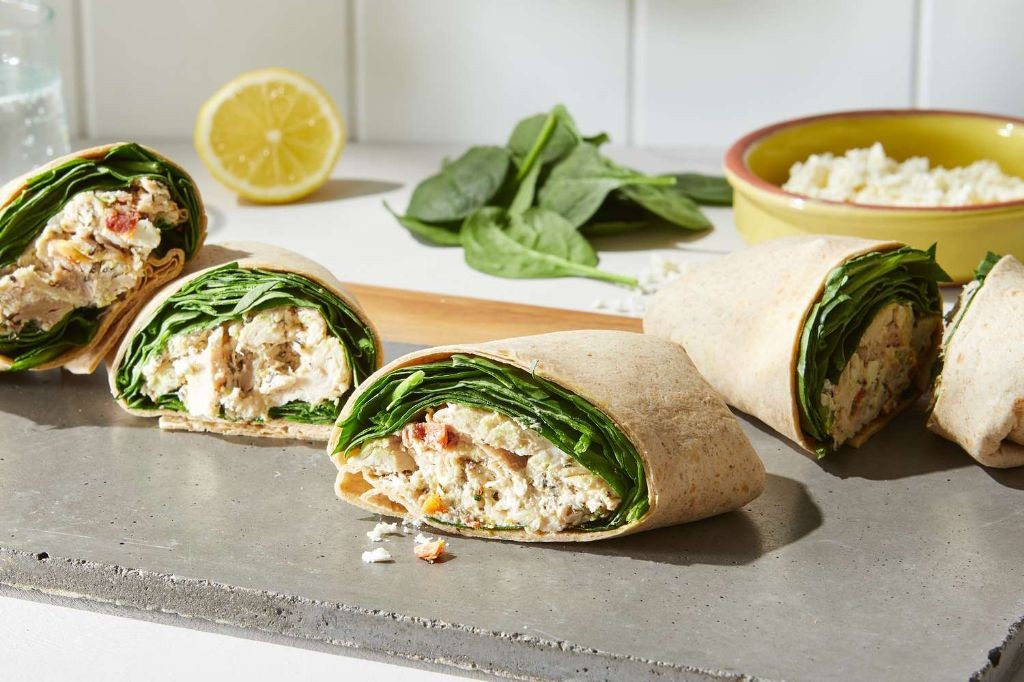
Kind of like those quiet afternoons when the kitchen becomes a sanctuary, this wrap holds simple comforts within its tender embrace. It’s a gentle assembly of grilled chicken and fresh greens, folded together for a meal that feels both nourishing and deeply personal.
Ingredients
– 2 boneless, skinless chicken breasts, patted dry with paper towels
– 1 tablespoon rich extra virgin olive oil
– 1 teaspoon fragrant garlic powder
– ½ teaspoon finely ground black pepper
– ½ teaspoon flaky sea salt
– 4 large flour tortillas, soft and pliable
– 2 cups fresh baby spinach leaves, vibrant and crisp
– ½ cup creamy mayonnaise
– 1 tablespoon tangy Dijon mustard
– 1 teaspoon bright lemon juice
Instructions
1. Preheat your grill or grill pan to 400°F, ensuring the grates are clean and lightly oiled to prevent sticking.
2. Brush both sides of the chicken breasts with the rich extra virgin olive oil, coating them evenly.
3. Sprinkle the fragrant garlic powder, finely ground black pepper, and flaky sea salt evenly over both sides of the chicken.
4. Place the seasoned chicken on the preheated grill and cook for 6 minutes without moving it to develop grill marks.
5. Flip the chicken using tongs and cook for another 6 minutes, or until the internal temperature reaches 165°F when checked with a meat thermometer.
6. Transfer the grilled chicken to a cutting board and let it rest for 5 minutes to allow the juices to redistribute.
7. While the chicken rests, warm the soft flour tortillas in a dry skillet over medium heat for 30 seconds per side until pliable.
8. In a small bowl, whisk together the creamy mayonnaise, tangy Dijon mustard, and bright lemon juice until smooth.
9. Thinly slice the rested chicken against the grain into ¼-inch strips.
10. Spread 2 tablespoons of the mayonnaise mixture evenly over the center of each warmed tortilla.
11. Arrange ½ cup of the vibrant baby spinach leaves over the sauce on each tortilla.
12. Divide the sliced chicken evenly among the tortillas, placing it over the spinach.
13. Fold the bottom edge of each tortilla up over the filling, then fold in the sides and roll tightly away from you to form a secure wrap.
Cutting the wrap diagonally reveals layers of tender chicken and crisp spinach, with the creamy sauce melding everything together in a quiet harmony. Serve it alongside a simple salad or enjoy it as a handheld meal during a peaceful moment alone.
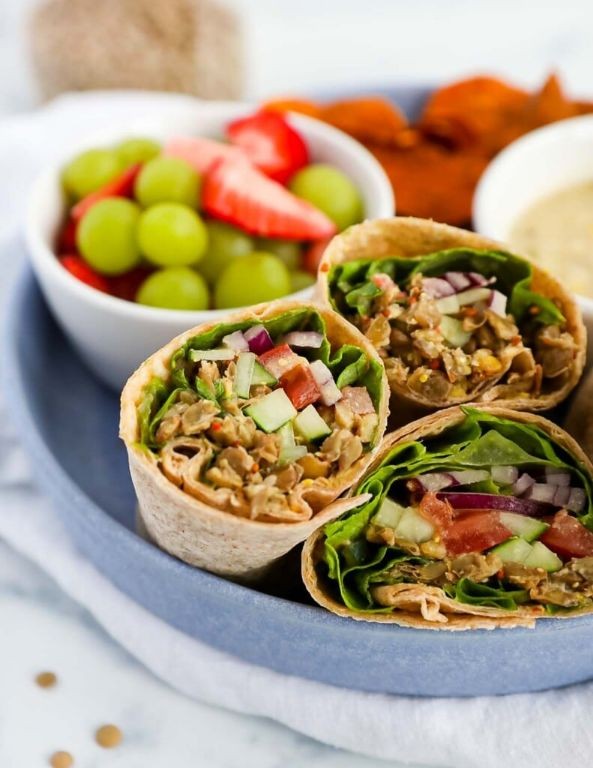
Hummus and Veggie Whole Wheat Pita

Vividly remembering the simple pleasure of spreading creamy hummus across warm bread, I find myself returning to this humble combination that feels both nourishing and comforting. There’s something deeply satisfying about the way the cool, smooth hummus contrasts with the earthy whole wheat pita and crisp vegetables that makes this feel like more than just a quick meal—it’s a moment of quiet sustenance.
Ingredients
– 2 whole wheat pita bread rounds
– 1 cup creamy classic hummus
– 1 medium cucumber, thinly sliced into crisp rounds
– 1 large ripe tomato, diced into juicy chunks
– 1/4 red onion, thinly sliced into sharp, translucent ribbons
– 2 tablespoons rich extra virgin olive oil
– 1 tablespoon freshly squeezed lemon juice
– 1/2 teaspoon coarse sea salt
– 1/4 teaspoon freshly cracked black pepper
– 1/4 cup fresh parsley leaves, roughly chopped
Instructions
1. Preheat your oven to 350°F and place the whole wheat pita bread rounds directly on the middle oven rack.
2. Bake the pita for exactly 5-7 minutes until they become warm and slightly crispy around the edges but still soft in the center.
3. While the pita warms, spread the creamy classic hummus evenly across a medium serving plate, creating a smooth base layer about 1/4-inch thick.
4. Arrange the thinly sliced cucumber rounds in a circular pattern over the hummus, slightly overlapping them for visual appeal.
5. Scatter the diced juicy tomato chunks evenly across the hummus, allowing some to nestle between the cucumber slices.
6. Separate the thinly sliced red onion ribbons with your fingers and distribute them artfully across the arrangement.
7. Drizzle the rich extra virgin olive oil in a slow, steady stream over the entire surface of the vegetables and hummus.
8. Squeeze the fresh lemon juice directly over the assembled ingredients, catching any seeds with your other hand.
9. Sprinkle the coarse sea salt evenly across the surface, focusing particularly on the tomato and cucumber areas where it will enhance their natural flavors.
10. Grind the freshly cracked black pepper over the entire dish, using about 10-12 turns of your pepper mill for optimal distribution.
11. Finish by scattering the roughly chopped fresh parsley leaves across the top as a bright green garnish.
12. Remove the warm pita bread from the oven and immediately cut each round into 6 equal wedges using a sharp knife.
Soft textures play beautifully here—the creamy hummus melts into the warm pita while the crisp vegetables provide refreshing contrast. The bright lemon and rich olive oil create a dressing that seeps into the bread, making each bite both substantial and light. Try serving this family-style where everyone can tear off pita wedges and scoop up generous portions, creating an interactive meal that feels both rustic and elegant.
Turkey and Cranberry Quinoa Bread Sandwich

Perhaps there’s something quietly comforting about transforming Thanksgiving’s familiar flavors into something entirely new, something that carries the warmth of holiday gatherings into ordinary weekday lunches, where the scent of toasted bread and savory herbs can make even the simplest meal feel like a small celebration.
Ingredients
- 1 cup cooked quinoa, cooled completely
- 2 cups finely shredded roasted turkey, moist and tender
- 1/2 cup whole-berry cranberry sauce, jewel-toned and slightly tart
- 1/4 cup mayonnaise, rich and creamy
- 2 tablespoons fresh parsley, finely chopped
- 1 teaspoon fresh thyme leaves, fragrant and earthy
- 1/4 teaspoon kosher salt, coarse and flaky
- 1/8 teaspoon freshly ground black pepper, finely textured
- 4 slices whole grain bread, thick-cut and sturdy
- 2 tablespoons unsalted butter, softened at room temperature
Instructions
- In a medium mixing bowl, combine the cooled cooked quinoa, finely shredded roasted turkey, whole-berry cranberry sauce, rich and creamy mayonnaise, finely chopped fresh parsley, fragrant and earthy fresh thyme leaves, coarse and flaky kosher salt, and finely textured freshly ground black pepper.
- Gently fold all ingredients together until evenly distributed, being careful not to break down the turkey shreds too much.
- Heat a non-stick skillet or griddle over medium-low heat (325°F surface temperature) for 2 minutes until evenly warmed.
- While the skillet heats, spread 1/2 tablespoon of room-temperature unsalted butter evenly across one side of each thick-cut whole grain bread slice.
- Place two bread slices buttered-side down in the preheated skillet.
- Divide the turkey and quinoa mixture evenly between the two bread slices in the skillet, spreading it to within 1/2 inch of the edges.
- Top each with the remaining bread slices, buttered-side facing up.
- Cook for 3-4 minutes until the bottom bread develops deep golden-brown toast marks and releases easily from the skillet.
- Carefully flip both sandwiches using a wide spatula, supporting the filling to prevent spillage.
- Cook for another 3-4 minutes until the second side achieves the same golden-brown color and the filling is heated through to 165°F internal temperature.
- Transfer the sandwiches to a cutting board and let rest for 1 minute before slicing to allow the filling to set.
- Cut each sandwich diagonally and serve immediately.
Delightfully textured, each bite offers the nutty chew of quinoa against the tender shreds of turkey, while the cranberries provide little bursts of tart sweetness that cut through the richness. The crispy, buttery bread gives way to a filling that’s simultaneously hearty and refreshing, making it perfect for packing in lunchboxes with a side of crisp apple slices or serving warm with a cup of creamy tomato soup for dipping.
Greek Yogurt Tuna Salad Sandwich
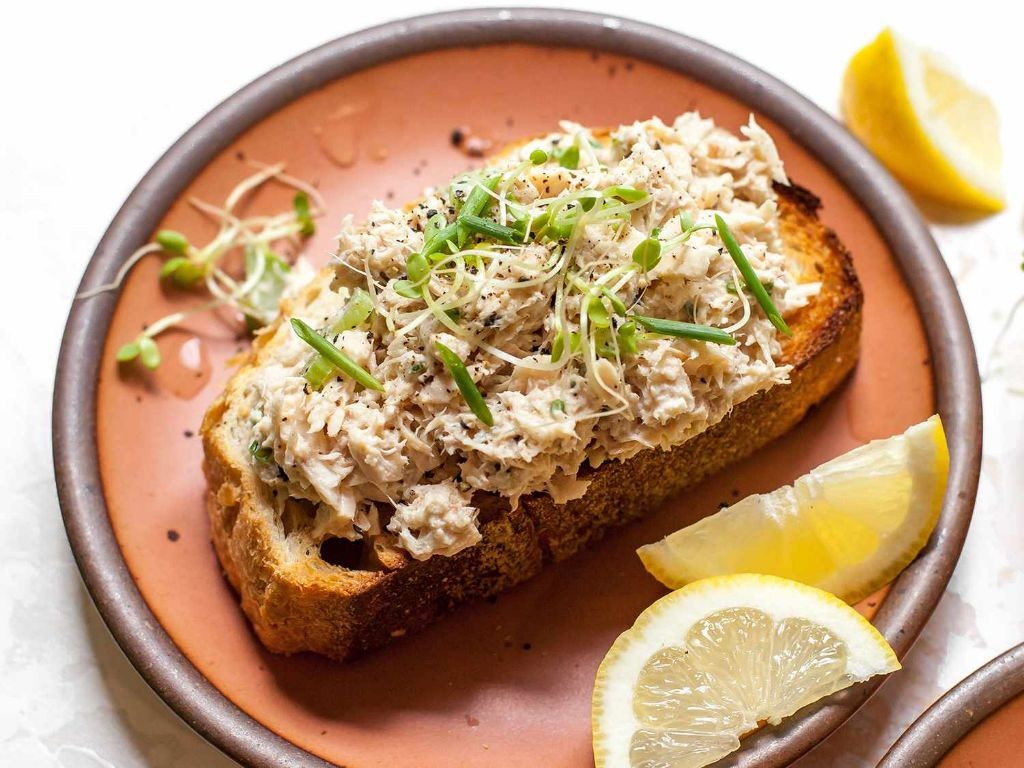
Maybe it’s the quiet hum of the kitchen, or the way the afternoon light slants across the counter, but some days call for a meal that feels both nourishing and gentle. This Greek yogurt tuna salad is one of those—a simple, creamy blend that turns a humble sandwich into a small moment of comfort, without the usual heaviness.
Ingredients
– 2 (5-ounce) cans of solid white albacore tuna in water, drained well
– 1/2 cup plain whole-milk Greek yogurt, thick and tangy
– 1/4 cup finely diced crisp celery stalks
– 2 tablespoons finely chopped fresh dill, fragrant and feathery
– 1 tablespoon freshly squeezed lemon juice, bright and zesty
– 1/2 teaspoon Dijon mustard, smooth and subtly sharp
– 1/4 teaspoon fine sea salt
– 1/4 teaspoon freshly cracked black pepper
– 4 slices of hearty whole-grain bread, lightly toasted
– 2 leaves of butter lettuce, tender and ruffled
Instructions
1. Place the drained tuna into a medium mixing bowl and flake it thoroughly with a fork until no large chunks remain.
2. Add the Greek yogurt, diced celery, chopped dill, lemon juice, Dijon mustard, sea salt, and black pepper to the bowl.
3. Gently fold all ingredients together with a spatula until evenly combined, being careful not to overmix—this keeps the texture light. Tip: For the best flavor, let the salad rest in the refrigerator for 15 minutes to allow the ingredients to meld.
4. While the salad chills, toast the bread slices in a toaster or oven at 350°F for 4–5 minutes, until golden and crisp at the edges.
5. Lay the toasted bread slices on a clean surface and top two slices with a butter lettuce leaf each. Tip: The lettuce acts as a barrier, preventing the bread from becoming soggy if not eaten immediately.
6. Divide the tuna salad evenly between the two lettuce-topped slices, spreading it gently to cover the surface.
7. Place the remaining toasted bread slices on top to form sandwiches. Tip: For easier handling, slice each sandwich in half diagonally with a serrated knife.
Perhaps what I love most is the way the creamy, tangy tuna salad contrasts with the crunch of toasted bread and crisp lettuce. It’s a sandwich that feels both fresh and satisfying, perfect for a quiet lunch with a side of pickles or tucked into a picnic basket for a sunny day outing.
Roasted Red Pepper and Goat Cheese Panini
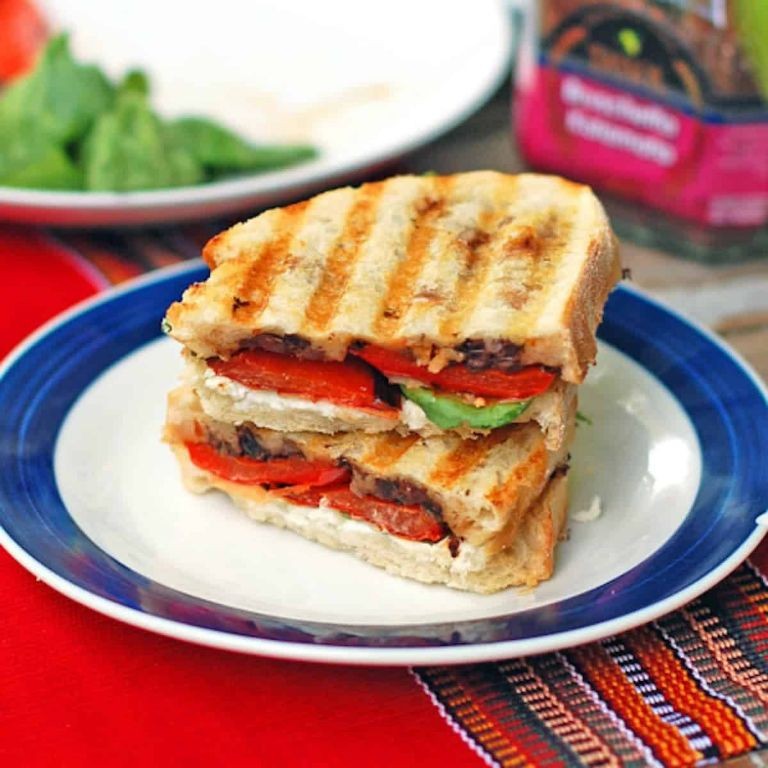
Wandering through the farmers market this morning, I found myself drawn to the deep crimson bell peppers and the little tub of fresh goat cheese that seemed to call for a quiet afternoon in the kitchen. There’s something comforting about pressing ingredients between warm bread, creating a meal that feels like a gentle embrace. This roasted red pepper and goat cheese panini is exactly that—a simple yet deeply satisfying sandwich that transforms humble ingredients into something special.
Ingredients
– 2 large red bell peppers, roasted until charred and sweet
– 4 slices of rustic sourdough bread, about 1/2-inch thick
– 4 ounces of creamy, tangy goat cheese
– 2 tablespoons of rich extra virgin olive oil
– 1/4 cup of fresh basil leaves, torn into fragrant pieces
– 1/4 teaspoon of flaky sea salt
– 1/4 teaspoon of freshly cracked black pepper
Instructions
1. Preheat your panini press to 375°F or heat a skillet over medium heat.
2. Brush one side of each sourdough slice lightly with extra virgin olive oil using a pastry brush.
3. Spread 1 ounce of creamy goat cheese evenly on the un-oiled side of two bread slices.
4. Arrange roasted red pepper strips in a single layer over the goat cheese.
5. Sprinkle flaky sea salt and freshly cracked black pepper evenly over the peppers.
6. Scatter torn fresh basil leaves across the peppers for aromatic freshness.
7. Place the remaining bread slices on top, oiled sides facing outward.
8. Transfer the assembled sandwich to the preheated panini press.
9. Close the press and cook for 4-5 minutes until golden brown stripes appear.
10. Remove the panini when the bread is crisp and the cheese has visibly softened.
11. Let the panini rest for 1 minute on a cutting board before slicing.
12. Cut the sandwich diagonally with a serrated knife for clean edges.
Beyond the crisp exterior lies a wonderfully soft interior where the tangy goat cheese melds with the sweet, smoky peppers. The basil adds just enough freshness to cut through the richness, making each bite perfectly balanced. Serve it alongside a simple arugula salad drizzled with lemon vinaigrette for a complete meal that feels both elegant and effortlessly cozy.
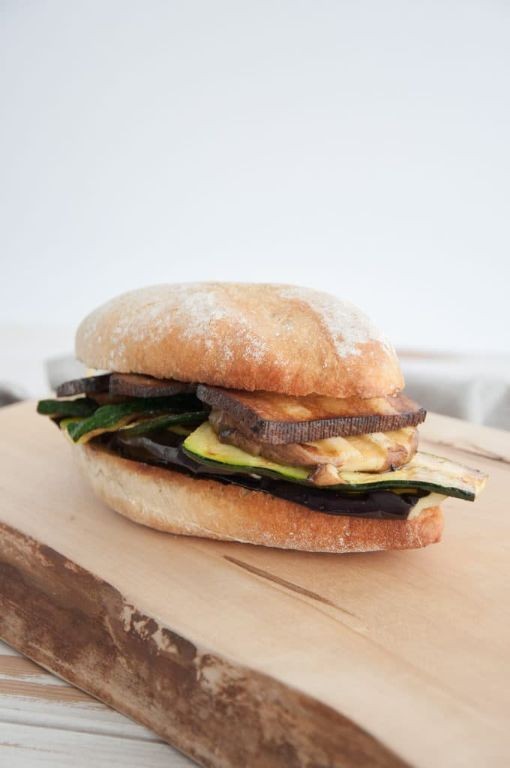
Eggplant and Zucchini Grilled Sandwich
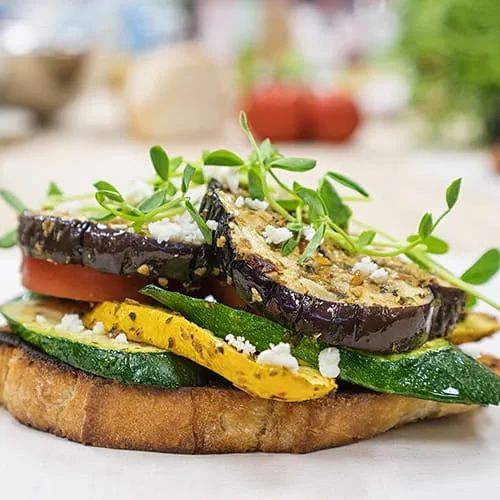
Kind of quietly, on a late autumn afternoon like this, I find myself drawn to simple vegetables transformed by fire and patience, the way eggplant and zucchini surrender their stubbornness to become something tender and profound between slices of bread.
Ingredients
– 1 medium firm eggplant, sliced into ½-inch thick rounds
– 1 medium vibrant green zucchini, sliced into ¼-inch thick rounds
– 2 tablespoons rich extra virgin olive oil
– ½ teaspoon coarse sea salt
– ¼ teaspoon freshly cracked black pepper
– 4 slices rustic sourdough bread
– 2 tablespoons creamy basil pesto
– 4 slices provolone cheese, gently melting
– 1 small ripe tomato, thinly sliced
– ¼ cup peppery arugula leaves
Instructions
1. Preheat your grill or grill pan to medium-high heat, approximately 400°F.
2. Brush both sides of the eggplant and zucchini slices lightly with the extra virgin olive oil using a pastry brush.
3. Sprinkle the vegetable slices evenly with coarse sea salt and freshly cracked black pepper.
4. Place the seasoned eggplant and zucchini slices directly on the preheated grill grates.
5. Grill the vegetables for 4-5 minutes per side, until they develop deep grill marks and become tender when pierced with a fork.
6. Remove the grilled vegetables from the heat and set them aside on a clean plate.
7. Lightly toast the sourdough bread slices on the grill for 1-2 minutes per side until golden with slight char marks.
8. Spread 1 tablespoon of creamy basil pesto evenly on two slices of the toasted sourdough bread.
9. Layer the provolone cheese slices directly onto the pesto-covered bread.
10. Arrange the grilled eggplant and zucchini slices in a single layer over the cheese.
11. Top the vegetables with the thinly sliced ripe tomato and peppery arugula leaves.
12. Cover each sandwich with the remaining slices of toasted sourdough bread.
13. Return the assembled sandwiches to the grill and press down gently with a spatula.
14. Grill for 2-3 minutes per side until the bread is crisp and the cheese has completely melted.
15. Remove the sandwiches from the grill and let them rest for 1 minute before slicing.
Each bite reveals the eggplant’s silken surrender against the zucchini’s gentle crispness, while the melted provolone binds everything together in a warm embrace. Especially satisfying when served with a drizzle of balsamic reduction or alongside a simple tomato soup for dipping, this sandwich feels like autumn comfort held between your hands.
Black Bean and Corn Salsa Wrap

Venturing into the kitchen this quiet afternoon feels like unfolding a familiar story, one where simple ingredients transform into something that holds both comfort and surprise. There’s a gentle rhythm to preparing these wraps, each step feeling like a quiet meditation on textures and flavors coming together. The final creation carries the warmth of the kitchen and the promise of satisfaction in every bite.
Ingredients
– 2 cups cooked black beans, tender and earthy
– 1 cup sweet corn kernels, freshly thawed or roasted
– 1/2 cup finely diced red onion, crisp and vibrant
– 1/4 cup freshly chopped cilantro, fragrant and bright
– 1 jalapeño, seeds removed and finely minced
– 2 tablespoons freshly squeezed lime juice, zesty and tangy
– 1 teaspoon ground cumin, warm and aromatic
– 1/2 teaspoon smoked paprika, subtly smoky
– 4 large flour tortillas, soft and pliable
– 1 cup shredded Monterey Jack cheese, creamy and mild
Instructions
1. Combine 2 cups cooked black beans, 1 cup sweet corn kernels, 1/2 cup finely diced red onion, 1/4 cup freshly chopped cilantro, and 1 finely minced jalapeño in a medium mixing bowl.
2. Drizzle 2 tablespoons freshly squeezed lime juice over the bean and corn mixture.
3. Sprinkle 1 teaspoon ground cumin and 1/2 teaspoon smoked paprika evenly across the ingredients.
4. Gently fold all ingredients together until fully incorporated and evenly coated.
5. Let the salsa mixture rest at room temperature for 10 minutes to allow flavors to meld.
6. Warm 4 large flour tortillas in a dry skillet over medium heat for 15-20 seconds per side until pliable.
7. Place one warmed tortilla flat on a clean work surface.
8. Spread 1/4 cup shredded Monterey Jack cheese in a horizontal line across the center of the tortilla.
9. Spoon one-quarter of the black bean and corn salsa mixture over the cheese layer.
10. Fold the bottom edge of the tortilla up over the filling, then fold in the sides, and roll tightly away from you to form a secure wrap.
11. Repeat the filling and rolling process with remaining tortillas and ingredients.
12. Heat a clean skillet over medium heat and place wraps seam-side down.
13. Cook for 2-3 minutes until the bottom develops golden-brown spots and the cheese begins to melt.
14. Carefully flip each wrap and cook for another 2-3 minutes until the second side is lightly toasted.
15. Remove wraps from heat and let rest for 1 minute before slicing.
Soft tortillas give way to a satisfying crunch from the fresh vegetables, while the melted cheese binds everything together in creamy contrast. Something about the way the smoky paprika whispers through the bright lime juice makes each bite feel both familiar and new. Try serving these wraps sliced diagonally with a dollop of cool Greek yogurt for an extra layer of texture, or pack them whole for a picnic where they’ll hold their structure beautifully.
Smoked Salmon and Cucumber Open-Faced Sandwich
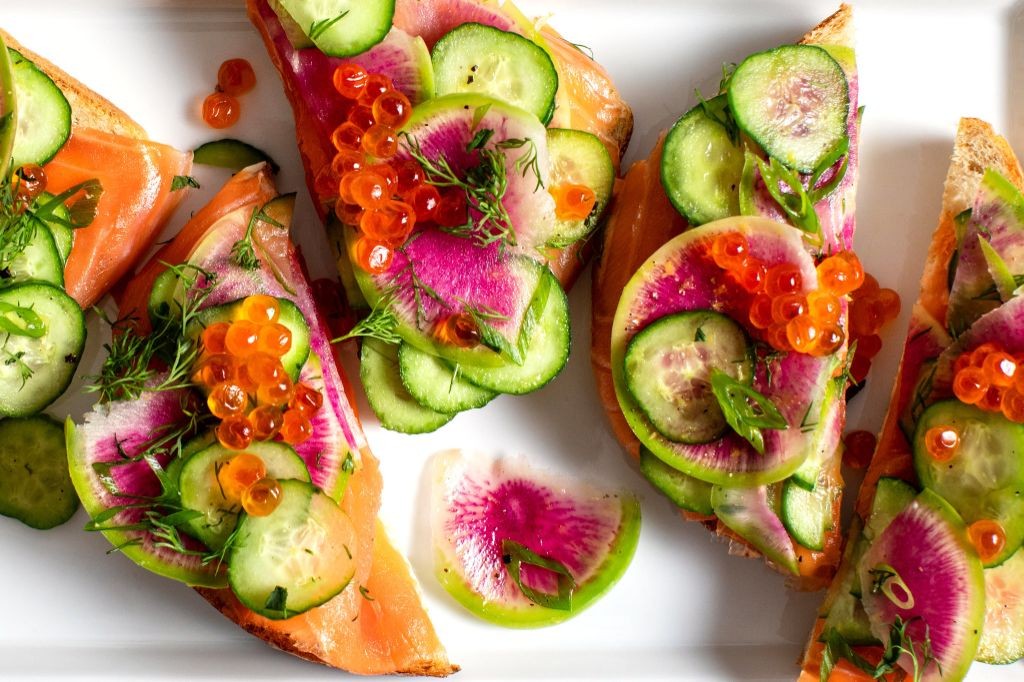
Sometimes, the simplest meals become the most memorable, those quiet moments when you pause to assemble something beautiful just for yourself. Sliding the cool cucumber slices beside the vibrant salmon feels like arranging flowers, each element promising its own gentle contribution to this edible meditation.
Ingredients
– 4 slices of rustic sourdough bread
– 8 ounces of thinly sliced cold-smoked salmon
– 1 medium English cucumber with crisp, cool flesh
– ½ cup of rich cream cheese at room temperature
– 2 tablespoons of fresh dill fronds
– 1 tablespoon of briny capers
– 1 teaspoon of freshly squeezed lemon juice
– ¼ teaspoon of finely ground black pepper
Instructions
1. Place 4 slices of rustic sourdough bread on a clean cutting board.
2. Toast the bread in a toaster or oven at 375°F for 4–5 minutes until golden brown and crisp at the edges.
3. Allow the toasted bread to cool for 2 minutes on a wire rack to prevent sogginess.
4. Spread 2 tablespoons of rich cream cheese evenly over each slice of toasted bread, covering the surface completely.
5. Thinly slice 1 medium English cucumber into ⅛-inch rounds using a sharp knife.
6. Arrange cucumber slices in a single, slightly overlapping layer over the cream cheese on each bread slice.
7. Gently drape 2 ounces of thinly sliced cold-smoked salmon over the cucumber layer on each sandwich.
8. Finely chop 2 tablespoons of fresh dill fronds, reserving a few whole sprigs for garnish.
9. Sprinkle the chopped dill evenly over the salmon on all four sandwiches.
10. Scatter 1 tablespoon of briny capers evenly across the four open-faced sandwiches.
11. Drizzle ¼ teaspoon of freshly squeezed lemon juice over each sandwich.
12. Finish each sandwich with a light dusting of ¼ teaspoon of finely ground black pepper total.
On the tongue, the creamy cheese melts into the crisp bread, while the salmon’s smoky silkiness contrasts with the cucumber’s watery crunch. Try serving these on a wooden board with radish roses, letting the pink and green hues catch the afternoon light through an open window.
Quinoa and Kale Stuffed Flatbread
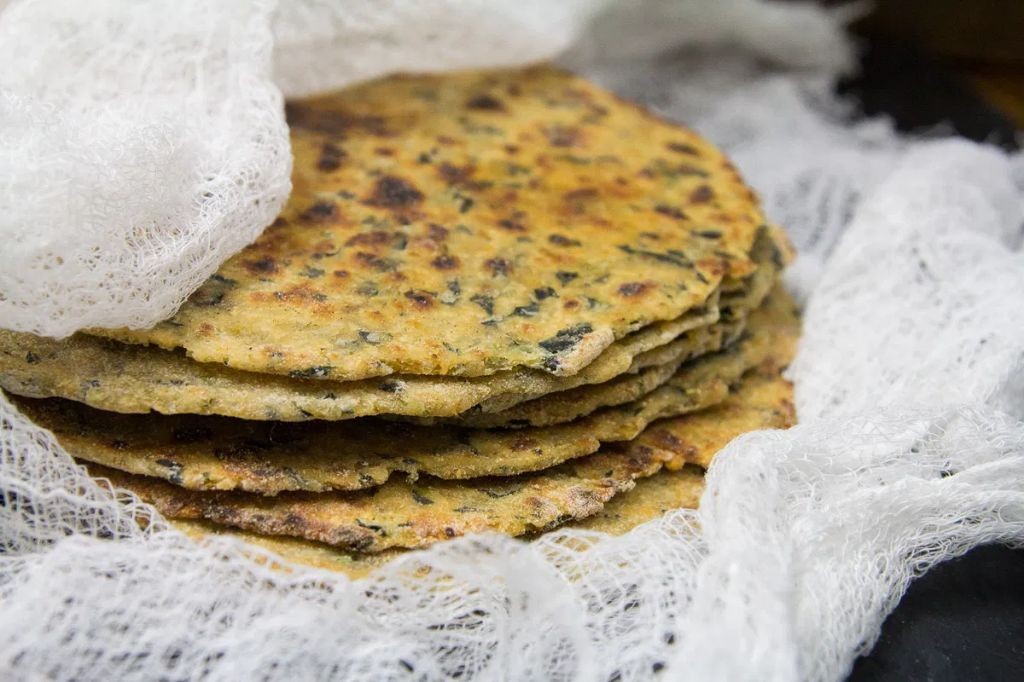
Perhaps there are moments when the kitchen becomes a quiet sanctuary, where simple ingredients transform into something comforting and nourishing. Today, I found myself drawn to the earthy warmth of quinoa and the gentle bitterness of kale, folded into soft flatbread that feels like a hug from within.
Ingredients
- 1 cup fluffy, pre-cooked quinoa
- 2 cups finely chopped, dark green kale leaves
- 1/2 cup crumbled, tangy feta cheese
- 1/4 cup rich extra virgin olive oil
- 1 teaspoon fragrant dried oregano
- 1/2 teaspoon coarse sea salt
- 1/4 teaspoon freshly cracked black pepper
- 4 soft, pliable whole wheat flatbreads
Instructions
- Preheat your oven to 375°F, placing a baking sheet inside to warm.
- In a medium bowl, combine the fluffy, pre-cooked quinoa and finely chopped, dark green kale leaves.
- Drizzle the mixture with 2 tablespoons of rich extra virgin olive oil, tossing gently to coat every grain and leaf.
- Sprinkle in the fragrant dried oregano, coarse sea salt, and freshly cracked black pepper, stirring until evenly distributed.
- Fold in the crumbled, tangy feta cheese, being careful not to overmix to maintain texture.
- Lay the 4 soft, pliable whole wheat flatbreads on a clean surface, dividing the quinoa-kale mixture evenly among them.
- Spoon the filling onto one half of each flatbread, leaving a 1-inch border around the edges.
- Brush the edges lightly with the remaining rich extra virgin olive oil to help them seal and crisp.
- Fold the empty half over the filling, pressing firmly along the edges to create a half-moon shape.
- Carefully transfer the stuffed flatbreads to the preheated baking sheet, arranging them in a single layer.
- Bake for 12–15 minutes, or until the flatbreads turn golden brown and the edges feel crisp to the touch.
- Remove from the oven and let rest for 2–3 minutes before serving to allow the filling to set.
Once baked, the flatbread emerges with a delicate crunch giving way to the soft, grain-filled interior. The feta melts slightly into the quinoa, creating pockets of creamy saltiness against the kale’s earthy notes. For a cozy twist, I love drizzling mine with a touch of honey or serving it alongside a simple tomato soup for dipping.
Grilled Portobello Mushroom and Pesto Sandwich
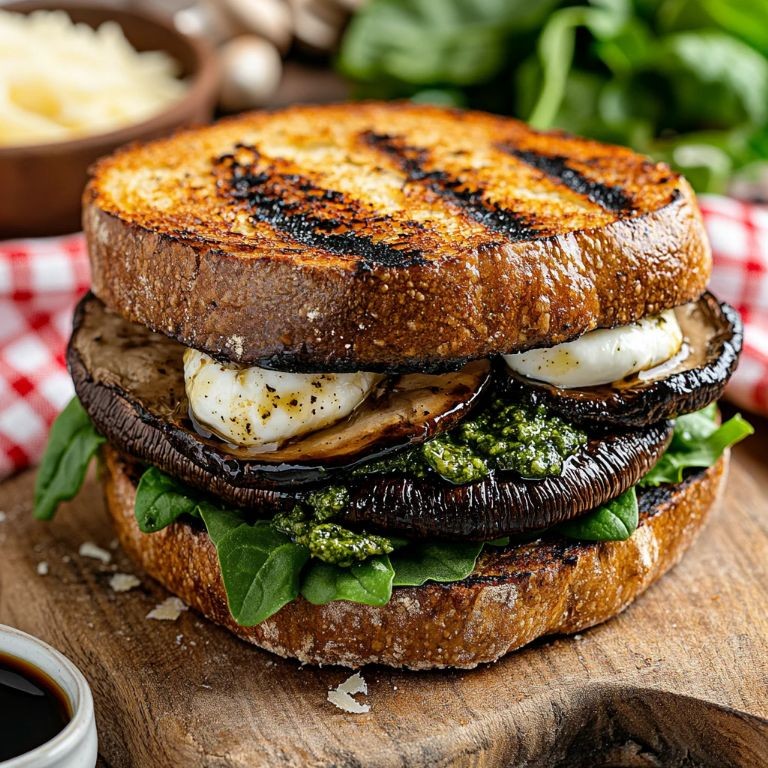
Folding back the layers of memory, I find myself returning to this simple pleasure—the way earthy mushrooms and bright pesto can transform humble bread into something quietly profound, like sunlight filtering through kitchen windows on an autumn afternoon.
Ingredients
– 4 large portobello mushroom caps with dark, meaty gills
– 4 thick slices of rustic sourdough bread
– ½ cup of vibrant basil pesto with toasted pine nuts
– 4 slices of creamy fresh mozzarella cheese
– 2 tablespoons of golden extra virgin olive oil
– 1 tablespoon of aged balsamic glaze
– ½ teaspoon of coarse sea salt
– ¼ teaspoon of freshly cracked black pepper
Instructions
1. Preheat your grill or grill pan to medium-high heat (400°F).
2. Gently clean the portobello caps with a damp paper towel, being careful not to oversaturate them.
3. Brush both sides of each mushroom cap generously with golden extra virgin olive oil.
4. Sprinkle the coarse sea salt and freshly cracked black pepper evenly over both sides of the mushrooms.
5. Place the mushrooms gill-side down on the hot grill and cook for 5 minutes until grill marks appear and the edges begin to soften.
6. Flip the mushrooms and cook for another 4 minutes until tender but still firm.
7. While mushrooms grill, lightly toast the rustic sourdough slices until golden with slight crispness.
8. Spread 2 tablespoons of vibrant basil pesto evenly on one side of each bread slice.
9. Place one slice of creamy fresh mozzarella cheese on two of the pesto-covered bread slices.
10. Arrange two grilled portobello caps over the mozzarella on each sandwich.
11. Drizzle ½ tablespoon of aged balsamic glaze over the mushrooms on each sandwich.
12. Top with remaining pesto-covered bread slices, pressing down gently to compact the layers.
13. Cut each sandwich diagonally and serve immediately. Using a grill pan instead of outdoor grill gives you better control over the mushroom texture. Letting the mushrooms rest for 2 minutes after grilling helps redistribute their juices. Toasting the bread just before assembly prevents sogginess while maintaining structural integrity.
Underneath the crisp sourdough crust lies a wonderful contrast—the juicy, meaty mushrooms yielding to creamy mozzarella while the pesto’s herbal brightness cuts through the richness. I sometimes serve these open-faced with a fried egg on top, the runny yolk creating a luxurious sauce that pools around the edges.
Spicy Lentil and Avocado Wrap
Zestfully contemplating the quiet moments of midday, I find myself drawn to simple, nourishing meals that require little fuss but deliver deep satisfaction. This wrap came to me during one of those reflective afternoons when hunger whispers rather than shouts, and the hands move almost meditatively through the preparation. There’s something profoundly comforting about the earthy warmth of lentils meeting the cool creaminess of avocado, all wrapped in a soft embrace.
Ingredients
– 1 cup dried brown lentils, earthy and speckled
– 2 cups water, filtered and cool
– 1 teaspoon fine sea salt, mineral-rich
– 1 tablespoon extra virgin olive oil, golden and fruity
– 1 small red onion, finely diced with vibrant purple layers
– 2 cloves garlic, freshly minced and aromatic
– 1 teaspoon ground cumin, warm and earthy
– 1/2 teaspoon smoked paprika, deep and ruby-hued
– 1/4 teaspoon cayenne pepper, fiery and bright
– 2 large ripe avocados, creamy and buttery
– 1 tablespoon fresh lime juice, zesty and bright
– 4 large whole wheat tortillas, soft and pliable
– 1/2 cup fresh cilantro leaves, fragrant and green
Instructions
1. Rinse 1 cup dried brown lentils under cool running water until the water runs clear.
2. Combine the rinsed lentils, 2 cups water, and 1 teaspoon fine sea salt in a medium saucepan.
3. Bring the lentil mixture to a boil over high heat, then reduce heat to maintain a gentle simmer.
4. Simmer uncovered for 20-25 minutes until lentils are tender but not mushy, stirring occasionally.
5. Drain any excess water from the cooked lentils and set aside to cool slightly.
6. Heat 1 tablespoon extra virgin olive oil in a skillet over medium heat until shimmering.
7. Add 1 small finely diced red onion and cook for 4-5 minutes until translucent and fragrant.
8. Stir in 2 cloves freshly minced garlic and cook for 1 minute until golden and aromatic.
9. Add 1 teaspoon ground cumin, 1/2 teaspoon smoked paprika, and 1/4 teaspoon cayenne pepper to the skillet.
10. Toast the spices for 30 seconds until fragrant, stirring constantly to prevent burning.
11. Combine the spice mixture with the cooked lentils, mixing thoroughly to coat every lentil.
12. In a separate bowl, mash 2 large ripe avocados with 1 tablespoon fresh lime juice until creamy.
13. Warm 4 large whole wheat tortillas in a dry skillet over medium heat for 30 seconds per side.
14. Spread the mashed avocado mixture evenly across the center of each warmed tortilla.
15. Spoon the spiced lentil mixture over the avocado layer, leaving a 2-inch border around the edges.
16. Sprinkle 1/2 cup fresh cilantro leaves evenly over the lentil layer.
17. Fold the bottom edge of each tortilla up over the filling, then fold in the sides and roll tightly.
18. Cut each wrap diagonally in half to reveal the beautiful layered interior.
Notably textured with creamy avocado against the toothsome lentils, this wrap offers a delightful contrast in every bite. The gentle heat from the spices builds slowly, while the fresh cilantro provides bursts of brightness that cut through the richness. Consider serving these wraps with a side of crisp vegetable sticks or a simple tomato salad for a complete, satisfying meal that feels both wholesome and indulgent.
Baked Falafel and Tahini Pita Pocket
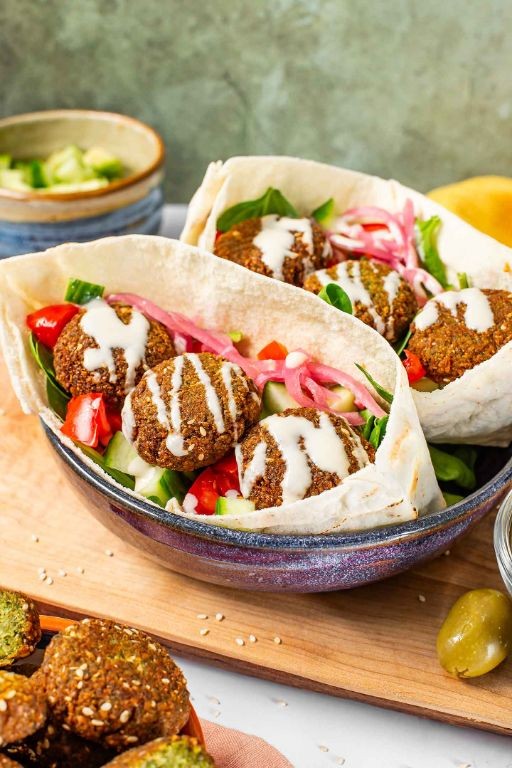
Dipping my hands into the cool chickpea mixture, I remember how these simple ingredients transform into something magical when baked—creating a meal that feels both nourishing and comforting on a quiet afternoon.
Ingredients
– 1 ½ cups dried chickpeas, soaked overnight until plump and tender
– ½ cup fresh parsley leaves, finely chopped with earthy fragrance
– ¼ cup fresh cilantro leaves, bright and citrusy
– 1 small yellow onion, roughly chopped with sharp sweetness
– 3 garlic cloves, minced into pungent fragments
– 1 tsp ground cumin, warm and aromatic
– 1 tsp ground coriander, subtly citrusy
– ½ tsp baking soda, for airy texture
– 3 tbsp extra virgin olive oil, rich and fruity
– ½ cup tahini paste, creamy and nutty
– ¼ cup fresh lemon juice, bright and tangy
– ¼ cup ice water, for silky consistency
– 4 whole wheat pita pockets, soft and warm
– 2 cups shredded romaine lettuce, crisp and fresh
– 1 cup cherry tomatoes, halved and juicy
– ½ cup cucumber slices, cool and refreshing
Instructions
1. Drain the soaked chickpeas thoroughly and pat them completely dry with paper towels.
2. Combine chickpeas, parsley, cilantro, onion, garlic, cumin, coriander, and baking soda in a food processor.
3. Pulse the mixture for 45 seconds until it forms a coarse paste that holds together when pressed.
4. Refrigerate the falafel mixture for 30 minutes to help the flavors meld and make shaping easier.
5. Preheat your oven to 375°F and line a baking sheet with parchment paper.
6. Scoop 2 tablespoons of mixture and roll into 16 firm balls, slightly flattening each into patties.
7. Arrange falafel patties on the baking sheet, leaving 1 inch between each for even browning.
8. Brush each patty lightly with olive oil using a pastry brush for golden crispness.
9. Bake for 25 minutes until deeply golden brown and firm to the touch, flipping halfway through.
10. Whisk tahini and lemon juice in a small bowl until smooth and pale.
11. Gradually add ice water while whisking continuously until the sauce reaches drizzling consistency.
12. Warm pita pockets in the oven for 3 minutes until soft and pliable.
13. Slice open one edge of each pita to create a pocket for filling.
14. Layer romaine lettuce, cucumber slices, and tomato halves inside each pita.
15. Nestle 4 baked falafel patties into each pita pocket.
16. Drizzle generously with tahini sauce until it coats the fillings.Just out of the oven, the falafel’s crisp exterior gives way to a remarkably tender, herb-flecked interior, while the tahini sauce drapes everything in nutty creaminess. I love stuffing extra cherry tomatoes alongside for bursts of juicy sweetness that cut through the richness, making each bite feel both wholesome and celebratory.
Curried Chicken Salad with Almonds Sandwich
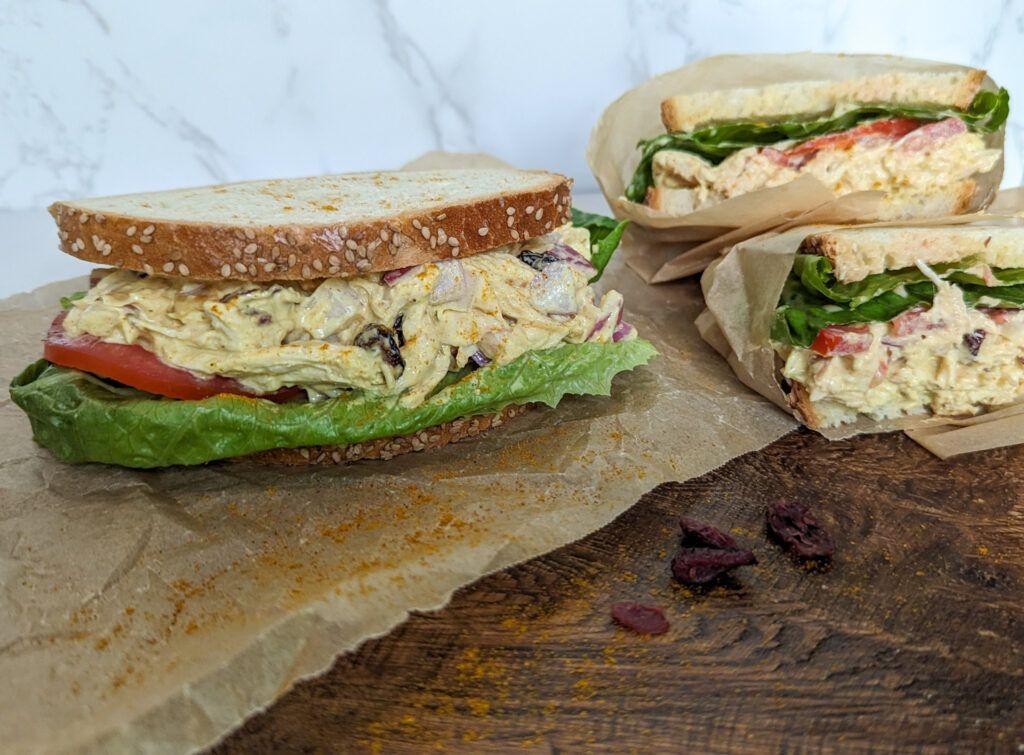
Just remembering how the golden afternoon light used to fall across my grandmother’s kitchen table, where she’d patiently teach me about the quiet magic that happens when spices meet simplicity. There’s something deeply comforting about this particular combination of flavors, a gentle reminder that the most satisfying meals often come from humble beginnings and patient hands.
Ingredients
– 2 cups shredded cooked chicken breast
– 1/2 cup creamy mayonnaise
– 1/4 cup finely chopped celery
– 1/4 cup toasted slivered almonds
– 2 tablespoons sweet golden raisins
– 1 tablespoon fresh lemon juice
– 1 teaspoon fragrant curry powder
– 1/4 teaspoon fine sea salt
– 8 slices soft whole wheat bread
– 4 large crisp butter lettuce leaves
Instructions
1. Place 2 cups of shredded cooked chicken breast in a medium mixing bowl.
2. Add 1/2 cup creamy mayonnaise to the chicken and stir gently until evenly coated.
3. Mix in 1/4 cup finely chopped celery, distributing it throughout the chicken mixture.
4. Sprinkle 1/4 cup toasted slivered almonds over the salad for nutty crunch.
5. Fold in 2 tablespoons sweet golden raisins to add subtle sweetness.
6. Drizzle 1 tablespoon fresh lemon juice over the mixture to brighten the flavors.
7. Sprinkle 1 teaspoon fragrant curry powder evenly across the salad.
8. Add 1/4 teaspoon fine sea salt to balance the seasoning.
9. Gently fold all ingredients together until well combined, being careful not to overmix.
10. Arrange 8 slices of soft whole wheat bread on your work surface.
11. Place 1 large crisp butter lettuce leaf on each of 4 bread slices to prevent sogginess.
12. Divide the chicken salad evenly among the 4 lettuce-lined bread slices.
13. Top each with the remaining bread slices to form complete sandwiches.
14. Cut each sandwich diagonally into two triangles for easy serving.
My favorite part is how the creamy chicken salad contrasts with the crisp lettuce and crunchy almonds, creating layers of texture that feel both familiar and exciting. Sometimes I’ll serve these open-faced on toasted sourdough for a more elegant presentation, or pack them for a picnic where the flavors seem to deepen in the open air.
Mediterranean Tofu and Olive Sandwich
Just now, as the afternoon light slants across my kitchen counter, I find myself craving something that feels both nourishing and nostalgic, a sandwich that carries the sun-drenched flavors of distant shores right here in my hands. Journeying through Mediterranean flavors doesn’t require a passport, just a willingness to let simple ingredients sing in harmony.
Ingredients
– 1 (14-ounce) block of firm tofu, pressed to remove excess moisture
– 2 tablespoons of golden extra virgin olive oil
– 1 teaspoon of fragrant dried oregano
– ½ teaspoon of finely ground sea salt
– ¼ teaspoon of freshly cracked black pepper
– ½ cup of briny Kalamata olives, pitted and roughly chopped
– ¼ cup of creamy tahini paste
– 2 tablespoons of freshly squeezed lemon juice
– 1 small garlic clove, minced to a fine paste
– 2 tablespoons of cool water
– 4 slices of crusty artisan bread, lightly toasted
– 1 cup of peppery arugula leaves
– ¼ cup of tangy sun-dried tomatoes, thinly sliced
Instructions
1. Preheat your oven to 400°F and line a baking sheet with parchment paper.
2. Slice the pressed tofu into ½-inch thick slabs and pat them completely dry with paper towels.
3. Arrange tofu slices in a single layer on the prepared baking sheet.
4. Drizzle 1 tablespoon of golden extra virgin olive oil evenly over the tofu.
5. Sprinkle fragrant dried oregano, finely ground sea salt, and freshly cracked black pepper over the tofu.
6. Bake for 25 minutes until the edges are golden brown and crispy.
7. While tofu bakes, combine briny Kalamata olives, creamy tahini paste, freshly squeezed lemon juice, minced garlic clove, and cool water in a small bowl.
8. Whisk the olive-tahini mixture vigorously until it forms a smooth, spreadable consistency.
9. Remove baked tofu from oven and let it rest for 5 minutes to allow textures to set.
10. Lightly toast 4 slices of crusty artisan bread until golden around the edges.
11. Spread the olive-tahini mixture generously on one side of each toast slice.
12. Layer peppery arugula leaves evenly over two slices of prepared bread.
13. Arrange baked tofu slices neatly over the arugula.
14. Scatter tangy sun-dried tomatoes evenly over the tofu.
15. Top with remaining bread slices, spread-side down, and press gently to compact.
A symphony of textures awaits in each bite—the crispness of baked tofu giving way to creamy olive spread, while peppery arugula provides a fresh counterpoint to the sun-drenched tomatoes. Consider serving it open-faced for a more elegant presentation, or wrap it tightly in parchment for a picnic where the Mediterranean flavors can truly transport you.
Apple, Walnut, and Ricotta Toast

There’s something quietly comforting about transforming humble ingredients into a moment of pure, simple delight, especially on a crisp autumn morning when the world outside feels still and the kitchen becomes a sanctuary. This apple, walnut, and ricotta toast is exactly that—a gentle assembly of textures and tastes that feels both nourishing and indulgent, like a warm hug in edible form.
Ingredients
– 2 thick slices of rustic sourdough bread
– 1/2 cup of creamy, whole-milk ricotta cheese
– 1 medium crisp Honeycrisp apple, thinly sliced
– 1/4 cup of toasted, coarsely chopped walnuts
– 2 tablespoons of golden, raw honey
– 1/2 teaspoon of fragrant ground cinnamon
– A pinch of flaky sea salt
Instructions
1. Preheat your oven or toaster oven to 375°F to gently warm and crisp the bread.
2. Place the 2 thick slices of rustic sourdough bread on a small baking sheet.
3. Toast the bread in the preheated oven for 5–7 minutes, until the edges are golden and the surface is lightly crisp.
4. Tip: For extra crunch, lightly brush the bread with olive oil before toasting, though this is optional and not listed in ingredients.
5. While the bread toasts, thinly slice 1 medium crisp Honeycrisp apple into even, 1/8-inch thick pieces.
6. In a small bowl, combine 1/2 cup of creamy, whole-milk ricotta cheese with 1/2 teaspoon of fragrant ground cinnamon, stirring until fully blended.
7. Tip: Let the ricotta sit at room temperature for 10 minutes beforehand for a smoother, easier spread.
8. Remove the toasted bread from the oven and let it cool for 1 minute to avoid melting the ricotta too quickly.
9. Evenly spread the cinnamon-ricotta mixture over the warm toast, covering each slice completely.
10. Arrange the thinly sliced apple pieces in a single, slightly overlapping layer on top of the ricotta.
11. Sprinkle 1/4 cup of toasted, coarsely chopped walnuts evenly over the apples.
12. Drizzle 2 tablespoons of golden, raw honey in a zigzag pattern across the toast.
13. Finish with a pinch of flaky sea salt scattered over the top to enhance the sweetness.
14. Tip: Toast the walnuts in a dry skillet over medium heat for 3–4 minutes, stirring frequently, until fragrant and lightly browned for deeper flavor.
Each bite offers a lovely contrast—the creamy ricotta melts into the warm, crisp bread, while the juicy apple and crunchy walnuts play off the honey’s floral sweetness. Enjoy it with a cup of hot tea for a peaceful breakfast, or slice it into strips for a whimsical, shareable snack that feels as special as it tastes.
Chickpea Salad and Sprouts Wrap

As I stand at my kitchen counter, the afternoon light spilling across the wooden surface, I find myself craving something both nourishing and gentle—a meal that feels like a quiet conversation with the season’s last warm days. This chickpea salad and sprouts wrap has become my go-to companion for these reflective moments, its simplicity belying the depth of flavor that unfolds with each thoughtful bite.
Ingredients
– 1 ½ cups cooked chickpeas, tender and plump
– ¼ cup creamy tahini paste
– 2 tablespoons fresh lemon juice, bright and zesty
– 1 tablespoon rich extra virgin olive oil
– ½ teaspoon fine sea salt
– ¼ teaspoon freshly ground black pepper
– ½ cup crisp alfalfa sprouts
– 2 large whole wheat tortillas, soft and pliable
– ¼ cup finely chopped red onion, vibrant and sharp
Instructions
1. Place the tender, plump chickpeas in a medium mixing bowl and gently mash them with a fork until they’re broken down but still retain some texture.
2. Add the creamy tahini paste, bright lemon juice, and rich olive oil to the mashed chickpeas.
3. Stir the mixture thoroughly until all ingredients are fully incorporated and the consistency becomes spreadable.
4. Season the chickpea mixture with fine sea salt and freshly ground black pepper, mixing again to distribute the seasonings evenly.
5. Lay the soft, pliable whole wheat tortillas flat on your work surface.
6. Divide the chickpea salad mixture between the two tortillas, spreading it evenly across the center third of each tortilla, leaving about 2 inches of space at the edges.
7. Sprinkle the vibrant, finely chopped red onion evenly over the chickpea mixture on both tortillas.
8. Top each tortilla with a generous handful of crisp alfalfa sprouts, arranging them in an even layer.
9. Fold the bottom edge of each tortilla up over the filling, then fold in the sides, and roll tightly away from you to form a secure wrap.
10. Cut each wrap in half diagonally with a sharp knife for easier handling and presentation.
Layers of creamy chickpea salad give way to the satisfying crunch of fresh sprouts and the gentle bite of red onion, creating a texture that feels both comforting and alive. The nutty whole wheat tortilla holds everything together while adding its own earthy notes to the symphony of flavors. These wraps travel beautifully for a picnic lunch or make for a lovely light dinner when served with a simple side of roasted vegetables.
Grilled Shrimp and Mango Salsa Roll
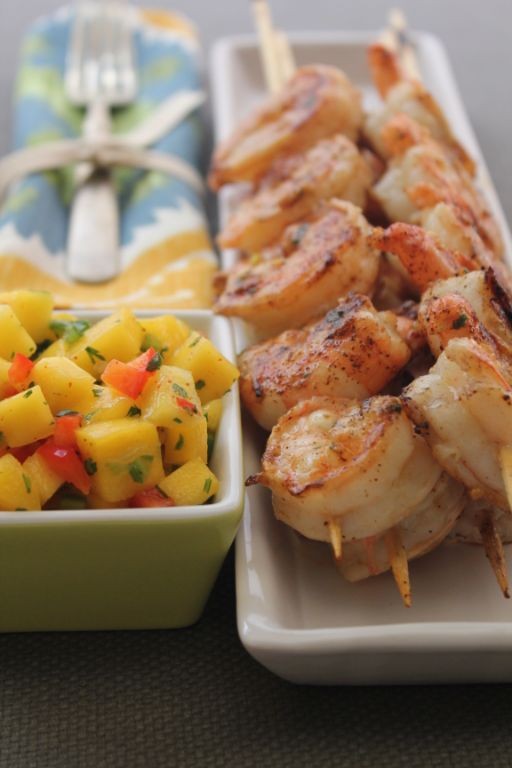
Years of summer evenings have taught me that the simplest combinations often hold the most magic, like these grilled shrimp and mango salsa rolls that feel like sunshine wrapped in a soft tortilla, a quiet celebration of sweet and savory dancing together. You can almost taste the gentle sea breeze in the shrimp and the tropical warmth in the mango, a pairing that slows time and invites you to savor each bite. It’s a dish that asks for nothing more than your presence and a moment of stillness to truly appreciate its delicate balance.
Ingredients
– 1 pound of large, wild-caught shrimp, peeled and deveined
– 2 tablespoons of golden extra virgin olive oil
– 1 teaspoon of smoked paprika
– ½ teaspoon of fine sea salt
– ¼ teaspoon of freshly cracked black pepper
– 2 ripe but firm mangoes, peeled and diced into ¼-inch cubes
– ¼ cup of finely chopped red onion
– 2 tablespoons of freshly squeezed lime juice
– 2 tablespoons of finely chopped cilantro
– 1 small jalapeño, seeds removed and minced
– 4 large flour tortillas
– 1 cup of shredded green cabbage
Instructions
1. Pat the shrimp completely dry with paper towels to ensure a crisp sear on the grill.
2. In a medium bowl, toss the shrimp with olive oil, smoked paprika, sea salt, and black pepper until evenly coated.
3. Preheat an outdoor grill or grill pan to medium-high heat, about 400°F.
4. Grill the shrimp for 2 minutes per side until they turn pink and opaque with light grill marks.
5. Transfer the grilled shrimp to a plate and let them rest for 3 minutes to allow juices to redistribute.
6. In a separate bowl, combine diced mango, red onion, lime juice, cilantro, and minced jalapeño to make the salsa.
7. Gently fold the salsa ingredients together until just mixed to keep the mango cubes intact.
8. Warm the flour tortillas on the grill for 20 seconds per side until pliable and lightly toasted.
9. Lay each tortilla flat and evenly distribute shredded cabbage down the center.
10. Top the cabbage with 4-5 grilled shrimp per tortilla.
11. Spoon ¼ cup of mango salsa over the shrimp in each tortilla.
12. Fold the bottom edge of the tortilla over the filling, then roll tightly from one side to form a secure bundle.
13. Slice each roll diagonally in half for an elegant presentation.
Soft tortillas give way to a crisp cabbage crunch, while the smoky shrimp and bright mango salsa mingle in a sweet-heat harmony that feels both refreshing and comforting. Serve these rolls alongside a drizzle of leftover lime juice or tucked into a picnic basket for a spontaneous outdoor meal, where their vibrant colors and layers seem to capture the very essence of leisurely afternoons.
Pesto Chicken and Sundried Tomato Ciabatta
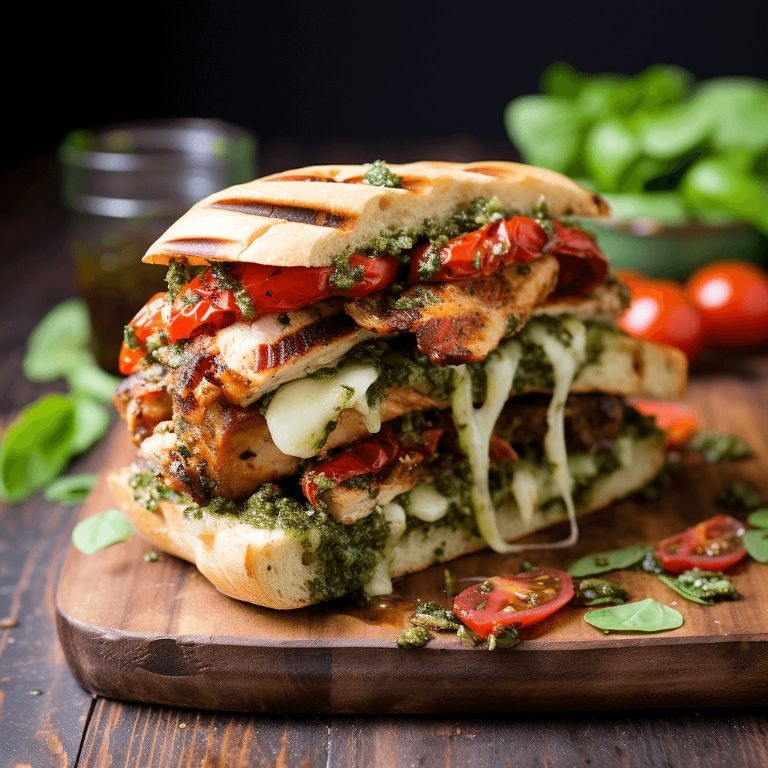
Beneath the golden afternoon light, I find myself drawn to simple comforts that feel both nourishing and celebratory. This pesto chicken and sundried tomato ciabatta is one of those quietly perfect meals that fills the kitchen with the most wonderful aromas, reminding me how small rituals can transform ordinary ingredients into something special.
Ingredients
– 2 boneless, skinless chicken breasts
– 4 ciabatta rolls, slightly stale
– 1/2 cup basil pesto, vibrant green and herbaceous
– 1/3 cup sundried tomatoes in oil, deeply concentrated and chewy
– 4 slices provolone cheese, mild and melty
– 2 tablespoons rich extra virgin olive oil
– 1/4 teaspoon coarse sea salt
– 1/4 teaspoon freshly cracked black pepper
Instructions
1. Preheat your oven to 375°F and line a baking sheet with parchment paper.
2. Pat the chicken breasts completely dry with paper towels to ensure proper browning.
3. Drizzle 1 tablespoon of olive oil over both sides of the chicken breasts.
4. Season both sides evenly with coarse sea salt and freshly cracked black pepper.
5. Heat a skillet over medium-high heat until a drop of water sizzles immediately.
6. Sear the chicken for 5-6 minutes per side until golden brown with visible grill marks.
7. Transfer the seared chicken to the prepared baking sheet.
8. Spread the vibrant green basil pesto evenly over the top of each chicken breast.
9. Arrange the deeply concentrated sundried tomatoes over the pesto layer.
10. Top each chicken breast with a slice of mild provolone cheese.
11. Bake for 12-15 minutes until the cheese is completely melted and bubbly.
12. While the chicken bakes, slice the slightly stale ciabatta rolls in half horizontally.
13. Brush the cut sides of the ciabatta with the remaining tablespoon of olive oil.
14. Toast the ciabatta directly on oven racks for the final 4-5 minutes of baking until golden and crisp.
15. Remove both the chicken and toasted ciabatta from the oven.
16. Let the chicken rest for 3 minutes to allow juices to redistribute evenly.
17. Slice the rested chicken breasts against the grain into 1/2-inch thick pieces.
18. Arrange the sliced chicken on the bottom halves of the toasted ciabatta rolls.
19. Cover with the top halves of the ciabatta rolls, pressing gently to compact.
20. Cut each sandwich in half diagonally for easier handling.
As you bite through the crisp ciabatta crust, the melty provolone gives way to tender chicken infused with basil’s bright freshness, while the sundried tomatoes offer sweet-tart bursts that contrast beautifully with the rich pesto. Consider serving these warm with a simple arugula salad dressed in lemon vinaigrette to cut through the richness, or pack them for a picnic where the flavors will have time to meld even further.
Summary
Sandwiches are the ultimate meal solution—quick, nutritious, and endlessly customizable. We hope this collection inspires you to get creative in the kitchen! Try these recipes, share your favorites in the comments below, and pin this article on Pinterest to keep these delicious ideas handy. Happy cooking!