
Versatile, convenient, and always delicious—Kraft products are the secret weapon in every home cook’s kitchen. Whether you’re whipping up a quick weeknight dinner, planning a festive gathering, or craving some classic comfort food, these recipes have you covered. Get ready to discover 20 mouthwatering dishes that will become your new go-tos for any occasion!
Kraft Mac and Cheese with Crispy Bacon Topping
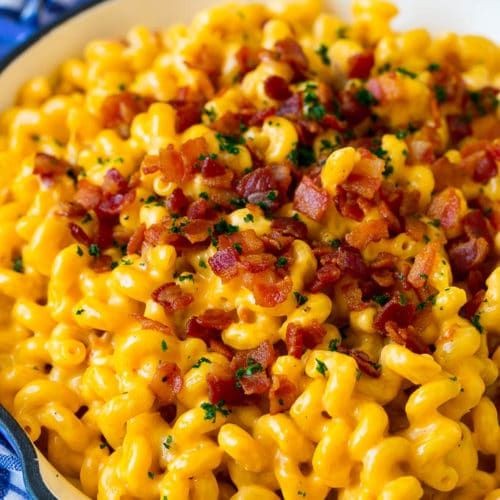
Oh my goodness, you guys—this is the mac and cheese upgrade you didn’t know you needed! I first threw this together on a lazy Sunday when my pantry was looking sparse, and now it’s my go-to comfort meal. There’s just something magical about that creamy Kraft cheese mixed with crispy, salty bacon that hits the spot every single time.
Ingredients
– Kraft Macaroni & Cheese Dinner – 1 box
– Bacon – 4 slices
– Milk – 1/4 cup
– Butter – 4 tbsp
Instructions
1. Fill a medium pot with 6 cups of water and bring it to a rolling boil over high heat.
2. Add the macaroni from the Kraft box and cook for 7–8 minutes, stirring occasionally, until the pasta is tender but still firm to the bite.
3. While the pasta cooks, arrange the bacon slices in a single layer in a cold skillet and turn the heat to medium.
4. Cook the bacon for 8–10 minutes, flipping every 2 minutes, until it is crispy and browned.
5. Transfer the cooked bacon to a paper towel-lined plate to drain excess grease, then crumble it into small pieces once cooled.
6. Drain the cooked macaroni in a colander and return it to the empty pot.
7. Add the butter, cheese sauce packet from the box, and milk to the pot with the drained macaroni.
8. Stir continuously over low heat for 2–3 minutes until the sauce is smooth and fully coats the pasta.
9. Sprinkle the crumbled bacon evenly over the top of the mac and cheese.
This dish delivers the ultimate combo of creamy, cheesy pasta with that irresistible bacon crunch. Try serving it straight from the pot for a cozy night in, or pair it with a simple green salad to balance the richness—either way, it’s pure comfort in a bowl.
Kraft Mayo Garlic Shrimp Pasta
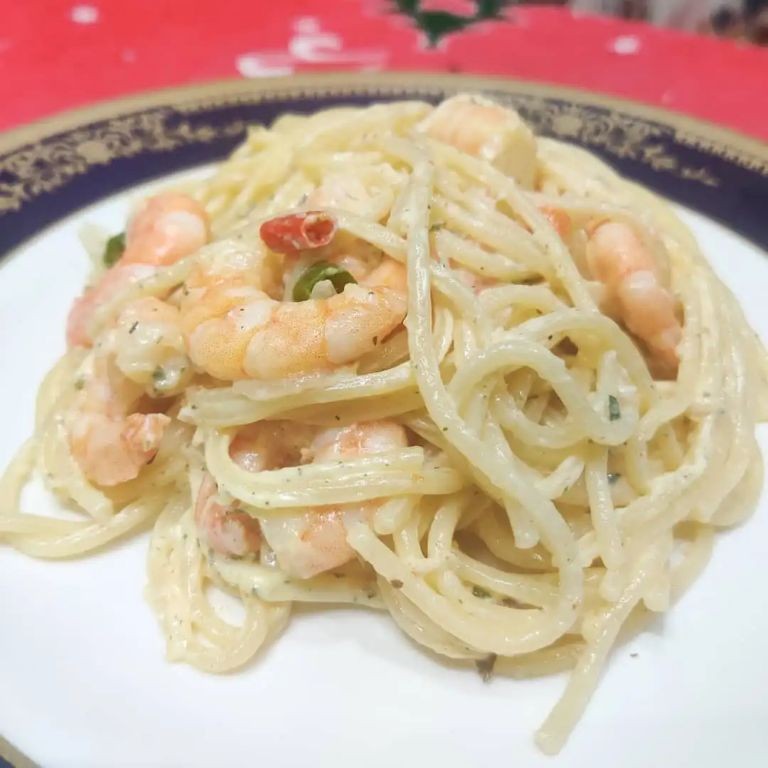
Yesterday, I was craving something creamy and garlicky but didn’t want to spend hours in the kitchen—that’s when I threw together this ridiculously easy pasta using ingredients I always have on hand. Honestly, the combination of Kraft Mayo and garlic creates this luxuriously smooth sauce that clings perfectly to every strand of pasta, and those plump shrimp just take it over the top.
Ingredients
- Kraft Mayo – ½ cup
- Shrimp – 1 lb, peeled and deveined
- Garlic – 4 cloves, minced
- Linguine pasta – 8 oz
- Butter – 2 tbsp
- Salt – ½ tsp
- Black pepper – ¼ tsp
- Lemon juice – 1 tbsp
- Fresh parsley – 2 tbsp, chopped
Instructions
- Bring a large pot of salted water to a rolling boil over high heat.
- Add linguine pasta to the boiling water and cook for 9–11 minutes, stirring occasionally to prevent sticking, until al dente (tip: taste a strand at 9 minutes—it should be tender but still have a slight bite).
- Drain the pasta in a colander, reserving ½ cup of pasta water.
- While pasta cooks, pat shrimp dry with paper towels and season evenly with salt and black pepper.
- Heat a large skillet over medium-high heat and melt butter until it sizzles.
- Add shrimp in a single layer and cook for 2 minutes per side, until opaque and lightly browned (tip: avoid overcrowding—cook in batches if needed for even searing).
- Transfer cooked shrimp to a plate and reduce skillet heat to medium-low.
- Add minced garlic to the skillet and sauté for 1 minute, stirring constantly, until fragrant but not browned.
- Whisk Kraft Mayo into the skillet with ¼ cup of reserved pasta water until smooth and creamy.
- Return cooked shrimp and drained pasta to the skillet, tossing to coat evenly in the sauce (tip: if sauce is too thick, add remaining pasta water 1 tbsp at a time).
- Stir in lemon juice and fresh parsley just before serving.
Heavenly is the only word for that velvety sauce clinging to each strand, with pops of garlic and tender shrimp in every bite. Try serving it with a simple arugula salad to cut through the richness, or double the garlic if you’re feeling bold—it’s that kind of forgiving, crowd-pleasing dish that never fails to impress.
Kraft Ranch Veggie Dip
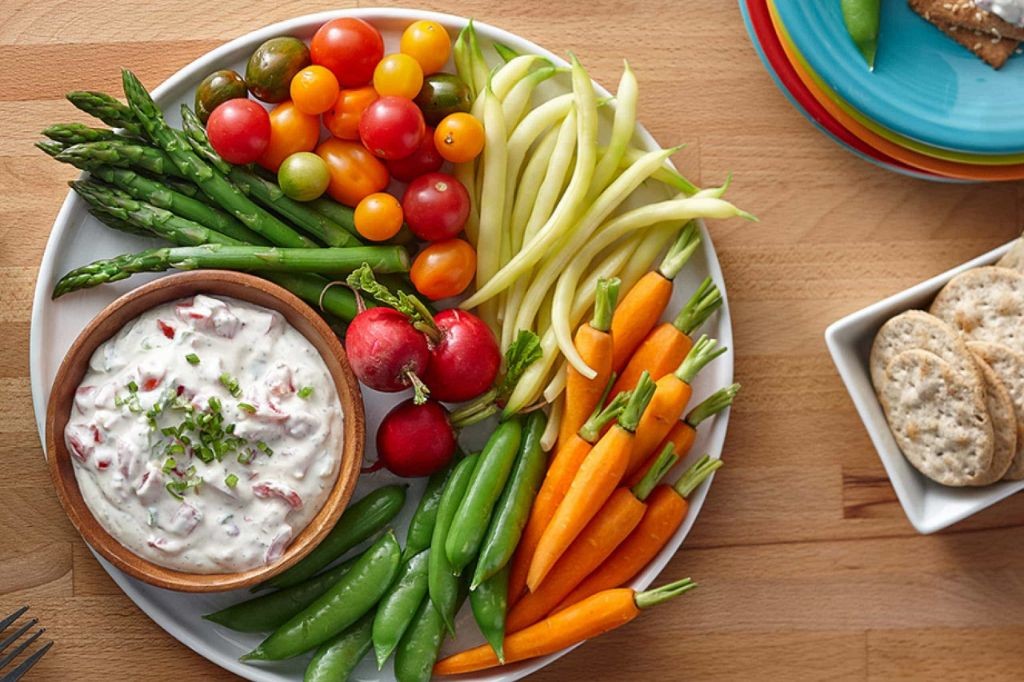
Remember those lazy summer afternoons when you just needed something quick and delicious to serve with fresh veggies? I created this Kraft Ranch Veggie Dip during one such moment when unexpected guests showed up, and it’s been my go-to ever since for its incredible simplicity and crowd-pleasing flavor.
Ingredients
Kraft Ranch Dressing Mix – 1 packet
Sour Cream – 16 oz
Mayonnaise – 1 cup
Instructions
1. Place 16 oz of sour cream in a medium mixing bowl.
2. Add 1 cup of mayonnaise to the same bowl.
3. Open 1 packet of Kraft Ranch Dressing Mix and pour it into the bowl.
4. Use a whisk to combine all ingredients thoroughly for exactly 2 minutes until completely smooth and no dry pockets remain. Tip: Whisking for the full 2 minutes ensures the ranch powder fully dissolves and prevents any gritty texture.
5. Transfer the dip to an airtight container.
6. Refrigerate the dip for at least 4 hours before serving. Tip: This chilling time is essential as it allows the flavors to fully develop and the dip to thicken to the perfect consistency.
7. Serve chilled with your favorite fresh vegetables. Tip: For best results, use vegetables that have been patted dry to prevent the dip from becoming watery. You’ll love how the creamy, tangy dip clings perfectly to crisp vegetables, creating that ideal flavor balance in every bite. Try serving it alongside colorful bell pepper strips and crunchy celery for a vibrant presentation that always disappears quickly at gatherings.
Kraft Philadelphia Cheesecake Bites

Trying new dessert recipes is my weekend therapy, and these Kraft Philadelphia Cheesecake Bites became an instant favorite after I accidentally discovered the magic of using cream cheese in bite-sized treats during a last-minute potluck scramble.
Ingredients
- Kraft Philadelphia Cream Cheese – 8 oz
- Graham Cracker Crumbs – 1 cup
- Granulated Sugar – ½ cup
- Butter – ¼ cup, melted
- Vanilla Extract – 1 tsp
- Large Egg – 1
Instructions
- Preheat your oven to 325°F and line a mini muffin tin with paper liners.
- Combine graham cracker crumbs and melted butter in a medium bowl until the mixture resembles wet sand.
- Press 1 tablespoon of the crumb mixture firmly into the bottom of each mini muffin cup using the back of a spoon.
- Bake the crusts for 5 minutes at 325°F until lightly golden, then remove from oven and let cool slightly.
- Beat the cream cheese with an electric mixer on medium speed for 2 minutes until completely smooth and lump-free.
- Gradually add sugar while mixing continuously to prevent graininess in the final texture.
- Mix in the vanilla extract and egg until just combined, being careful not to overmix which can cause cracking.
- Spoon the cheesecake filling evenly into the prepared crusts, filling each about ¾ full.
- Bake at 325°F for 15-18 minutes until the edges are set but the centers still have a slight jiggle.
- Cool completely at room temperature for 1 hour, then refrigerate for at least 2 hours before serving.
Not overly sweet with a velvety smooth center, these bites offer that classic creamy texture that makes Philadelphia cheesecake so beloved. I love serving them chilled with a drizzle of raspberry sauce or simply dusted with powdered sugar for an elegant touch.
Kraft Velveeta Queso Dip
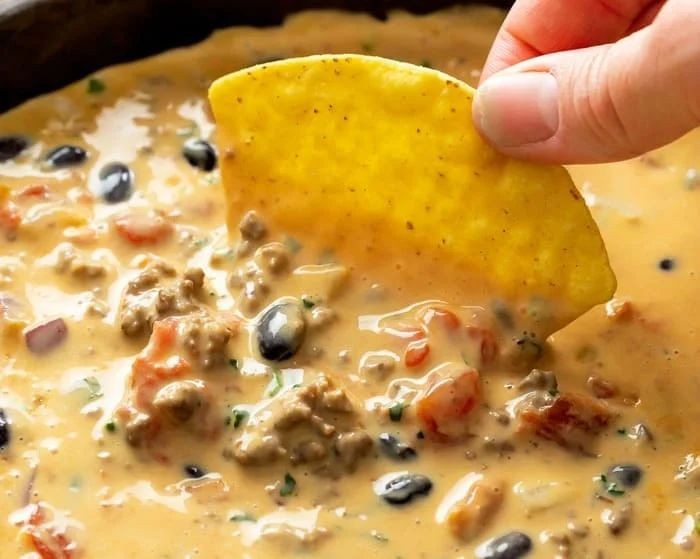
Finally, after countless game days and potlucks, I’ve perfected the easiest, creamiest queso dip that never fails to disappear first. My secret? Keeping it simple with just a few ingredients, because who has time for complicated recipes when friends are already at the door? I love how this Velveeta version reminds me of cozy nights in with my family, where the biggest debate was whether to use tortilla chips or pretzels for dipping.
Ingredients
Velveeta cheese – 16 oz
Rotel tomatoes – 1 can (10 oz)
Milk – ¼ cup
Instructions
1. Cut the Velveeta cheese into 1-inch cubes using a sharp knife. Tip: Slightly chilling the cheese makes it easier to cut cleanly without sticking.
2. Combine the cubed Velveeta, entire can of Rotel tomatoes (undrained), and milk in a medium saucepan.
3. Place the saucepan over low heat on the stovetop. Tip: Low heat prevents the cheese from scorching and ensures smooth melting.
4. Stir the mixture continuously with a wooden spoon for 8-10 minutes until the cheese is completely melted and the ingredients are fully incorporated.
5. Check that the dip has reached a smooth, pourable consistency with no visible cheese chunks. Tip: If the dip thickens upon standing, stir in an additional tablespoon of milk until desired consistency is achieved.
6. Remove the saucepan from heat and serve immediately. Just imagine that velvety, slightly spicy queso clinging to crispy tortilla chips—it’s the ultimate comfort food that turns any gathering into a celebration. I sometimes drizzle it over baked potatoes or stir it into scrambled eggs for a cheesy twist that always earns rave reviews.
Kraft Miracle Whip Coleslaw
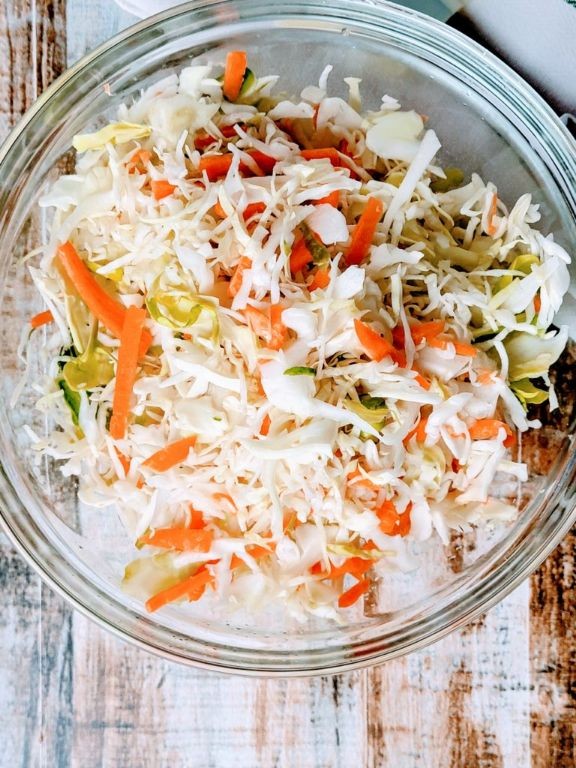
Browsing through my grandma’s old recipe box last weekend, I stumbled upon this gem that brought back memories of summer picnics and family gatherings. It’s one of those no-fuss recipes that always delivers that perfect creamy crunch we all love. I’ve made this coleslaw countless times, and it never fails to disappear first at potlucks.
Ingredients
– Coleslaw mix – 1 (16 oz) bag
– Miracle Whip – ¾ cup
– White vinegar – 2 tbsp
– Sugar – ¼ cup
– Celery seed – 1 tsp
Instructions
1. Place the coleslaw mix in a large mixing bowl.
2. Measure ¾ cup of Miracle Whip into a separate medium bowl.
3. Add 2 tablespoons of white vinegar to the Miracle Whip.
4. Stir in ¼ cup of sugar until completely dissolved.
5. Mix in 1 teaspoon of celery seed.
6. Pour the dressing over the coleslaw mix.
7. Toss everything together until evenly coated.
8. Cover the bowl with plastic wrap.
9. Refrigerate for at least 2 hours to allow flavors to meld.
10. Stir the coleslaw once more before serving.
This coleslaw develops the most wonderful creamy texture as it chills, with the celery seed adding that subtle earthy note that balances the sweetness perfectly. Try serving it on pulled pork sandwiches or alongside grilled burgers for that classic cookout experience that always brings people back for seconds.
Kraft Cool Whip Fruit Salad
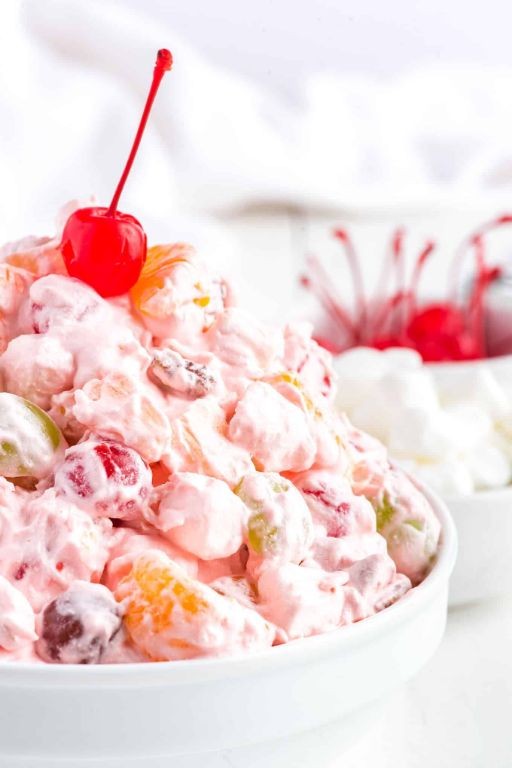
During those hectic holiday seasons when my kitchen counter looks like a battlefield of mixing bowls and measuring cups, I always turn to this ridiculously simple Cool Whip fruit salad that my grandma taught me to make. It’s the one dish that never fails to disappear first at potlucks, and honestly, I’ve caught myself eating it straight from the bowl more times than I’d care to admit.
Ingredients
Cool Whip – 8 oz
Mandarin oranges – 15 oz can, drained
Crushed pineapple – 20 oz can, drained
Mini marshmallows – 2 cups
Instructions
1. Open the can of mandarin oranges and pour them into a colander to drain completely for 5 minutes.
2. Open the can of crushed pineapple and drain it in the same colander for another 5 minutes—pressing gently with a spoon helps remove excess liquid.
3. Place the 8 oz container of Cool Whip into a large mixing bowl.
4. Add the drained mandarin oranges to the bowl with the Cool Whip.
5. Add the drained crushed pineapple to the mixture.
6. Measure 2 cups of mini marshmallows and add them to the bowl.
7. Use a rubber spatula to fold all ingredients together gently until evenly combined—overmixing will deflate the Cool Whip.
8. Cover the bowl with plastic wrap and refrigerate for at least 2 hours to allow flavors to meld.
9. Serve chilled directly from the refrigerator.
Keeping this salad chilled really makes the flavors pop, and I love how the marshmallows stay delightfully chewy against the creamy Cool Whip. Sometimes I’ll serve it in individual dessert cups with a sprinkle of toasted coconut for extra texture, but honestly, it’s perfect just as it is—cool, creamy, and refreshingly simple.
Kraft Cheese and Broccoli Rice Casserole
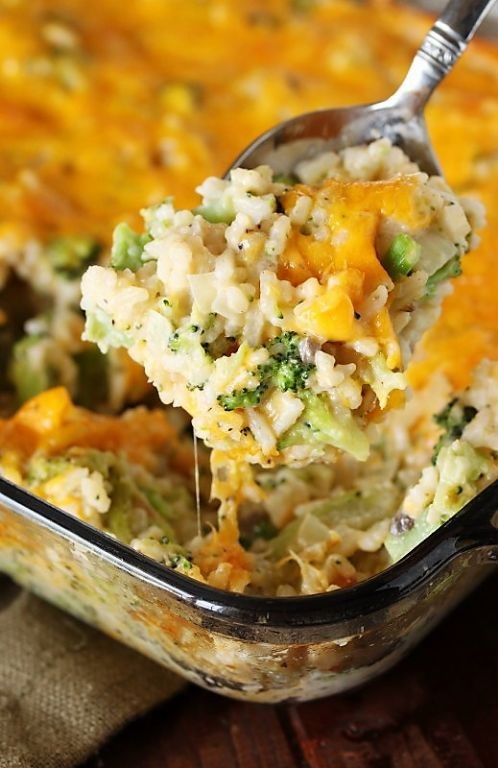
Yesterday, I found myself craving that nostalgic comfort food from my childhood—the kind of dish my mom would whip up on busy weeknights when time was tight but hearts needed warming. You know the one: cheesy, creamy, and packed with just enough broccoli to feel virtuous. It’s the ultimate cozy meal that never fails to hit the spot, especially when you’re short on time but long on hunger.
Ingredients
– Broccoli florets – 2 cups
– Cooked white rice – 3 cups
– Cream of mushroom soup – 1 can (10.5 oz)
– Milk – ½ cup
– Kraft shredded cheddar cheese – 1 ½ cups
– Butter – 2 tbsp
– Salt – ½ tsp
– Black pepper – ¼ tsp
Instructions
1. Preheat your oven to 375°F. 2. Steam the broccoli florets for 5–7 minutes until they turn bright green and are tender when pierced with a fork. 3. In a large mixing bowl, combine the cooked white rice, cream of mushroom soup, milk, 1 cup of Kraft shredded cheddar cheese, butter, salt, and black pepper. 4. Stir the mixture thoroughly until all ingredients are evenly distributed. 5. Gently fold in the steamed broccoli florets to avoid breaking them. 6. Transfer the mixture to a greased 9×13-inch baking dish, spreading it into an even layer. 7. Sprinkle the remaining ½ cup of Kraft shredded cheddar cheese evenly over the top. 8. Bake at 375°F for 20–25 minutes, or until the cheese is fully melted and the edges are bubbly. 9. Let the casserole rest for 5 minutes before serving to allow it to set. Getting this casserole on the table is a breeze, and the result is pure comfort—creamy rice mingles with tender broccoli beneath a golden, cheesy crust that’s irresistibly gooey. Serve it straight from the dish for a family-style meal, or pair it with a crisp side salad to balance the richness.
Kraft Tangy BBQ Meatballs
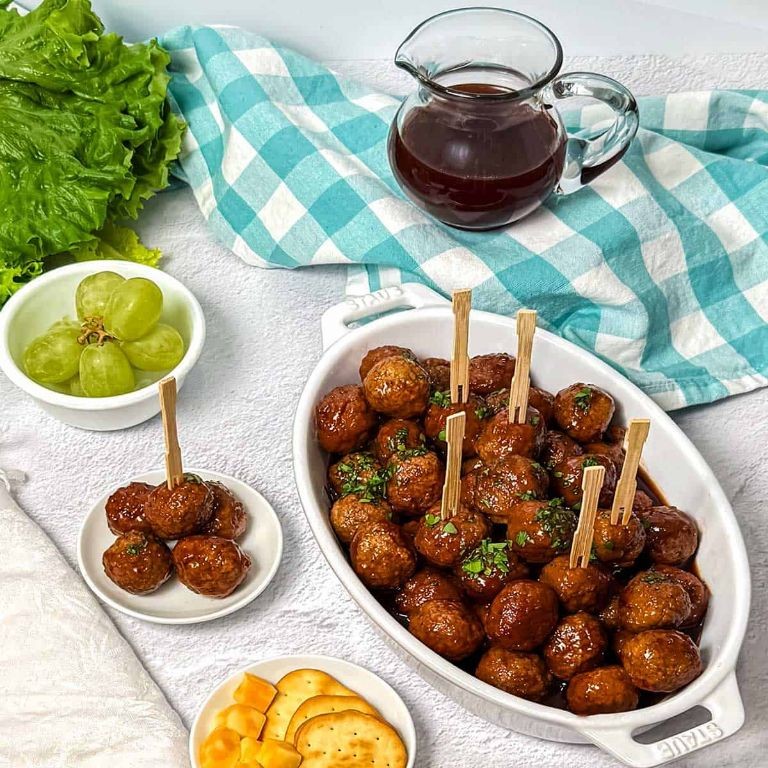
Perfect for those busy weeknights when you need something comforting and effortless, these Kraft Tangy BBQ Meatballs have become my go-to solution. I first discovered this recipe during a hectic holiday season when unexpected guests arrived, and now it’s my secret weapon for impressing crowds without spending hours in the kitchen.
Ingredients
- Frozen meatballs – 1 bag (32 oz)
- Kraft Original Barbecue Sauce – 1 bottle (18 oz)
- Grape jelly – 1 cup
Instructions
- Preheat your oven to 350°F and lightly grease a 9×13-inch baking dish with cooking spray.
- Place all frozen meatballs in the prepared baking dish, spreading them in a single layer for even cooking.
- In a medium bowl, combine the entire bottle of Kraft Original Barbecue Sauce with 1 cup of grape jelly, whisking until fully incorporated.
- Pour the sauce mixture evenly over the meatballs, making sure each one gets coated.
- Cover the baking dish tightly with aluminum foil and bake for 30 minutes.
- Remove the foil and continue baking for another 15-20 minutes until the sauce thickens and bubbles around the edges.
- Use a meat thermometer to check that the internal temperature of several meatballs reaches 165°F for food safety.
- Let the meatballs rest for 5 minutes before serving to allow the sauce to thicken further.
My favorite thing about these meatballs is how the sweet grape jelly balances the tangy barbecue sauce, creating a glossy glaze that clings perfectly to each bite. They develop a wonderful sticky texture that makes them ideal for serving over rice or stuffing into slider buns, and the sauce becomes irresistibly thick and caramelized around the edges of the baking dish.
Kraft Creamy Avocado Dressing
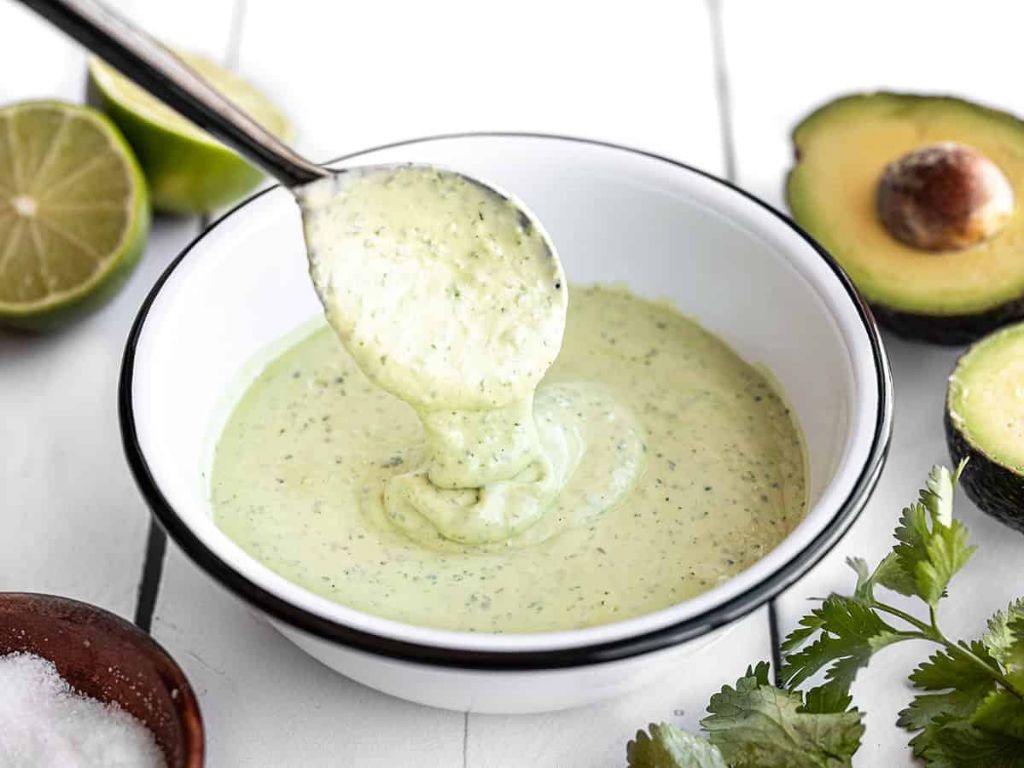
Kraft Creamy Avocado Dressing has become my go-to for busy weeknights when I want something fresh but don’t have time to make dressing from scratch—it reminds me of those summer potlucks where everyone brings something store-bought but pretends it’s homemade!
Ingredients
– Kraft Creamy Avocado Dressing – ¾ cup
– Fresh lime juice – 2 tbsp
– Plain Greek yogurt – ¼ cup
– Garlic powder – ½ tsp
– Water – 1-2 tbsp
Instructions
1. Measure ¾ cup of Kraft Creamy Avocado Dressing into a medium mixing bowl.
2. Add 2 tbsp of fresh lime juice to the bowl—squeezing it fresh rather than using bottled juice will give your dressing a brighter, zesty kick.
3. Spoon in ¼ cup of plain Greek yogurt; this adds creaminess while keeping the dressing light and tangy.
4. Sprinkle ½ tsp of garlic powder evenly over the mixture.
5. Whisk all ingredients together vigorously for 45-60 seconds, or until fully combined and smooth.
6. Check the consistency: if the dressing is too thick, add 1 tbsp of water and whisk again.
7. Taste the dressing and adjust thickness by adding another 1 tbsp of water if needed—this step ensures it pours easily over salads without being runny.
8. Transfer the finished dressing to a sealed container and refrigerate for at least 30 minutes before serving; chilling allows the flavors to meld and the garlic powder to fully hydrate.
Drizzling this over a crisp romaine salad gives you that rich, velvety texture with a subtle tang from the yogurt, while the garlic powder adds just enough savory depth without overpowering the avocado. I love using it as a dip for veggie sticks or even spreading it on turkey wraps for an extra creamy layer—it’s versatile enough to elevate simple meals without any fuss.
Kraft Peanut Butter Chocolate Pie
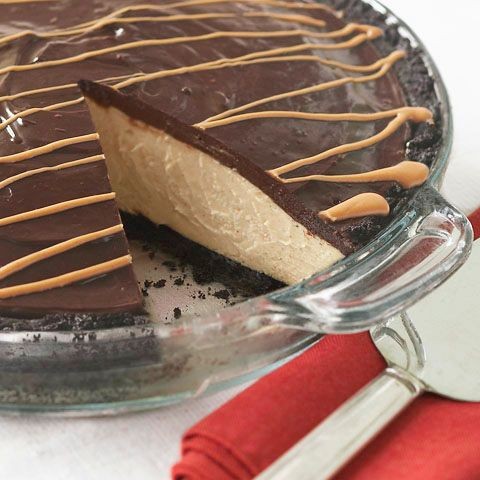
Remember those lazy Sunday afternoons when you just want something decadent without the fuss? I first tried this pie at a friend’s potluck and immediately demanded the recipe—it’s become my go-to for last-minute gatherings ever since.
Ingredients
– Cream cheese – 8 oz
– Powdered sugar – 1 cup
– Creamy peanut butter – 1 cup
– Cool Whip – 8 oz
– Chocolate pie crust – 1 (9-inch)
– Semi-sweet chocolate chips – 1 cup
– Heavy cream – ½ cup
Instructions
1. Place cream cheese in a large mixing bowl and beat with an electric mixer on medium speed for 2 minutes until smooth and creamy. (Tip: Let cream cheese sit at room temperature for 30 minutes first for easier blending.)
2. Add powdered sugar to the bowl and continue beating for 1 minute until fully incorporated.
3. Measure peanut butter and add it to the cream cheese mixture, beating for another 2 minutes until completely combined.
4. Fold in Cool Whip using a spatula until no white streaks remain, being careful not to deflate the mixture.
5. Transfer the peanut butter filling to the chocolate pie crust and spread evenly with a spatula.
6. Refrigerate the pie for 1 hour to set the filling while you prepare the topping.
7. Combine chocolate chips and heavy cream in a microwave-safe bowl.
8. Microwave the chocolate mixture on high for 1 minute, then stir until smooth and glossy. (Tip: If chocolate isn’t fully melted, microwave in 15-second intervals, stirring between each.)
9. Let the chocolate ganache cool for 5 minutes until slightly thickened but still pourable.
10. Pour ganache over the chilled pie, tilting the crust to spread it evenly across the surface.
11. Return pie to refrigerator and chill for at least 4 hours, or until fully set. (Tip: For clean slices, dip your knife in hot water before cutting each piece.)
Another slice? The silky peanut butter filling against the crisp chocolate crust creates this magical contrast, while the glossy ganache topping adds just enough bitterness to balance the sweetness. I love serving it with strong coffee to cut through the richness, or crumbling extra chocolate crust on top for added texture.
Kraft Italian Dressing Grilled Chicken
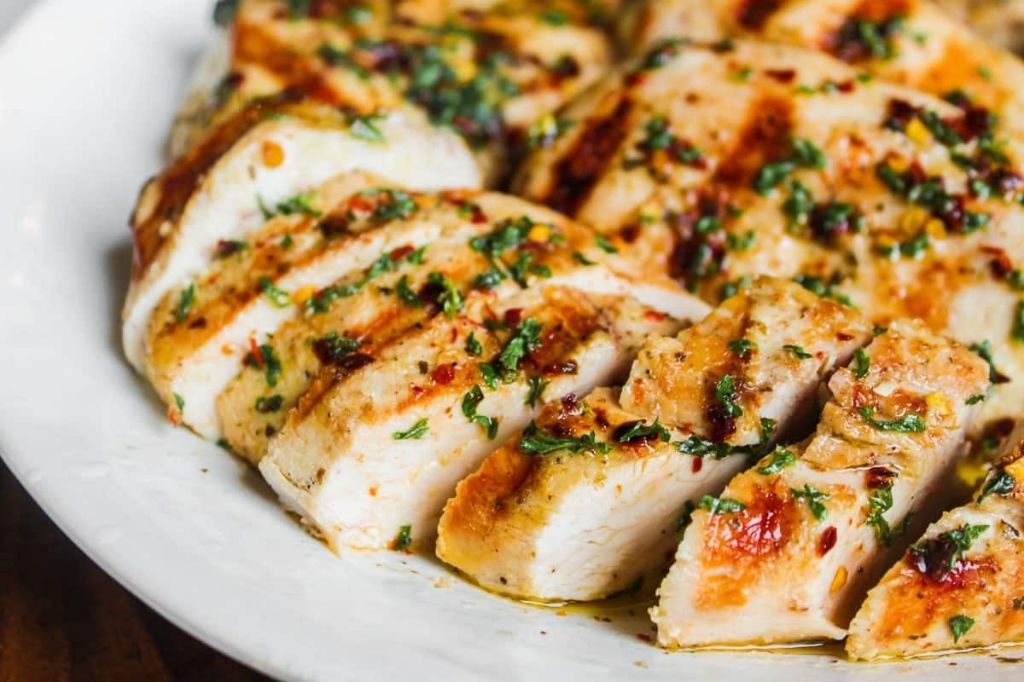
Unbelievably simple yet packed with flavor, this Kraft Italian Dressing Grilled Chicken has been my go-to weeknight dinner for years. I first discovered this trick during a busy summer when I needed something quick but delicious, and now it’s become my secret weapon for effortless entertaining.
Ingredients
- Chicken breasts – 4 (6 oz each)
- Kraft Zesty Italian Dressing – 1 cup
- Olive oil – 1 tbsp
- Salt – ½ tsp
- Black pepper – ¼ tsp
Instructions
- Place 4 chicken breasts in a large resealable plastic bag.
- Pour 1 cup of Kraft Zesty Italian Dressing over the chicken in the bag.
- Seal the bag tightly, removing as much air as possible.
- Refrigerate the marinating chicken for at least 4 hours or overnight for maximum flavor penetration.
- Preheat your outdoor grill to medium-high heat (400°F).
- Brush the grill grates with 1 tbsp of olive oil to prevent sticking.
- Remove chicken from the marinade, letting excess drip back into the bag.
- Discard the used marinade for food safety reasons.
- Season both sides of the chicken with ½ tsp salt and ¼ tsp black pepper.
- Place chicken on the preheated grill and close the lid.
- Grill for 6-8 minutes until the bottom develops dark grill marks and releases easily.
- Flip the chicken using tongs and grill for another 6-8 minutes.
- Check for doneness by inserting a meat thermometer into the thickest part – it should read 165°F.
- Transfer the cooked chicken to a clean plate and let it rest for 5 minutes before slicing.
Just look at that beautiful char and juicy interior! The chicken emerges incredibly tender with that signature zesty, herb-forward flavor that pairs perfectly with everything from simple salads to loaded grain bowls. I love slicing it thin for sandwiches or serving it alongside roasted vegetables for a complete meal that always impresses guests.
Kraft Mozzarella Stuffed Meatloaf
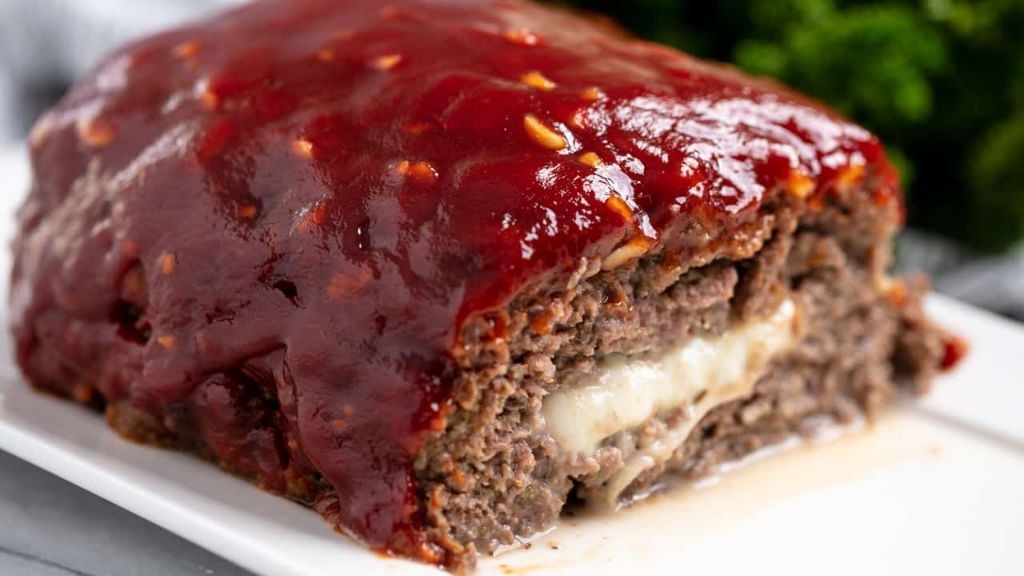
Unbelievably, my family’s favorite comfort food has been hiding a cheesy secret all these years. I discovered this twist on classic meatloaf during one of those hectic weeknights when I needed to use up leftover Kraft mozzarella, and now it’s become our go-to dinner that even my picky eater requests.
Ingredients
- Ground beef – 1.5 lbs
- Breadcrumbs – 1 cup
- Egg – 1
- Ketchup – ½ cup
- Worcestershire sauce – 1 tbsp
- Onion powder – 1 tsp
- Garlic powder – 1 tsp
- Salt – 1 tsp
- Black pepper – ½ tsp
- Kraft mozzarella cheese – 8 oz, shredded
Instructions
- Preheat your oven to 375°F and lightly grease a 9×5 inch loaf pan.
- Combine 1.5 lbs ground beef, 1 cup breadcrumbs, 1 egg, ½ cup ketchup, 1 tbsp Worcestershire sauce, 1 tsp onion powder, 1 tsp garlic powder, 1 tsp salt, and ½ tsp black pepper in a large bowl.
- Mix all ingredients with your hands until just combined, being careful not to overwork the meat.
- Press half of the meat mixture into the bottom of the prepared loaf pan, creating an even layer.
- Sprinkle 8 oz shredded Kraft mozzarella cheese evenly over the meat layer, leaving a ½-inch border around the edges.
- Top with the remaining meat mixture, pressing gently to seal the edges and completely encase the cheese.
- Bake at 375°F for 45 minutes, then brush the top with 2 tbsp additional ketchup if desired.
- Continue baking for another 15-20 minutes until the internal temperature reaches 160°F and the top is caramelized.
- Let the meatloaf rest for 10 minutes before slicing to allow the cheese to set properly.
Beyond the classic meatloaf experience, each slice reveals a molten mozzarella core that stretches beautifully when pulled apart. The cheese mellows the savory beef while adding a creamy texture contrast that makes this feel indulgent yet comforting. I love serving thick slices alongside garlic mashed potatoes to catch any escaped cheese, or making sandwiches with the leftovers the next day.
Kraft Catalina Taco Salad
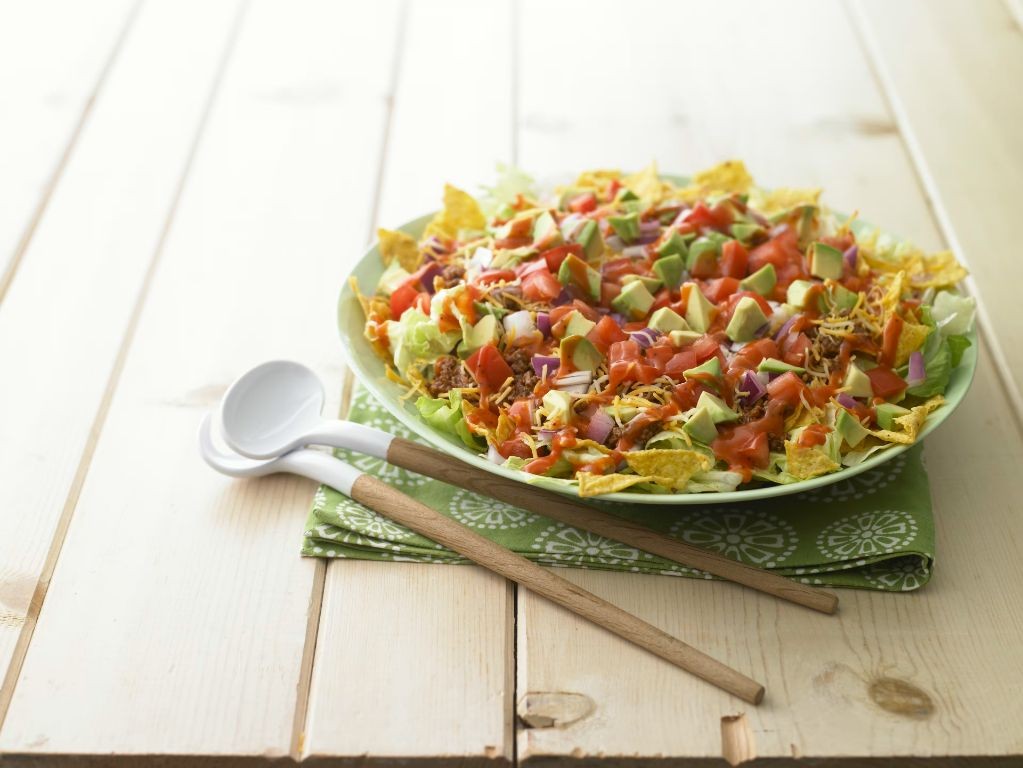
This retro Kraft Catalina Taco Salad has been my go-to potluck dish for years—it’s the one recipe my family requests every time we have a backyard gathering. There’s something about that sweet and tangy dressing mixed with crunchy chips that just screams summer fun.
Ingredients
Ground beef – 1 lb
Taco seasoning – 1 packet
Iceberg lettuce – 1 head, chopped
Cheddar cheese – 1 cup, shredded
Tomatoes – 2, diced
Catalina dressing – 1 cup
Tortilla chips – 4 cups
Instructions
1. Brown 1 lb of ground beef in a large skillet over medium-high heat for 8-10 minutes, breaking it into small crumbles with a wooden spoon.
2. Drain all excess grease from the skillet using a colander—this tip ensures your salad isn’t greasy.
3. Return the beef to the skillet and stir in 1 packet of taco seasoning with ¾ cup of water.
4. Simmer the mixture over medium heat for 5 minutes, stirring occasionally, until the liquid reduces and coats the beef.
5. Transfer the seasoned beef to a plate and refrigerate for 20 minutes to cool completely—this prevents wilting the lettuce later.
6. Chop 1 head of iceberg lettuce into bite-sized pieces and place in a large serving bowl.
7. Dice 2 tomatoes and add them to the bowl with the lettuce.
8. Sprinkle 1 cup of shredded cheddar cheese over the vegetables.
9. Add the cooled taco meat to the bowl and toss gently to combine.
10. Pour 1 cup of Catalina dressing over the salad and mix thoroughly until everything is coated.
11. Crush 4 cups of tortilla chips by hand directly over the bowl—this tip adds the perfect crunchy texture.
12. Toss the salad one final time and serve immediately for the best texture.
What I love most is how the cool, crisp lettuce contrasts with the warm, savory beef and sweet dressing. For a fun twist, try serving it in individual tortilla bowls or layering it like a dip with extra chips on the side—it’s always a crowd-pleaser!
Kraft Honey Mustard Glazed Salmon
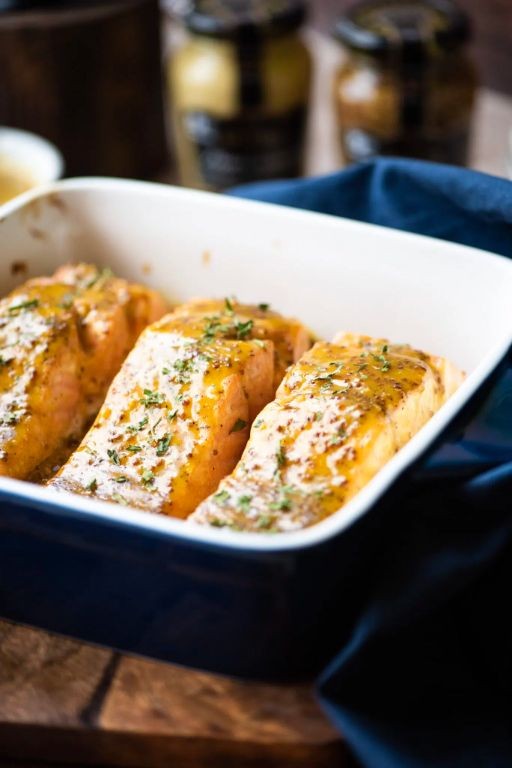
Unexpectedly, I discovered this honey mustard salmon recipe during a frantic pantry clean-out when I realized I had all the ingredients for a gourmet-tasting dinner without a trip to the store—it’s become my go-to for impressing guests with minimal effort.
Ingredients
– Salmon fillets – 4 (6 oz each)
– Kraft Honey Mustard Dressing – ½ cup
– Lemon juice – 2 tbsp
– Salt – ½ tsp
– Black pepper – ¼ tsp
Instructions
1. Preheat your oven to 400°F and line a baking sheet with parchment paper for easy cleanup—this prevents sticking without extra oil.
2. Pat the salmon fillets dry with paper towels to ensure the glaze adheres properly.
3. Arrange the salmon skin-side down on the baking sheet and season evenly with salt and black pepper.
4. Whisk together the Kraft Honey Mustard Dressing and lemon juice in a small bowl until fully combined.
5. Brush half of the honey mustard mixture generously over the top of each salmon fillet, coating them completely.
6. Bake the salmon for 12–15 minutes, or until the internal temperature reaches 145°F and the flesh flakes easily with a fork.
7. Remove the salmon from the oven and brush with the remaining glaze for an extra glossy finish.
8. Let the salmon rest for 3 minutes before serving to allow the juices to redistribute.
Buttery and flaky, this salmon boasts a caramelized glaze that balances sweet and tangy notes perfectly. I love pairing it with roasted asparagus or serving it over a bed of quinoa for a complete meal that feels indulgent yet wholesome.
Kraft Cheesy Hash Brown Bake
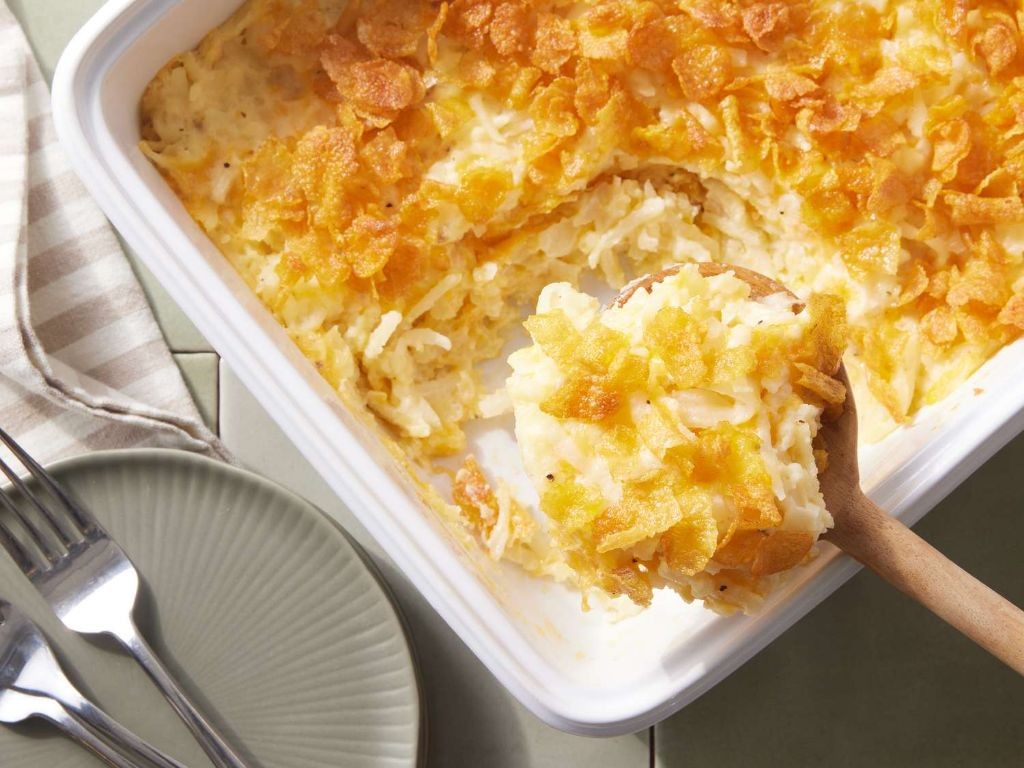
My family’s Sunday brunch just got a major upgrade with this incredibly easy cheesy hash brown bake that always disappears faster than I can say “seconds, please!” I discovered this recipe when I needed to use up some pantry staples, and now it’s our go-to comfort food that even my picky eater devours.
Ingredients
– Frozen shredded hash browns – 1 (30 oz) bag
– Cream of chicken soup – 1 (10.5 oz) can
– Sour cream – 1 cup
– Shredded cheddar cheese – 2 cups
– Butter – ½ cup, melted
– Corn flakes – 2 cups, crushed
– Salt – 1 tsp
Instructions
1. Preheat your oven to 350°F and grease a 9×13 inch baking dish with non-stick spray.
2. Combine the frozen hash browns, cream of chicken soup, sour cream, 1½ cups of cheddar cheese, and salt in a large mixing bowl.
3. Mix everything thoroughly until the hash browns are evenly coated with the creamy mixture.
4. Transfer the hash brown mixture to your prepared baking dish and spread it into an even layer.
5. In a separate small bowl, mix the crushed corn flakes with the melted butter until all flakes are lightly coated.
6. Sprinkle the remaining ½ cup of cheddar cheese evenly over the hash brown layer.
7. Top the cheese layer with the buttered corn flakes, spreading them evenly across the surface.
8. Bake at 350°F for 45-50 minutes until the edges are bubbly and the topping is golden brown.
9. Let the bake rest for 10 minutes before serving to allow the layers to set properly.
10. Use a sharp knife to cut clean portions, wiping the blade between cuts for neat servings.
You’ll love how the crispy corn flake topping gives way to that creamy, cheesy interior that’s pure comfort in every bite. Yesterday morning, I served this alongside scrambled eggs and fresh fruit for a brunch that had everyone asking for the recipe!
Kraft Thousand Island Burger Sauce
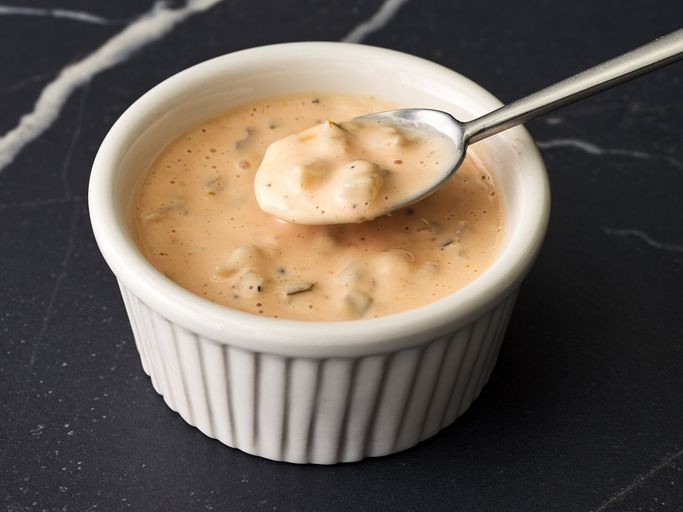
A few weeks ago, I was craving that classic burger joint flavor but wanted to whip something up quickly with pantry staples, and this simple Thousand Island sauce was the perfect solution—it’s become my go-to for burger nights ever since.
Ingredients
Mayonnaise – ½ cup
Ketchup – 2 tbsp
Sweet pickle relish – 1 tbsp
White vinegar – 1 tsp
Granulated sugar – 1 tsp
Onion powder – ¼ tsp
Instructions
1. Measure ½ cup of mayonnaise and add it to a medium mixing bowl.
2. Add 2 tablespoons of ketchup to the bowl with the mayonnaise.
3. Stir the mayonnaise and ketchup together with a whisk until fully combined.
4. Measure 1 tablespoon of sweet pickle relish and add it to the bowl.
5. Add 1 teaspoon of white vinegar to the mixture.
6. Sprinkle in 1 teaspoon of granulated sugar.
7. Add ¼ teaspoon of onion powder to the bowl.
8. Whisk all ingredients vigorously for about 1 minute until the sauce is smooth and uniformly pink.
9. Taste the sauce and adjust seasoning if needed, though the measurements are balanced for classic flavor.
10. Transfer the sauce to an airtight container and refrigerate for at least 30 minutes to allow flavors to meld. Now, this sauce has a creamy, slightly tangy kick with just the right sweetness, making it ideal not just for burgers but also as a dip for fries or spread on wraps—it’s versatile enough to elevate any casual meal.
Kraft Lemon Garlic Butter Shrimp
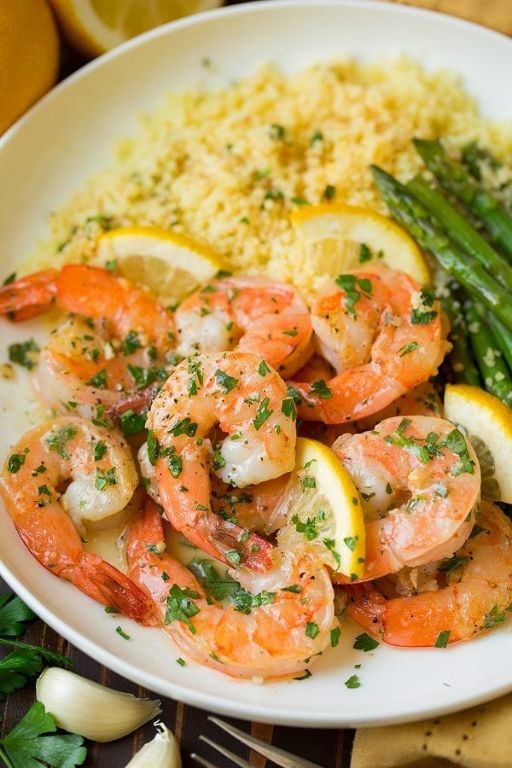
Whenever I’m craving something fancy but need dinner on the table in under 15 minutes, this Kraft Lemon Garlic Butter Shrimp is my absolute go-to. I actually discovered this combo during a frantic pantry raid last summer when friends showed up unexpectedly—now it’s my secret weapon for effortless entertaining that always gets rave reviews.
Ingredients
Large shrimp – 1 lb
Unsalted butter – 4 tbsp
Garlic – 3 cloves
Kraft Parmesan cheese – ¼ cup
Fresh lemon juice – 2 tbsp
Fresh parsley – 2 tbsp
Salt – ½ tsp
Black pepper – ¼ tsp
Instructions
1. Pat 1 lb of large shrimp completely dry with paper towels to ensure they sear properly instead of steaming.
2. Mince 3 cloves of garlic finely to distribute flavor evenly throughout the dish.
3. Heat a large skillet over medium-high heat until a drop of water sizzles immediately upon contact.
4. Add 4 tbsp of unsalted butter to the hot skillet and swirl until fully melted and bubbling.
5. Place shrimp in a single layer in the skillet, making sure they aren’t crowded for optimal browning.
6. Cook shrimp for 2 minutes without moving them to develop a golden crust on one side.
7. Flip each shrimp individually using tongs for precise control over the cooking process.
8. Cook for exactly 1 more minute until shrimp turn opaque and form a loose C-shape.
9. Add minced garlic to the skillet and cook for 30 seconds until fragrant but not browned.
10. Squeeze 2 tbsp of fresh lemon juice directly over the shrimp, scraping any browned bits from the pan bottom.
11. Sprinkle ¼ cup of Kraft Parmesan cheese evenly over the shrimp while gently stirring.
12. Remove skillet from heat immediately to prevent the cheese from clumping or becoming gritty.
13. Chop 2 tbsp of fresh parsley and stir it into the shrimp along with ½ tsp salt and ¼ tsp black pepper.
Heavenly doesn’t even begin to describe how the Parmesan creates this velvety, clingy sauce that coats each plump shrimp. The sharp cheese perfectly balances the bright lemon, making these irresistible served over creamy polenta or tossed with angel hair pasta to soak up every last drop of that glorious garlic butter sauce.