Planning healthy meals doesn’t have to mean sacrificing flavor or spending hours in the kitchen. We’ve gathered 20 delicious low-fat recipes that prove eating well can be both satisfying and simple. From quick weeknight dinners to comforting classics with a healthy twist, these dishes will keep your taste buds happy while supporting your wellness goals. Get ready to discover your new favorite meals—let’s dive in!
Skinny Turkey Meatballs
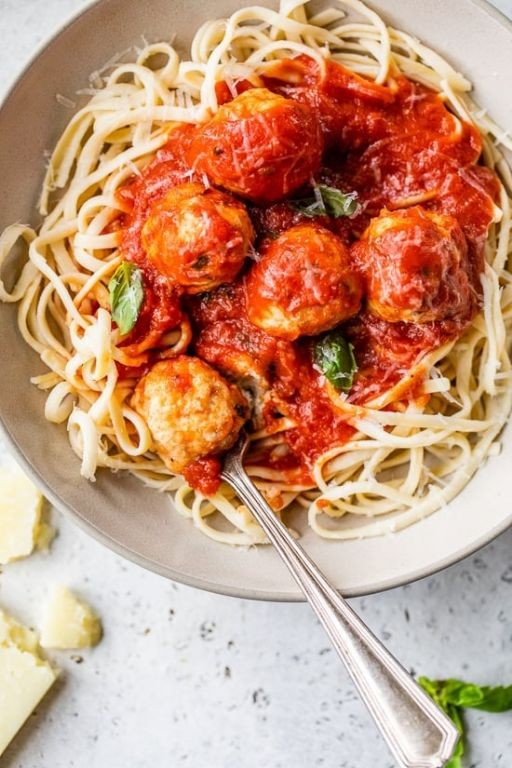
Light, yet deeply satisfying, these slender turkey meatballs offer a sophisticated twist on a classic comfort food, delivering robust flavor without the traditional heaviness. Crafted with lean ground turkey and aromatic herbs, they achieve an elegant balance between wholesome nutrition and culinary refinement. Their delicate texture and savory profile make them versatile enough for both casual weeknight dinners and polished entertaining occasions.
Ingredients
– 1 pound lean ground turkey (93/7 blend)
– ½ cup panko breadcrumbs
– ¼ cup finely grated Parmigiano-Reggiano
– 1 large pasture-raised egg, lightly beaten
– 2 tablespoons extra-virgin olive oil
– 1 tablespoon fresh oregano, minced
– 2 cloves garlic, microplaned
– ½ teaspoon fine sea salt
– ¼ teaspoon freshly cracked black pepper
Instructions
1. Preheat your oven to 400°F and line a rimmed baking sheet with parchment paper.
2. In a large mixing bowl, combine the ground turkey, panko breadcrumbs, Parmigiano-Reggiano, lightly beaten egg, minced oregano, microplaned garlic, sea salt, and black pepper.
3. Using a fork or your fingertips, gently mix the ingredients until just combined—overmixing will result in dense meatballs.
4. Portion the mixture into 1½-inch spheres using a small cookie scoop or tablespoon measure, rolling each portion gently between your palms to form smooth rounds.
5. Arrange the formed meatballs in a single layer on the prepared baking sheet, ensuring at least 1 inch of space between each for even browning.
6. Brush each meatball lightly with extra-virgin olive oil using a pastry brush to promote golden caramelization.
7. Bake for 18–20 minutes, rotating the sheet halfway through, until the internal temperature reaches 165°F on an instant-read thermometer.
8. For enhanced browning, switch the oven to broil on high and cook for an additional 1–2 minutes, watching closely to prevent burning.
9. Rest the meatballs on the baking sheet for 5 minutes before serving to allow juices to redistribute.
Zestfully tender with a delicate crumb, these meatballs boast a subtle herbaceous fragrance and savory depth from the aged cheese. Their lightly crisp exterior gives way to a remarkably moist interior, making them splendid served over creamy polenta or nestled in a vibrant marinara sauce for an elevated yet approachable meal.
Quinoa Stuffed Bell Peppers

Elegant yet approachable, quinoa-stuffed bell peppers transform humble ingredients into a visually stunning centerpiece dish that nourishes both body and soul with its vibrant colors and sophisticated flavor profile. These edible vessels cradle a fragrant mixture of ancient grains and aromatic vegetables, creating a complete meal that satisfies with both texture and taste.
Ingredients
– 4 large bell peppers, mixed colors, tops removed and seeded
– 1 cup tri-color quinoa, thoroughly rinsed
– 2 cups vegetable broth, simmering
– 2 tablespoons extra-virgin olive oil
– 1 medium yellow onion, finely diced
– 3 cloves garlic, minced
– 1 cup cremini mushrooms, finely chopped
– 1 teaspoon smoked paprika
– ½ teaspoon ground cumin
– ¼ cup fresh parsley, finely chopped
– 4 ounces aged goat cheese, crumbled
– Sea salt and freshly cracked black pepper
Instructions
1. Preheat your oven to 375°F and lightly grease a baking dish with olive oil.
2. Place the prepared bell peppers cut-side up in the baking dish and roast for 15 minutes to soften slightly.
3. While peppers roast, combine quinoa and simmering vegetable broth in a saucepan, cover, and cook over low heat for exactly 18 minutes until liquid is absorbed and grains show little tails.
4. Heat olive oil in a large skillet over medium heat until shimmering but not smoking.
5. Sauté diced onion for 5-7 minutes until translucent and fragrant.
6. Add minced garlic and cook for 60 seconds until aromatic but not browned.
7. Incorporate chopped mushrooms and cook for 8-10 minutes until they release their moisture and develop golden edges.
8. Stir in smoked paprika and ground cumin, toasting the spices for 30 seconds to release their essential oils.
9. Fluff the cooked quinoa with a fork and combine with the mushroom mixture in the skillet.
10. Fold in chopped parsley and half of the crumbled goat cheese until evenly distributed.
11. Season the filling generously with sea salt and freshly cracked black pepper.
12. Carefully spoon the quinoa mixture into the partially roasted bell peppers, packing gently but not compressing.
13. Top each pepper with remaining goat cheese and bake at 375°F for 25-30 minutes until peppers are tender-crisp and cheese is lightly golden.
14. Rest the stuffed peppers for 5 minutes before serving to allow flavors to meld.
A symphony of textures awaits in each bite—the tender-crisp pepper gives way to the nutty quinoa and earthy mushrooms, while the melted goat cheese provides creamy contrast. Serve these vibrant vessels atop a pool of roasted red pepper coulis for dramatic presentation, or accompany with a simple arugula salad dressed in lemon vinaigrette to cut through the richness. The smoked paprika lends a subtle warmth that deepens overnight, making these even more flavorful as leftovers.
Low Fat Greek Yogurt Pancakes

Sublimely light yet satisfyingly substantial, these Low Fat Greek Yogurt Pancakes redefine morning indulgence with their delicate texture and sophisticated flavor profile. Crafted with premium ingredients, they transform the humble pancake into an elegant breakfast centerpiece that nourishes without compromise. Each golden disc emerges with a tender crumb and subtle tang that pairs beautifully with both sweet and savory accompaniments.
Ingredients
– 1 cup all-purpose flour, sifted
– 2 teaspoons aluminum-free baking powder
– ¼ teaspoon fine sea salt
– 1 cup nonfat Greek yogurt
– 2 large pasture-raised eggs, lightly beaten
– ¼ cup pure maple syrup
– 1 teaspoon Madagascar bourbon vanilla extract
– 2 tablespoons clarified butter
– Fresh seasonal berries for serving
Instructions
1. Whisk together the sifted all-purpose flour, aluminum-free baking powder, and fine sea salt in a large mixing bowl until thoroughly combined.
2. In a separate bowl, gently fold the nonfat Greek yogurt into the lightly beaten pasture-raised eggs until just incorporated.
3. Drizzle the pure maple syrup and Madagascar bourbon vanilla extract into the yogurt mixture, stirring with a silicone spatula until the liquid ingredients emulsify.
4. Create a well in the center of the dry ingredients and pour the wet mixture into it, folding gently until no dry pockets remain—being careful not to overmix to maintain a tender crumb.
5. Heat a cast-iron griddle over medium-low heat (325°F surface temperature) and brush with ½ tablespoon of clarified butter using a pastry brush.
6. Pour ¼-cup portions of batter onto the preheated surface, spacing them 2 inches apart to allow for even spreading.
7. Cook for 2-3 minutes until bubbles form across the entire surface and the edges appear set with a matte finish.
8. Slide a thin offset spatula beneath each pancake and flip decisively in one smooth motion to preserve the airy structure.
9. Continue cooking for 1½-2 minutes on the second side until golden brown and spring back lightly when pressed with a fingertip.
10. Transfer to a wire rack in a single layer rather than stacking to prevent steaming and maintain crisp edges.
11. Repeat the cooking process with remaining batter, brushing the griddle with additional clarified butter between batches.
12. Arrange the pancakes on warmed plates and garnish generously with fresh seasonal berries.
A delicate balance of airy texture and substantial satisfaction defines these elegant pancakes, with the Greek yogurt contributing a subtle tang that complements the sweetness of maple. The tender crumb practically melts on the tongue while maintaining enough structure to support luxurious toppings like lemon curd or honeyed ricotta. For an unexpected twist, layer them with smoked salmon and dill crème fraîche for a sophisticated brunch presentation that transcends traditional breakfast boundaries.
Cauliflower Crust Veggie Pizza

A sophisticated twist on a beloved classic, this cauliflower crust veggie pizza transforms humble vegetables into an elegant, gluten-free masterpiece. The delicate crust provides a crisp foundation for vibrant seasonal produce and artisanal cheeses, creating a dish that satisfies both nutritional aspirations and culinary sophistication. With its refined flavors and beautiful presentation, this pizza elevates plant-based dining to new heights of gastronomic pleasure.
Ingredients
– 1 large head cauliflower, riced (approximately 4 cups)
– 2 pasture-raised eggs, lightly beaten
– 1 cup finely grated Parmigiano-Reggiano cheese
– 1 teaspoon dried oregano
– ½ teaspoon garlic powder
– ¼ teaspoon fine sea salt
– ½ cup organic tomato sauce
– 1 cup fresh mozzarella cheese, torn into small pieces
– ½ cup roasted red peppers, thinly sliced
– ¼ cup Kalamata olives, pitted and halved
– 2 tablespoons extra virgin olive oil
– ¼ cup fresh basil leaves, for garnish
Instructions
1. Preheat your oven to 425°F and line a baking sheet with parchment paper.
2. Process the cauliflower florets in a food processor until they reach a rice-like consistency.
3. Steam the cauliflower rice for exactly 5 minutes until tender but not mushy.
4. Transfer the steamed cauliflower to a clean kitchen towel and squeeze firmly to remove all excess moisture.
5. Combine the dried cauliflower with beaten pasture-raised eggs, grated Parmigiano-Reggiano, dried oregano, garlic powder, and fine sea salt in a mixing bowl.
6. Press the cauliflower mixture into a 12-inch circle on the prepared baking sheet, creating a slightly thicker edge for the crust.
7. Bake the crust for 20 minutes at 425°F until golden brown and firm to the touch.
8. Remove the crust from the oven and brush the surface with 1 tablespoon of extra virgin olive oil.
9. Spread the organic tomato sauce evenly over the crust, leaving a ½-inch border.
10. Arrange the torn fresh mozzarella cheese evenly across the sauce.
11. Distribute the thinly sliced roasted red peppers and halved Kalamata olives artfully over the cheese.
12. Drizzle the remaining tablespoon of extra virgin olive oil over the assembled pizza.
13. Return the pizza to the oven and bake for 12-15 minutes at 425°F until the cheese is bubbly and lightly browned.
14. Remove the pizza from the oven and let it rest for 3 minutes before slicing.
15. Garnish with fresh basil leaves just before serving.
Beyond its visual appeal, this pizza delivers a satisfying crunch from the golden crust that contrasts beautifully with the creamy mozzarella and tangy tomato sauce. The roasted peppers provide a subtle sweetness that complements the briny olives, creating a sophisticated flavor profile that belies its vegetable-forward nature. Serve it alongside a crisp arugula salad dressed with lemon vinaigrette for a complete dining experience that celebrates seasonal produce at its finest.
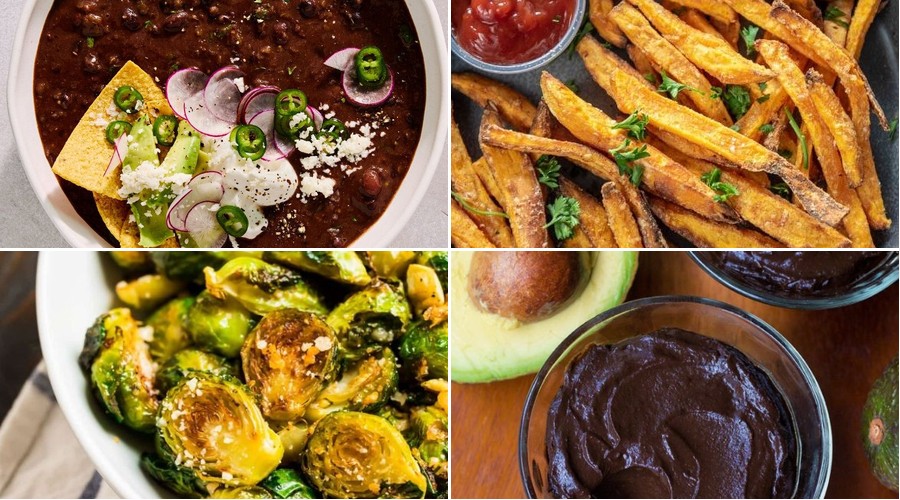
Spicy Black Bean Soup

Beneath the crisp autumn air lies a bowl of profound comfort—this Spicy Black Bean Soup marries earthy legumes with vibrant heat in a symphony of textures that both nourishes and excites the palate. Each spoonful reveals layers of smoky depth and bright acidity, making it an ideal centerpiece for cozy gatherings or solitary reflection.
Ingredients
– 2 tablespoons extra-virgin olive oil
– 1 large yellow onion, finely diced
– 3 garlic cloves, minced
– 1 jalapeño pepper, seeded and finely chopped
– 1 teaspoon ground cumin
– 1/2 teaspoon smoked paprika
– 4 cups cooked black beans, rinsed
– 4 cups vegetable broth
– 1/4 cup freshly squeezed lime juice
– 1/4 cup chopped fresh cilantro
– 1/2 cup crumbled queso fresco
– 1 avocado, sliced
Instructions
1. Heat 2 tablespoons of extra-virgin olive oil in a heavy-bottomed Dutch oven over medium heat until shimmering.
2. Add 1 large finely diced yellow onion and sauté for 6–8 minutes, until translucent and fragrant.
3. Stir in 3 minced garlic cloves and 1 finely chopped seeded jalapeño, cooking for 1 minute until aromatic.
4. Sprinkle 1 teaspoon ground cumin and 1/2 teaspoon smoked paprika over the aromatics, toasting for 30 seconds to deepen their flavors.
5. Pour in 4 cups cooked black beans and 4 cups vegetable broth, scraping the bottom to incorporate any fond.
6. Bring the mixture to a gentle boil, then reduce heat to low and simmer uncovered for 25 minutes, allowing the beans to soften further.
7. Carefully transfer half of the soup to a blender and purée until smooth, holding the lid firmly with a towel to prevent splattering.
8. Return the puréed mixture to the pot, stirring to create a velvety base with whole beans.
9. Stir in 1/4 cup freshly squeezed lime juice and simmer for 5 additional minutes to meld the flavors.
10. Ladle the soup into bowls and garnish with 1/4 cup chopped fresh cilantro, 1/2 cup crumbled queso fresco, and sliced avocado.
Zestful and robust, this soup achieves a luxurious creaminess from partial puréeing while retaining satisfying whole beans. The bright lime cuts through the smoky undertones, making it exceptional when paired with toasted cumin-scented tortilla strips or a drizzle of crema for added richness.
Lightened-Up Eggplant Parmesan
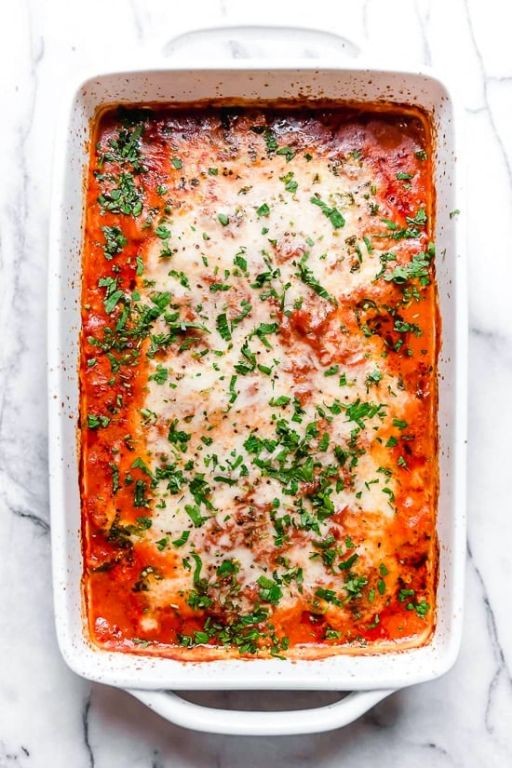
Glistening with golden promise, this reimagined eggplant parmesan transforms the classic comfort dish into an elegant, health-conscious masterpiece that maintains all the soul-satisfying qualities of the original while introducing refined techniques and premium ingredients. By employing a delicate baking method rather than traditional frying, we preserve the vegetable’s inherent silkiness while achieving that coveted crisp exterior. The result is a sophisticated interpretation that honors tradition while embracing contemporary culinary sensibilities.
Ingredients
– 2 large globe eggplants, sliced into ¼-inch rounds
– 1 cup fine Italian-style breadcrumbs
– ¾ cup freshly grated Parmigiano-Reggiano
– 2 pasture-raised eggs, lightly beaten
– ½ cup all-purpose flour
– 3 cups San Marzano tomato sauce
– 8 ounces fresh mozzarella di bufala, thinly sliced
– ¼ cup extra virgin olive oil
– 1 teaspoon sea salt flakes
– ½ teaspoon freshly cracked black pepper
– ¼ cup fresh basil leaves, chiffonade
Instructions
1. Arrange eggplant slices in a single layer on a wire rack set over a baking sheet and sprinkle both sides with sea salt flakes to draw out excess moisture.
2. Allow the salted eggplant to rest for 30 minutes until beads of moisture appear on the surface.
3. Pat each eggplant slice thoroughly dry with paper towels to ensure optimal crispiness during baking.
4. Preheat your oven to 425°F and line two baking sheets with parchment paper.
5. Create a standard breading station with three shallow dishes: one containing all-purpose flour, another with lightly beaten pasture-raised eggs, and the third with breadcrumbs mixed with half of the grated Parmigiano-Reggiano.
6. Dredge each dried eggplant slice first in flour, shaking off excess, then dip in egg mixture, allowing excess to drip back into the bowl.
7. Press each coated slice firmly into the breadcrumb-Parmigiano mixture, ensuring complete coverage on both sides.
8. Arrange breaded eggplant in a single layer on prepared baking sheets and drizzle with extra virgin olive oil.
9. Bake for 18-20 minutes until the coating is golden brown and crisp, rotating pans halfway through cooking.
10. Reduce oven temperature to 375°F and spread 1 cup of San Marzano tomato sauce in the bottom of a 9×13-inch baking dish.
11. Layer half of the baked eggplant slices over the sauce, overlapping slightly if necessary.
12. Top with 1 cup of remaining tomato sauce and half of the fresh mozzarella di bufala slices.
13. Repeat layers with remaining eggplant, sauce, and mozzarella, then sprinkle with remaining Parmigiano-Reggiano.
14. Bake uncovered for 25-30 minutes until the cheese is bubbling and lightly browned around the edges.
15. Let the dish rest for 10 minutes before serving to allow the layers to set properly.
16. Garnish with chiffonade of fresh basil leaves and freshly cracked black pepper just before serving.
Exquisitely layered and beautifully balanced, this lighter version delivers the same comforting richness as traditional eggplant parmesan with remarkably improved texture and cleaner flavors. The eggplant maintains a delicate silkiness beneath its crisp coating, while the high-quality cheeses melt into the vibrant tomato sauce creating luxurious strata. Consider serving individual portions alongside a simple arugula salad dressed with lemon vinaigrette to complement the dish’s robust character.
Low Fat Banana Oat Muffins

Wondrously moist and satisfying, these low-fat banana oat muffins offer a sophisticated take on breakfast baking that doesn’t compromise on flavor or texture. Perfectly balanced with the natural sweetness of overripe bananas and the wholesome heartiness of rolled oats, they emerge from the oven with a delicate crumb and golden-brown crown. Each bite delivers the comforting essence of banana bread in a perfectly portioned, guilt-free package that’s equally suited for elegant brunches or quick morning nourishment.
Ingredients
– 2 cups mashed overripe bananas (approximately 4 medium bananas)
– 1 ½ cups old-fashioned rolled oats
– ½ cup pure maple syrup
– ¼ cup extra-virgin olive oil
– 2 pasture-raised eggs, lightly beaten
– 1 teaspoon pure vanilla extract
– 1 teaspoon baking soda
– ½ teaspoon ground cinnamon
– ¼ teaspoon fine sea salt
Instructions
1. Preheat your oven to 375°F and line a standard 12-cup muffin tin with parchment liners.
2. In a large mixing bowl, combine the mashed overripe bananas, pure maple syrup, extra-virgin olive oil, lightly beaten pasture-raised eggs, and pure vanilla extract, whisking until fully emulsified.
3. In a separate bowl, whisk together the old-fashioned rolled oats, baking soda, ground cinnamon, and fine sea salt until evenly distributed.
4. Gently fold the dry ingredients into the wet mixture using a spatula, being careful not to overmix—this ensures a tender crumb rather than a tough texture.
5. Divide the batter evenly among the prepared muffin cups, filling each approximately three-quarters full to allow for proper rising.
6. Bake for 18-22 minutes, or until the muffins spring back lightly when pressed and a toothpick inserted into the center comes out clean.
7. Transfer the muffin tin to a wire rack and allow the muffins to cool for 5 minutes before removing them—this prevents steaming and maintains structural integrity.
8. Carefully lift the muffins from the tin and place them directly on the wire rack to cool completely, about 30 minutes.
The resulting muffins boast a delightfully moist interior with subtle chewiness from the oats, while the banana flavor shines through with nuanced sweetness enhanced by cinnamon’s warmth. For an elegant presentation, split them horizontally and toast lightly before serving with a dollop of Greek yogurt and a drizzle of honey, or enjoy them as a sophisticated afternoon treat alongside freshly brewed coffee.
Garlic Herb Roasted Brussels Sprouts
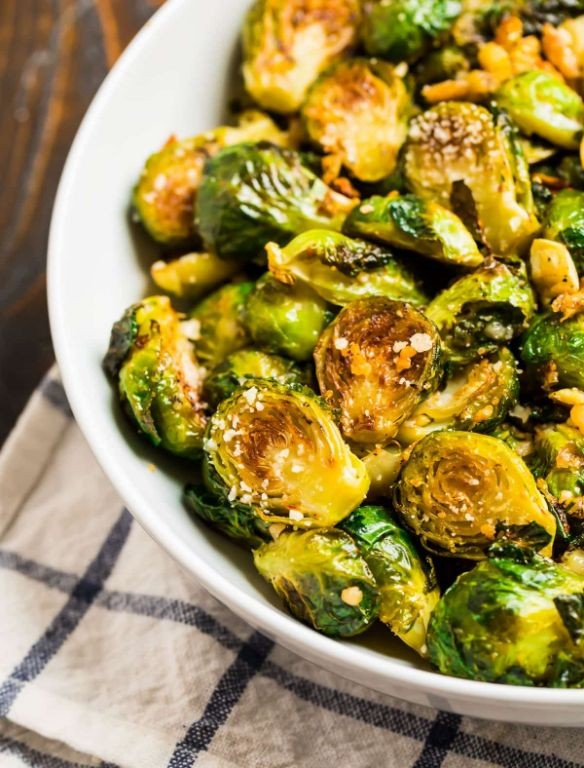
Perfectly caramelized and aromatic, these garlic herb roasted Brussels sprouts transform the humble vegetable into an elegant side dish worthy of any sophisticated table. Their crisp-edged leaves and tender interiors develop complex flavors through careful roasting, while fresh herbs and toasted garlic create a symphony of savory notes. This simple yet refined preparation elevates the Brussels sprout from ordinary to extraordinary.
Ingredients
- 1 ½ pounds fresh Brussels sprouts, trimmed and halved lengthwise
- 3 tablespoons extra virgin olive oil
- 4 large garlic cloves, thinly sliced
- 2 tablespoons fresh thyme leaves
- 1 tablespoon fresh rosemary, finely chopped
- ½ teaspoon flaky sea salt
- ¼ teaspoon freshly cracked black pepper
- 2 tablespoons aged balsamic vinegar
Instructions
- Preheat your oven to 425°F and position one rack in the upper third of the oven.
- Place the trimmed and halved Brussels sprouts in a large mixing bowl.
- Drizzle the extra virgin olive oil over the Brussels sprouts, ensuring all surfaces are lightly coated.
- Add the thinly sliced garlic cloves, fresh thyme leaves, and finely chopped rosemary to the bowl.
- Sprinkle the flaky sea salt and freshly cracked black pepper evenly over the mixture.
- Toss everything together with your hands, making sure each Brussels sprout half is well-coated with oil and seasonings.
- Arrange the Brussels sprouts in a single layer on a rimmed baking sheet, placing them cut-side down for maximum caramelization.
- Roast on the upper rack for 18-22 minutes, until the cut sides develop deep golden-brown coloring and the outer leaves become crisp.
- Remove the baking sheet from the oven and immediately drizzle the aged balsamic vinegar over the hot Brussels sprouts.
- Toss gently to distribute the vinegar, which will create a glossy glaze as it hits the warm surface.
- Return the baking sheet to the oven for exactly 2 more minutes to allow the vinegar to reduce slightly.
When properly roasted, these Brussels sprouts achieve a delightful textural contrast between their crisp, almost chip-like outer leaves and their creamy, tender interiors. The caramelized edges provide subtle sweetness that beautifully balances the earthy herbs and pungent garlic, while the balsamic reduction adds a sophisticated acidic counterpoint. Wonderful served alongside herb-roasted chicken or as part of an elegant vegetarian spread, these sprouts also make a stunning topping for creamy polenta or rustic bread crostini.
Lentil and Vegetable Stir Fry
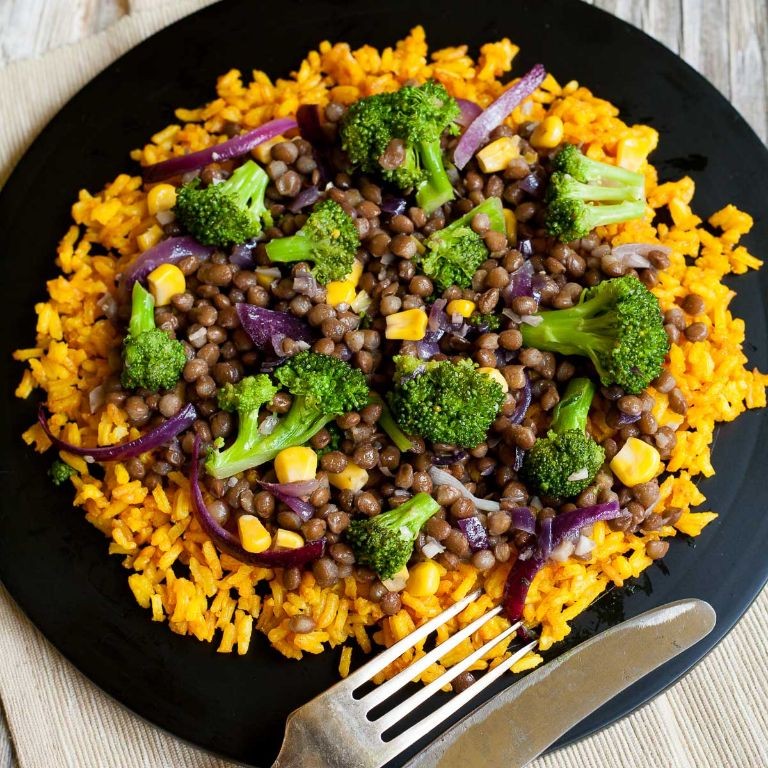
Aromatic and vibrantly hued, this lentil and vegetable stir-fry transforms humble ingredients into an elegant weeknight masterpiece that satisfies both the palate and the soul with its harmonious blend of textures and flavors.
Ingredients
– 1 cup French green lentils, rinsed and drained
– 2 tablespoons cold-pressed extra virgin olive oil
– 1 large yellow onion, finely julienned
– 3 garlic cloves, microplaned
– 1 tablespoon freshly grated ginger root
– 2 medium carrots, cut into matchsticks
– 1 red bell pepper, thinly sliced
– 1 cup shiitake mushrooms, stems removed and caps sliced
– 3 tablespoons tamari
– 1 tablespoon toasted sesame oil
– 2 tablespoons rice vinegar
– ½ teaspoon crushed red pepper flakes
– ¼ cup fresh cilantro leaves, roughly chopped
– 2 scallions, thinly sliced on the bias
Instructions
1. Combine 1 cup French green lentils with 2½ cups water in a medium saucepan and bring to a boil over high heat.
2. Reduce heat to low, cover, and simmer lentils for 20-25 minutes until tender but still retaining slight bite.
3. Drain any excess liquid from cooked lentils and set aside to cool slightly.
4. Heat 2 tablespoons cold-pressed extra virgin olive oil in a large wok or skillet over medium-high heat until shimmering but not smoking.
5. Add 1 large yellow onion, finely julienned, and sauté for 3-4 minutes until translucent and edges begin to caramelize.
6. Incorporate 3 garlic cloves, microplaned, and 1 tablespoon freshly grated ginger root, stirring constantly for 45 seconds until fragrant.
7. Add 2 medium carrots, cut into matchsticks, and cook for 2 minutes until slightly softened but still crisp.
8. Introduce 1 red bell pepper, thinly sliced, and 1 cup shiitake mushrooms, stems removed and caps sliced, stir-frying for 3 minutes until vegetables achieve tender-crisp texture.
9. Fold in cooked lentils, ensuring even distribution throughout the vegetable mixture.
10. Create a sauce by drizzling 3 tablespoons tamari, 1 tablespoon toasted sesame oil, 2 tablespoons rice vinegar, and ½ teaspoon crushed red pepper flakes around the perimeter of the wok.
11. Toss all ingredients vigorously for 1-2 minutes until sauce evenly coats every component and lentils absorb the flavors.
12. Remove from heat and garnish with ¼ cup fresh cilantro leaves, roughly chopped, and 2 scallions, thinly sliced on the bias.
Now, this dish presents a delightful interplay of earthy lentils against crisp-tender vegetables, with the tamari and sesame oil creating an umami-rich foundation that’s beautifully balanced by the bright acidity of rice vinegar. Consider serving it over jasmine rice or stuffing it into warm tortillas for an unexpected twist that highlights its versatile nature.
Baked Cod with Tomato and Olives
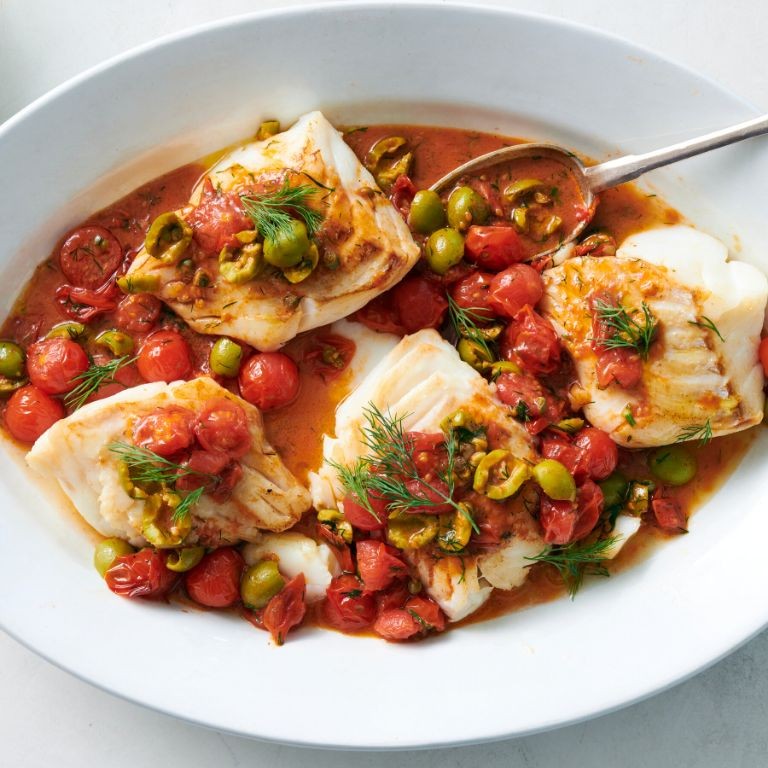
Zestfully bridging Mediterranean simplicity with elegant preparation, this baked cod celebrates the ocean’s delicate bounty through harmonious flavor pairing. The briny olives and sweet tomatoes create a vibrant sauce that gently steams the flaky white fish to perfection, yielding a dish that feels both rustic and refined. Each element maintains its distinct character while contributing to a beautifully balanced whole that delights both palate and eye.
Ingredients
- 4 (6-ounce) cod fillets, skinless and pin bones removed
- 2 tablespoons extra-virgin olive oil
- 1 large shallot, finely minced
- 2 garlic cloves, thinly sliced
- 1 pint cherry tomatoes, halved
- ½ cup Kalamata olives, pitted and halved
- 2 tablespoons capers, drained
- ¼ cup dry white wine
- 2 tablespoons fresh lemon juice
- 2 tablespoons unsalted butter, chilled and cubed
- 2 tablespoons fresh parsley, finely chopped
- ½ teaspoon sea salt flakes
- ¼ teaspoon freshly cracked black pepper
Instructions
- Preheat your oven to 400°F and position a rack in the center.
- Pat the cod fillets completely dry with paper towels to ensure proper searing.
- Season both sides of the fillets evenly with sea salt flakes and freshly cracked black pepper.
- Heat extra-virgin olive oil in a large oven-safe skillet over medium-high heat until shimmering.
- Sear the cod fillets for 2 minutes per side until lightly golden, then transfer to a plate.
- Reduce heat to medium and sauté the minced shallot until translucent, about 3 minutes.
- Add the sliced garlic and cook for 30 seconds until fragrant but not browned.
- Introduce the halved cherry tomatoes and cook until they begin to collapse, approximately 4 minutes.
- Deglaze the pan with dry white wine, scraping up any browned bits from the bottom.
- Stir in the halved Kalamata olives and drained capers.
- Return the seared cod fillets to the skillet, nestling them into the tomato-olive mixture.
- Transfer the skillet to the preheated oven and bake for 8-10 minutes until the cod flakes easily with a fork.
- Remove the skillet from the oven and place the cod fillets on serving plates.
- Stir fresh lemon juice and chilled butter cubes into the skillet sauce until emulsified.
- Fold in the finely chopped fresh parsley.
- Spoon the warm sauce generously over each cod fillet.
Remarkably tender and flaky, the cod practically dissolves on the tongue while the vibrant sauce provides bright acidity and briny depth. The tomatoes break down into a jammy consistency that contrasts beautifully with the firm olive halves, creating multiple textural experiences in each bite. For an elegant presentation, serve over creamy polenta or alongside crusty artisan bread to capture every last drop of the exquisite pan sauce.
Low Fat Chocolate Avocado Mousse
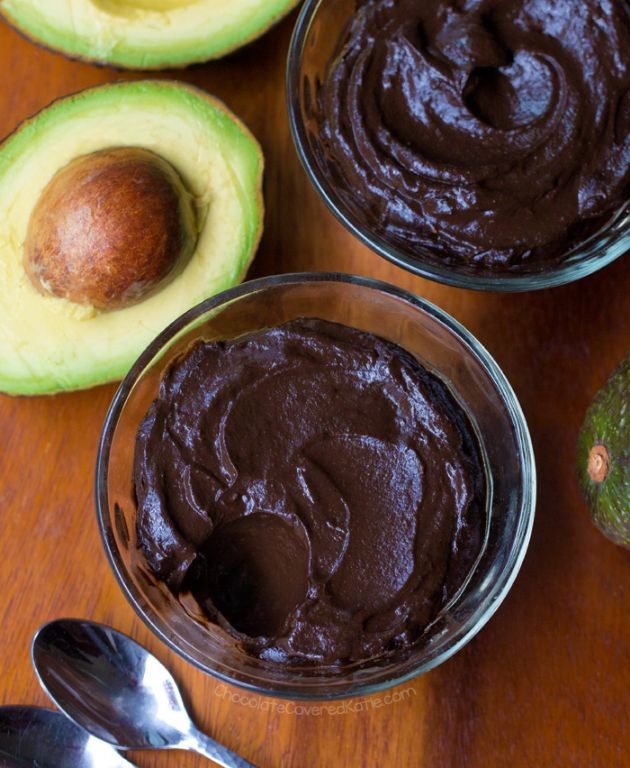
Yielded from the brilliant union of nature’s creamiest fruit and the world’s most beloved indulgence, this sophisticated dessert transforms humble ingredients into an ethereal confection. Your journey to velvety chocolate perfection begins with ripe avocados, whose subtle nuttiness provides the ideal canvas for rich cocoa. This elegant preparation proves that decadence need not compromise wellness, offering a guilt-free pleasure that satisfies both palate and conscience.
Ingredients
– 2 large, ripe Hass avocados, peeled and pitted
– ¼ cup premium Dutch-process cocoa powder
– ⅓ cup pure maple syrup, grade A dark
– ¼ cup unsweetened almond milk, chilled
– 1 teaspoon pure vanilla extract
– ¼ teaspoon fine sea salt
– ½ cup fresh raspberries, for garnish
– 4 sprigs fresh mint, for garnish
Instructions
1. Scoop the avocado flesh into a high-speed blender pitcher, ensuring no green skin remnants remain.
2. Add the Dutch-process cocoa powder, taking care to sift it through a fine-mesh sieve to eliminate any lumps.
3. Pour in the pure maple syrup, using a rubber spatula to scrape every drop from the measuring cup.
4. Incorporate the chilled unsweetened almond milk, which will help create a lighter, airier texture.
5. Add the pure vanilla extract and fine sea salt, distributing them evenly across the mixture.
6. Secure the blender lid tightly and begin processing on low speed for 15 seconds to initially combine ingredients.
7. Increase to high speed and blend for exactly 90 seconds, stopping once to scrape down the sides with a flexible spatula.
8. Check consistency by dipping a spoon into the mixture—it should coat the back of the spoon smoothly without any avocado streaks.
9. Divide the mousse equally among four 6-ounce ramekins, tapping each gently on the counter to remove air pockets.
10. Cover each ramekin with plastic wrap, pressing it directly onto the mousse surface to prevent oxidation.
11. Refrigerate for minimum 4 hours or ideally overnight at 38°F to achieve optimal firmness and flavor development.
12. Just before serving, arrange 8-10 fresh raspberries in a circular pattern atop each portion.
13. Garnish each serving with a single mint sprig placed artfully to one side.
Final presentation reveals a dessert of remarkable sophistication—the mousse possesses an impossibly smooth texture that melts luxuriously on the tongue. Deep chocolate notes are beautifully balanced by the subtle fruitiness of avocado, creating a complex flavor profile that evolves with each spoonful. For an elegant variation, layer it in clear glasses with crushed almond biscotti or serve alongside espresso granita for a sophisticated dinner party finale.
Asian-Inspired Cabbage Salad
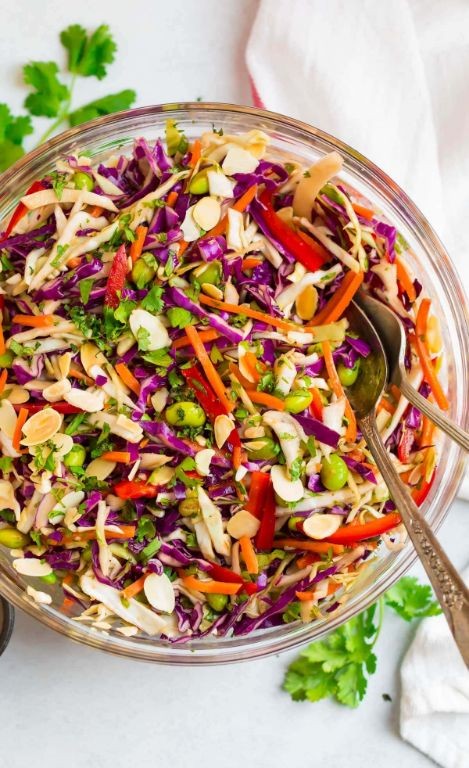
For those seeking a vibrant departure from ordinary greens, this Asian-inspired cabbage salad offers a symphony of crisp textures and umami-rich flavors that dance elegantly on the palate. Fresh napa cabbage forms the foundation, while toasted sesame seeds and aromatic herbs create layers of complexity that elevate this humble vegetable to extraordinary heights.
Ingredients
– 1 large head napa cabbage, thinly sliced
– 3 medium carrots, julienned
– 1 English cucumber, thinly sliced
– 4 scallions, finely chopped
– ½ cup roasted unsalted peanuts, roughly chopped
– ¼ cup toasted sesame seeds
– ¼ cup rice vinegar
– 3 tablespoons toasted sesame oil
– 2 tablespoons soy sauce
– 1 tablespoon honey
– 1 teaspoon freshly grated ginger
– 1 garlic clove, minced
– ¼ teaspoon red pepper flakes
Instructions
1. Place the thinly sliced napa cabbage in a large mixing bowl.
2. Add the julienned carrots, thinly sliced cucumber, and finely chopped scallions to the bowl.
3. In a separate small bowl, whisk together rice vinegar, toasted sesame oil, soy sauce, honey, freshly grated ginger, minced garlic, and red pepper flakes until fully emulsified.
4. Pour the dressing over the vegetable mixture and toss thoroughly to coat every component evenly.
5. Cover the bowl with plastic wrap and refrigerate for exactly 30 minutes to allow the flavors to meld and the cabbage to slightly soften.
6. Meanwhile, toast the sesame seeds in a dry skillet over medium heat for 2-3 minutes until fragrant and golden brown, stirring constantly to prevent burning.
7. Remove the salad from refrigeration and add the roughly chopped roasted peanuts and toasted sesame seeds.
8. Toss the salad gently one final time to distribute the nuts and seeds throughout.
9. Transfer the salad to a serving platter, ensuring an elegant presentation with visible layers of colorful vegetables.
Each bite delivers a satisfying crunch from the marinated cabbage, balanced by the creamy richness of peanuts and the nutty aroma of toasted sesame. The salad makes an exceptional accompaniment to grilled meats or stands beautifully on its own when garnished with fresh cilantro leaves and lime wedges for added brightness.
Herbed Brown Rice Pilaf
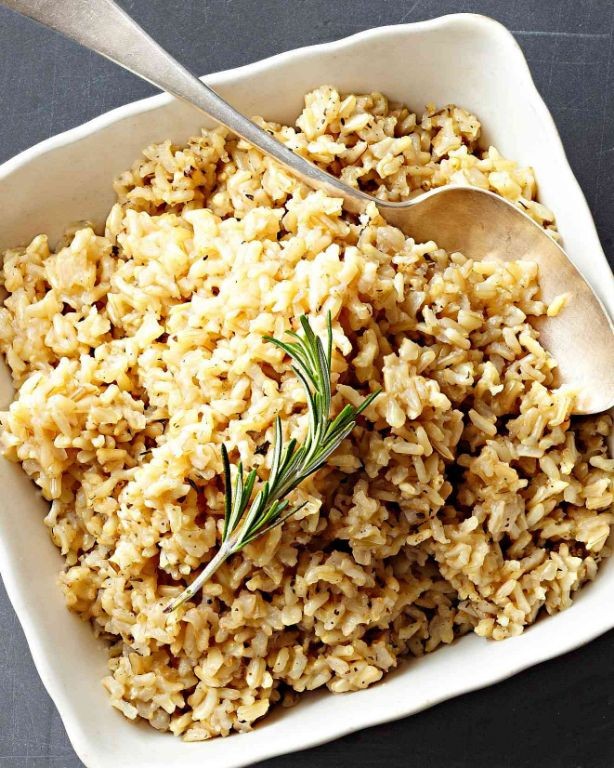
Just when you thought brown rice couldn’t become more sophisticated, this herbed pilaf transforms the humble grain into an elegant centerpiece worthy of any dinner party. Jewel-toned with flecks of emerald herbs and aromatic with the earthiness of toasted grains, this dish elevates simple ingredients through careful technique and thoughtful seasoning. Each forkful delivers complex layers of flavor that will make you reconsider brown rice’s potential entirely.
Ingredients
– 1 ½ cups long-grain brown rice
– 3 cups homemade vegetable stock
– 2 tablespoons clarified butter
– 1 medium yellow onion, finely diced
– 3 garlic cloves, minced
– ½ cup dry white wine
– ¼ cup fresh flat-leaf parsley, finely chopped
– 2 tablespoons fresh thyme leaves
– 1 tablespoon fresh rosemary, minced
– 1 teaspoon fine sea salt
– ½ teaspoon freshly cracked black pepper
Instructions
1. Rinse 1 ½ cups long-grain brown rice under cold running water until the water runs clear, then drain thoroughly to remove excess starch that can make the pilaf gummy.
2. Heat 2 tablespoons clarified butter in a heavy-bottomed saucepan over medium heat until shimmering but not smoking.
3. Add 1 finely diced medium yellow onion and sauté for 6-8 minutes until translucent and lightly golden around the edges.
4. Stir in 3 minced garlic cloves and cook for exactly 60 seconds until fragrant but not browned.
5. Add the drained brown rice and toast for 3-4 minutes, stirring constantly, until the grains become slightly opaque and smell nutty.
6. Pour in ½ cup dry white wine and cook for 2 minutes, scraping any browned bits from the bottom of the pan to incorporate their flavor.
7. Add 3 cups homemade vegetable stock, 1 teaspoon fine sea salt, and ½ teaspoon freshly cracked black pepper, then bring to a rolling boil.
8. Immediately reduce heat to the lowest setting, cover tightly with a lid, and simmer undisturbed for 45 minutes.
9. Remove the saucepan from heat and let stand covered for 15 minutes—this resting period allows the grains to steam and become perfectly separate.
10. Fluff the rice gently with a fork, then fold in ¼ cup finely chopped fresh flat-leaf parsley, 2 tablespoons fresh thyme leaves, and 1 tablespoon minced fresh rosemary.
11. Let the pilaf rest for 5 minutes to allow the herbs to wilt slightly and release their essential oils into the warm grains. Offering a delightful contrast between the firm, chewy rice grains and the tender herb flecks, this pilaf presents nutty undertones that harmonize beautifully with the aromatic rosemary and earthy thyme. Consider serving it alongside roasted heritage chicken or as a bed for seared wild mushrooms to create a vegetarian main course that celebrates texture and depth of flavor.
Summary
You now have 20 delicious low-fat recipes to make healthy eating enjoyable and sustainable. We hope these dishes inspire your kitchen adventures! Try them out, leave a comment sharing your favorite, and don’t forget to pin this article on Pinterest to save these recipes for later.