Kickstart your gift-giving game with these perfectly layered mason jar creations! Whether you’re looking for quick dinners, seasonal favorites, or comforting treats, these 20 delicious recipes transform simple ingredients into stunning, thoughtful presents. Ready to impress friends and family with beautiful, edible gifts? Keep reading to discover how easy it is to create these charming jarred delights!
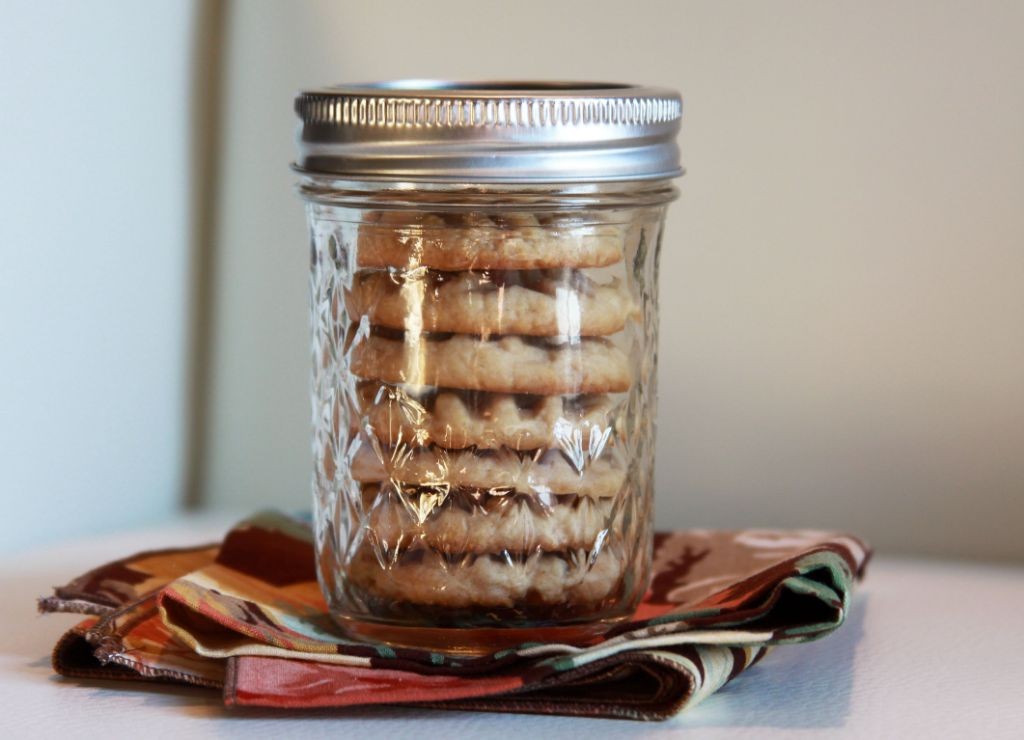
Chocolate Chip Cookie Mix in a Jar
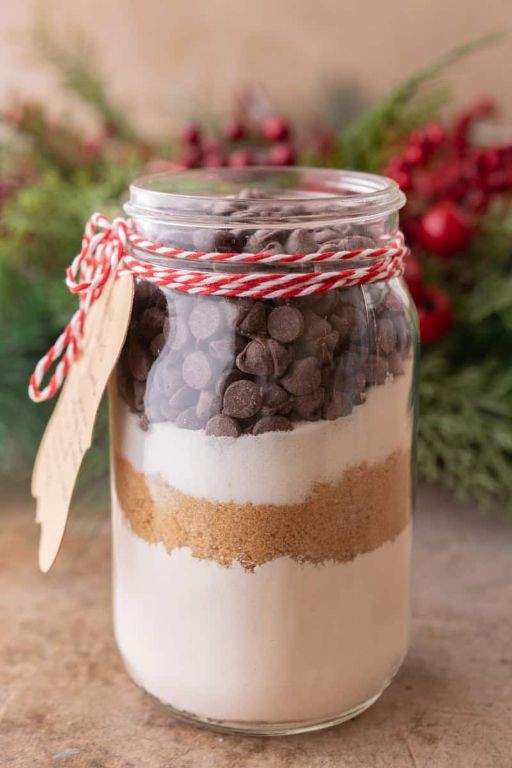
Keeping things simple in the kitchen is always a win, especially when you can create something delicious with minimal effort. This chocolate chip cookie mix in a jar is the perfect solution for when you want homemade cookies without all the measuring and prep work. You’ll love how easy it is to transform this pretty layered jar into warm, chewy cookies.
Ingredients
– 1 ¾ cups all-purpose flour
– ¾ teaspoon baking soda
– ¾ teaspoon fine sea salt
– ¾ cup packed light brown sugar
– ½ cup granulated sugar
– 1 cup semi-sweet chocolate chips
– ½ cup chopped walnuts (optional)
– 1 large farm-fresh egg
– 1 teaspoon pure vanilla extract
– ½ cup softened unsalted butter
Instructions
1. Preheat your oven to 375°F and line two baking sheets with parchment paper.
2. Empty the entire jar contents into a large mixing bowl.
3. Add ½ cup softened unsalted butter to the dry ingredients.
4. Crack 1 large farm-fresh egg into the bowl.
5. Pour in 1 teaspoon pure vanilla extract.
6. Mix everything together with a wooden spoon until just combined—don’t overmix!
7. Let the dough rest for 5 minutes to allow the flour to hydrate properly.
8. Scoop rounded tablespoons of dough onto prepared baking sheets, spacing them 2 inches apart.
9. Bake for 9-11 minutes until the edges are golden brown but centers still look slightly underdone.
10. Remove from oven and let cookies cool on baking sheets for 5 minutes before transferring to a wire rack.
Here’s the best part: these cookies come out perfectly chewy in the middle with crisp edges and that classic chocolate chip cookie flavor. Try serving them warm with a scoop of vanilla ice cream for the ultimate treat, or package them up as thoughtful homemade gifts for friends and neighbors.
Homemade Hot Cocoa Mix in a Jar
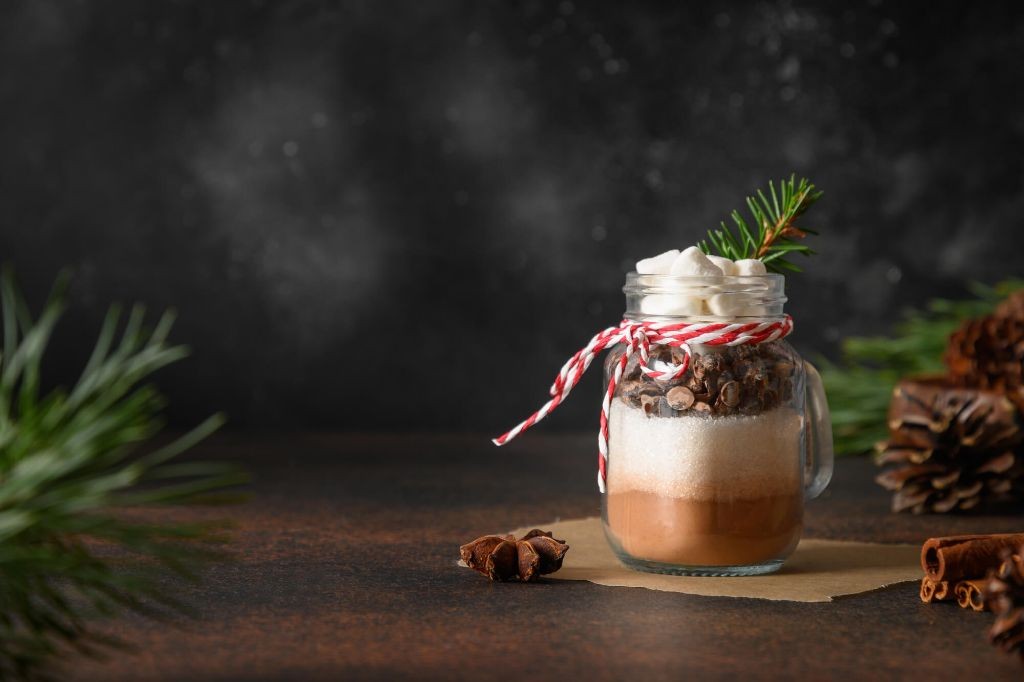
Mmm, there’s nothing quite like wrapping your hands around a warm mug of homemade hot cocoa on a chilly day. You can whip up this delightful mix in minutes and store it beautifully in a jar for cozy moments all season long. It makes the perfect homemade gift too—just add a cute tag and ribbon!
Ingredients
– 1 cup high-quality unsweetened cocoa powder
– 1 cup granulated sugar
– 1 cup powdered milk
– 1/2 cup mini marshmallows
– 1/4 cup finely chopped dark chocolate
– 1 teaspoon pure vanilla powder
– 1/2 teaspoon sea salt
Instructions
1. Measure 1 cup of high-quality unsweetened cocoa powder into a large mixing bowl.
2. Add 1 cup of granulated sugar to the same bowl.
3. Pour in 1 cup of powdered milk.
4. Sprinkle 1 teaspoon of pure vanilla powder evenly over the dry ingredients.
5. Add 1/2 teaspoon of sea salt to balance the sweetness.
6. Whisk all dry ingredients together for 2 minutes until fully combined and no streaks remain.
7. Gently fold in 1/4 cup of finely chopped dark chocolate using a spatula.
8. Carefully mix in 1/2 cup of mini marshmallows until evenly distributed.
9. Transfer the complete mixture to a clean, dry 1-quart glass jar.
10. Seal the jar tightly and store in a cool, dry place for up to 3 months.
11. To serve, add 1/3 cup of the mix to your favorite mug.
12. Pour 8 ounces of very hot water (just below boiling at 200°F) over the mix.
13. Stir continuously for 1 minute until the chocolate is fully melted and the mixture is smooth.
Know that this hot cocoa delivers the most velvety texture with deep chocolate flavor that store-bought mixes can’t match. The melted dark chocolate creates luxurious ribbons throughout each sip, while the mini marshmallows add playful sweetness and creaminess. Try serving it with a cinnamon stick stirrer or a drizzle of caramel sauce for an extra special treat!
Layered Brownie Mix in a Jar
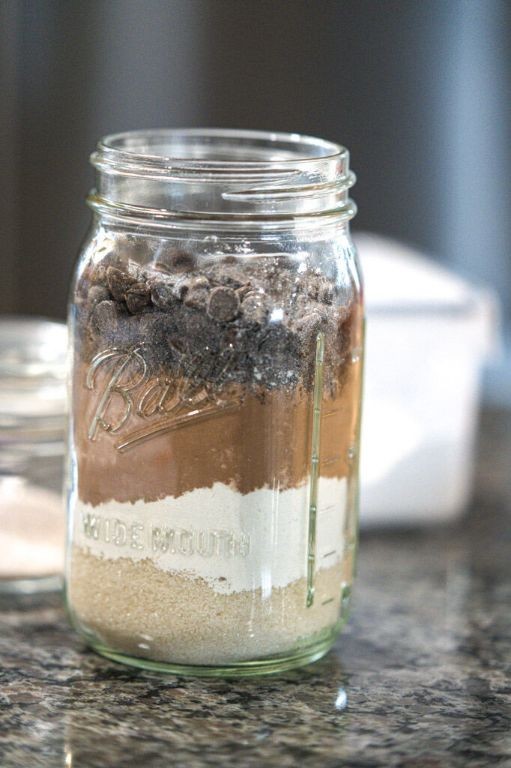
Mmm, imagine gifting someone a beautiful jar filled with all the makings of decadent brownies—just add a few fresh ingredients and bake! This layered brownie mix in a jar is not only a thoughtful present but also a foolproof way to whip up fudgy, chocolatey bliss anytime. You’ll love how the layers look and how easy it is to transform them into the ultimate treat.
Ingredients
- 1 cup granulated sugar
- ¾ cup all-purpose flour
- ⅓ cup unsweetened cocoa powder
- ½ cup semi-sweet chocolate chips
- ½ cup chopped walnuts
- ½ teaspoon baking powder
- ¼ teaspoon fine sea salt
- 2 large farm-fresh eggs
- ½ cup rich unsalted butter, melted
- 1 teaspoon pure vanilla extract
Instructions
- Layer 1 cup granulated sugar into the bottom of a clean 1-quart mason jar.
- Add ¾ cup all-purpose flour on top of the sugar, tapping the jar gently to create an even layer.
- Spoon ⅓ cup unsweetened cocoa powder over the flour, using the back of a spoon to level it.
- Pour ½ cup semi-sweet chocolate chips evenly over the cocoa layer.
- Sprinkle ½ cup chopped walnuts over the chocolate chips.
- Combine ½ teaspoon baking powder and ¼ teaspoon fine sea salt in a small bowl, then add this mixture to the jar as the final dry layer.
- Seal the jar tightly and attach a tag with wet ingredients: “Add 2 large farm-fresh eggs, ½ cup rich unsalted butter (melted), and 1 teaspoon pure vanilla extract.”
- Preheat your oven to 350°F and grease an 8×8-inch baking pan.
- Empty the jar contents into a large mixing bowl, scraping down all layers.
- Add 2 large farm-fresh eggs, ½ cup melted unsalted butter, and 1 teaspoon pure vanilla extract to the dry ingredients.
- Stir until just combined—be careful not to overmix for fudgy texture.
- Spread the batter evenly into the prepared pan using a spatula.
- Bake at 350°F for 25–30 minutes, until a toothpick inserted near the center comes out with a few moist crumbs.
- Cool brownies completely in the pan on a wire rack before slicing.
These brownies emerge with crackly tops and a dense, fudgy interior that melts in your mouth. The walnuts add a satisfying crunch, while the chocolate chips create gooey pockets throughout. Serve them warm with a scoop of vanilla ice cream for an indulgent dessert, or pack squares in lunchboxes for a sweet surprise.
Apple Cinnamon Oatmeal Mix in a Jar
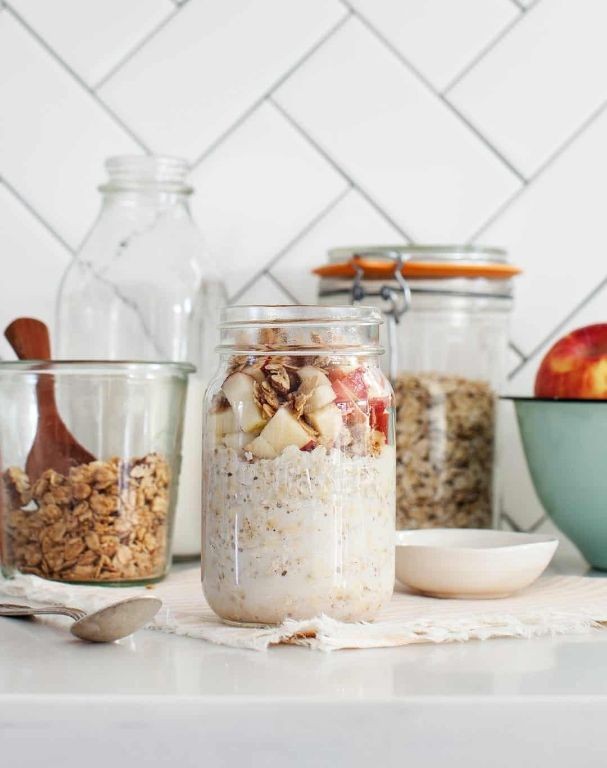
Let’s be honest—mornings can be hectic. That’s why this make-ahead apple cinnamon oatmeal mix is your new best friend for busy days. Just grab a jar, add hot water, and enjoy a cozy, homemade breakfast in minutes.
Ingredients
– 1 cup old-fashioned rolled oats
– ¼ cup finely chopped dried apples
– 2 tbsp packed light brown sugar
– 1 tsp ground cinnamon
– ¼ tsp fine sea salt
– 2 cups boiling water
Instructions
1. Combine 1 cup old-fashioned rolled oats, ¼ cup finely chopped dried apples, 2 tbsp packed light brown sugar, 1 tsp ground cinnamon, and ¼ tsp fine sea salt in a medium bowl.
2. Stir the mixture with a whisk for 30 seconds to evenly distribute the cinnamon and break up any brown sugar clumps.
3. Transfer the blended oatmeal mix to a clean 16-ounce mason jar and seal tightly with the lid.
4. Store the sealed jar in a cool, dry pantry for up to 3 months until ready to use.
5. When ready to prepare, remove the lid and pour the entire contents of the jar into a medium microwave-safe bowl.
6. Carefully measure 2 cups of boiling water and pour it directly over the dry oatmeal mixture.
7. Stir the oatmeal and water together thoroughly with a spoon until no dry patches remain.
8. Let the oatmeal sit undisturbed for 5 minutes to allow the oats to fully absorb the liquid and soften.
9. Stir the oatmeal again to fluff the texture and incorporate any settled cinnamon from the bottom.
10. Check that the oatmeal has thickened to a creamy consistency with tender oats and rehydrated apples.
Nothing beats the comforting warmth of this oatmeal with its soft, chewy texture and sweet-spiced apple flavor. Try topping it with a drizzle of maple syrup or a sprinkle of toasted walnuts for extra crunch. It’s the perfect cozy breakfast that feels like a hug in a bowl.
Peppermint Bark Cookie Mix in a Jar
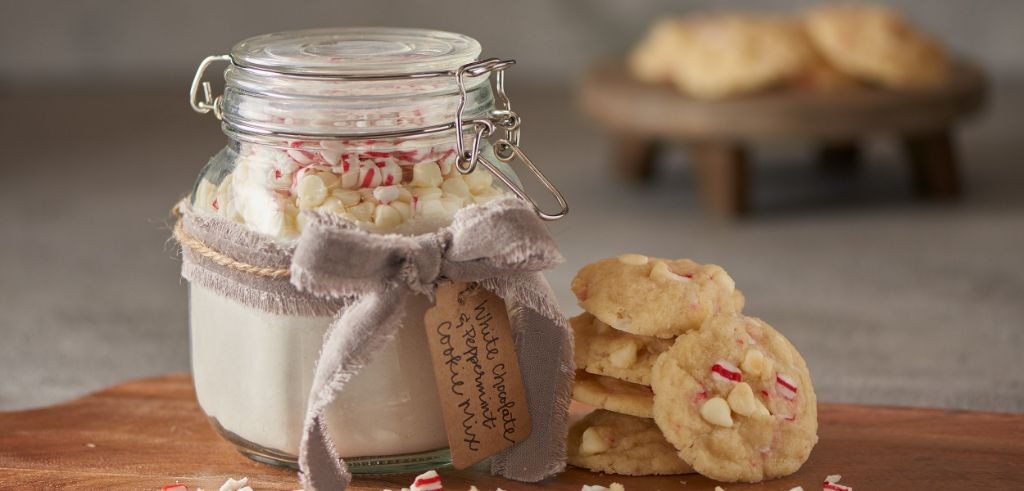
Ever find yourself craving that perfect holiday treat but short on time? You’re going to love this festive peppermint bark cookie mix that comes together in minutes. It’s like having Christmas in a jar, ready whenever you need a sweet, minty pick-me-up.
Ingredients
– 1 cup all-purpose flour
– 1/2 teaspoon baking soda
– 1/4 teaspoon fine sea salt
– 1/2 cup unsalted butter, softened to room temperature
– 1/2 cup light brown sugar, packed
– 1/4 cup granulated sugar
– 1 large farm-fresh egg
– 1 teaspoon pure vanilla extract
– 1/2 cup crushed peppermint candies
– 1/2 cup white chocolate chips
– 1/2 cup semi-sweet chocolate chunks
Instructions
1. Preheat your oven to 350°F and line two baking sheets with parchment paper.
2. In a medium bowl, whisk together 1 cup all-purpose flour, 1/2 teaspoon baking soda, and 1/4 teaspoon fine sea salt until fully combined.
3. In a separate large bowl, cream 1/2 cup softened unsalted butter with 1/2 cup packed light brown sugar and 1/4 cup granulated sugar using an electric mixer on medium speed for 2 minutes until light and fluffy.
4. Beat in 1 large farm-fresh egg and 1 teaspoon pure vanilla extract until the mixture is smooth and well-incorporated.
5. Gradually add the dry flour mixture to the wet ingredients, mixing on low speed just until no white streaks remain.
6. Gently fold in 1/2 cup crushed peppermint candies, 1/2 cup white chocolate chips, and 1/2 cup semi-sweet chocolate chunks with a spatula until evenly distributed.
7. Using a 1-tablespoon cookie scoop, drop rounded balls of dough onto prepared baking sheets, spacing them 2 inches apart.
8. Bake at 350°F for 10-12 minutes until the edges are golden brown but centers still look slightly soft.
9. Let cookies cool on baking sheets for 5 minutes before transferring to a wire rack to cool completely.
Keep these cookies stored in an airtight container—they stay wonderfully chewy for days. The combination of crunchy peppermint bits with melty chocolate creates the most delightful texture contrast. Try crumbling them over vanilla ice cream for an instant holiday sundae, or package them in cute tins as edible gifts that’ll make you everyone’s favorite friend this season.
Pancake Mix in a Jar with Maple Syrup
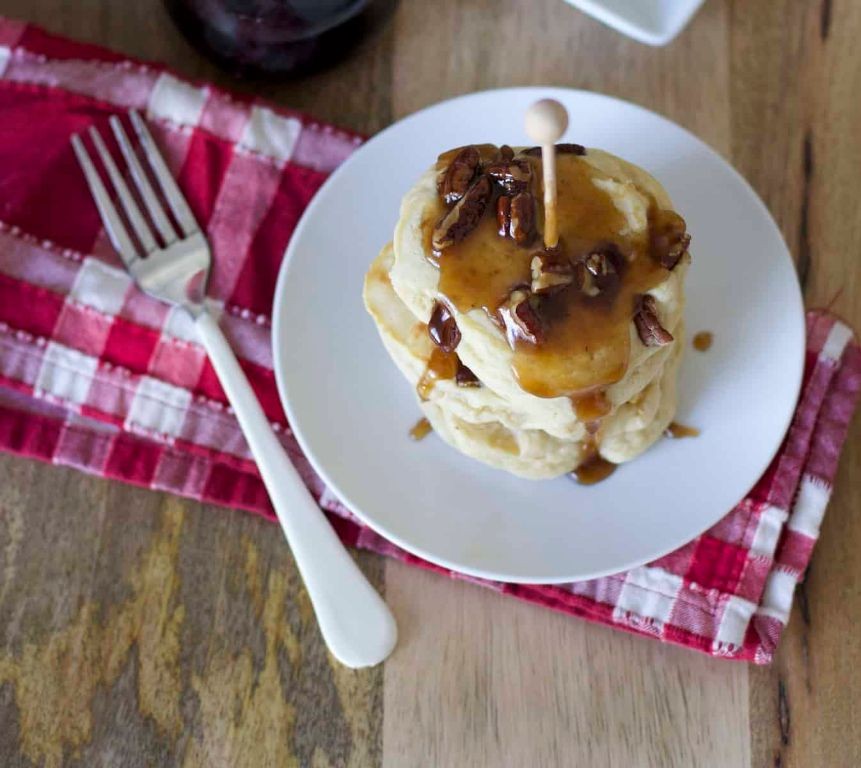
Sometimes you just need breakfast to be simple and delicious. This pancake mix in a jar with maple syrup is your new go-to for busy mornings when you want homemade flavor without the fuss. You’ll love having this ready to grab and go!
Ingredients
– 2 cups all-purpose flour
– 3 tablespoons granulated sugar
– 2 teaspoons baking powder
– 1/2 teaspoon fine sea salt
– 1 large farm-fresh egg
– 1 1/4 cups whole milk
– 3 tablespoons melted unsalted butter
– 1 teaspoon pure vanilla extract
– Pure maple syrup for serving
– Fresh berries for garnish
Instructions
1. Combine 2 cups all-purpose flour, 3 tablespoons granulated sugar, 2 teaspoons baking powder, and 1/2 teaspoon fine sea salt in a large mixing bowl.
2. Whisk the dry ingredients together for 30 seconds until fully incorporated.
3. Transfer the dry mixture to a clean 1-quart mason jar and seal tightly with the lid.
4. Store the jar in a cool, dry place until ready to use.
5. When ready to cook, preheat a non-stick skillet or griddle over medium heat (350°F).
6. Crack 1 large farm-fresh egg into a medium bowl and whisk until smooth.
7. Pour 1 1/4 cups whole milk into the bowl with the egg.
8. Add 3 tablespoons melted unsalted butter and 1 teaspoon pure vanilla extract to the wet ingredients.
9. Whisk the wet mixture vigorously for 1 minute until fully combined.
10. Pour the dry pancake mix from the jar into the wet ingredients.
11. Gently fold the batter together with a spatula until just combined, leaving some small lumps.
12. Test the skillet temperature by sprinkling a few drops of water – they should sizzle and evaporate quickly.
13. Pour 1/4 cup portions of batter onto the hot skillet, spacing them 2 inches apart.
14. Cook the pancakes for 2-3 minutes until bubbles form on the surface and edges look set.
15. Flip each pancake carefully with a spatula when the bottoms are golden brown.
16. Cook for another 1-2 minutes on the second side until golden and cooked through.
17. Transfer the cooked pancakes to a warm plate.
18. Repeat with remaining batter, greasing the skillet lightly between batches if needed.
19. Serve the pancakes immediately drizzled with pure maple syrup.
20. Garnish with fresh berries if desired.
You’ll love how these pancakes turn out fluffy and golden every time. The vanilla adds a warm sweetness that pairs perfectly with that rich maple syrup. Try stacking them high with sliced bananas and a sprinkle of cinnamon for an extra special breakfast treat!
Spiced Chai Tea Mix in a Jar
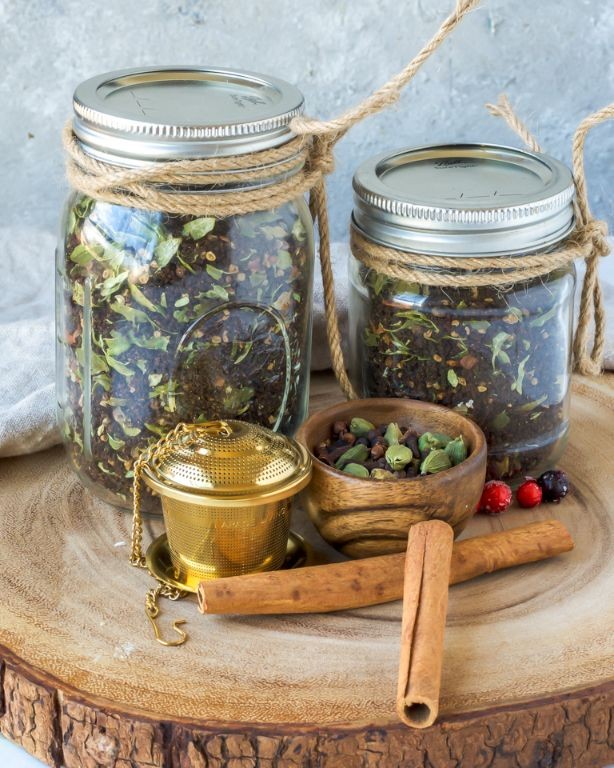
Looking for a cozy homemade gift or a quick way to warm up on chilly mornings? This spiced chai tea mix is your new go-to. You just layer the ingredients in a jar, and you’ve got a fragrant, ready-to-brew treat that feels like a hug in a mug.
Ingredients
- 1 cup fragrant loose-leaf black tea
- ½ cup aromatic whole cardamom pods
- ¼ cup warming whole cloves
- 3 plump cinnamon sticks, broken into pieces
- 2 tablespoons freshly grated nutmeg
- 1 tablespoon coarsely ground black peppercorns
- ½ cup crystallized ginger, finely chopped
Instructions
- Place 1 cup of fragrant loose-leaf black tea at the bottom of a clean 16-ounce glass jar.
- Add ½ cup of aromatic whole cardamom pods evenly over the tea layer.
- Sprinkle ¼ cup of warming whole cloves on top of the cardamom.
- Break 3 plump cinnamon sticks into 1-inch pieces and layer them over the cloves.
- Grate 2 tablespoons of fresh nutmeg directly into the jar for the brightest flavor.
- Measure 1 tablespoon of coarsely ground black peppercorns and sprinkle evenly over the nutmeg.
- Finely chop ½ cup of crystallized ginger and add it as the final layer to create a sweet, spicy top.
- Seal the jar tightly with its lid to preserve the aromatic spices.
- Store the jar in a cool, dark cupboard for up to 3 months to maintain freshness.
- To brew, add 1 heaping tablespoon of the mix to 8 ounces of just-boiled water and steep for 5 full minutes.
- Strain the tea through a fine-mesh sieve into your favorite mug.
- Stir in your preferred milk and sweetener, heating the mixture if desired until steaming hot.
Steamy and spiced, this chai delivers a bold, warming kick with hints of ginger and cinnamon. Try it iced with a splash of oat milk for a refreshing twist, or gift a jar tied with a ribbon—it’s a homemade treat that spreads comfort in every sip.
Lemon Blueberry Scone Mix in a Jar
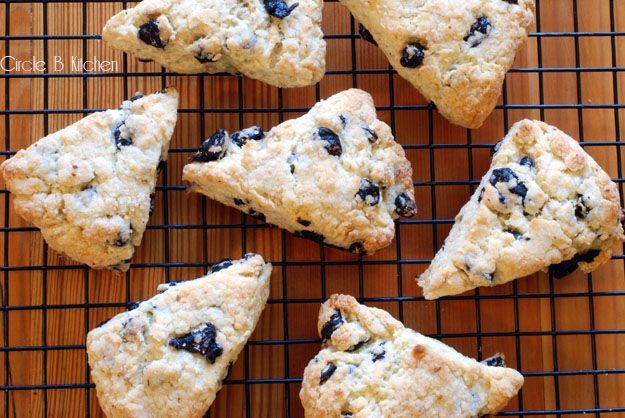
Baking should be easy and fun, right? Well, this lemon blueberry scone mix in a jar is your new best friend for lazy weekend mornings or last-minute guests. You just add a few fresh ingredients to the pre-measured dry mix, and voilà—homemade scones without the fuss.
Ingredients
- 2 cups all-purpose flour
- 1/2 cup granulated sugar
- 1 tablespoon baking powder
- 1/2 teaspoon salt
- 1/2 cup cold unsalted butter, cubed
- 1 cup dried blueberries
- 2 teaspoons lemon zest
- 1/2 cup heavy cream
- 1 large egg
- 1 teaspoon vanilla extract
Instructions
- Preheat your oven to 400°F and line a baking sheet with parchment paper.
- Empty the jar contents into a large mixing bowl.
- Add 1/2 cup cold cubed unsalted butter to the dry ingredients.
- Use a pastry cutter or your fingers to work the butter into the flour mixture until it resembles coarse crumbs.
- Stir in 1 cup dried blueberries and 2 teaspoons lemon zest until evenly distributed.
- In a separate small bowl, whisk together 1/2 cup heavy cream, 1 large egg, and 1 teaspoon vanilla extract.
- Pour the wet ingredients into the dry mixture and gently stir until just combined—don’t overmix!
- Tip: For tender scones, handle the dough as little as possible to avoid developing gluten.
- Turn the dough out onto a lightly floured surface and pat it into a 1-inch thick circle.
- Use a sharp knife to cut the circle into 8 equal wedges.
- Tip: Dip your knife in flour before cutting to prevent sticking and get clean edges.
- Arrange the wedges on the prepared baking sheet, leaving about 2 inches between each.
- Brush the tops of the scones lightly with extra heavy cream for a golden finish.
- Bake for 15–18 minutes, or until the edges are lightly golden and the tops are firm to the touch.
- Tip: Check for doneness by inserting a toothpick into the center—it should come out clean.
- Transfer the scones to a wire rack and let them cool for at least 10 minutes before serving.
Heavenly warm from the oven, these scones boast a crumbly, buttery texture with juicy bursts of blueberry and a bright lemon zing. Serve them split open with a smear of clotted cream and your favorite jam, or enjoy them as a grab-and-go treat with your morning coffee.
Peanut Butter Cookie Mix in a Jar
You know those days when you’re craving something sweet but don’t want to deal with measuring everything? This peanut butter cookie mix in a jar is your new best friend—just add a few fresh ingredients and you’ve got warm, homemade cookies in no time.
Ingredients
– 1 cup creamy natural peanut butter
– ¾ cup packed light brown sugar
– ½ cup granulated white sugar
– 1 ¾ cups all-purpose flour
– ½ teaspoon baking soda
– ¼ teaspoon fine sea salt
– 1 large farm-fresh egg
– ½ cup softened unsalted butter
– 1 teaspoon pure vanilla extract
Instructions
1. Preheat your oven to 350°F and line two baking sheets with parchment paper.
2. In a large mixing bowl, combine the creamy natural peanut butter, softened unsalted butter, packed light brown sugar, and granulated white sugar.
3. Use an electric mixer on medium speed to beat the mixture for exactly 2 minutes until light and fluffy. (Tip: Proper creaming creates air pockets for chewier cookies!)
4. Crack the large farm-fresh egg into the bowl and add the pure vanilla extract.
5. Beat for another 30 seconds until the egg is fully incorporated and the mixture looks smooth.
6. In a separate bowl, whisk together the all-purpose flour, baking soda, and fine sea salt.
7. Gradually add the dry ingredients to the wet mixture, mixing on low speed just until no white streaks remain. (Tip: Overmixing develops gluten and makes cookies tough!)
8. Scoop tablespoon-sized portions of dough and roll them into smooth balls between your palms.
9. Place dough balls 2 inches apart on prepared baking sheets and use a fork to create classic criss-cross patterns, flattening slightly.
10. Bake for 10-12 minutes until the edges are golden brown but centers still look slightly soft. (Tip: They’ll continue cooking on the hot baking sheet for perfect texture!)
11. Let cookies cool on the baking sheet for 5 minutes before transferring to a wire rack. Nothing beats the crumbly, melt-in-your-mouth texture of these peanut butter wonders. The rich nutty flavor pairs perfectly with a cold glass of milk, or try crumbling them over vanilla ice cream for an instant dessert upgrade.
Rainbow Pasta Salad Mix in a Jar

Sometimes you need a meal that’s as vibrant as your personality and just as easy to take on the go. This rainbow pasta salad mix in a jar is your new best friend for busy days, packed lunches, or last-minute picnics. You’ll love how all the colorful ingredients stay perfectly layered until you’re ready to dig in.
Ingredients
- 1 cup tri-color rotini pasta
- 1/2 cup crisp cherry tomatoes, halved
- 1/3 cup sweet yellow corn kernels
- 1/4 cup finely diced red bell pepper
- 1/4 cup thinly sliced black olives
- 1/4 cup crumbled creamy feta cheese
- 2 tbsp rich extra virgin olive oil
- 1 tbsp zesty red wine vinegar
- 1 tsp dried aromatic oregano
- 1/2 tsp coarse sea salt
- 1/4 tsp freshly cracked black pepper
- 2 cups fresh baby spinach leaves
Instructions
- Bring a large pot of salted water to a rolling boil over high heat.
- Add 1 cup tri-color rotini pasta to the boiling water and cook for 8-10 minutes until al dente (tender but still firm to the bite).
- Drain the cooked pasta in a colander and immediately rinse with cold water for 1 minute to stop the cooking process.
- Spread the cooled pasta in a single layer on a baking sheet and let it air dry for 5 minutes to prevent sogginess.
- In a small bowl, whisk together 2 tbsp rich extra virgin olive oil, 1 tbsp zesty red wine vinegar, 1 tsp dried aromatic oregano, 1/2 tsp coarse sea salt, and 1/4 tsp freshly cracked black pepper until well combined.
- Place 2 cups fresh baby spinach leaves at the bottom of a 32-ounce mason jar.
- Layer 1/2 cup crisp cherry tomatoes evenly over the spinach.
- Add 1/3 cup sweet yellow corn kernels as the next layer.
- Sprinkle 1/4 cup finely diced red bell pepper over the corn.
- Scatter 1/4 cup thinly sliced black olives across the previous layer.
- Add the cooled tri-color rotini pasta as the next layer, packing it down gently.
- Top with 1/4 cup crumbled creamy feta cheese.
- Pour the prepared dressing over the final layer, ensuring it coats the top ingredients.
- Screw the lid on tightly and refrigerate for up to 24 hours before serving.
Every bite delivers a satisfying crunch from the fresh vegetables paired with the tender pasta and tangy feta. The dressing marinates everything beautifully as it sits, creating layers of flavor that meld together perfectly. Try serving it straight from the jar for a fun picnic presentation, or shake it vigorously and enjoy the colorful confetti of flavors mixed throughout.
Chili Seasoning Mix in a Jar
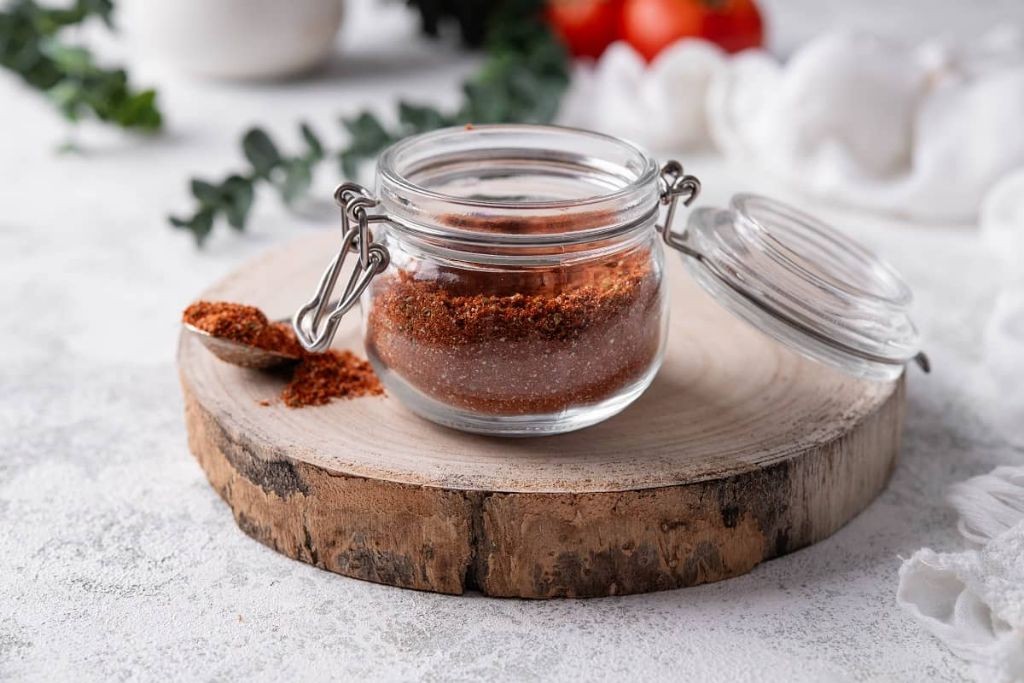
Perfect for those busy weeknights when you want homemade flavor without the fuss. You’ll love having this versatile chili seasoning mix ready to go in your pantry. Just grab a jar and you’re halfway to a comforting bowl of chili.
Ingredients
- 2 tablespoons rich chili powder
- 1 tablespoon aromatic ground cumin
- 1 tablespoon sweet smoked paprika
- 1 teaspoon pungent garlic powder
- 1 teaspoon savory onion powder
- 1 teaspoon coarse sea salt
- ½ teaspoon freshly cracked black pepper
- ½ teaspoon cayenne pepper for heat
Instructions
- Gather all your dried spices and a clean 8-ounce glass jar with a tight-fitting lid.
- Measure 2 tablespoons of rich chili powder directly into your jar.
- Add 1 tablespoon of aromatic ground cumin to the jar.
- Pour in 1 tablespoon of sweet smoked paprika.
- Sprinkle 1 teaspoon of pungent garlic powder into the mixture.
- Add 1 teaspoon of savory onion powder.
- Measure 1 teaspoon of coarse sea salt and add it to the jar.
- Include ½ teaspoon of freshly cracked black pepper.
- Finish with ½ teaspoon of cayenne pepper for that perfect kick.
- Securely fasten the lid on your jar and shake vigorously for 30 seconds until all spices are completely combined.
- Store your seasoning mix in a cool, dark place for up to 6 months to maintain maximum flavor.
- When ready to use, add the entire contents to 1 pound of browned ground beef along with 2 cups of tomato sauce and 1 cup of beef broth.
This blend creates chili with deep, smoky warmth and just the right amount of heat that builds gradually. The texture coats every bite beautifully without being gritty. Try sprinkling some over roasted potatoes or mixing into meatloaf for an unexpected flavor boost.
Caramel Apple Pie Mix in a Jar
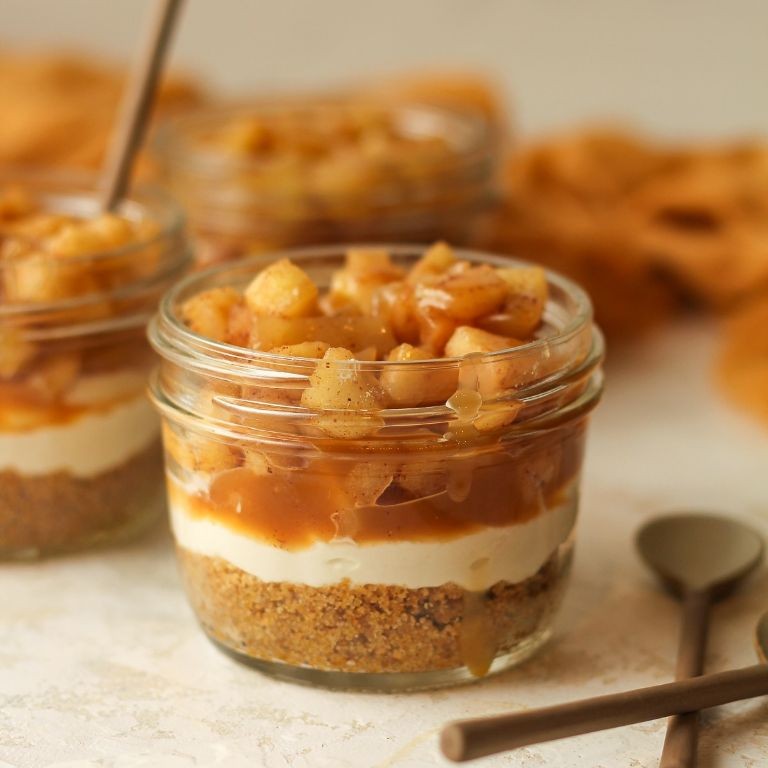
You know those cozy autumn days when you’re craving something sweet but don’t want to spend hours in the kitchen? This caramel apple pie mix in a jar is your new best friend—it’s like having fall in a jar, ready to transform into the most comforting dessert whenever the mood strikes.
Ingredients
– 2 cups old-fashioned rolled oats
– 1 cup packed light brown sugar
– 1/2 cup granulated sugar
– 1/4 cup cornstarch
– 2 tsp ground cinnamon
– 1/2 tsp freshly grated nutmeg
– 1/4 tsp fine sea salt
– 4 cups thinly sliced crisp apples (like Honeycrisp or Granny Smith)
– 1/2 cup rich caramel sauce
– 2 tbsp cold unsalted butter, cubed
Instructions
1. Layer 1 cup of old-fashioned rolled oats into the bottom of a clean 1-quart mason jar.
2. Combine 1 cup packed light brown sugar, 1/2 cup granulated sugar, 1/4 cup cornstarch, 2 tsp ground cinnamon, 1/2 tsp freshly grated nutmeg, and 1/4 tsp fine sea salt in a medium bowl, whisking for 30 seconds until fully incorporated.
3. Spoon half of the sugar-spice mixture over the oats in the jar, tapping the jar gently on the counter to settle the layers evenly.
4. Add the remaining 1 cup of old-fashioned rolled oats as the next layer.
5. Top with the remaining sugar-spice mixture, leaving about 1 inch of headspace at the top of the jar.
6. Seal the jar tightly with its lid, label it with the date, and store in a cool, dark place for up to 3 months.
7. When ready to bake, preheat your oven to 375°F and grease an 8×8-inch baking dish.
8. Empty the entire jar contents into a large mixing bowl.
9. Toss 4 cups thinly sliced crisp apples with the dry mix until each slice is thoroughly coated.
10. Pour the apple mixture into the prepared baking dish, spreading it into an even layer.
11. Drizzle 1/2 cup rich caramel sauce evenly over the apples.
12. Dot the surface with 2 tbsp cold unsalted butter, cubed, distributing the pieces uniformly.
13. Bake at 375°F for 35–40 minutes, until the apples are tender when pierced with a fork and the topping is golden brown with bubbling caramel around the edges.
14. Let the dessert rest for 15 minutes before serving to allow the caramel to thicken slightly.
A warm, gooey caramel layer seeps into the tender spiced apples, while the oat topping adds just the right amount of chewiness. Try serving it over vanilla ice cream for that classic hot-and-cold contrast, or pack it in individual jars for adorable portable treats on crisp autumn outings.
Raspberry Cheesecake Mix in a Jar
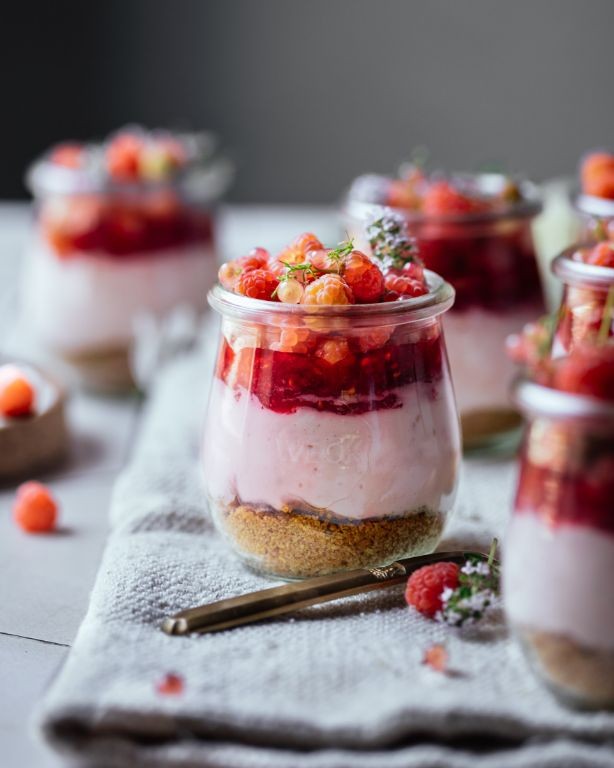
Got a jar and a craving for something sweet? This raspberry cheesecake mix is your new best friend—it’s easy to whip up, looks adorable layered in a jar, and tastes like a dream. You’ll love how the tangy raspberries play off the creamy cheesecake filling.
Ingredients
- 1 cup graham cracker crumbs, finely crushed
- 4 tbsp unsalted butter, melted and slightly cooled
- 8 oz cream cheese, softened to room temperature
- 1/2 cup powdered sugar, sifted for smoothness
- 1 tsp pure vanilla extract
- 1 cup heavy whipping cream, chilled
- 1 cup fresh raspberries, gently rinsed and patted dry
Instructions
- In a medium bowl, combine the finely crushed graham cracker crumbs with the melted unsalted butter until the mixture holds together when pressed. Tip: For extra crunch, use a food processor to crush the graham crackers into fine, even crumbs.
- Press 2 tablespoons of the graham cracker mixture firmly into the bottom of a 16-ounce mason jar to form the crust layer.
- In a separate large bowl, beat the softened cream cheese with an electric mixer on medium speed for 1–2 minutes, until completely smooth and lump-free.
- Add the sifted powdered sugar and pure vanilla extract to the cream cheese, and beat on low speed for 30 seconds, then increase to medium until fully incorporated.
- In another chilled bowl, whip the heavy whipping cream on high speed for 2–3 minutes, until stiff peaks form. Tip: Chill your bowl and beaters beforehand to help the cream whip up faster and hold its shape.
- Gently fold the whipped cream into the cream cheese mixture using a spatula, until no white streaks remain and the filling is light and fluffy.
- Spoon half of the cheesecake filling over the graham cracker crust in the jar, spreading it evenly with the back of a spoon.
- Layer half of the fresh raspberries over the cheesecake filling, gently pressing them in.
- Repeat with the remaining graham cracker mixture, pressing it lightly over the raspberries.
- Top with the rest of the cheesecake filling, smoothing the surface.
- Arrange the remaining fresh raspberries on top of the final cheesecake layer. Tip: For a prettier presentation, reserve a few whole raspberries to garnish the top just before serving.
- Cover the jar with a lid and refrigerate for at least 4 hours, or until the cheesecake is firm and set. Look for the filling to hold its shape when the jar is tilted slightly.
Look for that creamy, no-bake texture that’s both light and indulgent—each spoonful delivers a burst of tart raspberry against the smooth cheesecake. Serve it straight from the jar for a cozy treat, or top with extra berries and a drizzle of honey for a fancy twist.
Pumpkin Spice Bread Mix in a Jar
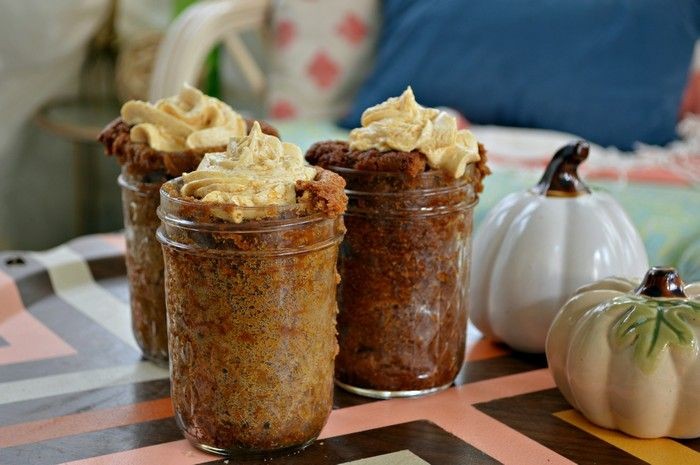
Mmm, can you imagine opening your pantry and finding this beautiful layered jar just waiting to become the most delicious pumpkin spice bread? This mix-in-a-jar concept is perfect for gifting or keeping on hand for those cozy autumn mornings when you want fresh baked goodness without the measuring fuss. You’ll love how the warm spices fill your kitchen as it bakes.
Ingredients
– 1 ½ cups all-purpose flour
– 1 cup granulated sugar
– 1 teaspoon baking soda
– ½ teaspoon salt
– 1 teaspoon ground cinnamon
– ½ teaspoon ground nutmeg
– ¼ teaspoon ground cloves
– ¼ teaspoon ground ginger
– ½ cup vegetable oil
– 2 large farm-fresh eggs
– 1 cup canned pumpkin puree
– ¼ cup room temperature water
– ½ cup chopped walnuts (optional)
Instructions
1. Preheat your oven to 350°F and generously grease a 9×5 inch loaf pan.
2. Pour the entire jar contents into a large mixing bowl.
3. Add ½ cup vegetable oil to the dry ingredients.
4. Crack 2 large farm-fresh eggs into the bowl.
5. Measure 1 cup canned pumpkin puree and add to the mixture.
6. Pour in ¼ cup room temperature water.
7. Mix everything together until just combined – don’t overmix or your bread will be tough.
8. If using walnuts, fold ½ cup chopped walnuts gently into the batter.
9. Pour the batter into your prepared loaf pan, spreading it evenly.
10. Bake at 350°F for 50-60 minutes until a toothpick inserted in the center comes out completely clean.
11. Let the bread cool in the pan for 15 minutes before transferring to a wire rack.
12. Allow the bread to cool completely before slicing for clean cuts.
Absolutely nothing beats slicing into this moist, tender bread and seeing those beautiful spice-speckled crumbs. The pumpkin keeps it incredibly moist while the warm spice blend creates that classic autumn flavor we all crave. Try toasting a slice and spreading it with cream cheese for the ultimate breakfast treat, or serve it warm with a pat of melting butter for the coziest snack imaginable.
Gingerbread House Kit in a Jar
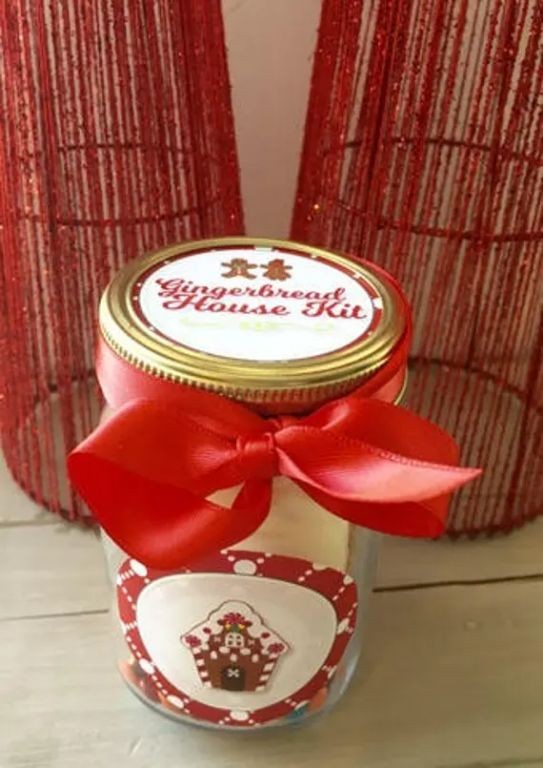
Now, imagine creating a magical gingerbread house without all the holiday stress. You get to build an adorable edible masterpiece with this clever jar kit, perfect for gifting or keeping the family entertained on a cozy afternoon. All the dry ingredients are perfectly measured and layered, ready for your holiday baking adventure.
Ingredients
– 2 cups all-purpose flour
– 1 cup dark brown sugar
– ¾ cup molasses
– 2 large farm-fresh eggs
– ½ cup unsalted butter
– 1 tbsp ground ginger
– 2 tsp ground cinnamon
– 1 tsp baking soda
– ½ tsp ground cloves
– ¼ tsp finely ground salt
– 1 cup powdered sugar
– 2 tbsp whole milk
– ½ tsp pure vanilla extract
– Assorted colorful candies for decoration
Instructions
1. Preheat your oven to 350°F and line two baking sheets with parchment paper.
2. In a large mixing bowl, cream together the softened unsalted butter and dark brown sugar until light and fluffy, about 3 minutes.
3. Beat in the farm-fresh eggs one at a time until fully incorporated.
4. Stir in the molasses until the mixture is smooth and evenly colored.
5. In a separate bowl, whisk together the all-purpose flour, ground ginger, ground cinnamon, baking soda, ground cloves, and finely ground salt.
6. Gradually add the dry ingredients to the wet mixture, mixing just until a soft dough forms. Tip: Don’t overmix to keep your gingerbread tender.
7. Divide the dough into two equal portions and wrap each in plastic wrap.
8. Chill the dough in the refrigerator for exactly 30 minutes to make it easier to roll out.
9. On a lightly floured surface, roll one portion of dough to ¼-inch thickness.
10. Cut out gingerbread house pieces using templates or cookie cutters, making four walls and two roof pieces.
11. Carefully transfer the cut pieces to the prepared baking sheets using a spatula.
12. Bake for 12-15 minutes until the edges are lightly browned and the centers are set.
13. Cool the gingerbread pieces completely on a wire rack, about 1 hour. Tip: They must be completely cool before assembling to prevent collapsing.
14. While cooling, prepare the royal icing by whisking powdered sugar, whole milk, and pure vanilla extract until smooth and thick.
15. Transfer the icing to a piping bag fitted with a small round tip.
16. Pipe icing along the edges of one wall piece and attach it to another wall at a 90-degree angle.
17. Continue assembling all four walls, holding each joint for 30 seconds to set.
18. Attach the roof pieces by piping icing along the top edges of the walls.
19. Let the structure set for 30 minutes before decorating. Tip: Work quickly with the icing as it crusts over fast.
20. Decorate your gingerbread house with assorted colorful candies using additional royal icing as glue.
A perfectly baked gingerbread house offers crisp edges with a slightly chewy center, filled with warm spice notes that fill your kitchen with holiday nostalgia. The royal icing hardens to create a sturdy edible glue while the colorful candies add sweet crunch and visual appeal. Display your creation as a festive centerpiece or let everyone nibble on their favorite decorated sections throughout the season.
Layered Trail Mix in a Jar
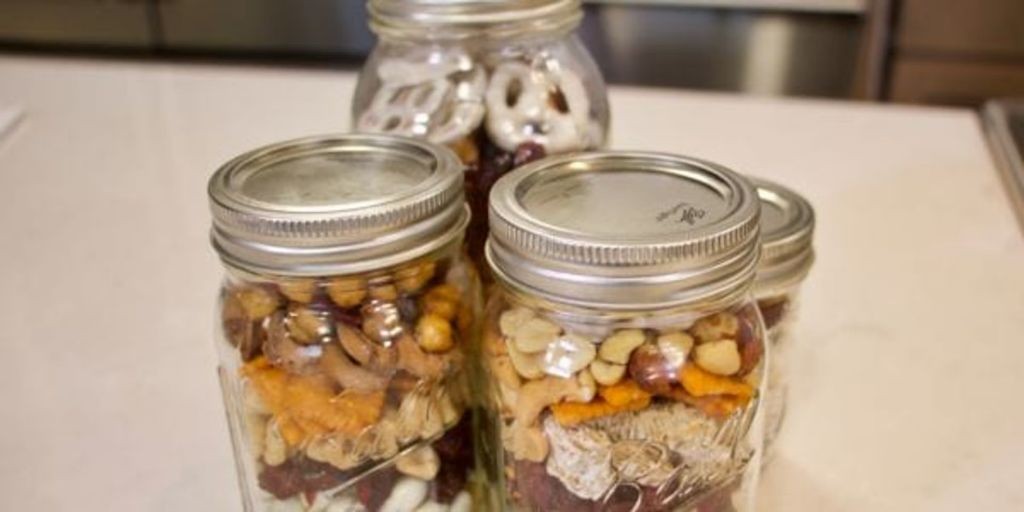
Gosh, you know those days when you need a snack that’s both satisfying and easy to grab? Layered trail mix in a jar is your perfect solution—it’s portable, customizable, and looks gorgeous with all those colorful layers. Plus, it keeps everything fresh and crunchy until you’re ready to dig in.
Ingredients
- 1 cup of sweet dried cranberries
- 1 cup of roasted salted almonds
- 1 cup of creamy milk chocolate chips
- 1 cup of crispy rice cereal squares
- 1/2 cup of crunchy roasted pumpkin seeds
Instructions
- Gather one clean 32-ounce glass jar with a tight-fitting lid.
- Pour 1 cup of sweet dried cranberries into the bottom of the jar to create your first layer.
- Add 1 cup of roasted salted almonds evenly over the cranberries for a nutty, savory base.
- Sprinkle 1 cup of creamy milk chocolate chips gently over the almonds to avoid melting them with warm hands.
- Top with 1 cup of crispy rice cereal squares, pressing lightly to fit more without crushing them.
- Finish with 1/2 cup of crunchy roasted pumpkin seeds as the top layer for a final texture boost.
- Seal the jar tightly with the lid to lock in freshness and prevent staleness.
- Store the jar in a cool, dry place away from direct sunlight for up to two weeks.
- Shake the jar gently before serving to mix the layers, or scoop directly to enjoy the visual appeal.
Now you’ve got a snack that’s as fun to look at as it is to eat! The combo of chewy cranberries, crunchy almonds, and melty chocolate hits all the right notes. Try packing individual jars for hikes or layering it over yogurt for a quick breakfast parfait—it’s endlessly adaptable.
Vanilla Sugar Scrub in a Jar

Vanilla sugar scrub in a jar is one of those simple DIY projects that feels luxurious but takes minutes to make. You’ll love how it transforms your skin while filling your bathroom with that warm, comforting vanilla scent we all adore. It’s perfect for gifting or treating yourself to some at-home pampering.
Ingredients
– 1 cup of pure granulated cane sugar
– ½ cup of fractionated coconut oil
– 2 teaspoons of pure vanilla extract
– 1 tablespoon of sweet almond oil
Instructions
1. Measure 1 cup of pure granulated cane sugar into a medium mixing bowl.
2. Add ½ cup of fractionated coconut oil to the sugar.
3. Pour in 2 teaspoons of pure vanilla extract.
4. Drizzle 1 tablespoon of sweet almond oil into the mixture.
5. Stir all ingredients together with a wooden spoon for about 2 minutes until fully combined and no dry sugar remains. Tip: If the mixture feels too dry, add another tablespoon of fractionated coconut oil for better consistency.
6. Check the texture by pressing a small amount between your fingers – it should hold together without being overly greasy.
7. Transfer the completed scrub into a clean 8-ounce glass jar with a tight-fitting lid. Tip: Wide-mouth mason jars work perfectly for easy access while showering.
8. Seal the jar tightly and store in a cool, dry place away from direct sunlight. Tip: For longer shelf life, consider storing in the refrigerator if your bathroom tends to get warm and humid.
Makes your skin feel incredibly soft and smooth with just one use. The gentle exfoliation from the sugar crystals combined with the moisturizing oils leaves your skin glowing. Try using it before shaving for ultra-smooth results, or package several jars with pretty ribbons for thoughtful homemade gifts.
DIY Soup Mix in a Jar
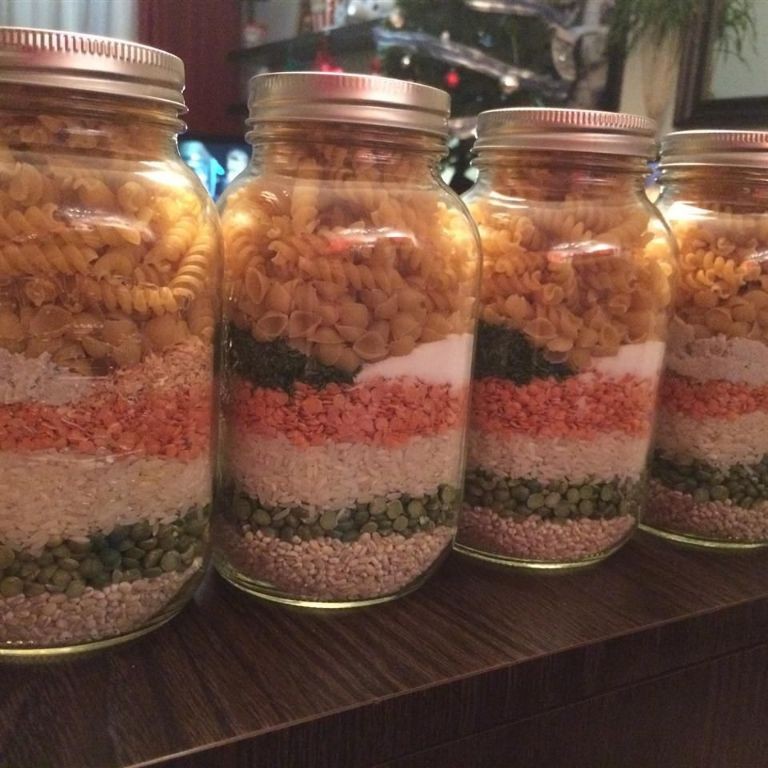
Looking for the perfect homemade gift or an easy weeknight dinner solution? DIY soup mix in a jar is your answer—it’s customizable, shelf-stable, and packed with flavor.
Ingredients
- 1 cup pearled barley
- 1/2 cup dried split peas
- 1/3 cup dried minced onion
- 1/4 cup dried carrot flakes
- 2 tbsp beef bouillon granules
- 1 tbsp dried parsley flakes
- 1 tsp garlic powder
- 1/2 tsp coarse black pepper
- 8 cups cold water
Instructions
- Layer 1 cup pearled barley into the bottom of a 1-quart mason jar.
- Add 1/2 cup dried split peas on top of the barley layer.
- Sprinkle 1/3 cup dried minced onion evenly over the split peas.
- Place 1/4 cup dried carrot flakes over the onion layer.
- Combine 2 tbsp beef bouillon granules, 1 tbsp dried parsley flakes, 1 tsp garlic powder, and 1/2 tsp coarse black pepper in a small bowl.
- Transfer the seasoning mixture into a small resealable bag and place it on top of the carrot layer in the jar.
- Seal the jar tightly and attach a gift tag with cooking instructions if giving as a present.
- To prepare the soup, empty the entire jar contents except the seasoning bag into a large stockpot.
- Add 8 cups cold water to the pot and bring to a rolling boil over high heat.
- Reduce heat to medium-low, cover, and simmer for 45 minutes until barley is tender and split peas have broken down.
- Open the seasoning bag and stir the contents into the simmering soup.
- Continue cooking uncovered for 15 more minutes until the soup thickens slightly.
Makes a wonderfully hearty soup with chewy barley and creamy split peas in a savory broth. Try topping it with a dollop of sour cream or serving alongside crusty bread for a complete meal—it’s comfort in a bowl that tastes like it simmered all day.
Cookie Butter Fudge Mix in a Jar
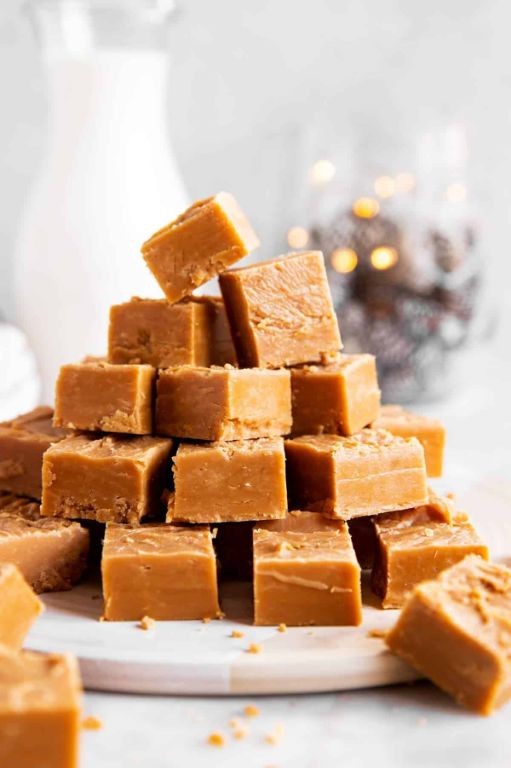
Brace yourself for the easiest, most addictive holiday treat you’ll ever make! This cookie butter fudge mix in a jar is the perfect edible gift that comes together in minutes. You’ll love how the creamy cookie butter transforms into rich, velvety fudge with just a few simple steps.
Ingredients
– 1 cup creamy, dreamy cookie butter
– 1/2 cup sweetened condensed milk
– 1/4 cup finely crushed graham crackers
– 1/4 cup mini chocolate chips
– 1/8 teaspoon flaky sea salt
Instructions
1. Line an 8×8 inch baking pan with parchment paper, leaving some overhang on two opposite sides for easy removal.
2. Combine 1 cup creamy cookie butter and 1/2 cup sweetened condensed milk in a medium microwave-safe bowl.
3. Microwave the mixture on high power for 30 seconds, then stir vigorously until completely smooth and well-combined.
4. Stir in 1/4 cup finely crushed graham crackers and 1/4 cup mini chocolate chips until evenly distributed throughout the mixture.
5. Pour the fudge mixture into your prepared baking pan, spreading it into an even layer with a spatula.
6. Sprinkle 1/8 teaspoon flaky sea salt evenly over the top of the fudge.
7. Refrigerate the fudge for at least 2 hours, or until completely firm and set.
8. Use the parchment paper overhang to lift the fudge block out of the pan.
9. Cut the fudge into 1-inch squares using a sharp knife wiped clean between cuts for neat edges.
10. Store the fudge squares in an airtight container in the refrigerator for up to one week.
Velvety smooth with that signature cookie butter warmth, this fudge has the perfect creamy texture that melts in your mouth. The graham cracker crumbs add a subtle crunch while the sea salt balances the sweetness beautifully. Try serving these squares slightly chilled with your afternoon coffee or package them in cute boxes for holiday gifting—they’re guaranteed to disappear fast!
Strawberry Shortcake Mix in a Jar
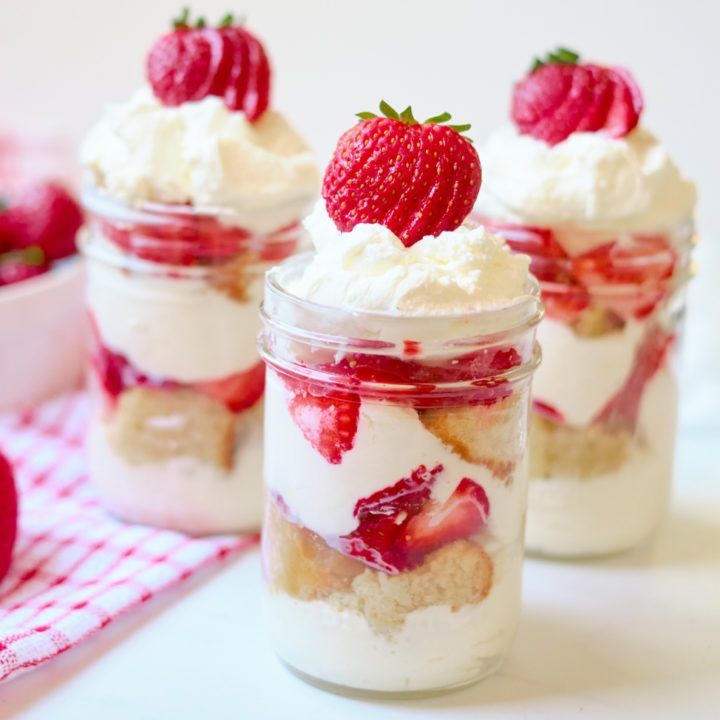
Tired of complicated desserts but craving something homemade? You’re going to love this strawberry shortcake mix in a jar—it’s the perfect make-ahead treat for busy days or last-minute guests. Simply layer the dry ingredients, seal it up, and you’ve got instant summer vibes ready whenever you need them.
Ingredients
- 1 ½ cups all-purpose flour
- ½ cup granulated sugar
- 2 tsp baking powder
- ½ tsp salt
- ½ cup cold unsalted butter, cubed
- 1 cup heavy whipping cream
- 1 tsp pure vanilla extract
- 2 cups fresh ripe strawberries, sliced
- 2 tbsp powdered sugar
Instructions
- In a medium bowl, whisk together 1 ½ cups all-purpose flour, ½ cup granulated sugar, 2 tsp baking powder, and ½ tsp salt until fully combined.
- Add ½ cup cold unsalted butter, cubed, and use a pastry cutter or your fingers to work the butter into the flour mixture until it resembles coarse crumbs with pea-sized butter pieces throughout.
- Layer the butter-flour mixture into a clean 1-quart mason jar, pressing down gently with the back of a spoon to compact it slightly and create even layers.
- Seal the jar tightly with the lid and store in a cool, dry place for up to 1 month, or attach a gift tag with baking instructions if giving as a gift.
- When ready to bake, preheat your oven to 375°F and line a baking sheet with parchment paper.
- Empty the jar contents into a large bowl and make a well in the center.
- Pour in 1 cup heavy whipping cream and 1 tsp pure vanilla extract, then stir gently with a fork until just combined—be careful not to overmix. Tip: The dough will be slightly sticky; that’s normal and ensures tender shortcakes.
- Scoop 6 equal portions of dough onto the prepared baking sheet, spacing them about 2 inches apart to allow for spreading.
- Bake for 15–18 minutes, or until the shortcakes are golden brown on top and a toothpick inserted into the center comes out clean. Tip: Rotate the baking sheet halfway through for even browning.
- While the shortcakes bake, combine 2 cups fresh ripe strawberries, sliced, with 2 tbsp powdered sugar in a medium bowl, gently tossing to coat. Tip: Let the strawberries sit for at least 10 minutes to release their natural juices and create a syrupy sauce.
- Allow the shortcakes to cool on the baking sheet for 5 minutes before splitting them in half horizontally with a serrated knife.
- Place the bottom half of each shortcake on a plate, spoon the macerated strawberries and their juices over it, then top with the shortcake lid.
Ultimate comfort in every bite—the shortcakes are tender and buttery, while the juicy strawberries soak into every crumb. Serve them warm with a dollop of whipped cream for extra indulgence, or try crumbling them over vanilla ice cream for a deconstructed version that’s just as delightful.
Summary
Embrace the joy of thoughtful, homemade gifting with these perfectly layered mason jar recipes! Whether you’re a seasoned cook or just starting out, these beautiful creations are sure to delight your loved ones. We’d love to hear which recipes you try—drop a comment with your favorites and share this inspiration on Pinterest to spread the homemade gift love!