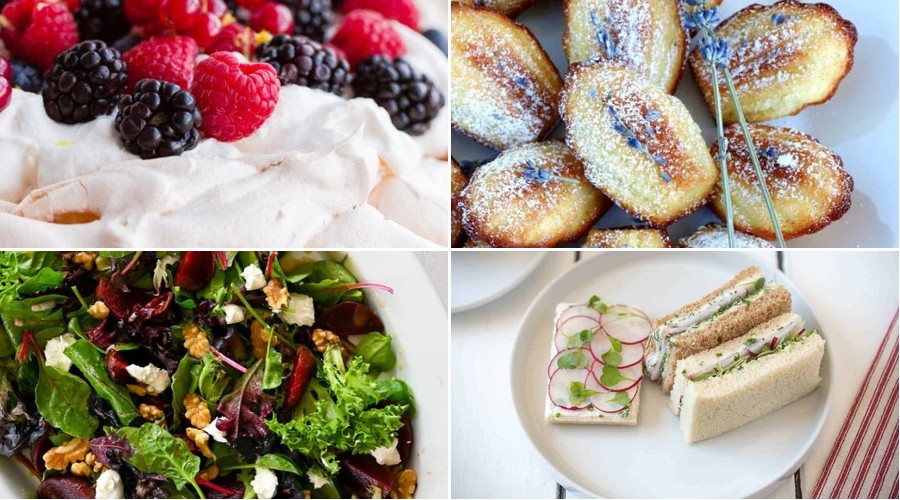
Greetings, spring enthusiasts! As Ostara arrives, it’s the perfect time to celebrate the season’s fresh flavors and vibrant energy. Whether you’re planning a festive gathering or simply embracing spring’s renewal, we’ve gathered 20 delightful recipes that capture the essence of this magical time. From fresh salads to sweet treats, get ready to fill your table with seasonal joy—let’s dive into these inspiring dishes!
Spring Vegetable Frittata
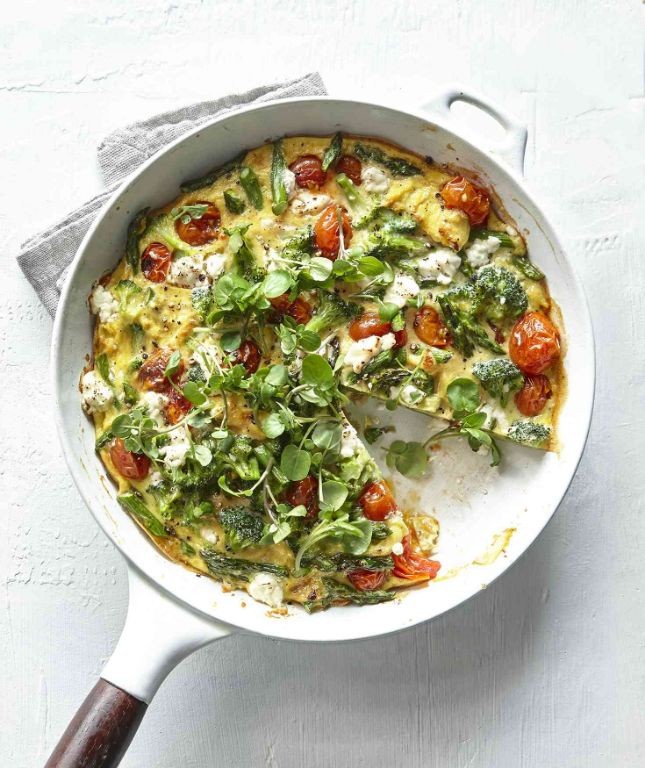
Savor the vibrant essence of the season captured in this elegant Spring Vegetable Frittata, where tender asparagus, sweet peas, and fresh herbs create a sophisticated brunch centerpiece that celebrates nature’s renewal. This versatile dish transitions beautifully from a leisurely weekend gathering to an impressive weeknight dinner, offering both visual appeal and nourishing satisfaction in every golden slice. Its delicate balance of flavors and textures makes it equally suited for formal entertaining or casual family meals.
Ingredients
– 8 large eggs
– 1/4 cup heavy cream
– 1/2 teaspoon kosher salt
– 1/4 teaspoon black pepper
– 2 tablespoons olive oil
– 1 cup chopped asparagus
– 1/2 cup fresh peas
– 1/4 cup chopped scallions
– 1/4 cup crumbled feta cheese
– 2 tablespoons chopped fresh dill
Instructions
1. Preheat your oven to 375°F and position the rack in the center for even heating.
2. Whisk together 8 large eggs, 1/4 cup heavy cream, 1/2 teaspoon kosher salt, and 1/4 teaspoon black pepper in a medium bowl until fully combined and slightly frothy.
3. Heat 2 tablespoons olive oil in a 10-inch oven-safe skillet over medium heat until shimmering but not smoking.
4. Add 1 cup chopped asparagus and cook for 3 minutes until bright green and slightly tender.
5. Stir in 1/2 cup fresh peas and 1/4 cup chopped scallions, cooking for 1 additional minute to warm through.
6. Pour the egg mixture evenly over the vegetables, tilting the pan to distribute it completely.
7. Sprinkle 1/4 cup crumbled feta cheese and 2 tablespoons chopped fresh dill evenly across the surface.
8. Cook undisturbed on the stovetop for 4 minutes until the edges begin to set.
9. Transfer the skillet to the preheated oven and bake for 12-15 minutes until the center is fully set and the top is lightly golden.
10. Remove from oven and let rest for 5 minutes before slicing to allow the layers to settle properly.
11. Run a spatula around the edges and slide the frittata onto a cutting board for serving.
Making this frittata yields a beautifully textured dish with a creamy interior contrasting against the crisp vegetable bites and salty feta pockets. The delicate herbal notes from fresh dill complement the sweet spring vegetables, creating layers of flavor that evolve with each bite. Consider serving warm slices alongside a simple arugula salad dressed with lemon vinaigrette, or cut into smaller squares for an elegant appetizer at your next gathering.
Herbed Roasted Leg of Lamb
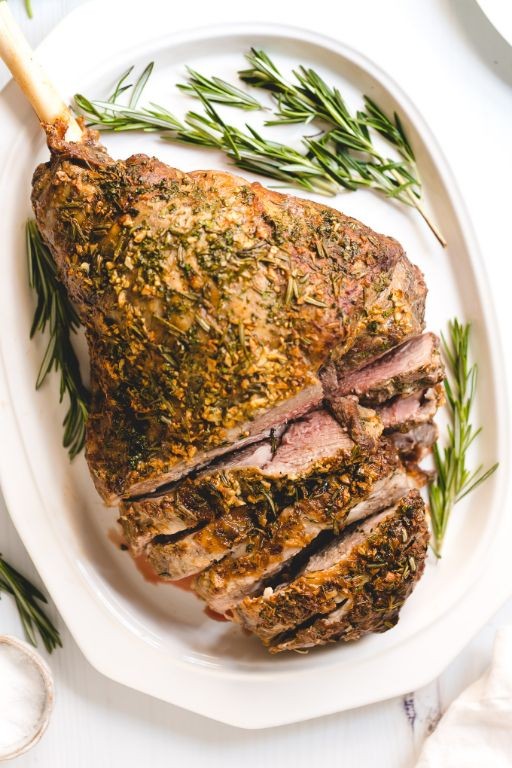
This succulent centerpiece transforms a simple leg of lamb into an elegant feast, where aromatic herbs create a fragrant crust that seals in the meat’s natural juices. The slow-roasting method ensures tender, perfectly cooked lamb that falls effortlessly from the bone, making it ideal for holiday gatherings or special Sunday dinners.
Ingredients
– 1 (5-7 pound) bone-in leg of lamb
– 3 tablespoons olive oil
– 4 cloves garlic, minced
– 2 tablespoons fresh rosemary, chopped
– 1 tablespoon fresh thyme leaves
– 1 teaspoon kosher salt
– ½ teaspoon black pepper
– 1 cup dry white wine
– 2 cups chicken broth
– 2 tablespoons all-purpose flour
Instructions
1. Preheat your oven to 325°F and position the rack in the lower third of the oven.
2. Pat the leg of lamb completely dry with paper towels to ensure proper browning.
3. In a small bowl, combine the olive oil, minced garlic, chopped rosemary, thyme leaves, kosher salt, and black pepper to create the herb paste.
4. Rub the herb mixture evenly over the entire surface of the lamb, including into any crevices.
5. Place the lamb fat-side up in a roasting pan fitted with a rack to allow heat circulation.
6. Insert an oven-safe meat thermometer into the thickest part of the lamb, avoiding the bone.
7. Roast for 20-25 minutes per pound, or until the internal temperature reaches 135°F for medium-rare.
8. Transfer the lamb to a cutting board and tent loosely with foil, letting it rest for 20 minutes to redistribute juices.
9. While the lamb rests, pour the dry white wine into the roasting pan and scrape up all the browned bits from the bottom.
10. Whisk the all-purpose flour into the chicken broth until smooth, then add to the pan.
11. Bring the sauce to a simmer over medium heat, stirring constantly until thickened, about 5-7 minutes.
12. Strain the sauce through a fine-mesh sieve for a silky smooth texture.
What emerges from the oven is lamb with a crisp, herb-flecked exterior giving way to rosy, exceptionally tender meat beneath. The garlic and rosemary infuse every bite with earthy depth, while the pan sauce adds a bright, savory counterpoint. For a stunning presentation, carve thick slices across the grain and serve alongside roasted root vegetables to soak up the rich juices.
Fresh Pea and Mint Soup
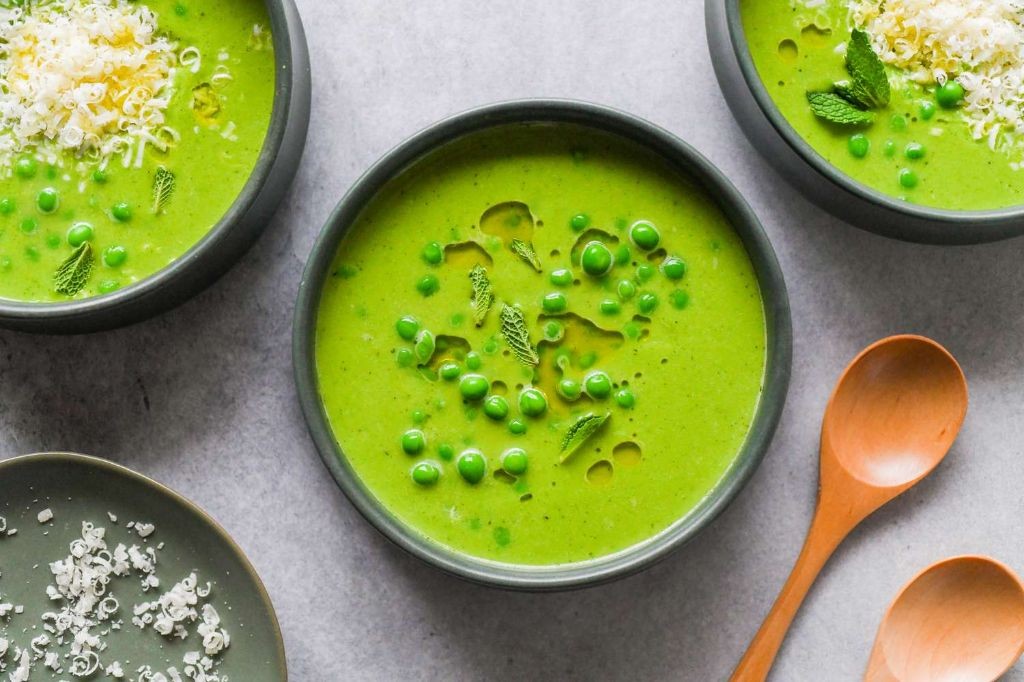
Brimming with spring’s vibrant essence, this elegant soup captures the delicate sweetness of fresh peas balanced by the refreshing coolness of mint. Its brilliant green hue and velvety texture make it a sophisticated starter for any occasion, while remaining surprisingly simple to prepare. This chilled soup offers a refreshing respite from warmer days, celebrating seasonal produce at its peak.
Ingredients
– 2 tablespoons olive oil
– 1 medium yellow onion, chopped
– 2 cloves garlic, minced
– 4 cups fresh shelled peas
– 4 cups vegetable broth
– 1/2 cup fresh mint leaves
– 1/2 cup heavy cream
– 1 teaspoon salt
– 1/2 teaspoon black pepper
Instructions
1. Heat 2 tablespoons olive oil in a large pot over medium heat until shimmering.
2. Add 1 chopped yellow onion and cook for 5-7 minutes until translucent and fragrant.
3. Stir in 2 minced garlic cloves and cook for 1 minute until aromatic but not browned.
4. Pour in 4 cups vegetable broth and bring to a boil over high heat.
5. Add 4 cups fresh shelled peas and cook for 3-4 minutes until bright green and tender.
6. Remove the pot from heat and stir in 1/2 cup fresh mint leaves.
7. Carefully transfer the mixture to a blender and puree until completely smooth, about 2 minutes.
8. Strain the soup through a fine-mesh sieve into a clean bowl to achieve a silky texture.
9. Whisk in 1/2 cup heavy cream until fully incorporated.
10. Season with 1 teaspoon salt and 1/2 teaspoon black pepper, adjusting if needed.
11. Chill the soup in the refrigerator for at least 2 hours until thoroughly cold.
Now ready to serve, this soup boasts an exceptionally smooth texture that glides across the palate with each spoonful. The sweet pea flavor shines through while the mint provides a cooling counterpoint that lingers pleasantly. Consider garnishing with edible flowers or serving in chilled glass bowls for an elegant presentation that highlights its vibrant color.
Rainbow Chard and Goat Cheese Tart

Delicately layered with vibrant greens and creamy cheese, this elegant tart transforms humble rainbow chard into a sophisticated centerpiece. The crisp, buttery crust provides the perfect foundation for the earthy greens and tangy goat cheese filling. Each slice reveals a beautiful mosaic of colors and textures that celebrates seasonal produce at its finest.
Ingredients
– 1 1/4 cups all-purpose flour
– 1/2 cup cold unsalted butter, cubed
– 3 tablespoons ice water
– 1 large bunch rainbow chard, stems and leaves separated
– 2 tablespoons olive oil
– 1 medium yellow onion, thinly sliced
– 2 cloves garlic, minced
– 4 ounces goat cheese, crumbled
– 2 large eggs
– 1/2 cup heavy cream
– 1/4 teaspoon freshly grated nutmeg
– 1/2 teaspoon kosher salt
– 1/4 teaspoon black pepper
Instructions
1. Combine 1 1/4 cups all-purpose flour and 1/2 cup cubed cold butter in a food processor, pulsing until mixture resembles coarse crumbs.
2. Gradually add 3 tablespoons ice water while pulsing until dough just comes together.
3. Form dough into a disk, wrap in plastic, and refrigerate for 30 minutes until firm.
4. Preheat oven to 375°F and roll chilled dough to fit a 9-inch tart pan with removable bottom.
5. Press dough into pan, trim excess, and prick bottom with fork before blind baking for 15 minutes.
6. While crust bakes, chop rainbow chard stems and leaves separately, keeping them divided.
7. Heat 2 tablespoons olive oil in a large skillet over medium heat and sauté 1 thinly sliced onion for 8 minutes until softened.
8. Add chopped chard stems and cook for 5 minutes until tender-crisp.
9. Stir in 2 minced garlic cloves and cook for 1 minute until fragrant.
10. Add chard leaves and cook for 3 minutes until wilted, then transfer mixture to a colander to drain excess liquid.
11. Whisk together 2 eggs, 1/2 cup heavy cream, 1/4 teaspoon nutmeg, 1/2 teaspoon salt, and 1/4 teaspoon pepper in a medium bowl.
12. Spread drained chard mixture evenly over pre-baked crust and sprinkle with 4 ounces crumbled goat cheese.
13. Pour egg mixture over filling and bake at 375°F for 25-30 minutes until center is set and edges are golden brown.
14. Cool tart on wire rack for 15 minutes before slicing.
Velvety custard envelops the tender chard and creamy goat cheese, creating a luxurious texture contrast against the flaky crust. The subtle bitterness of the greens balances beautifully with the tangy cheese and sweet caramelized onions. Serve warm slices alongside a crisp arugula salad for a complete meal, or cut into smaller portions for an elegant appetizer at your next gathering.
Rosemary Garlic Roasted Potatoes
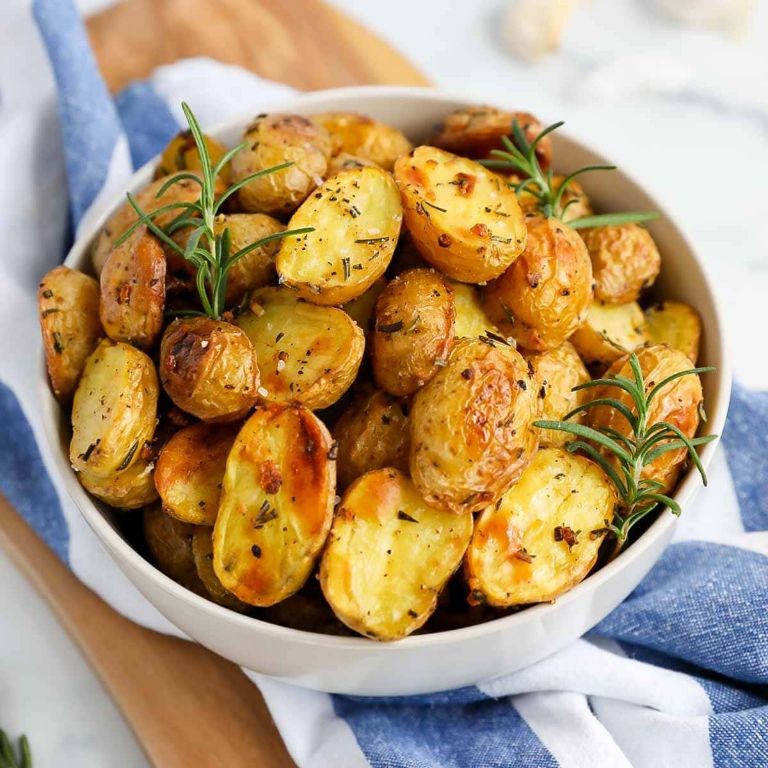
Nothing elevates the humble potato quite like the aromatic embrace of rosemary and garlic, transforming simple roots into a sophisticated side dish that complements any main course. Nestled in a hot oven until golden and crisp, these potatoes achieve a perfect balance of tender interiors and crackling exteriors that will have everyone reaching for seconds.
Ingredients
- 2 lbs baby potatoes
- 3 tbsp olive oil
- 4 cloves garlic
- 2 tbsp fresh rosemary
- 1 tsp kosher salt
- 1/2 tsp black pepper
Instructions
- Preheat your oven to 425°F and position a rack in the center.
- Scrub 2 lbs baby potatoes thoroughly under cold running water to remove any dirt.
- Pat the potatoes completely dry with paper towels to ensure crisp roasting.
- Cut larger potatoes in half to create uniform pieces for even cooking.
- Place potatoes in a large mixing bowl and drizzle with 3 tbsp olive oil.
- Toss potatoes vigorously until every surface glistens with oil.
- Mince 4 cloves garlic and chop 2 tbsp fresh rosemary leaves finely.
- Sprinkle 1 tsp kosher salt, 1/2 tsp black pepper, garlic, and rosemary over potatoes.
- Toss again until seasonings are evenly distributed across all potato pieces.
- Arrange potatoes in a single layer on a parchment-lined baking sheet.
- Roast at 425°F for 25 minutes until bottoms develop golden crusts.
- Flip each potato carefully using tongs to expose unbrowned surfaces.
- Continue roasting for another 15-20 minutes until deeply golden and crisp.
- Test doneness by piercing with a fork – potatoes should yield easily.
- Transfer to a serving dish immediately to maintain crisp texture.
Just out of the oven, these potatoes offer a symphony of textures from their shatteringly crisp exteriors to their cloud-soft interiors. Juxtaposed against the earthy rosemary and mellow roasted garlic, each bite delivers sophisticated comfort that pairs beautifully with roasted meats or stands proudly alongside a simple green salad. Consider scattering them over a bed of arugula with shaved Parmesan for an unexpected salad transformation.
Asparagus and Prosciutto Bundles
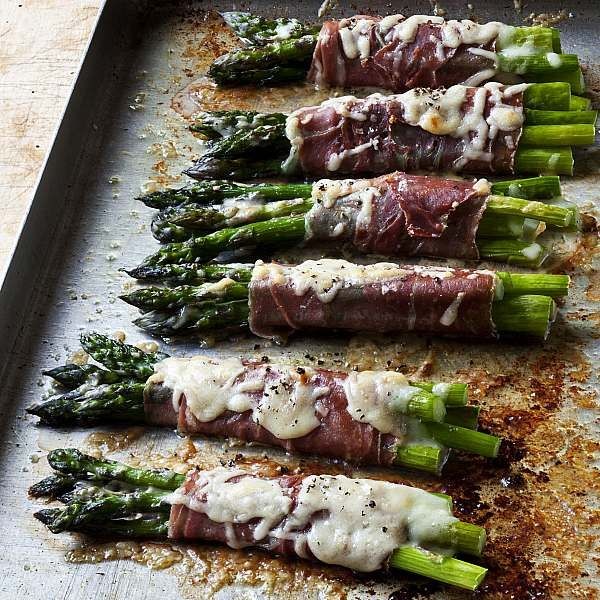
Yielded by spring’s bounty, these elegant asparagus and prosciutto bundles transform simple ingredients into a sophisticated side dish. Wrapped in salty, paper-thin prosciutto, crisp-tender asparagus spears roast to perfection, creating a beautiful presentation that belies their effortless preparation. This dish celebrates the harmony between earthy vegetables and rich cured meats, making it ideal for both weeknight dinners and special occasions.
Ingredients
– 1 pound fresh asparagus spears
– 8 slices prosciutto
– 2 tablespoons olive oil
– 1/2 teaspoon black pepper
– 1/4 teaspoon salt
Instructions
1. Preheat your oven to 400°F and line a baking sheet with parchment paper.
2. Trim the tough, woody ends from the asparagus spears by bending each spear until it snaps naturally at its tender point.
3. Divide the asparagus into 8 equal bundles, arranging 4-6 spears in each group depending on thickness.
4. Drizzle the olive oil evenly over the asparagus bundles, ensuring each spear is lightly coated.
5. Season the asparagus with salt and black pepper, distributing the seasoning evenly across all bundles.
6. Wrap one slice of prosciutto around the center of each asparagus bundle, overlapping the ends slightly to secure.
7. Arrange the wrapped bundles in a single layer on the prepared baking sheet, leaving space between each for even cooking.
8. Roast in the preheated oven for 12-15 minutes until the prosciutto is crisp and the asparagus is tender when pierced with a fork.
9. For optimal browning, rotate the baking sheet halfway through the cooking time to ensure even heat distribution.
10. Remove from the oven and let rest for 2 minutes before serving to allow the flavors to meld.
Serving these bundles immediately showcases the delightful contrast between the crisp, salty prosciutto and the tender, slightly sweet asparagus. The elegant presentation makes them perfect for arranging on a platter as an appetizer or alongside roasted meats. Their sophisticated appearance and balanced flavors elevate any meal from ordinary to exceptional.
Lemon Poppy Seed Pancakes

Beneath the morning sun, these lemon poppy seed pancakes emerge as a citrus-kissed revelation, where the bright zest of fresh lemons dances elegantly with the delicate crunch of poppy seeds in a tender, golden batter. Each fluffy round offers a sophisticated twist on the classic breakfast, transforming your table into a scene of refined comfort. This recipe balances vibrant acidity with subtle nuttiness, creating a memorable start to any day.
Ingredients
– 1 ½ cups all-purpose flour
– 2 tablespoons granulated sugar
– 2 teaspoons baking powder
– ¼ teaspoon salt
– 1 tablespoon poppy seeds
– 2 tablespoons fresh lemon zest
– 1 cup whole milk
– 1 large egg
– 3 tablespoons unsalted butter, melted
– 2 tablespoons fresh lemon juice
– 1 teaspoon vanilla extract
– 2 tablespoons vegetable oil
– Maple syrup, for serving
Instructions
1. Whisk together 1 ½ cups all-purpose flour, 2 tablespoons granulated sugar, 2 teaspoons baking powder, ¼ teaspoon salt, 1 tablespoon poppy seeds, and 2 tablespoons fresh lemon zest in a large bowl until fully combined.
2. In a separate medium bowl, whisk 1 cup whole milk, 1 large egg, 3 tablespoons melted unsalted butter, 2 tablespoons fresh lemon juice, and 1 teaspoon vanilla extract until smooth.
3. Pour the wet ingredients into the dry ingredients and gently fold with a spatula until just combined, being careful not to overmix to ensure tender pancakes.
4. Heat a non-stick skillet or griddle over medium heat and lightly coat with ½ tablespoon vegetable oil, repeating as needed for subsequent batches.
5. Pour ¼ cup batter per pancake onto the hot skillet, cooking until bubbles form on the surface and edges look set, about 2–3 minutes.
6. Flip each pancake carefully with a spatula and cook for another 1–2 minutes until golden brown and cooked through.
7. Transfer cooked pancakes to a warm oven at 200°F to keep them fluffy while finishing the batch.
8. Serve immediately with maple syrup. Generously these pancakes boast a light, airy crumb punctuated by the subtle crunch of poppy seeds and the bright, aromatic burst of lemon. For an elegant presentation, layer them with a dollop of lemon curd or fresh berries, allowing the citrus notes to shine through every delightful bite.
Spring Greens Salad with Edible Flowers
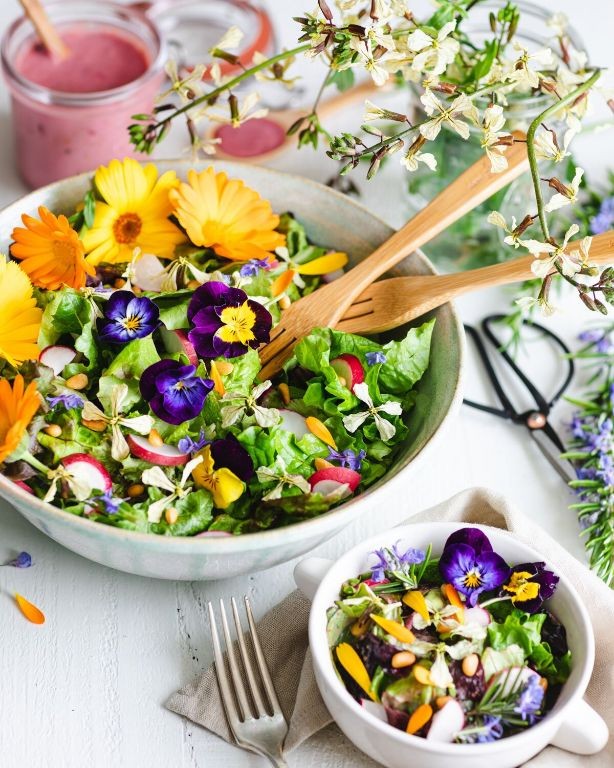
Yearning for a dish that captures the ephemeral beauty of spring? This vibrant Spring Greens Salad with Edible Flowers transforms simple ingredients into an elegant composition, where tender leaves and delicate blossoms create a symphony of textures and flavors. Perfect for al fresco dining or as a sophisticated starter, it celebrates seasonal produce at its peak.
Ingredients
– 6 cups mixed spring greens
– 1/4 cup edible flowers (nasturtiums, pansies, violets)
– 1/2 cup thinly sliced radishes
– 1/4 cup toasted pine nuts
– 2 tbsp extra virgin olive oil
– 1 tbsp fresh lemon juice
– 1 tsp honey
– 1/4 tsp sea salt
– 1/8 tsp freshly ground black pepper
Instructions
1. Place the spring greens in a large salad bowl, gently separating any clumped leaves.
2. Arrange the edible flowers decoratively over the greens, being careful not to crush the delicate petals.
3. Scatter the thinly sliced radishes evenly across the salad for crisp texture and peppery notes.
4. Sprinkle the toasted pine nuts over the top to add nutty flavor and crunch.
5. In a small bowl, whisk together the extra virgin olive oil, fresh lemon juice, and honey until fully emulsified.
6. Drizzle the dressing evenly over the salad, starting from the edges and moving toward the center.
7. Season the salad with sea salt and freshly ground black pepper, tossing gently with salad tongs to coat all ingredients without bruising the greens.
8. Serve immediately on chilled plates to maintain crispness.
Subtle peppery notes from the radishes contrast beautifully with the floral sweetness, while the toasted pine nuts provide satisfying crunch. For an elegant presentation, arrange individual portions on marble slabs or vintage china, allowing the vibrant colors to shine. The delicate petals maintain their structure just long enough to create a memorable dining experience before wilting gently into the greens.
Herb-Crusted Salmon with Lemon Butter
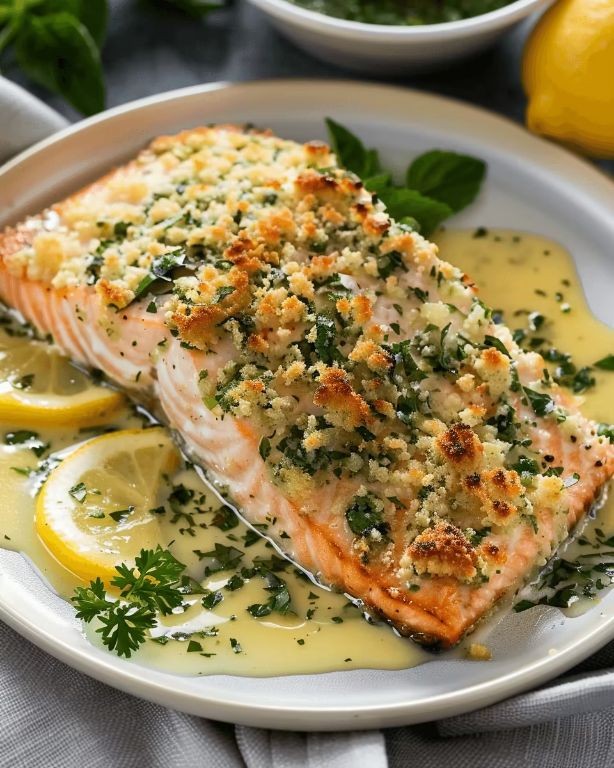
A perfectly prepared salmon fillet transforms an ordinary evening into an elegant affair, especially when encased in a fragrant herb crust and finished with a bright lemon butter sauce. This herb-crusted salmon with lemon butter achieves that delicate balance between rich, buttery flavor and fresh, herbaceous notes, making it both impressive and surprisingly simple to prepare. An ideal centerpiece for weeknight dinners or intimate gatherings, it promises restaurant-quality results from your own kitchen.
Ingredients
– 4 (6-ounce) salmon fillets, skin-on
– 1/4 cup fresh parsley, finely chopped
– 2 tablespoons fresh dill, finely chopped
– 1 tablespoon fresh thyme leaves
– 1/2 cup panko breadcrumbs
– 2 tablespoons olive oil
– 1 teaspoon kosher salt
– 1/2 teaspoon black pepper
– 4 tablespoons unsalted butter, divided
– 2 garlic cloves, minced
– 1 lemon, juiced (about 3 tablespoons)
– 1 lemon, thinly sliced
Instructions
1. Preheat your oven to 400°F and line a baking sheet with parchment paper.
2. Pat the salmon fillets completely dry with paper towels to ensure proper crust adhesion.
3. In a medium bowl, combine parsley, dill, thyme, panko breadcrumbs, olive oil, salt, and pepper until the mixture resembles wet sand.
4. Press the herb mixture firmly onto the top of each salmon fillet, creating an even 1/4-inch thick crust.
5. Place the crusted salmon fillets skin-side down on the prepared baking sheet.
6. Arrange lemon slices around the salmon on the baking sheet.
7. Bake for 12-15 minutes until the internal temperature reaches 125°F and the crust is golden brown.
8. While the salmon bakes, melt 2 tablespoons of butter in a small saucepan over medium heat.
9. Add minced garlic and cook for 1 minute until fragrant but not browned.
10. Whisk in the remaining 2 tablespoons of butter and lemon juice until the sauce emulsifies.
11. Remove the salmon from the oven when it reaches 125°F internal temperature and let rest for 3 minutes.
12. Spoon the lemon butter sauce over the rested salmon fillets.
Resilient yet delicate, the golden herb crust gives way to moist, flaky salmon that practically melts in your mouth. The bright acidity of the lemon butter cuts through the richness of the fish, while the fresh herbs provide aromatic complexity that lingers pleasantly. For a stunning presentation, serve alongside roasted asparagus spears and a crisp Sauvignon Blanc to complement the citrus notes.
Radish and Butter Tea Sandwiches
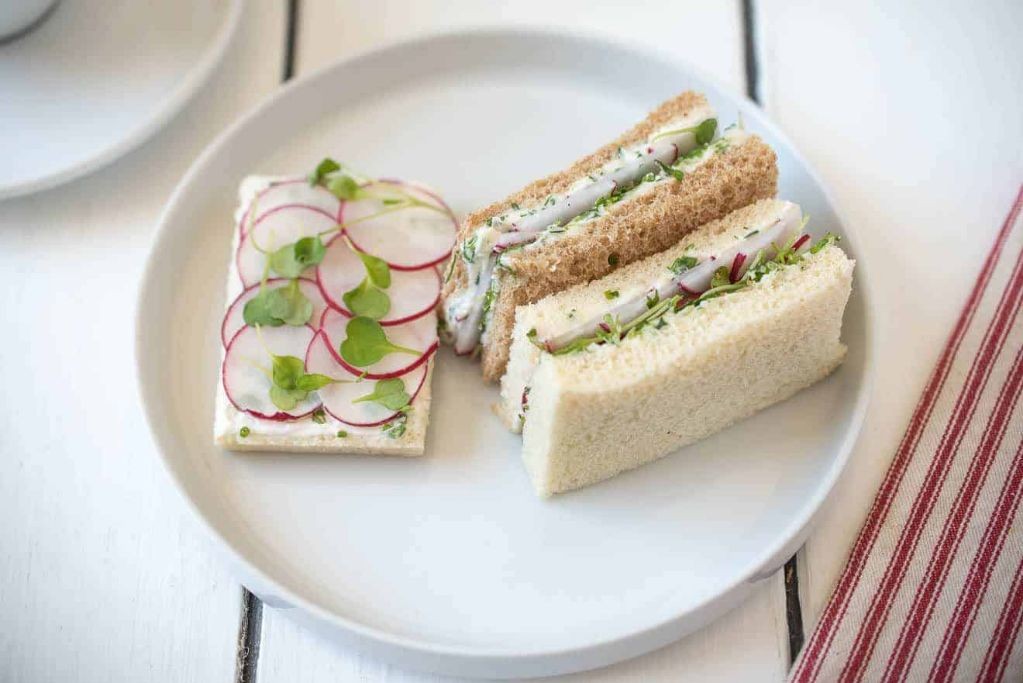
Heralding the arrival of spring with crisp elegance, these radish and butter tea sandwiches transform humble ingredients into delicate finger food. Their vibrant colors and clean flavors make them perfect for afternoon gatherings or as a refreshing appetizer that celebrates simplicity at its finest.
Ingredients
– 8 slices white sandwich bread
– 4 tablespoons unsalted butter
– 6 medium radishes
– 1/4 teaspoon flaky sea salt
– 1/8 teaspoon freshly ground black pepper
– 2 tablespoons fresh chives
Instructions
1. Remove crusts from all 8 slices of white sandwich bread using a serrated knife for clean edges.
2. Spread 1/2 tablespoon of softened unsalted butter evenly across one side of each bread slice.
3. Thinly slice 6 medium radishes into 1/8-inch rounds using a mandoline for uniform thickness.
4. Arrange radish slices in a single, overlapping layer on the buttered side of 4 bread slices.
5. Sprinkle 1/16 teaspoon of flaky sea salt evenly over the radishes on each prepared slice.
6. Distribute 1/32 teaspoon of freshly ground black pepper across all radish-topped bread slices.
7. Finely chop 2 tablespoons of fresh chives and sprinkle evenly over the seasoned radishes.
8. Top each prepared slice with remaining buttered bread slices, buttered side facing inward.
9. Cut each sandwich diagonally into 4 triangular quarters using a sharp knife.
10. Arrange tea sandwiches on a serving platter and cover with a damp paper towel to prevent drying.
The crisp radishes provide satisfying crunch against the creamy butter, while the flaky salt crystals burst with each bite. For an elegant presentation, alternate sandwich quarters with radish slices facing different directions on your platter, creating visual interest that matches their refreshing flavor profile.
Lavender Honey Madeleines
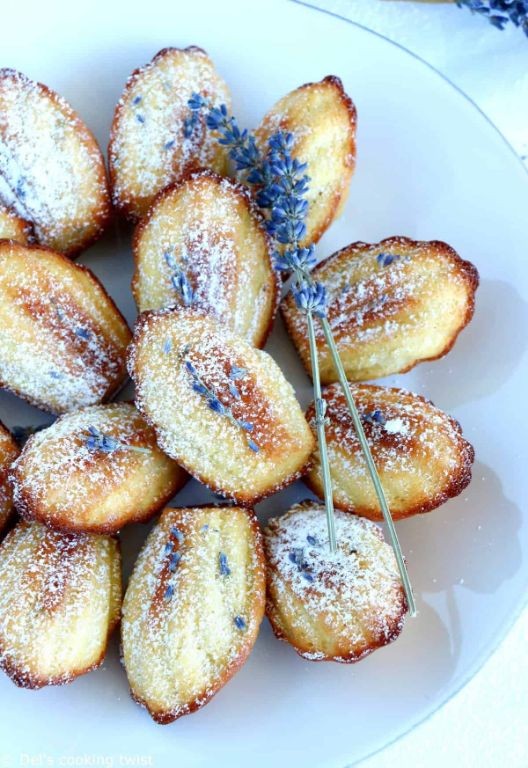
Lavender honey madeleines offer a sophisticated twist on the classic French tea cake, blending floral elegance with golden sweetness in each delicate shell-shaped bite. These ethereal treats achieve their distinctive hump through precise technique and quality ingredients, creating a teatime indulgence that feels both nostalgic and refreshingly modern.
Ingredients
– 1 cup all-purpose flour
– ½ cup granulated sugar
– 2 large eggs
– ½ cup unsalted butter
– 2 tablespoons lavender honey
– 1 teaspoon baking powder
– ¼ teaspoon salt
– 1 tablespoon culinary lavender buds
Instructions
1. Preheat your oven to 375°F and generously butter a madeleine pan, ensuring every shell cavity is thoroughly coated.
2. Melt the unsalted butter in a small saucepan over medium heat until fully liquid, then stir in lavender honey until completely incorporated.
3. Whisk eggs and granulated sugar in a medium bowl for exactly 3 minutes until pale and thickened, creating the foundation for the characteristic hump.
4. Sift flour, baking powder, and salt directly into the egg mixture, folding gently with a spatula until just combined to avoid developing gluten.
5. Gradually pour the warm butter-honey mixture into the batter, folding continuously until you achieve a smooth, homogeneous consistency.
6. Gently fold in culinary lavender buds, distributing them evenly throughout the batter without overmixing.
7. Cover the bowl with plastic wrap and refrigerate the batter for 30 minutes to chill thoroughly, which helps create the perfect dome during baking.
8. Spoon 1 tablespoon of chilled batter into the center of each prepared madeleine cavity, leaving space for spreading.
9. Bake for 8-10 minutes until the edges turn golden brown and the centers spring back when lightly touched.
10. Immediately tap the pan on the counter to release madeleines, then transfer to a wire rack using a small offset spatula.
Golden and fragrant from the oven, these madeleines boast a crisp exterior that gives way to a tender, cake-like crumb infused with subtle floral notes. Serve them warm with afternoon tea, or drizzle with additional lavender honey for an extra touch of elegance that highlights their sophisticated flavor profile.
Spring Berry Pavlova
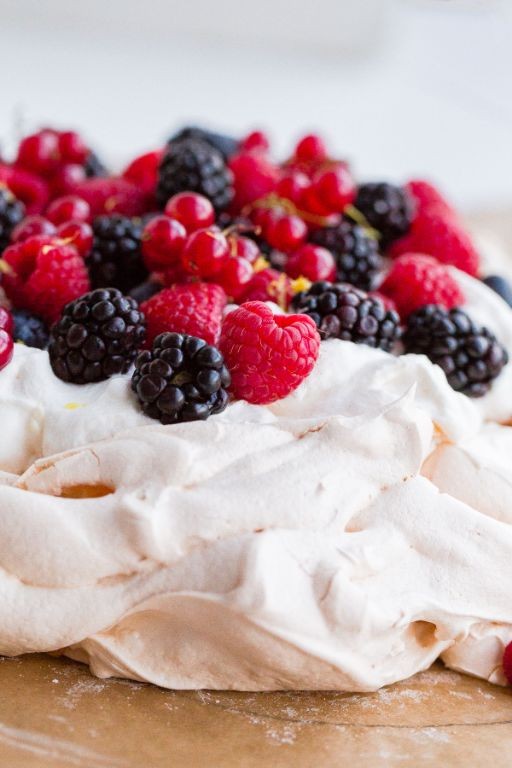
Towering like a delicate cloud, this Spring Berry Pavlova combines crisp meringue with billowy whipped cream and vibrant seasonal berries for a dessert that celebrates the arrival of warmer days. The contrast of textures—from the shatteringly crisp exterior to the marshmallow-soft interior—creates an unforgettable eating experience that feels both elegant and effortlessly simple. With its pastel hues and fresh flavors, this dessert brings a touch of springtime magic to any table.
Ingredients
– 4 large egg whites
– 1 cup granulated sugar
– 1 teaspoon white vinegar
– 1 teaspoon cornstarch
– 1 teaspoon vanilla extract
– 1 cup heavy cream
– 2 tablespoons powdered sugar
– 2 cups mixed fresh berries (strawberries, raspberries, blueberries)
– 1 tablespoon fresh lemon juice
Instructions
1. Preheat your oven to 250°F and line a baking sheet with parchment paper.
2. Using an electric mixer on medium speed, beat 4 large egg whites until soft peaks form, about 2-3 minutes.
3. Gradually add 1 cup granulated sugar, 1 tablespoon at a time, while continuing to beat on high speed until stiff, glossy peaks form, about 5-7 minutes.
4. Gently fold in 1 teaspoon white vinegar, 1 teaspoon cornstarch, and 1 teaspoon vanilla extract using a spatula, being careful not to deflate the meringue.
5. Spoon the meringue onto the prepared baking sheet, shaping it into an 8-inch circle with slightly higher edges to form a nest.
6. Bake at 250°F for 1 hour and 30 minutes, then turn off the oven and let the pavlova cool completely inside for at least 2 hours without opening the door.
7. While the pavlova cools, whip 1 cup heavy cream and 2 tablespoons powdered sugar on medium-high speed until medium peaks form, about 3-4 minutes.
8. In a separate bowl, toss 2 cups mixed fresh berries with 1 tablespoon fresh lemon juice to enhance their natural brightness.
9. Spread the whipped cream evenly over the cooled meringue base.
10. Arrange the berry mixture over the whipped cream, allowing some berries to cascade down the sides.
Heavenly in both appearance and taste, this pavlova offers a delightful contrast between the crisp meringue shell and the soft, chewy interior that melts on the tongue. The tart berries cut through the sweetness of the cream, creating a perfectly balanced dessert that shines when served immediately after assembly. For an extra touch of elegance, garnish with edible flowers or mint leaves to complement the spring theme.
Summary
Embrace the vibrant flavors of spring with these 20 festive Ostara recipes! From fresh salads to delightful baked goods, this collection offers something special for every celebration. We hope you find inspiration to create memorable meals. Try a recipe, leave a comment sharing your favorite, and don’t forget to pin this article on Pinterest to save for your spring festivities. Happy cooking!