Craving something tasty but short on time? We’ve all been there! That’s why we’ve gathered 20 delicious quick snack recipes perfect for those busy days when you need a satisfying bite in minutes. From savory bites to sweet treats, these easy options will keep you fueled and happy. Let’s dive into these simple, scrumptious ideas that will become your new go-tos!
Avocado Toast with Chili Flakes
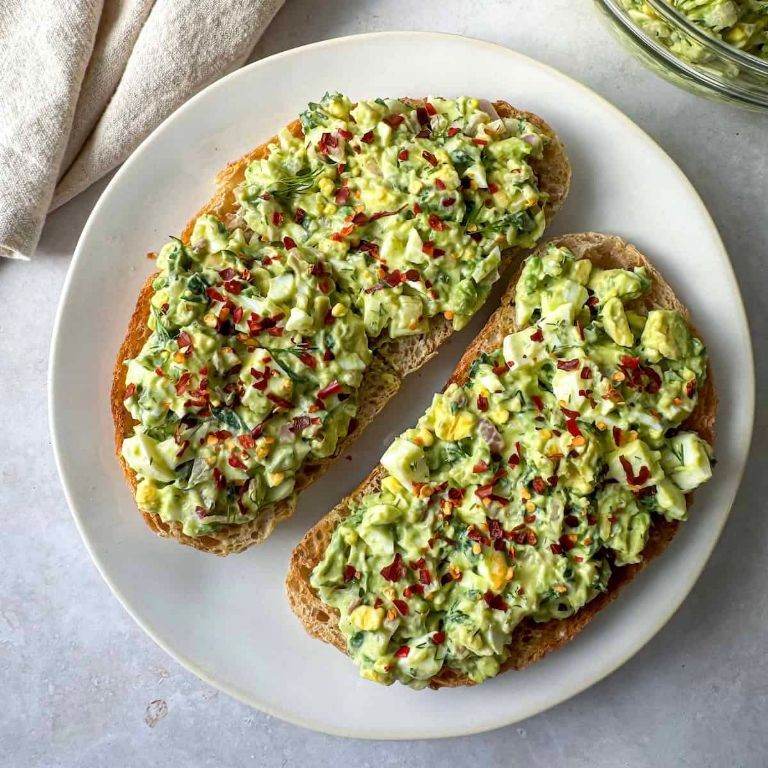
Tired of boring breakfasts? This avocado toast with chili flakes will wake up your taste buds. Smash creamy avocado on crunchy toast, sprinkle with spicy flakes, and get ready for the easiest gourmet moment of your day.
Ingredients
– 2 slices of thick sourdough bread
– 1 ripe avocado
– A good squeeze of fresh lime juice
– A generous pinch of flaky sea salt
– A couple of tablespoons of extra virgin olive oil
– A heavy sprinkle of red chili flakes
Instructions
1. Preheat your oven to 400°F.
2. Place 2 slices of sourdough bread on a baking sheet.
3. Brush both sides of each bread slice with 1 tablespoon of olive oil total.
4. Toast the bread in the oven for exactly 8 minutes until golden brown and crispy.
5. While bread toasts, cut 1 ripe avocado in half and remove the pit.
6. Scoop the avocado flesh into a small bowl.
7. Add a good squeeze of fresh lime juice to the avocado.
8. Mash the avocado with a fork until creamy but still slightly chunky.
9. Spread the mashed avocado evenly onto the hot toasted bread.
10. Sprinkle a generous pinch of flaky sea salt over the avocado.
11. Finish with a heavy sprinkle of red chili flakes across the top.
That creamy avocado against the crunchy toast creates the perfect texture contrast, while the chili flakes add just enough heat to keep things interesting. Try topping it with a fried egg for breakfast or serve alongside a simple salad for a light lunch that feels anything but basic.
Greek Yogurt with Honey and Almonds

Whip up this creamy dream in minutes. Transform basic Greek yogurt into a protein-packed masterpiece. Your taste buds will thank you later.
Ingredients
- 2 cups of thick Greek yogurt
- 3 tablespoons of raw honey
- A generous handful of sliced almonds
- A tiny pinch of sea salt
Instructions
- Scoop 2 cups of Greek yogurt into your favorite serving bowl.
- Drizzle 3 tablespoons of raw honey over the yogurt in a zigzag pattern.
- Sprinkle a generous handful of sliced almonds evenly across the surface.
- Add a tiny pinch of sea salt directly over the almonds to enhance all the flavors.
- Gently fold everything together with a spoon until the honey creates beautiful swirls throughout the yogurt.
- Let the mixture sit for exactly 2 minutes to allow the honey to soften slightly into the yogurt.
- Check that the almonds are evenly distributed and no large clumps of honey remain unmixed.
Cool, creamy yogurt meets sweet honey and crunchy almonds in every spoonful. Create pretty layers in a glass jar for Instagram-worthy breakfast parfaits. The salt makes the honey taste even sweeter without adding extra sugar.
Microwave Mug Omelette

Mornings just got a major upgrade with this lightning-fast microwave mug omelette. Forget the skillet—this fluffy egg creation cooks in under 2 minutes flat. Perfect for rushed weekdays or lazy weekend brunches when you want something satisfying without the cleanup.
Ingredients
– 2 large eggs
– A splash of milk (about 1 tbsp)
– A big pinch of shredded cheddar cheese
– A small handful of diced ham
– A couple of cherry tomatoes, chopped
– A tiny pinch of salt and black pepper
– A quick spray of cooking oil
Instructions
1. Lightly spray the inside of a 12-ounce microwave-safe mug with cooking oil to prevent sticking.
2. Crack 2 large eggs directly into the mug.
3. Add 1 tablespoon of milk to the eggs.
4. Sprinkle in a pinch of salt and black pepper.
5. Use a fork to vigorously whisk the mixture until fully combined and slightly frothy—this creates air pockets for fluffiness.
6. Stir in the diced ham and chopped cherry tomatoes.
7. Microwave on high for 1 minute.
8. Carefully remove the mug (it will be hot) and stir the partially cooked eggs with a fork, pulling cooked edges toward the center.
9. Sprinkle the shredded cheddar cheese evenly over the top.
10. Microwave for another 30–45 seconds until the eggs are fully set and no liquid remains.
11. Let the omelette rest in the mug for 1 minute to finish cooking gently and make removal easier.
12. Run a butter knife around the edges and gently tip the omelette onto a plate. Done! Dig into that fluffy, cheesy goodness right away—the ham adds savory depth while the tomatoes give bursts of freshness. Crumble some crispy bacon over top or drizzle with hot sauce for an extra kick.
Spicy Roasted Chickpeas

Perfectly crispy, protein-packed chickpeas that’ll make your taste buds dance. Pop these spicy roasted gems straight from the oven for the ultimate crunchy snack. Prepare to become obsessed.
Ingredients
- 2 cans of chickpeas, drained and rinsed
- A good glug of olive oil (about 2 tablespoons)
- A generous sprinkle of smoked paprika (1 teaspoon)
- A couple of pinches of garlic powder (½ teaspoon)
- A dash of cayenne pepper (¼ teaspoon)
- A healthy shake of salt (½ teaspoon)
Instructions
- Preheat your oven to 400°F and line a baking sheet with parchment paper.
- Spread the rinsed chickpeas on a clean kitchen towel and pat them completely dry—this is crucial for maximum crispiness.
- Transfer the dried chickpeas to a medium bowl and drizzle with olive oil, tossing to coat evenly.
- Sprinkle smoked paprika, garlic powder, cayenne pepper, and salt over the chickpeas, then toss again until every chickpea is coated in spices.
- Spread the chickpeas in a single layer on your prepared baking sheet, making sure none are touching for even roasting.
- Roast for 25-30 minutes, shaking the pan halfway through, until the chickpeas are deep golden brown and crispy.
- Let the chickpeas cool completely on the baking sheet—they’ll continue to crisp up as they cool.
What you get are addictively crunchy chickpeas with a smoky-spicy kick that lingers. Toss them over salads for extra texture, or mix into trail mix for a protein boost. They stay crispy for days in an airtight container—if they last that long.
Cheesy Garlic Bread Bites

Oozing with cheesy goodness and garlicky perfection, these bite-sized delights are about to become your new obsession. They’re crispy on the outside, fluffy on the inside, and loaded with flavor in every single bite. Get ready to impress at your next gathering or just treat yourself to something seriously delicious.
Ingredients
– 1 can of refrigerated biscuit dough
– 4 tablespoons of melted butter
– 3 cloves of garlic, minced
– A generous handful of shredded mozzarella cheese
– A couple of tablespoons of grated Parmesan cheese
– A sprinkle of dried parsley
– A pinch of salt
Instructions
1. Preheat your oven to 375°F and line a baking sheet with parchment paper.
2. Open the can of biscuit dough and separate each biscuit.
3. Cut each biscuit into 4 equal pieces using a sharp knife or kitchen scissors.
4. Roll each piece into a small ball between your palms.
5. Arrange the dough balls on the prepared baking sheet, spacing them about 1 inch apart.
6. In a small bowl, combine the melted butter and minced garlic.
7. Brush the garlic butter mixture generously over each dough ball using a pastry brush.
8. Sprinkle the shredded mozzarella cheese evenly over all the dough balls.
9. Top with the grated Parmesan cheese, making sure each bite gets some coverage.
10. Add a pinch of salt and a sprinkle of dried parsley over the cheese-covered bites.
11. Bake in the preheated oven for 12-15 minutes until the cheese is bubbly and golden brown.
12. Remove from the oven and let cool for 2-3 minutes before serving.
Absolutely irresistible straight from the oven, these bites offer a satisfying crunch that gives way to a soft, cheesy center. The garlic butter soaks into every nook, while the melted mozzarella creates that perfect stretch with every pull. Try serving them alongside marinara sauce for dipping or toss them into a salad for an unexpected crunch that elevates any meal.
Mini Quesadillas with Salsa

Aren’t you tired of boring snacks? These mini quesadillas deliver maximum flavor in bite-sized packages. Grab your tortillas and let’s transform basic ingredients into party-perfect bites.
Ingredients
– 8 small flour tortillas (the 6-inch ones)
– 1 cup shredded Monterey Jack cheese
– 1 cup shredded cooked chicken (rotisserie works great!)
– 2 tablespoons olive oil
– A couple of spoonfuls of your favorite salsa
– A squeeze of fresh lime juice
– A pinch of chili powder
– A sprinkle of chopped cilantro
Instructions
1. Lay 4 tortillas flat on your cutting board.
2. Sprinkle ¼ cup shredded Monterey Jack cheese evenly over each tortilla.
3. Divide 1 cup shredded cooked chicken evenly among the tortillas.
4. Drizzle 2 tablespoons of your favorite salsa across all four tortillas.
5. Squeeze fresh lime juice lightly over the filling.
6. Sprinkle a pinch of chili powder over each quesadilla.
7. Top each with the remaining 4 tortillas to create sandwiches.
8. Heat a large skillet over medium heat for 2 minutes until properly warmed.
9. Add 1 tablespoon olive oil to the hot skillet and swirl to coat.
10. Place 2 quesadillas in the skillet and cook for 2-3 minutes until the bottom tortilla develops golden brown spots.
11. Flip the quesadillas using a spatula and cook for another 2-3 minutes until the second side is equally golden and the cheese is visibly melted.
12. Remove the cooked quesadillas to a cutting board and repeat steps 8-11 with the remaining olive oil and quesadillas.
13. Cut each quesadilla into 4 wedges using a sharp knife or pizza cutter.
14. Arrange the mini wedges on a serving platter.
15. Sprinkle chopped cilantro over the arranged quesadilla wedges.
Warm, melty cheese oozes from every crispy corner while the salsa adds just enough tangy kick. Serve these immediately with extra salsa for dipping, or get creative by topping each wedge with a dollop of guacamole and a single cilantro leaf for instant party appetizers.
Pita Chips with Tzatziki Dip

A crispy, garlicky snack that’s perfect for your next gathering. Grab those pitas and whip up this crowd-pleaser in minutes—your taste buds will thank you.
Ingredients
– 4 large pita breads
– 3 tablespoons olive oil
– 1 teaspoon garlic powder
– 1/2 teaspoon salt
– 1 cup Greek yogurt
– 1/2 cucumber, grated and squeezed dry
– 1 tablespoon lemon juice
– 1 small garlic clove, minced
– a handful of fresh dill, chopped
– a pinch of salt
Instructions
1. Preheat your oven to 375°F.
2. Cut each pita bread into 8 triangles.
3. Place the pita triangles in a large bowl.
4. Drizzle the olive oil over the pita triangles.
5. Sprinkle the garlic powder and salt evenly over the pitas.
6. Toss everything until the pitas are well-coated. Tip: Make sure every piece gets some oil for maximum crispiness!
7. Arrange the pita triangles in a single layer on a baking sheet.
8. Bake for 10-12 minutes, or until golden brown and crisp. Tip: Check at 8 minutes to prevent burning—ovens vary.
9. Remove the baking sheet from the oven and let the chips cool completely.
10. While the chips bake, make the dip: combine Greek yogurt, grated cucumber, lemon juice, minced garlic, chopped dill, and a pinch of salt in a medium bowl.
11. Stir the mixture until everything is fully incorporated. Tip: Let the dip sit for 10 minutes so the flavors meld together beautifully.
12. Serve the cooled pita chips with the tzatziki dip. Vibrant, crunchy chips meet that cool, herby dip—it’s a texture dream. Try pairing them with grilled veggies or stacking them high for a stunning party platter.
Stuffed Dates with Cream Cheese

Oh my gosh, these stuffed dates will literally change your snack game forever. Grab your ingredients and let’s make magic happen in under 15 minutes—your taste buds will thank you!
Ingredients
– About 20 Medjool dates, pitted
– One 8-ounce block of cream cheese, softened
– A couple tablespoons of honey
– A handful of chopped walnuts
– A pinch of flaky sea salt
– A splash of vanilla extract
Instructions
1. Preheat your oven to 350°F and line a baking sheet with parchment paper.
2. Slice each date lengthwise down the middle, being careful not to cut all the way through.
3. Use a small spoon to stuff each date with about 1 teaspoon of softened cream cheese.
4. Drizzle honey evenly over all the stuffed dates.
5. Sprinkle chopped walnuts generously over the honey layer.
6. Add a tiny pinch of flaky sea salt to each date.
7. Bake for 8-10 minutes until the cream cheese is slightly puffed and the walnuts are lightly toasted.
8. Remove from oven and immediately drizzle with vanilla extract.
9. Let cool for 5 minutes before serving.
Unbelievably good—the warm, creamy centers contrast perfectly with the chewy dates and crunchy walnuts. Serve these beauties on a wooden board with coffee for the ultimate cozy moment, or plate them fancy-style with extra honey drizzle for your next dinner party.
Quick Cucumber Sandwiches
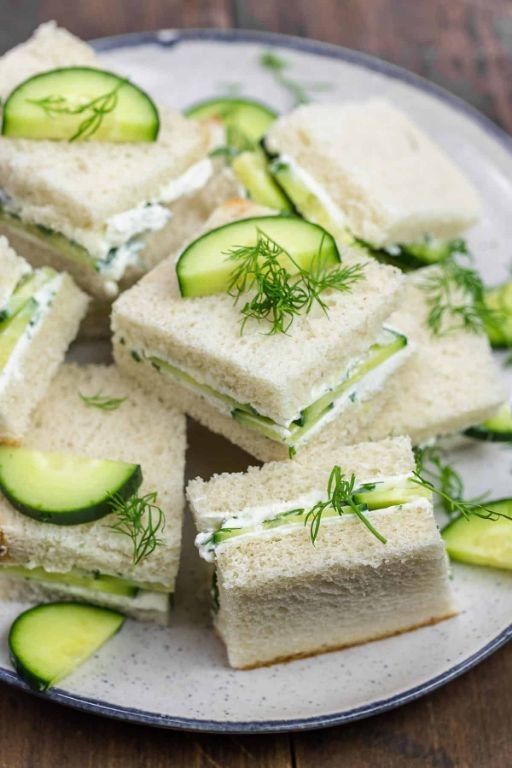
Aren’t you tired of complicated recipes that take forever? These quick cucumber sandwiches are your new go-to for effortless entertaining. Grab your ingredients and let’s make magic happen in minutes.
Ingredients
– 8 slices of white sandwich bread
– 1 large cucumber
– 1/2 cup of cream cheese, softened
– 2 tablespoons of fresh dill, chopped
– A pinch of salt
– A splash of lemon juice
– A couple of tablespoons of butter, softened
Instructions
1. Place the cream cheese in a small bowl and let it sit at room temperature for 15 minutes to soften.
2. Thinly slice the cucumber into rounds about 1/8-inch thick using a sharp knife or mandoline.
3. Spread a thin layer of softened butter on one side of each bread slice to prevent sogginess.
4. Chop the fresh dill until you have approximately 2 tablespoons packed.
5. Add the softened cream cheese, chopped dill, a pinch of salt, and a splash of lemon juice to a mixing bowl.
6. Stir the cream cheese mixture vigorously with a fork for 1-2 minutes until completely smooth and well-combined.
7. Spread the cream cheese mixture evenly on the unbuttered side of 4 bread slices, covering completely to the edges.
8. Arrange cucumber slices in a single layer over the cream cheese, slightly overlapping them.
9. Top each prepared slice with the remaining bread slices, buttered sides facing out.
10. Use a serrated knife to carefully trim off the crusts for clean edges.
11. Cut each sandwich diagonally into 4 triangles for easy serving.
12. Arrange the sandwich triangles on a platter and serve immediately.
Buttery bread gives way to that cool, crisp cucumber crunch against the tangy cream cheese filling. The fresh dill and lemon brighten every bite, making these perfect for afternoon tea or as a refreshing starter. Try stacking them high on a tiered stand for that picture-perfect brunch moment everyone will rave about.
Trail Mix with Dark Chocolate

Let’s be real—this trail mix is about to become your new snack obsession. Load up on crunchy, sweet, and salty goodness with dark chocolate chunks that melt just right. Perfect for hiking, desk-drawer emergencies, or just because you deserve it.
Ingredients
– 2 cups of roasted almonds
– 1 cup of dried cranberries
– 1 cup of roasted pepitas
– 1 cup of unsweetened coconut flakes
– ½ cup of dark chocolate chunks
– A good pinch of sea salt
– A drizzle of maple syrup
Instructions
1. Preheat your oven to 325°F and line a baking sheet with parchment paper.
2. Spread 2 cups of roasted almonds evenly on the baking sheet.
3. Toast the almonds in the oven for 8–10 minutes, until they’re fragrant and slightly darker—watch closely to avoid burning.
4. Remove the baking sheet and let the almonds cool completely on the sheet, about 15 minutes.
5. In a large bowl, combine the cooled almonds with 1 cup of dried cranberries, 1 cup of roasted pepitas, and 1 cup of unsweetened coconut flakes.
6. Drizzle a splash of maple syrup over the mix and toss until everything is lightly coated.
7. Sprinkle a pinch of sea salt over the mixture and toss again to distribute evenly.
8. Fold in ½ cup of dark chocolate chunks gently to keep them from melting.
9. Store the trail mix in an airtight container at room temperature for up to 2 weeks. Pro tip: If your kitchen is warm, pop it in the fridge to keep the chocolate firm.
10. Pack it in small bags for on-the-go snacking or serve it straight from the bowl. Perfectly crunchy almonds and chewy cranberries play off the rich, melty chocolate—toss it over yogurt or ice cream for a next-level treat.
Microwave Popcorn with Parmesan

Let’s transform that boring microwave popcorn into a cheesy, savory snack that’ll have everyone begging for the recipe. This Parmesan upgrade takes two minutes and zero cooking skills—perfect for when hunger strikes during your Netflix binge.
Ingredients
– 1 bag of plain microwave popcorn
– 1/4 cup of finely grated Parmesan cheese
– 2 tablespoons of melted butter
– A good pinch of garlic powder
– A couple of fresh parsley leaves, chopped
Instructions
1. Place one bag of plain microwave popcorn in the microwave.
2. Cook on high for 2 minutes and 30 seconds, or until pops are 2 seconds apart.
3. Carefully open the hot bag away from your face to avoid steam burns.
4. Pour the popped popcorn into a large mixing bowl.
5. Drizzle 2 tablespoons of melted butter evenly over the popcorn.
6. Toss immediately with a large spoon to coat every kernel.
7. Sprinkle 1/4 cup of finely grated Parmesan cheese over the buttered popcorn.
8. Add a good pinch of garlic powder for that savory kick.
9. Toss vigorously for 30 seconds to distribute cheese and seasoning evenly.
10. Taste one piece to check seasoning balance.
11. Sprinkle a couple of chopped fresh parsley leaves over the top for color.
12. Serve immediately in your favorite bowl.
This snack delivers that addictive crunch with salty, cheesy goodness clinging to every kernel. The Parmesan melts slightly from the warm butter, creating little flavor pockets throughout. Try serving it alongside marinara sauce for dipping—it’s like instant pizza popcorn that disappears within minutes.
Deviled Eggs with Paprika

Perfect party appetizer that always disappears first. These deviled eggs bring creamy texture with that signature paprika kick—your guests will beg for the recipe.
Ingredients
– 6 large eggs
– 1/4 cup mayonnaise
– 1 tablespoon yellow mustard
– A splash of white vinegar
– A pinch of salt
– A generous sprinkle of paprika
Instructions
1. Place 6 eggs in a single layer in a saucepan.
2. Cover eggs with cold water by 1 inch.
3. Bring water to a rolling boil over high heat.
4. Once boiling, cover pan and remove from heat.
5. Let eggs sit in hot water for exactly 12 minutes.
6. Transfer eggs to an ice bath for 15 minutes until completely cool.
7. Gently tap each egg on counter to crack shells.
8. Peel eggs under running cool water for easier shell removal.
9. Slice eggs in half lengthwise with a sharp knife.
10. Pop out yolks into a medium bowl.
11. Arrange empty egg white halves on a serving plate.
12. Mash yolks with a fork until fine crumbs form.
13. Add 1/4 cup mayonnaise to yolk mixture.
14. Mix in 1 tablespoon yellow mustard.
15. Stir in a splash of white vinegar.
16. Season with a pinch of salt.
17. Blend until completely smooth and creamy.
18. Spoon filling into a piping bag or zip-top bag.
19. Cut 1/2 inch off corner of bag if using zip-top.
20. Pipe filling evenly into egg white halves.
21. Dust generously with paprika right before serving.
The creamy filling contrasts beautifully with the firm egg whites, while the paprika adds smoky depth. Try sprinkling with crispy bacon bits for extra crunch, or arrange on a bed of microgreens for an elegant presentation.
Baked Sweet Potato Fries

Let’s turn those sweet potatoes into crispy, golden fries that’ll have everyone fighting for the last one. Skip the deep fryer—we’re baking these beauties to perfection with minimal oil and maximum crunch.
Ingredients
- 2 large sweet potatoes
- 2 tablespoons olive oil
- 1 teaspoon garlic powder
- 1 teaspoon smoked paprika
- A good pinch of salt
- A couple of tablespoons of cornstarch
Instructions
- Preheat your oven to 425°F and grab a large baking sheet.
- Scrub those sweet potatoes clean—no need to peel them, the skins add texture and nutrients.
- Slice each sweet potato into ¼-inch thick fry-shaped sticks, keeping them as uniform as possible so they cook evenly.
- Toss the sweet potato sticks with cornstarch in a large bowl—this secret coating creates that crave-worthy crispy exterior.
- Drizzle with olive oil and sprinkle with garlic powder, smoked paprika, and salt.
- Use your hands to massage everything together until each fry is evenly coated—don’t be shy, get in there!
- Arrange the fries in a single layer on the baking sheet, making sure none are touching—this is crucial for proper air circulation and browning.
- Bake for 15 minutes, then flip each fry carefully using tongs—this ensures both sides get equally crispy and golden.
- Return to the oven for another 10-15 minutes until the edges are deeply caramelized and the centers are tender when pierced with a fork.
- Let the fries rest on the baking sheet for 5 minutes before serving—this final wait allows them to crisp up even more as they cool slightly.
Perfectly crispy outside with that signature sweet, creamy interior—these fries are begging for your favorite dipping sauce. Pile them high next to burgers or enjoy straight from the baking sheet while they’re still warm.
Tomato Bruschetta on Toast

Brace yourself for the easiest appetizer that always steals the show. This tomato bruschetta delivers fresh, vibrant flavor in every single bite. Get ready to impress with minimal effort.
Ingredients
– A couple of thick slices of crusty bread
– 2 medium ripe tomatoes
– 1 small garlic clove
– A handful of fresh basil leaves
– A good glug of extra virgin olive oil
– A generous pinch of salt
– A few cracks of black pepper
Instructions
1. Preheat your oven to 400°F.
2. Slice your crusty bread into 1-inch thick pieces.
3. Place bread slices directly on the oven rack and bake for 8-10 minutes until golden and crisp around the edges.
4. While bread toasts, dice your tomatoes into ¼-inch pieces.
5. Mince the garlic clove finely.
6. Chop the fresh basil leaves into thin ribbons.
7. Combine diced tomatoes, minced garlic, and chopped basil in a medium bowl.
8. Drizzle the olive oil over the tomato mixture.
9. Sprinkle salt and pepper over the mixture.
10. Gently toss everything together until well combined.
11. Remove the toasted bread from the oven using oven mitts.
12. Rub one side of each warm toast with the cut side of a garlic clove for extra flavor.
13. Spoon the tomato mixture generously over each garlic-rubbed toast.
14. Drizzle with another teaspoon of olive oil over the top.
15. Serve immediately while the toast is still warm and crisp.
Unbelievably fresh and satisfying, the crisp toast provides the perfect crunch against the juicy tomato mixture. That garlic-infused oil soaks into every nook, creating an explosion of Mediterranean flavors. Try topping with creamy burrata or serving alongside grilled chicken for a complete meal that feels restaurant-worthy.
Frozen Yogurt-Covered Berries

Perfect your snack game with these frozen yogurt-covered berries. Pop them straight from the freezer for a creamy, fruity bite that satisfies any sweet craving. They’re ridiculously easy to make and totally addictive.
Ingredients
- 2 cups of fresh mixed berries (like strawberries, blueberries, raspberries)
- 1 cup of plain Greek yogurt
- A couple of tablespoons of honey
- A splash of vanilla extract
Instructions
- Rinse your berries under cold water and pat them completely dry with paper towels. Tip: Dry berries thoroughly so the yogurt sticks better.
- Line a baking sheet with parchment paper.
- In a medium bowl, combine the Greek yogurt, honey, and vanilla extract. Stir until smooth.
- Drop one berry into the yogurt mixture and use a fork to coat it evenly.
- Lift the berry out with the fork, letting excess yogurt drip off.
- Place the coated berry onto the prepared baking sheet. Repeat with remaining berries.
- Freeze the baking sheet for at least 2 hours, or until the yogurt coating is completely firm. Tip: Space berries apart so they don’t stick together.
- Transfer the frozen berries to an airtight container or freezer bag. Tip: Store them in a single layer to prevent clumping.
These frozen yogurt-covered berries deliver a satisfying crunch from the firm yogurt shell that gives way to a juicy, slightly tart berry center. Toss them into a bowl for a quick dessert, or sprinkle over morning oatmeal for a chilly twist. They’re the perfect cool treat to stash for whenever a sweet tooth strikes.
Summary
Zesty, quick, and satisfying—these 20 snack recipes are perfect for your busiest days. We hope they bring a little joy and ease to your routine! Try a few, then let us know your favorites in the comments. If you enjoyed this roundup, we’d be so grateful if you shared it on Pinterest to help other busy food lovers discover these tasty ideas. Happy snacking!