Craving freshly baked cookies without the fuss? Refrigerator cookies are your secret weapon! These slice-and-bake wonders are perfect for any occasion—whether you need a last-minute treat for guests or a cozy weekend project. With dough ready to go in your fridge, warm, homemade cookies are just minutes away. Get ready to discover 18 delicious recipes that will make you a cookie hero anytime!
Classic Chocolate Chip Refrigerator Cookies

Diving into cookie baking doesn’t have to be intimidating, especially with these classic chocolate chip refrigerator cookies that let you prepare the dough ahead and bake whenever a sweet craving strikes. I’ll walk you through each simple step to ensure perfect, chewy-centered cookies with crisp edges every single time. Let’s start by gathering our ingredients and tools for success.
Ingredients
– 2 cups all-purpose flour (I always spoon and level mine for accuracy)
– 1/2 teaspoon baking soda (check the expiration date—fresh makes all the difference)
– 1/2 teaspoon salt (I prefer fine sea salt for even distribution)
– 3/4 cup unsalted butter, softened to room temperature (this creams beautifully with sugar)
– 1/2 cup granulated sugar
– 3/4 cup packed light brown sugar (pack it firmly into the measuring cup)
– 1 large egg, at room temperature (it blends smoother with the butter mixture)
– 1 teaspoon pure vanilla extract (the real stuff adds depth)
– 1 1/2 cups semi-sweet chocolate chips (I sometimes mix in dark chocolate for richness)
Instructions
1. Whisk together 2 cups all-purpose flour, 1/2 teaspoon baking soda, and 1/2 teaspoon salt in a medium bowl until fully combined.
2. In a separate large bowl, beat 3/4 cup softened unsalted butter, 1/2 cup granulated sugar, and 3/4 cup packed light brown sugar with an electric mixer on medium speed for 2–3 minutes until light and fluffy.
3. Add 1 large room-temperature egg and 1 teaspoon pure vanilla extract to the butter-sugar mixture, then beat on medium speed for 1 minute until fully incorporated.
4. Gradually add the flour mixture to the wet ingredients, mixing on low speed just until no dry streaks remain—be careful not to overmix.
5. Fold in 1 1/2 cups semi-sweet chocolate chips with a spatula until evenly distributed throughout the dough.
6. Divide the dough in half and shape each portion into a log about 2 inches in diameter on a sheet of plastic wrap.
7. Tightly wrap each log in plastic wrap, twisting the ends to secure, and refrigerate for at least 2 hours or up to 3 days—chilling firms the dough for clean slicing.
8. Preheat your oven to 375°F and line two baking sheets with parchment paper.
9. Unwrap one dough log and slice it into 1/2-inch thick rounds, placing them 2 inches apart on the prepared baking sheets.
10. Bake one sheet at a time in the preheated oven for 9–11 minutes, until the edges are golden brown but the centers still look slightly soft.
11. Cool the cookies on the baking sheet for 5 minutes before transferring them to a wire rack to cool completely.
Ready to enjoy? These cookies emerge with a crisp edge giving way to a soft, chewy center, while the semi-sweet chocolate chips add pockets of melty richness. For a fun twist, crumble them over vanilla ice cream or pack them in lunchboxes for a homemade treat that always delights.
Vanilla Almond Slice-and-Bake Cookies

Savor the simplicity of these vanilla almond slice-and-bake cookies—they’re perfect for beginners and seasoned bakers alike. Starting with a straightforward dough that comes together quickly, you’ll appreciate how the chilling step makes them easy to handle and slice. These cookies bake up with a delicate crunch and subtle nutty aroma that fills your kitchen with warmth.
Ingredients
- 1 cup unsalted butter, softened to room temperature (this helps it cream smoothly with the sugar)
- ¾ cup granulated sugar, for just the right sweetness without overpowering the vanilla
- 1 large egg, at room temperature to bind everything evenly
- 2 teaspoons pure vanilla extract, my favorite for that warm, aromatic flavor
- 2 ½ cups all-purpose flour, spooned and leveled to avoid a dense dough
- ½ cup finely chopped almonds, toasted lightly first for a deeper, nuttier taste
- ½ teaspoon salt, to balance the sweetness and enhance the other flavors
Instructions
- Beat the softened butter and granulated sugar in a large bowl with an electric mixer on medium speed for 2 minutes, until light and fluffy.
- Add the room temperature egg and vanilla extract to the butter mixture, and mix on low speed for 30 seconds until fully incorporated.
- Gradually add the all-purpose flour and salt to the wet ingredients, mixing on low just until a dough forms and no dry streaks remain.
- Fold in the finely chopped toasted almonds with a spatula until evenly distributed throughout the dough.
- Divide the dough in half and shape each portion into a log about 1 ½ inches in diameter on a clean surface.
- Wrap each log tightly in plastic wrap and refrigerate for at least 2 hours, or until firm enough to slice neatly.
- Preheat your oven to 350°F and line two baking sheets with parchment paper for easy cleanup.
- Unwrap one dough log and slice it into ¼-inch thick rounds, placing them 1 inch apart on the prepared baking sheets.
- Bake the cookies for 10–12 minutes, until the edges turn a light golden brown and the centers look set.
- Let the cookies cool on the baking sheets for 5 minutes before transferring them to a wire rack to cool completely.
These cookies emerge with a crisp edge and tender center, offering a buttery vanilla flavor accented by the toasted almonds. Try serving them alongside a cup of coffee for a cozy treat, or crumble them over ice cream for a delightful crunch. They store beautifully in an airtight container, keeping their texture for days.
Lemon Zest Refrigerator Shortbread

Creating this lemon zest refrigerator shortbread couldn’t be simpler, even for baking newcomers. This methodical approach ensures perfect results every time, with the dough chilling conveniently in your refrigerator until you’re ready to bake.
Ingredients
– 1 cup unsalted butter, softened to room temperature (this makes creaming so much easier)
– 1/2 cup granulated sugar, plus 2 tablespoons for sprinkling
– 2 cups all-purpose flour, spooned and leveled to avoid dense cookies
– 1 tablespoon fresh lemon zest (I always use organic lemons for the brightest flavor)
– 1/4 teaspoon fine sea salt
Instructions
1. In a large mixing bowl, beat the softened butter with an electric mixer on medium speed for 30 seconds until creamy.
2. Gradually add the 1/2 cup granulated sugar while continuing to beat for 2 minutes until light and fluffy.
3. Add the all-purpose flour, lemon zest, and sea salt all at once to the butter mixture.
4. Mix on low speed just until the dough comes together and no dry flour remains, about 1 minute.
5. Turn the dough out onto a clean surface and shape it into a 12-inch long log about 2 inches in diameter.
6. Wrap the dough log tightly in plastic wrap and refrigerate for at least 4 hours or up to 3 days.
7. Preheat your oven to 325°F and line two baking sheets with parchment paper.
8. Unwrap the chilled dough and slice it into 1/4-inch thick rounds using a sharp knife.
9. Arrange the slices 1 inch apart on the prepared baking sheets.
10. Sprinkle the remaining 2 tablespoons of sugar evenly over the cookie tops.
11. Bake for 18-20 minutes until the edges are just beginning to turn golden brown.
12. Transfer the cookies to a wire rack and let them cool completely, about 30 minutes.
Golden and crisp with a delightful sandy texture, these lemon-kissed shortbread cookies offer the perfect balance of buttery richness and citrus brightness. Try serving them alongside afternoon tea or crumbling them over vanilla ice cream for an elegant dessert upgrade.
Double Chocolate Mint Refrigerator Cookies

Baking these Double Chocolate Mint Refrigerator Cookies is like having a secret weapon in your dessert arsenal—they require no fancy equipment and the dough chills while you go about your day, making them perfect for busy schedules. These slice-and-bake wonders deliver rich chocolate flavor with a refreshing mint twist that develops beautifully as they bake. You’ll love how the crisp edges give way to a slightly chewy center, creating the ideal texture contrast in every bite.
Ingredients
– 1 cup unsalted butter, softened (I find taking it out 30 minutes before starting works best)
– 3/4 cup granulated sugar
– 3/4 cup packed brown sugar (dark brown adds wonderful molasses notes)
– 2 large eggs, at room temperature for better emulsion
– 1 teaspoon pure vanilla extract
– 1 teaspoon peppermint extract (use pure, not imitation, for the cleanest mint flavor)
– 2 1/4 cups all-purpose flour
– 3/4 cup unsweetened cocoa powder (Dutch-processed gives deeper color)
– 1 teaspoon baking soda
– 1/2 teaspoon salt
– 1 cup semi-sweet chocolate chips (I prefer the mini ones for better distribution)
Instructions
1. In a large mixing bowl, cream together the softened butter, granulated sugar, and brown sugar using a hand mixer on medium speed for exactly 2 minutes until light and fluffy.
2. Add the room temperature eggs one at a time, beating for 30 seconds after each addition until fully incorporated.
3. Mix in the vanilla extract and peppermint extract on low speed just until combined, about 15 seconds.
4. In a separate medium bowl, whisk together the all-purpose flour, cocoa powder, baking soda, and salt until no streaks remain.
5. Gradually add the dry ingredients to the wet mixture, mixing on low speed until the dough just comes together, about 1 minute.
6. Fold in the semi-sweet chocolate chips using a spatula until evenly distributed throughout the dough.
7. Divide the dough in half and shape each portion into a 12-inch log about 2 inches in diameter.
8. Wrap each log tightly in plastic wrap and refrigerate for at least 4 hours or up to 3 days—this chilling step is crucial for sliceable dough and prevents spreading.
9. Preheat your oven to 350°F and line two baking sheets with parchment paper.
10. Remove one dough log from refrigerator and unwrap, then slice into 1/4-inch thick rounds using a sharp knife.
11. Arrange the cookie rounds 2 inches apart on prepared baking sheets, placing 12 cookies per sheet.
12. Bake at 350°F for 10-12 minutes until the edges look set but centers still appear slightly soft.
13. Cool cookies on baking sheets for 5 minutes before transferring to wire racks to cool completely.
Keep these cookies stored in an airtight container where they’ll maintain their crisp-chewy texture for up to a week. The chocolate intensity deepens overnight, making them even more irresistible the next day. Try serving them slightly warmed with a scoop of vanilla ice cream for an elegant dessert, or crumble them over yogurt for a breakfast treat that feels indulgent yet simple.
Cinnamon Sugar Swirl Cookies

Now, let’s create these delightful cinnamon sugar swirl cookies that fill your kitchen with the warmest aromas. Perfect for beginners, this recipe walks you through each simple step to achieve beautifully swirled, tender cookies every single time.
Ingredients
– 2 cups all-purpose flour (I always spoon and level mine for accuracy)
– 1/2 teaspoon baking powder
– 1/4 teaspoon salt
– 3/4 cup unsalted butter, softened (room temperature makes creaming so much easier)
– 3/4 cup granulated sugar
– 1 large egg (room temperature eggs incorporate better with the butter)
– 1 teaspoon vanilla extract
– 1/4 cup granulated sugar for rolling
– 2 tablespoons ground cinnamon (I prefer Saigon cinnamon for its bold flavor)
Instructions
1. Preheat your oven to 350°F and line two baking sheets with parchment paper.
2. Whisk together 2 cups flour, 1/2 teaspoon baking powder, and 1/4 teaspoon salt in a medium bowl.
3. In a separate large bowl, beat 3/4 cup softened butter and 3/4 cup sugar with an electric mixer on medium speed for 2 minutes until light and fluffy.
4. Add 1 egg and 1 teaspoon vanilla extract to the butter mixture, beating until fully incorporated.
5. Gradually add the flour mixture to the wet ingredients, mixing on low speed just until a soft dough forms.
6. Combine 1/4 cup sugar and 2 tablespoons cinnamon in a small shallow bowl.
7. Divide the dough into 24 equal portions, rolling each into a smooth ball between your palms.
8. Roll each dough ball in the cinnamon sugar mixture until completely coated.
9. Place 12 coated balls on each prepared baking sheet, spacing them 2 inches apart.
10. Use the bottom of a glass to gently flatten each ball to about 1/2-inch thickness.
11. Bake one sheet at a time in the preheated oven for 10-12 minutes until the edges are lightly golden.
12. Let the cookies cool on the baking sheet for 5 minutes before transferring to a wire rack.
Perfectly tender with a crisp cinnamon sugar coating, these cookies offer that satisfying crackle when you bite into them. Try serving them warm with a cold glass of milk, or crumble them over vanilla ice cream for an extra special treat.
Oatmeal Raisin Refrigerator Cookies

Now, let’s make these wonderfully convenient oatmeal raisin refrigerator cookies that you can slice and bake whenever a cookie craving strikes. Nothing beats having ready-to-bake dough waiting in your fridge for those moments when you need something sweet but don’t want to start from scratch. These cookies deliver that perfect chewy texture with plump raisins and warm cinnamon notes that make them feel like a hug in cookie form.
Ingredients
– 1 cup unsalted butter, softened (I always take mine out about an hour before baking)
– 1 cup light brown sugar, packed (dark brown works too for deeper molasses flavor)
– ½ cup granulated sugar
– 2 large eggs, at room temperature for better emulsion
– 1 teaspoon pure vanilla extract (the good stuff makes all the difference)
– 2 ½ cups old-fashioned rolled oats (not quick-cooking for better texture)
– 2 cups all-purpose flour
– 1 teaspoon baking soda
– 1 teaspoon ground cinnamon (I add an extra pinch because I love warm spices)
– ½ teaspoon salt
– 1 ½ cups raisins (I prefer the plump Thompson variety)
Instructions
1. Place softened butter, brown sugar, and granulated sugar in a large mixing bowl.
2. Beat the butter and sugars together on medium speed for exactly 2 minutes until light and fluffy.
3. Crack one egg into the bowl and beat for 30 seconds until fully incorporated.
4. Crack the second egg into the bowl and beat for another 30 seconds.
5. Pour in vanilla extract and beat for 15 seconds to combine.
6. In a separate medium bowl, whisk together oats, flour, baking soda, cinnamon, and salt for 1 minute to ensure even distribution.
7. Gradually add the dry ingredients to the wet ingredients while mixing on low speed.
8. Mix just until no dry flour remains visible, about 45 seconds.
9. Add raisins and mix on low speed for 20 seconds until evenly distributed.
10. Divide the dough in half and shape each portion into a 12-inch log.
11. Wrap each log tightly in plastic wrap, twisting the ends securely.
12. Refrigerate the wrapped dough logs for at least 4 hours or up to 3 days.
13. Preheat your oven to 350°F and line baking sheets with parchment paper.
14. Unwrap one dough log and slice into ½-inch thick rounds using a sharp knife.
15. Place cookie rounds 2 inches apart on prepared baking sheets.
16. Bake for 12-14 minutes until edges are golden brown but centers still look slightly soft.
17. Cool cookies on baking sheets for 5 minutes before transferring to wire racks.
Keep these cookies stored in an airtight container where they’ll maintain their delightful chewiness for days. The beauty of refrigerator cookies lies in their versatility—slice off just a few for a small batch or bake the whole log when company comes. That wonderful contrast between the crispy edges and soft, raisin-studded centers makes them perfect with afternoon tea or crumbled over vanilla ice cream for an easy dessert upgrade.
Coconut Lime Refrigerator Cookies

Haven’t you ever wished for a cookie that practically makes itself? These Coconut Lime Refrigerator Cookies are your answer—a delightful dough you can prepare ahead and slice-and-bake whenever a sweet, tropical craving strikes. They’re the perfect project for a relaxed baking session, yielding crisp, flavorful cookies with minimal fuss.
Ingredients
– 1 cup (2 sticks) unsalted butter, softened to room temperature—this makes creaming so much easier
– ¾ cup granulated sugar, for that perfect sweetness level
– 1 large egg, at room temperature to help it incorporate smoothly
– 2 tablespoons fresh lime juice, squeezed from about 1 juicy lime
– 1 teaspoon pure vanilla extract, my secret for depth of flavor
– 2 ¼ cups all-purpose flour, spooned and leveled to avoid dense cookies
– ½ teaspoon baking powder, for a slight lift
– ¼ teaspoon salt, to balance the sweetness
– 1 cup sweetened shredded coconut, for that chewy tropical texture
– 2 teaspoons lime zest, from that same lime for maximum citrus punch
Instructions
1. In a large mixing bowl, combine 1 cup softened unsalted butter and ¾ cup granulated sugar.
2. Using an electric mixer on medium speed, beat the butter and sugar together for exactly 2 minutes until pale and fluffy.
3. Add 1 large room temperature egg, 2 tablespoons fresh lime juice, and 1 teaspoon vanilla extract to the bowl.
4. Beat the wet ingredients on medium speed for 1 minute until fully incorporated and smooth.
5. In a separate medium bowl, whisk together 2 ¼ cups all-purpose flour, ½ teaspoon baking powder, and ¼ teaspoon salt.
6. Gradually add the dry ingredients to the wet ingredients, mixing on low speed until just combined.
7. Fold in 1 cup sweetened shredded coconut and 2 teaspoons lime zest with a spatula until evenly distributed.
8. Divide the dough in half and shape each portion into a 6-inch log about 2 inches in diameter.
9. Wrap each log tightly in plastic wrap and refrigerate for at least 4 hours or until firm.
10. Preheat your oven to 350°F and line two baking sheets with parchment paper.
11. Unwrap one dough log and slice it into ¼-inch thick rounds using a sharp knife.
12. Arrange the cookie rounds 2 inches apart on prepared baking sheets.
13. Bake at 350°F for 12-14 minutes until the edges are lightly golden.
14. Transfer the cookies to a wire rack to cool completely.
These cookies emerge with a satisfying crispness that gives way to a chewy coconut center. The bright lime zest cuts through the richness beautifully, making each bite refreshing. Try serving them alongside a scoop of coconut ice cream for an extra tropical treat, or simply enjoy with afternoon tea.
Pistachio and White Chocolate Slice-and-Bake

Frequently, the simplest recipes yield the most impressive results, and these pistachio and white chocolate slice-and-bake cookies are a perfect example. Following just a few methodical steps will give you a buttery, nutty cookie that’s perfect for holiday gifting or a cozy afternoon treat. Let’s walk through the process together so you can achieve bakery-quality results right in your own kitchen.
Ingredients
– 1 cup unsalted butter, softened to room temperature (this is crucial for proper creaming)
– 3/4 cup granulated sugar
– 1 large egg, brought to room temperature for better emulsion
– 2 1/4 cups all-purpose flour, spooned and leveled to avoid dense cookies
– 1/2 cup shelled pistachios, finely chopped (I prefer raw for their vibrant green color)
– 3/4 cup white chocolate chips, the good quality ones that don’t seize up
– 1/2 teaspoon pure vanilla extract, my secret for depth of flavor
– 1/4 teaspoon fine sea salt, to balance the sweetness
Instructions
1. Preheat your oven to 350°F and line two baking sheets with parchment paper.
2. In a large mixing bowl, beat the softened butter and granulated sugar together on medium speed for exactly 3 minutes until pale and fluffy.
3. Add the room temperature egg and vanilla extract, then beat for 1 more minute until fully incorporated.
4. Gradually add the flour and salt to the wet ingredients, mixing on low speed just until the dough comes together.
5. Fold in the chopped pistachios and white chocolate chips by hand until evenly distributed throughout the dough.
6. Divide the dough in half and shape each portion into a log approximately 2 inches in diameter.
7. Wrap each log tightly in plastic wrap and refrigerate for at least 2 hours, or until firm enough to slice cleanly.
8. Unwrap one dough log and use a sharp knife to slice it into 1/4-inch thick rounds.
9. Arrange the slices 2 inches apart on your prepared baking sheets.
10. Bake for 12-14 minutes, or until the edges are just beginning to turn golden brown.
11. Transfer the cookies to a wire rack and let them cool completely before serving. Generously studded with pistachios and white chocolate, these cookies offer a delightful contrast between crisp edges and tender centers. The buttery base lets the nutty pistachios shine while the white chocolate adds creamy sweetness without overwhelming the other flavors.
Maple Pecan Refrigerator Cookies
Zesty and wonderfully simple, these maple pecan refrigerator cookies require no fancy equipment or baking expertise. You’ll be amazed at how the dough transforms in your fridge into slice-and-bake perfection. Let me walk you through each step methodically so you can create these delightful treats with confidence.
Ingredients
– 1 cup unsalted butter, softened to room temperature (this creams beautifully with sugar)
– ¾ cup pure maple syrup, the darker grade B variety for that robust flavor I always prefer
– 1 large egg, brought to room temperature for better emulsion
– 2 ½ cups all-purpose flour, spooned and leveled to avoid dense cookies
– ½ teaspoon baking soda, fresh for optimal rise
– ¼ teaspoon fine sea salt, my secret for balancing sweetness
– 1 cup chopped pecans, toasted first to deepen their nutty character
Instructions
1. Place softened butter and maple syrup in a large mixing bowl.
2. Beat the butter and maple syrup together on medium speed for exactly 2 minutes until pale and fluffy.
3. Crack the room temperature egg into the mixture.
4. Beat for 1 additional minute until the egg is fully incorporated and the mixture appears smooth.
5. In a separate medium bowl, whisk together the flour, baking soda, and sea salt.
6. Add the dry ingredients to the wet ingredients in three separate additions.
7. Mix on low speed after each addition until just combined, being careful not to overmix.
8. Fold in the toasted chopped pecans with a spatula until evenly distributed.
9. Divide the dough in half and shape each portion into a log approximately 2 inches in diameter.
10. Wrap each log tightly in plastic wrap, smoothing the surface as you go.
11. Refrigerate the wrapped dough logs for at least 4 hours, or up to 3 days for flavor development.
12. Preheat your oven to 350°F and line baking sheets with parchment paper.
13. Unwrap one dough log and slice into ¼-inch thick rounds using a sharp knife.
14. Arrange the slices 2 inches apart on prepared baking sheets.
15. Bake for 10-12 minutes until the edges are lightly golden but centers still appear soft.
16. Cool on baking sheets for 5 minutes before transferring to wire racks.
Miraculously crisp edges give way to chewy centers in these maple-kissed cookies. The toasty pecans provide satisfying crunch against the smooth maple backdrop. Try serving them slightly warm with a drizzle of extra maple syrup or crumbled over vanilla ice cream for an elegant dessert transformation.
Espresso Chocolate Crinkle Cookies
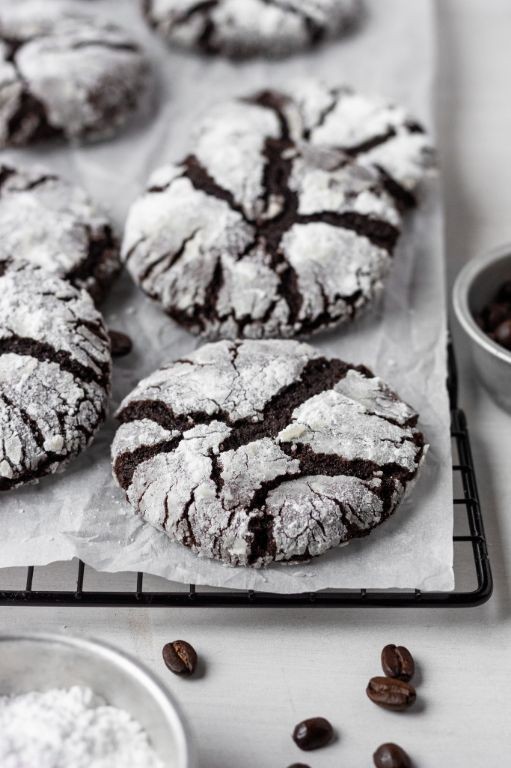
Ultimately, these espresso chocolate crinkle cookies combine rich cocoa with bold coffee notes in a beautifully cracked appearance that’s surprisingly simple to master. Understanding the methodical process ensures even beginners achieve that perfect fudgy center and delicate powdered sugar coating. Using quality ingredients and precise timing transforms basic components into sophisticated holiday-worthy treats.
Ingredients
- 1 cup all-purpose flour – I always spoon and level mine to avoid dense cookies
- 1/2 cup unsweetened cocoa powder – Dutch-processed gives the deepest chocolate flavor
- 1 teaspoon baking powder
- 1/4 teaspoon salt – fine sea salt balances the sweetness perfectly
- 3/4 cup granulated sugar
- 1/4 cup vegetable oil – neutral oil keeps them moist without overpowering
- 2 large eggs – room temperature eggs incorporate more smoothly
- 2 teaspoons instant espresso powder – dissolve it completely for even coffee distribution
- 1 teaspoon vanilla extract
- 1/2 cup powdered sugar for rolling – have extra handy for re-dusting sticky dough
Instructions
- Preheat your oven to 350°F and line two baking sheets with parchment paper.
- Whisk together 1 cup flour, 1/2 cup cocoa powder, 1 teaspoon baking powder, and 1/4 teaspoon salt in a medium bowl until no streaks remain.
- Combine 3/4 cup granulated sugar, 1/4 cup vegetable oil, 2 eggs, 2 teaspoons espresso powder, and 1 teaspoon vanilla in a separate large bowl, whisking vigorously for 1 full minute until smooth and slightly thickened.
- Gradually stir the dry ingredients into the wet mixture using a spatula, mixing just until combined with no flour pockets visible.
- Cover the bowl with plastic wrap and refrigerate the dough for exactly 30 minutes to firm up – chilled dough prevents excessive spreading.
- Place 1/2 cup powdered sugar in a shallow bowl while dough chills.
- Scoop 1 tablespoon of chilled dough and roll between palms to form smooth balls.
- Roll each ball thoroughly in powdered sugar until completely coated, then place 2 inches apart on prepared baking sheets.
- Bake one sheet at a time for 10-12 minutes until surfaces crack and edges feel set when lightly touched.
- Cool cookies on baking sheet for 5 minutes before transferring to wire rack – they firm up as they cool.
Outstanding cookies emerge with crackled tops revealing dark chocolate beneath the snowy sugar coating. These boast an intense double-chocolate flavor where espresso enhances rather than overpowers, creating sophisticated depth against the fudgy, brownie-like interior. Try serving them slightly warm with vanilla ice cream for a decadent affogato-inspired dessert, or package in cellophane bags tied with baker’s twine for thoughtful homemade gifts.
Gingerbread Spice Refrigerator Cookies

Let’s create these delightful gingerbread spice refrigerator cookies that fill your kitchen with the warmest holiday aromas. Lasting through the cookie season, these slice-and-bake treats are perfect for busy bakers who want freshly baked cookies on demand. We’ll walk through each step methodically to ensure your cookies turn out perfectly spiced and beautifully textured every time.
Ingredients
– 2 cups all-purpose flour (I always spoon and level mine for accuracy)
– 1 teaspoon baking soda (check the expiration date—fresh soda makes all the difference)
– 2 teaspoons ground ginger (I prefer the extra kick of freshly ground ginger)
– 1 teaspoon ground cinnamon (Vietnamese cinnamon has the best flavor)
– ½ teaspoon ground cloves (just a hint creates that classic gingerbread warmth)
– ¼ teaspoon salt (fine sea salt disperses evenly through the dough)
– ¾ cup unsalted butter, softened to room temperature (this creams beautifully with the sugar)
– ¾ cup packed dark brown sugar (the molasses notes complement the spices perfectly)
– 1 large egg, at room temperature (cold eggs can cause the dough to separate)
– ¼ cup molasses (I use robust flavor for that deep, traditional taste)
– ½ cup granulated sugar for rolling (coarse sugar adds a lovely sparkle and crunch)
Instructions
1. In a medium bowl, whisk together 2 cups all-purpose flour, 1 teaspoon baking soda, 2 teaspoons ground ginger, 1 teaspoon ground cinnamon, ½ teaspoon ground cloves, and ¼ teaspoon salt until thoroughly combined.
2. In a separate large bowl, use an electric mixer on medium speed to beat ¾ cup softened unsalted butter and ¾ cup packed dark brown sugar together for exactly 2 minutes until light and fluffy.
3. Add 1 large room temperature egg to the butter mixture and beat for 30 seconds until fully incorporated.
4. Pour in ¼ cup molasses and mix on low speed for 1 minute until the mixture is smooth and uniformly brown.
5. Gradually add the flour mixture to the wet ingredients, mixing on low speed just until no dry streaks remain—be careful not to overmix.
6. Divide the dough in half and shape each portion into a 6-inch log about 2 inches in diameter.
7. Roll each log in ½ cup granulated sugar, pressing gently to ensure the sugar adheres to all surfaces.
8. Wrap each sugared log tightly in plastic wrap and refrigerate for at least 4 hours or up to 3 days—the dough must be firm to slice cleanly.
9. Preheat your oven to 350°F and line two baking sheets with parchment paper.
10. Remove one dough log from the refrigerator and unwrap it, keeping the other chilled.
11. Using a sharp knife, slice the firm dough into ¼-inch thick rounds, rotating the log slightly after each cut to maintain its round shape.
12. Arrange the slices 2 inches apart on prepared baking sheets—they’ll spread slightly as they bake.
13. Bake at 350°F for 10-12 minutes until the edges are set and the centers appear slightly puffed.
14. Cool the cookies on the baking sheet for 5 minutes before transferring to a wire rack to cool completely.
Each cookie emerges with crisp edges giving way to a wonderfully chewy center that’s packed with warm gingerbread spices. Enjoy them alongside coffee for breakfast or crumbled over vanilla ice cream for an elegant dessert—their slice-and-bake convenience means you can bake just what you need and keep the rest frozen for spontaneous cookie cravings.
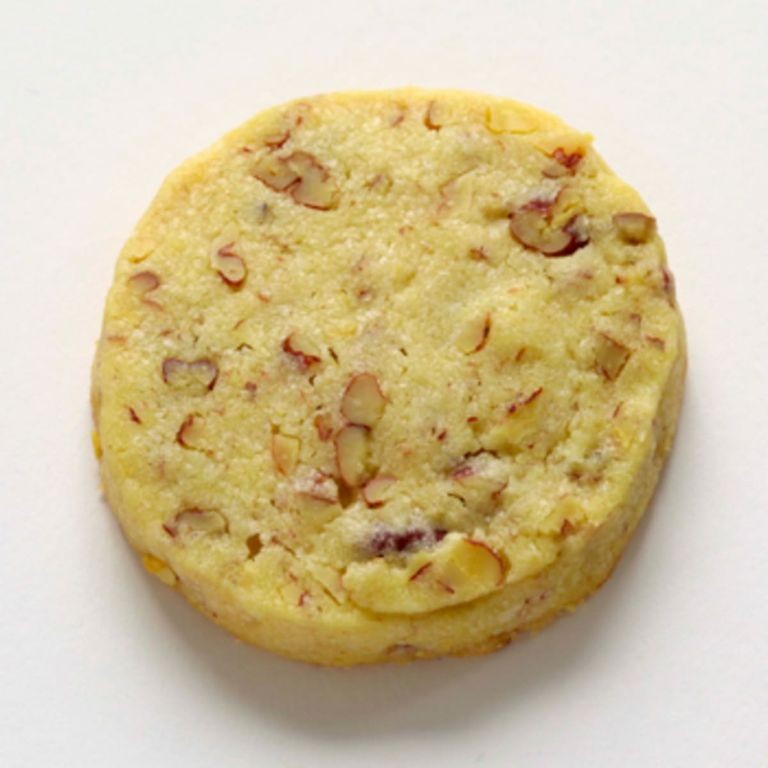
Cherry Almond Shortbread Slices

Very few treats combine elegance and simplicity quite like these cherry almond shortbread slices. Visualize buttery, crumbly shortbread layered with sweet-tart cherry preserves and nutty almond flavor—they’re perfect for holiday cookie trays or a cozy afternoon snack. Let’s walk through each step together so you can create these delightful bars with confidence.
Ingredients
- 1 cup unsalted butter, softened (I always use room temperature butter for easier creaming)
- 1/2 cup granulated sugar (this creates a delicate sweetness without overpowering the fruit)
- 2 cups all-purpose flour (measured by spooning into the cup and leveling off for accuracy)
- 1/2 teaspoon almond extract (this is my secret for that bakery-style almond aroma)
- 1/2 cup cherry preserves (look for ones with visible fruit pieces for better texture)
- 1/4 cup sliced almonds (toasted first for maximum crunch and flavor)
Instructions
- Preheat your oven to 350°F and line an 8×8 inch baking pan with parchment paper, leaving overhang on two sides for easy removal.
- In a large mixing bowl, beat the softened butter and granulated sugar together with an electric mixer on medium speed for exactly 2 minutes until pale and fluffy.
- Add the all-purpose flour and almond extract to the butter mixture, mixing on low speed just until the dough comes together and no dry flour remains.
- Press two-thirds of the dough evenly into the bottom of your prepared pan using your fingers or the bottom of a measuring cup.
- Spread the cherry preserves over the dough layer in an even thickness, leaving a 1/4-inch border around the edges to prevent sticking.
- Crumble the remaining dough over the cherry layer in small pieces, creating an uneven, rustic topping.
- Sprinkle the sliced almonds evenly over the entire surface, pressing gently so they adhere to the dough.
- Bake for 25-30 minutes until the edges are golden brown and the top appears set when you gently shake the pan.
- Cool completely in the pan on a wire rack for at least 2 hours before slicing into bars.
A buttery, sandy texture gives way to the bright cherry filling, while the toasted almonds provide satisfying crunch. These slices pair wonderfully with afternoon tea or can be dressed up with a dusting of powdered sugar for special occasions. Store them in an airtight container where they’ll maintain their perfect texture for up to five days.
Brown Butter Toffee Refrigerator Cookies
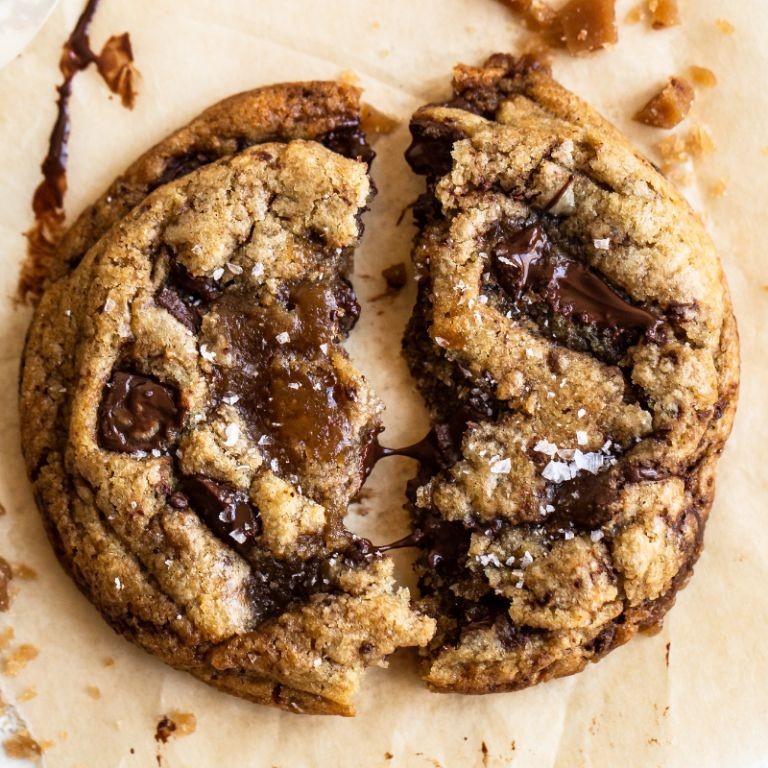
Baking these brown butter toffee refrigerator cookies feels like discovering a secret shortcut to cookie perfection. By preparing the dough ahead and chilling it, you can slice and bake fresh, warm cookies whenever the craving strikes. This methodical approach ensures consistent results every single time.
Ingredients
– 1 cup unsalted butter (I always use unsalted to control the salt level)
– ¾ cup packed light brown sugar (this creates that wonderful chewiness)
– ½ cup granulated sugar
– 1 large egg (room temperature eggs incorporate much more smoothly)
– 2 teaspoons pure vanilla extract (the real stuff makes all the difference)
– 2¼ cups all-purpose flour
– 1 teaspoon baking soda
– ½ teaspoon salt
– 1 cup toffee bits (I prefer the ones with chocolate for extra richness)
Instructions
1. Place 1 cup unsalted butter in a light-colored saucepan over medium heat.
2. Melt the butter completely, then continue cooking for 5-7 minutes while stirring constantly until it turns amber-colored and smells nutty.
3. Immediately pour the brown butter into a heatproof bowl to stop the cooking process.
4. Let the brown butter cool at room temperature for exactly 30 minutes until it’s solid but still soft.
5. In a large mixing bowl, combine the cooled brown butter with ¾ cup packed light brown sugar and ½ cup granulated sugar.
6. Beat the butter and sugars together on medium speed for 2 full minutes until light and fluffy.
7. Add 1 large egg and 2 teaspoons pure vanilla extract to the butter mixture.
8. Beat for another minute until the egg is fully incorporated and the mixture looks creamy.
9. In a separate bowl, whisk together 2¼ cups all-purpose flour, 1 teaspoon baking soda, and ½ teaspoon salt.
10. Gradually add the dry ingredients to the wet ingredients, mixing on low speed until just combined.
11. Fold in 1 cup toffee bits using a spatula until evenly distributed throughout the dough.
12. Divide the dough in half and shape each portion into a 2-inch diameter log.
13. Wrap each log tightly in plastic wrap and refrigerate for at least 4 hours or up to 3 days.
14. Preheat your oven to 350°F and line baking sheets with parchment paper.
15. Unwrap one dough log and slice it into ¼-inch thick rounds using a sharp knife.
16. Place the cookie slices 2 inches apart on prepared baking sheets.
17. Bake at 350°F for 10-12 minutes until the edges are golden brown but centers still look slightly soft.
18. Let cookies cool on the baking sheet for 5 minutes before transferring to a wire rack.
You’ll notice these cookies have a wonderful crisp edge that gives way to a chewy center, with the toffee bits creating little pockets of caramel sweetness. They’re perfect for holiday cookie exchanges or as an afternoon treat with coffee, and the dough logs freeze beautifully for up to three months.
Snickerdoodle Refrigerator Cookies
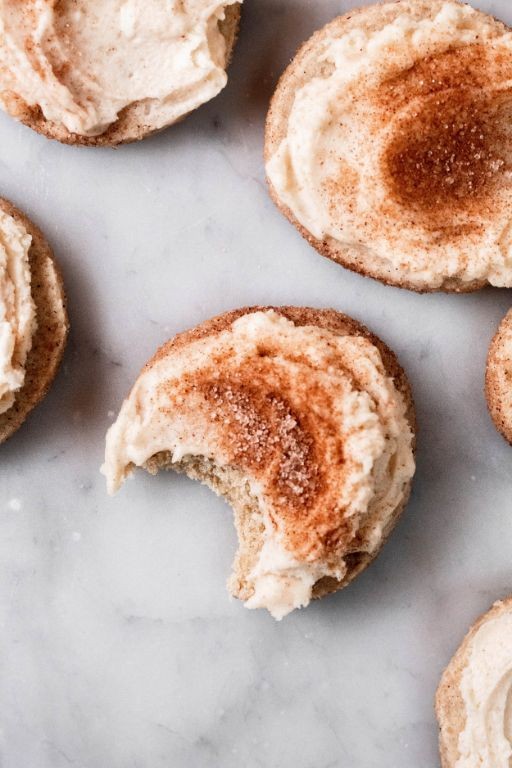
Whenever you need a quick cookie fix but don’t want to commit to full baking day, these snickerdoodle refrigerator cookies are your perfect solution. With just a few minutes of prep work, you’ll have dough ready to slice and bake whenever cookie cravings strike. Vivid cinnamon-sugar spirals create that classic snickerdoodle look while the make-ahead convenience means fresh cookies are always within reach.
Ingredients
– 1 cup unsalted butter, softened (I always take mine out about an hour before baking)
– 1 ½ cups granulated sugar, divided (save ¼ cup for the cinnamon sugar coating)
– 2 large eggs at room temperature (they incorporate much better when not cold)
– 1 teaspoon vanilla extract (pure vanilla makes all the difference here)
– 3 cups all-purpose flour, spooned and leveled (this prevents dense cookies)
– 1 teaspoon cream of tartar (the secret to that signature snickerdoodle tang)
– ½ teaspoon baking soda
– ½ teaspoon salt
– 2 tablespoons ground cinnamon (I prefer Saigon cinnamon for its warm, complex flavor)
Instructions
1. Place softened butter and 1 ¼ cups sugar in a large mixing bowl.
2. Beat the butter and sugar together on medium speed for exactly 2 minutes until light and fluffy.
3. Add one egg and mix until fully incorporated, about 30 seconds.
4. Add the second egg and vanilla extract, mixing for another 30 seconds until smooth.
5. In a separate bowl, whisk together flour, cream of tartar, baking soda, and salt.
6. Gradually add the dry ingredients to the wet ingredients, mixing on low speed just until combined.
7. Divide the dough in half and shape each portion into a 2-inch diameter log.
8. Combine remaining ¼ cup sugar and cinnamon in a shallow bowl.
9. Roll each dough log in the cinnamon-sugar mixture, coating all sides evenly.
10. Wrap the coated logs tightly in plastic wrap.
11. Refrigerate the dough logs for at least 4 hours or up to 3 days.
12. Preheat your oven to 375°F and line baking sheets with parchment paper.
13. Unwrap one dough log and slice into ¼-inch thick rounds.
14. Place cookies 2 inches apart on prepared baking sheets.
15. Bake for 8-10 minutes until the edges are lightly golden but centers still look slightly soft.
16. Cool cookies on the baking sheet for 5 minutes before transferring to a wire rack.
Vibrant with warm cinnamon flavor and that characteristic soft-yet-chewy texture, these cookies develop even more complexity after cooling completely. Try serving them slightly warm with a cold glass of milk, or crumble them over vanilla ice cream for an easy dessert upgrade that always impresses.
Orange Cardamom Slice-and-Bake Cookies

Every holiday season, I find myself reaching for this reliable slice-and-bake cookie recipe that fills the kitchen with the most incredible warming aroma. These orange cardamom cookies are perfect for beginners because the dough comes together quickly and can be made ahead, eliminating last-minute baking stress.
Ingredients
- 1 cup unsalted butter, softened to room temperature (this makes creaming much easier)
- 3/4 cup granulated sugar
- 1 large egg, at room temperature for better emulsion
- 2 tablespoons fresh orange zest (I prefer using organic oranges since we’re using the peel)
- 2 teaspoons ground cardamom, freshly ground if possible for maximum flavor
- 1/2 teaspoon pure vanilla extract
- 2 1/4 cups all-purpose flour, spooned and leveled to avoid dense cookies
- 1/4 teaspoon fine sea salt
- 2 tablespoons coarse sugar for rolling
Instructions
- Place the softened butter and granulated sugar in a large mixing bowl.
- Beat the butter and sugar together on medium speed for exactly 3 minutes until light and fluffy, scraping down the bowl halfway through.
- Add the room temperature egg and beat for 30 seconds until fully incorporated.
- Mix in the orange zest, ground cardamom, and vanilla extract until evenly distributed.
- Gradually add the flour and salt to the wet ingredients with the mixer on low speed.
- Mix just until the dough comes together and no dry flour remains, about 45 seconds.
- Divide the dough in half and shape each portion into a 6-inch log on a clean surface.
- Sprinkle the coarse sugar onto a sheet of parchment paper and roll each dough log in the sugar to coat evenly.
- Wrap each sugared log tightly in plastic wrap and refrigerate for at least 2 hours, or up to 3 days.
- Preheat your oven to 350°F and line two baking sheets with parchment paper.
- Remove one dough log from the refrigerator and unwrap it carefully.
- Using a sharp knife, slice the chilled dough into 1/4-inch thick rounds, rotating the log slightly after each cut to maintain its round shape.
- Arrange the cookie slices 2 inches apart on the prepared baking sheets.
- Bake for 12-14 minutes until the edges are lightly golden while the centers remain pale.
- Transfer the cookies to a wire rack and let them cool completely, about 30 minutes.
Here you’ll find these cookies have a delightful sandy texture that melts in your mouth, with the bright citrus notes perfectly balancing the warm spice of cardamom. They’re wonderful alongside afternoon tea or crumbled over vanilla ice cream for an elegant dessert, and the dough logs freeze beautifully for unexpected guests.
Dark Chocolate Sea Salt Refrigerator Cookies

Sometimes the best cookies are the ones that require no baking at all—these dark chocolate sea salt refrigerator cookies come together with minimal effort but deliver maximum satisfaction. Simply mix, shape, and chill for a treat that’s rich, sophisticated, and perfect for satisfying sudden chocolate cravings.
Ingredients
– 2 cups finely crushed chocolate wafer cookies (I prefer Nabisco Famous Wafers for their deep chocolate flavor)
– 1 cup powdered sugar, sifted (sifting prevents lumps for smoother mixing)
– 1/2 cup unsalted butter, softened to room temperature (this creams more easily with the sugar)
– 4 ounces high-quality dark chocolate, chopped (I use 70% cacao for balanced bitterness)
– 1/2 cup heavy cream (full-fat creates the creamiest texture)
– 1 teaspoon pure vanilla extract (the real stuff makes a noticeable difference)
– 1/2 teaspoon flaky sea salt, plus extra for sprinkling (Maldon salt adds lovely crunch)
Instructions
1. Place the chocolate wafer cookies in a zip-top bag and crush them into fine crumbs using a rolling pin.
2. Transfer the cookie crumbs to a medium mixing bowl and add the sifted powdered sugar.
3. In a separate large bowl, beat the softened butter with an electric mixer on medium speed for 1 minute until creamy.
4. Gradually add the cookie crumb and powdered sugar mixture to the butter, mixing on low speed until fully combined.
5. Line a baking sheet with parchment paper and scoop tablespoon-sized portions of the dough.
6. Roll each portion between your palms to form 1-inch balls, then place them 1 inch apart on the prepared baking sheet.
7. Use the bottom of a glass to gently flatten each ball to 1/2-inch thickness.
8. Chill the shaped cookies in the refrigerator for 30 minutes to firm up while you prepare the chocolate coating.
9. Combine the chopped dark chocolate and heavy cream in a microwave-safe bowl.
10. Microwave the chocolate mixture in 30-second intervals, stirring after each, until completely smooth and melted (about 90 seconds total).
11. Stir the vanilla extract and 1/2 teaspoon flaky sea salt into the melted chocolate mixture until fully incorporated.
12. Remove the chilled cookies from the refrigerator and dip each one halfway into the chocolate coating.
13. Return the dipped cookies to the parchment-lined baking sheet and immediately sprinkle with additional flaky sea salt.
14. Refrigerate the cookies for at least 2 hours, or until the chocolate coating is completely set and firm to the touch.
What makes these cookies truly special is their contrast of textures—the crisp chocolate shell gives way to a dense, fudgy center that melts on the tongue. The flaky sea salt not only looks beautiful but cuts through the richness with each bite. Try serving them slightly chilled with a glass of cold milk or crumbling them over vanilla ice cream for an elegant dessert upgrade.
Summary
Zesty, convenient, and endlessly versatile—this collection proves refrigerator cookies are the ultimate baking solution for busy home cooks. Whether you need a last-minute treat or want to stock your freezer with ready-to-bake dough, these 18 recipes have you covered. Try your favorites, share which ones you love in the comments, and pin this roundup to your Pinterest boards for easy access. Happy baking!