Who says you have to give up sweets to eat healthy? Whether you’re managing sugar intake or simply craving guilt-free treats, these 18 delicious sugar-free candy recipes are perfect for satisfying your sweet tooth. From creamy fudge to chewy caramels, discover easy-to-make options that don’t compromise on flavor. Get ready to indulge in wholesome goodness—your next favorite treat is just a recipe away!
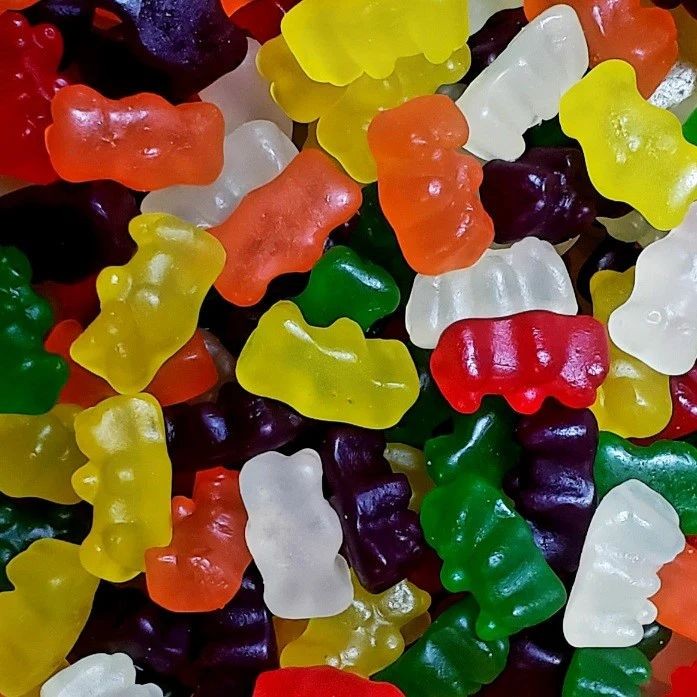
Homemade Sugar Free Peanut Butter Cups
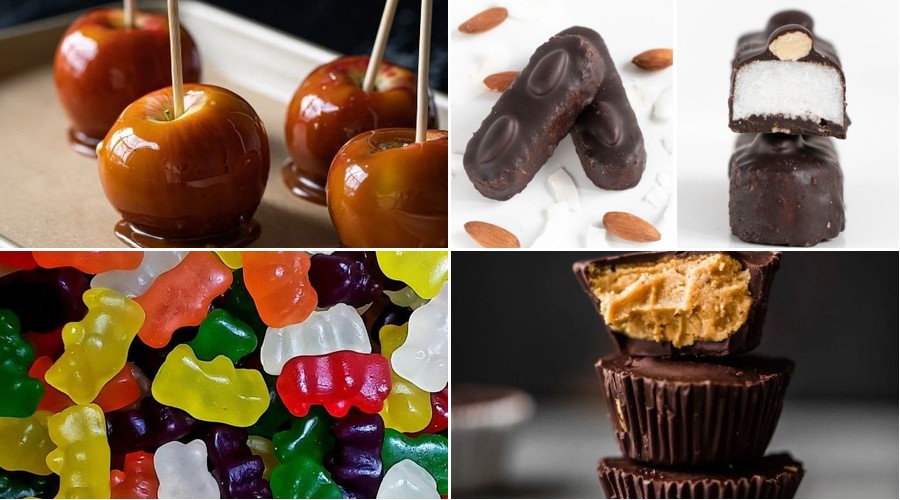
Remarkably sophisticated yet surprisingly simple to create, these homemade sugar-free peanut butter cups elevate the classic candy into an artisanal treat worthy of any gourmet occasion. Rich, dark chocolate encases a velvety peanut butter filling that delivers profound flavor without refined sugars. Each delicate cup offers a perfect balance of bitter chocolate notes and nutty sweetness that will delight even the most discerning palates.
Ingredients
- 8 ounces premium 70% dark chocolate, finely chopped
- 1/2 cup natural creamy peanut butter, unsweetened
- 3 tablespoons pure maple syrup
- 2 tablespoons coconut oil, refined
- 1/4 teaspoon Maldon sea salt flakes
- 1 teaspoon pure vanilla extract
Instructions
- Line a standard 12-cup mini muffin tin with paper liners, ensuring they fit snugly against the sides.
- Create a double boiler by placing a heatproof bowl over a saucepan of gently simmering water, making sure the bottom of the bowl doesn’t touch the water.
- Add the finely chopped dark chocolate and 1 tablespoon of refined coconut oil to the bowl, stirring continuously with a silicone spatula until completely melted and glossy, about 3-4 minutes.
- Using a small spoon, carefully coat the bottom and sides of each muffin liner with approximately 1 teaspoon of melted chocolate, creating an even layer about 1/8-inch thick.
- Transfer the chocolate-coated liners to the refrigerator and chill until firm to the touch, approximately 8-10 minutes.
- While the chocolate sets, combine the unsweetened peanut butter, remaining 1 tablespoon of refined coconut oil, pure maple syrup, and vanilla extract in a small mixing bowl, whisking vigorously until perfectly smooth and emulsified.
- Remove the chilled chocolate cups from refrigerator and spoon approximately 1/2 teaspoon of the peanut butter mixture into the center of each cup, leaving a 1/8-inch border around the edges.
- Gently tap the muffin tin on the countertop to settle the filling and create an even surface.
- Re-warm the remaining melted chocolate over the double boiler for 30 seconds, then spoon it over the peanut butter centers, covering completely and sealing the edges.
- Sprinkle a few Maldon sea salt flakes over the surface of each cup while the chocolate is still warm.
- Return the completed cups to the refrigerator and chill until completely set and firm, approximately 25-30 minutes.
Notably, these confections achieve an exquisite textural contrast between the crisp chocolate shell and the creamy, yielding peanut butter center. The sophisticated bitterness of high-quality dark chocolate beautifully complements the natural sweetness of maple-kissed peanut butter, while the occasional crunch of flaky salt provides a delightful finishing note. For an elegant presentation, arrange them on a chilled marble slab or serve alongside freshly brewed espresso to highlight their complex flavor profile.
Keto-Friendly Chocolate Coconut Bars
Evocative of tropical indulgence yet meticulously crafted for the health-conscious palate, these keto-friendly chocolate coconut bars offer a sophisticated balance of rich cocoa and creamy coconut. Each layer harmonizes premium ingredients to create a dessert that feels both decadent and virtuous. The result is an elegant treat that satisfies sweet cravings while adhering to low-carb principles.
Ingredients
- 2 cups unsweetened shredded coconut
- 1/2 cup coconut oil, gently melted
- 1/3 cup premium cocoa powder
- 1/4 cup powdered erythritol
- 1 teaspoon pure vanilla extract
- 1/4 teaspoon fine sea salt
- 1/4 cup roasted almond slivers
Instructions
- Line an 8×8-inch baking pan with parchment paper, allowing 2-inch overhangs on two opposite sides for easy removal.
- Combine 2 cups unsweetened shredded coconut and 1/4 teaspoon fine sea salt in a food processor, pulsing until the mixture begins to clump together, about 45 seconds.
- Add 1/2 cup gently melted coconut oil and 1 teaspoon pure vanilla extract to the food processor, then pulse until the mixture forms a cohesive dough that holds together when pressed.
- Transfer the coconut mixture to the prepared pan, pressing firmly into an even layer using the bottom of a measuring cup to create a compact base.
- In a medium bowl, whisk 1/3 cup premium cocoa powder and 1/4 cup powdered erythritol until no lumps remain, ensuring thorough incorporation for smooth chocolate flavor.
- Spread the chocolate mixture evenly over the coconut base using an offset spatula, creating a uniform layer about 1/8-inch thick.
- Sprinkle 1/4 cup roasted almond slivers evenly across the chocolate layer, gently pressing them into the surface to adhere.
- Refrigerate the pan for exactly 2 hours until completely firm, allowing the coconut oil to solidify properly for clean slicing.
- Using the parchment overhangs, lift the entire block from the pan and place on a cutting board.
- Cut into 16 equal bars using a sharp knife warmed under hot water and wiped dry between cuts for clean edges.
What makes these bars particularly delightful is the satisfying contrast between the chewy coconut base and the crisp chocolate layer, with roasted almonds adding subtle crunch. The sophisticated bitterness of premium cocoa balances beautifully with the natural sweetness of coconut, creating depth that evolves with each bite. For an elegant presentation, arrange the bars on a slate serving platter and garnish with edible gold leaf or serve alongside freshly brewed espresso.
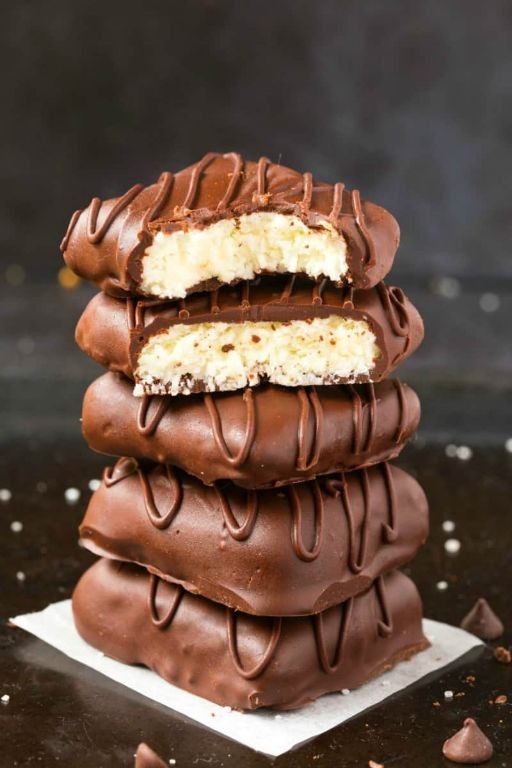
Sugar Free Gummy Bears with Stevia
Beneath their jewel-like translucency lies a sophisticated confection that reimagines childhood nostalgia through a modern, health-conscious lens. These sugar-free gummy bears harness the pure sweetness of stevia to deliver guilt-free indulgence, achieving that quintessential chew without refined sugars. Crafted with precision and care, they transform simple ingredients into elegant morsels perfect for mindful snacking.
Ingredients
- 1/2 cup cold-filtered water
- 3 tablespoons grass-fed beef gelatin powder
- 1/2 cup unsweetened apple juice concentrate
- 1/4 teaspoon finely ground stevia extract powder
- 1/4 teaspoon malic acid
- 1/4 teaspoon pure lemon oil
- 1/8 teaspoon fine sea salt
Instructions
- Bloom the grass-fed beef gelatin powder by sprinkling it evenly over 1/4 cup of cold-filtered water in a small bowl, then let it stand undisturbed for 5 minutes until it forms a firm, rubbery texture.
- Combine the remaining 1/4 cup cold-filtered water, unsweetened apple juice concentrate, finely ground stevia extract powder, malic acid, pure lemon oil, and fine sea salt in a small saucepan.
- Heat the saucepan over medium-low heat, stirring constantly with a silicone spatula until the mixture reaches 160°F on a digital thermometer and all components are fully dissolved.
- Remove the saucepan from heat and immediately whisk in the bloomed gelatin mixture until completely smooth and free of any lumps, about 2 minutes of vigorous stirring.
- Allow the mixture to cool for 8-10 minutes until it thickens slightly but remains pourable, testing by dipping a spoon and observing a coating that holds its shape for 3 seconds.
- Carefully pour the warm gelatin mixture into silicone gummy bear molds, filling each cavity to just below the rim to prevent overflow during setting.
- Transfer the filled molds to the refrigerator and chill for exactly 2 hours until the gummy bears are firm to the touch and release cleanly from the molds.
- Gently pop the set gummy bears out of the molds and arrange them in a single layer on a parchment-lined baking sheet.
- Let the gummy bears air-dry at room temperature for 12 hours to develop a slightly firmer exterior while maintaining a tender interior.
Luxuriously chewy with a delicate resistance that gives way to bright citrus notes, these translucent gems offer a sophisticated mouthfeel that belies their sugar-free nature. Their vibrant tartness, balanced by the clean sweetness of stevia, makes them ideal for elegant dessert charcuterie boards or as garnishes for artisanal cocktails. Store them in an airtight container between layers of parchment to preserve their perfect texture and jewel-like appearance.
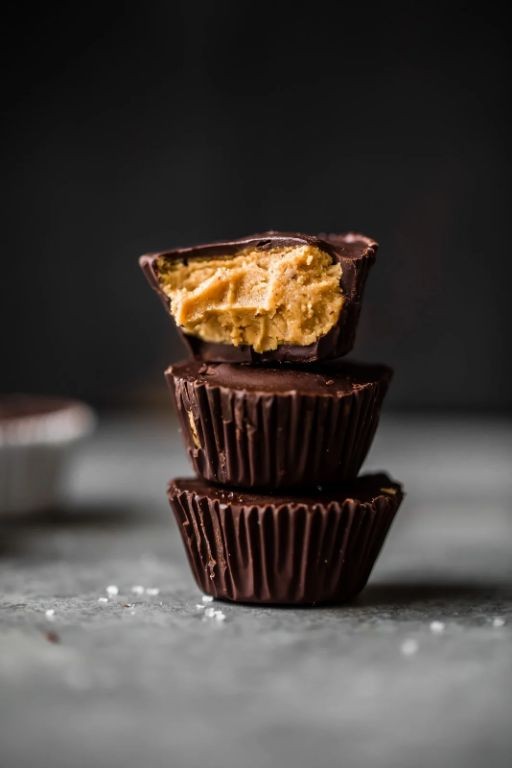
Low-Carb Almond Joy Candy Bites
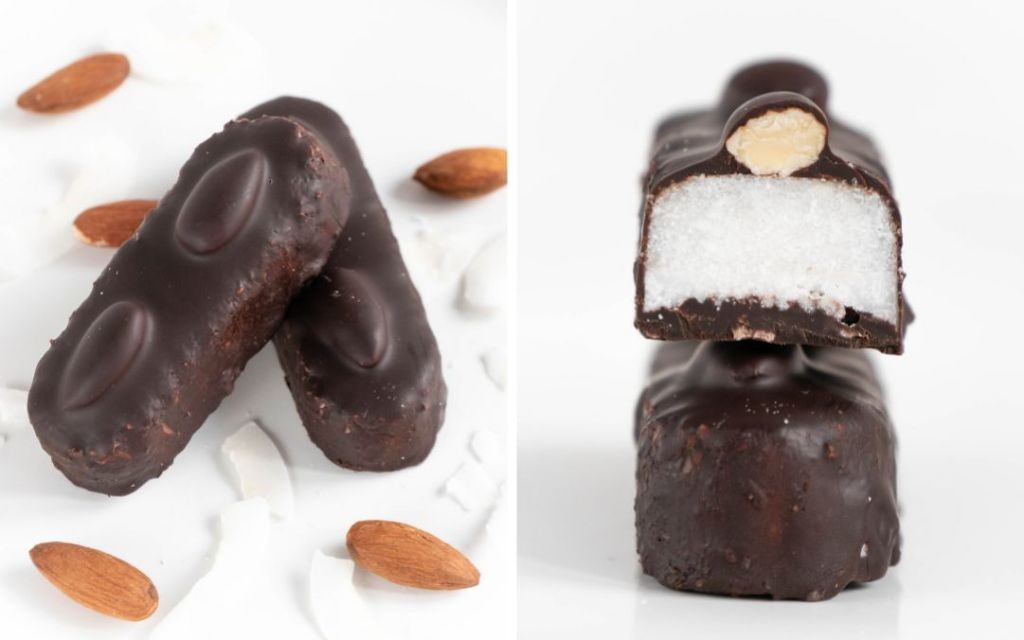
Perfectly capturing the nostalgic essence of the classic candy bar while embracing a sophisticated, health-conscious approach, these Low-Carb Almond Joy Candy Bites offer a moment of pure indulgence. Each delicate morsel combines the rich, deep notes of premium dark chocolate with the satisfying crunch of toasted almonds and the subtle sweetness of coconut. Crafted with precision and care, they transform simple ingredients into an elegant confection worthy of any gathering.
Ingredients
- 1 cup unsweetened shredded coconut
- 1/4 cup coconut oil, gently warmed to liquid state
- 3 tbsp powdered erythritol
- 1/2 tsp pure vanilla extract
- 24 whole raw almonds
- 4 oz sugar-free dark chocolate (70% cacao), finely chopped
- 1 tsp refined coconut oil
Instructions
- Line a small baking sheet with parchment paper.
- In a medium mixing bowl, combine the unsweetened shredded coconut, liquid coconut oil, powdered erythritol, and pure vanilla extract.
- Stir the mixture vigorously for 2 minutes until it forms a cohesive, slightly sticky mass. Tip: Warming the coconut oil slightly above room temperature (about 80°F) ensures easier incorporation and a smoother texture.
- Scoop 1 tablespoon of the coconut mixture and compress it firmly between your palms to form a compact oval shape.
- Press one whole raw almond firmly into the top center of each coconut oval.
- Arrange the shaped bites on the prepared baking sheet and freeze for 20 minutes until completely firm.
- Create a double boiler by placing a heatproof bowl over a saucepan of simmering water, ensuring the bottom of the bowl does not touch the water.
- Add the finely chopped sugar-free dark chocolate and refined coconut oil to the bowl, stirring continuously with a silicone spatula until fully melted and glossy, about 4–5 minutes. Tip: Avoid overheating the chocolate; keep the water at a gentle simmer (around 160°F) to prevent seizing.
- Using a dipping fork or two forks, carefully dip each frozen coconut-almond bite into the melted chocolate, coating entirely.
- Allow excess chocolate to drip off for 10 seconds before returning the bite to the parchment-lined sheet.
- Repeat until all bites are coated, then refrigerate for 25 minutes until the chocolate shell is fully set and crisp. Tip: For a professional finish, gently tap the fork on the bowl’s edge to remove excess chocolate and create smooth, even coverage.
Silken and rich, these bites deliver a satisfying snap from the dark chocolate shell, giving way to a chewy, fragrant coconut center and the nutty crunch of almonds. Serve them artfully arranged on a chilled slate board for an elegant dessert presentation, or enjoy them as a refined afternoon treat with a cup of freshly brewed coffee.
Easy Sugar Free Hard Candy with Erythritol
Perfectly translucent and jewel-like, these sophisticated sugar-free hard candies offer a guilt-free indulgence that rivals their traditional counterparts. Crafted with crystalline erythritol and pure flavor extracts, each piece delivers a satisfying crunch and clean finish that will delight even the most discerning palate. This elegant confection proves that restraint can yield remarkable complexity.
Ingredients
- 2 cups granulated erythritol
- 1/2 cup filtered water
- 1/4 teaspoon cream of tartar
- 1 teaspoon pure liquid stevia extract
- 1/2 teaspoon food-grade citric acid
- 1/2 teaspoon pure peppermint extract
Instructions
- Combine granulated erythritol, filtered water, and cream of tartar in a heavy-bottomed saucepan.
- Place over medium heat and stir continuously with a heat-resistant silicone spatula until erythritol completely dissolves, about 3-4 minutes.
- Attach a candy thermometer to the saucepan, ensuring it doesn’t touch the bottom.
- Increase heat to medium-high and bring mixture to 300°F without stirring, which typically takes 12-15 minutes.
- Monitor temperature carefully, as erythritol can scorch if heated beyond 310°F.
- Immediately remove saucepan from heat when thermometer reaches 300°F.
- Allow bubbles to subside completely, about 1 minute.
- Stir in pure liquid stevia extract, food-grade citric acid, and pure peppermint extract until fully incorporated.
- Quickly pour hot candy mixture into silicone candy molds, working efficiently before it hardens.
- Let candies cool completely at room temperature for 25-30 minutes until firm.
- Gently pop candies out of molds and store in an airtight container with parchment between layers.
These crystalline confections deliver a satisfying snap with each bite, releasing waves of cool peppermint balanced by the subtle tang of citric acid. Their glass-like clarity makes them particularly elegant when presented in glass apothecary jars or wrapped individually as thoughtful gifts. The sophisticated sweetness lingers cleanly without the cloying aftertaste common to sugar-free alternatives.
Healthy Sugar Free Caramel Chews
Nestled between the realms of nostalgic confectionery and contemporary wellness, these sugar-free caramel chews offer a sophisticated indulgence that honors both palate and principle. Crafted with premium ingredients and meticulous technique, they transform simple components into elegant morsels of caramelized delight that satisfy cravings without compromise. Each chew delivers the rich, buttery depth of traditional caramel through innovative sweetening methods that elevate this classic treat to new heights of refined enjoyment.
Ingredients
– 1 cup organic coconut cream, full-fat
– ¾ cup golden monk fruit sweetener
– ¼ cup pure maple syrup, grade A dark
– 6 tablespoons European-style cultured butter, unsalted
– 1 teaspoon Madagascar bourbon vanilla extract
– ½ teaspoon Maldon sea salt flakes
– ¼ teaspoon xanthan gum
Instructions
1. Combine 1 cup organic coconut cream, ¾ cup golden monk fruit sweetener, and ¼ cup pure maple syrup in a heavy-bottomed saucepan.
2. Attach a digital candy thermometer to the saucepan, ensuring it doesn’t touch the bottom.
3. Heat the mixture over medium heat, stirring constantly with a silicone spatula until the sweeteners fully dissolve, approximately 3-4 minutes.
4. Continue cooking without stirring until the thermometer registers 240°F (soft-ball stage), about 8-10 minutes.
5. Remove from heat and immediately whisk in 6 tablespoons European-style cultured butter until completely emulsified.
6. Sprinkle ¼ teaspoon xanthan gum over the surface while whisking vigorously to prevent clumping.
7. Stir in 1 teaspoon Madagascar bourbon vanilla extract and ½ teaspoon Maldon sea salt flakes until fully incorporated.
8. Pour the caramel into a parchment-lined 8×8-inch baking dish, spreading evenly with an offset spatula.
9. Cool at room temperature for 45 minutes until firm but still slightly pliable.
10. Transfer the slab to a cutting board and slice into 1-inch squares using a chef’s knife wiped clean between cuts.
11. Individually wrap each square in wax paper, twisting the ends to secure.
12. Store in an airtight container at cool room temperature for up to two weeks.
Heavenly in both texture and complexity, these chews possess a remarkably smooth, pliable consistency that yields to the tooth with satisfying resistance. The deep, buttery notes are beautifully balanced by subtle salt crystals that provide occasional bursts of contrast, while the monk fruit sweetener lends a clean finish without any bitter aftertaste. For an elegant presentation, arrange them in miniature paper cups and serve alongside espresso or as a sophisticated conclusion to a dinner party.
Vegan Sugar Free Chocolate Truffles
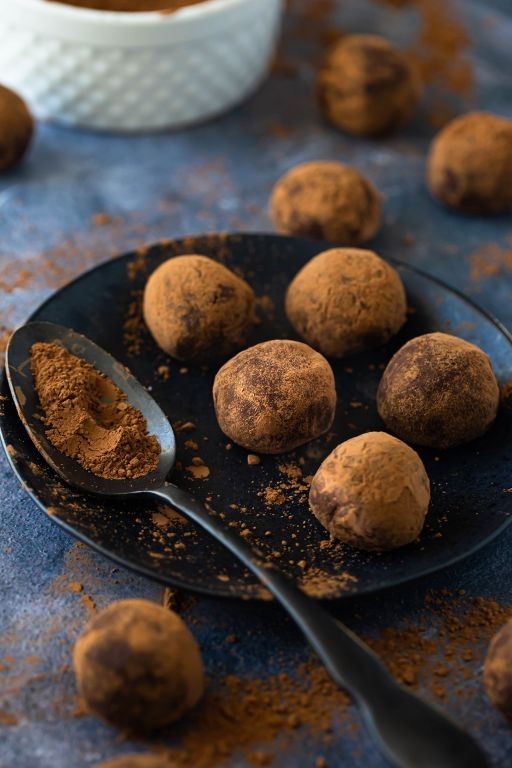
Perfectly indulgent yet consciously crafted, these vegan sugar-free chocolate truffles offer a sophisticated treat for the discerning palate. Their velvety texture and rich cocoa depth make them an elegant addition to any dessert spread or thoughtful homemade gift. Each bite delivers pure chocolate bliss without compromise, proving that decadence and dietary mindfulness can beautifully coexist.
Ingredients
- 1 cup raw cashews, soaked overnight
- 1/2 cup unsweetened cocoa powder, Dutch-processed
- 1/4 cup coconut oil, cold-pressed and unrefined
- 3 tablespoons pure maple syrup, grade A dark
- 1 teaspoon pure vanilla extract, Madagascar bourbon
- 1/4 teaspoon fine sea salt
- 1/4 cup cocoa nibs, for coating
Instructions
- Drain the soaked cashews thoroughly and pat dry with a clean kitchen towel to remove excess moisture.
- Combine the drained cashews, Dutch-processed cocoa powder, cold-pressed coconut oil, dark maple syrup, Madagascar bourbon vanilla extract, and fine sea salt in a high-speed blender.
- Blend the mixture on high speed for 2-3 minutes until completely smooth and creamy, scraping down the sides with a spatula as needed.
- Transfer the chocolate mixture to a shallow bowl and refrigerate uncovered for 45 minutes until firm enough to handle.
- Using a melon baller or small cookie scoop, portion the chilled mixture into 1-inch balls, rolling quickly between your palms to form smooth spheres.
- Place the cocoa nibs in a small shallow bowl and roll each truffle gently to coat evenly, pressing lightly to adhere.
- Arrange the finished truffles on a parchment-lined baking sheet and refrigerate for another 30 minutes to set completely.
- Store the truffles in an airtight container in the refrigerator for up to two weeks, separating layers with parchment paper.
Velvety and intensely chocolate, these truffles offer a satisfying snap from the cocoa nib coating that gives way to a lush, fudgy interior. Their sophisticated bitterness pairs wonderfully with a glass of full-bodied red wine or strong espresso. For an elegant presentation, arrange them in petite paper cups and garnish with edible gold leaf or crushed pistachios.
Sugar Free Peppermint Patties
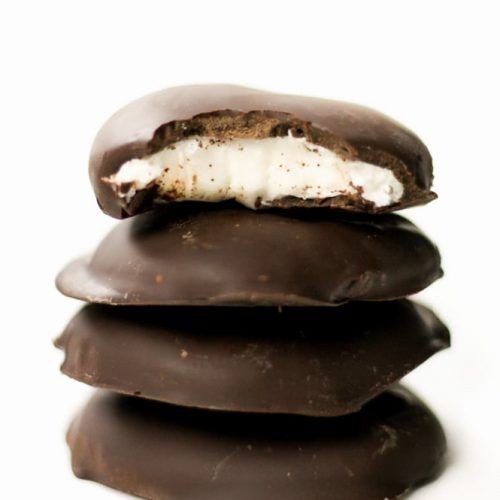
Sublime confections that capture the essence of winter’s crisp air, these sugar-free peppermint patties offer sophisticated indulgence without compromise. Their elegant contrast of rich dark chocolate and refreshing peppermint creates a treat that feels both celebratory and wholesome. Crafted with premium ingredients and mindful sweetness, they transform simple components into something truly extraordinary.
Ingredients
– 1 cup coconut cream, chilled overnight
– 1/4 cup monk fruit sweetener
– 1 tsp pure peppermint extract
– 1/4 tsp fine sea salt
– 8 oz sugar-free dark chocolate (70% cacao), finely chopped
– 1 tbsp coconut oil, refined
Instructions
1. Scoop the solidified coconut cream from the chilled can into a stand mixer bowl, discarding any liquid at the bottom.
2. Whip the coconut cream on medium-high speed for 2 minutes until soft peaks form.
3. Gradually add the monk fruit sweetener while continuing to whip for 1 additional minute.
4. Incorporate the peppermint extract and fine sea salt, mixing just until combined, about 30 seconds.
5. Line a baking sheet with parchment paper and portion the mixture using a 1-tablespoon cookie scoop.
6. Roll each portion between your palms to form smooth spheres, then flatten into 1/2-inch thick discs.
7. Freeze the patties on the prepared baking sheet for 45 minutes until completely firm.
8. Create a double boiler by placing a heatproof bowl over a saucepan with 1 inch of simmering water.
9. Melt the chopped sugar-free dark chocolate and refined coconut oil together, stirring constantly with a silicone spatula until completely smooth and reaching 115°F on a digital thermometer.
10. Remove the bowl from heat and cool the chocolate to 90°F, stirring occasionally to maintain emulsion.
11. Using dipping tools, submerge each frozen patty completely in the tempered chocolate, allowing excess to drip off.
12. Return the coated patties to the parchment-lined sheet and let set at room temperature for 20 minutes. Marvel at how these refined confections achieve perfect harmony between creamy peppermint center and crisp chocolate shell. The sophisticated snap of quality chocolate gives way to an ethereal, cooling creaminess that lingers elegantly on the palate. For an artistic presentation, arrange them on a slate board with fresh mint sprigs or package in glassine bags as thoughtful edible gifts.
Keto Sugar Free Fudge Squares
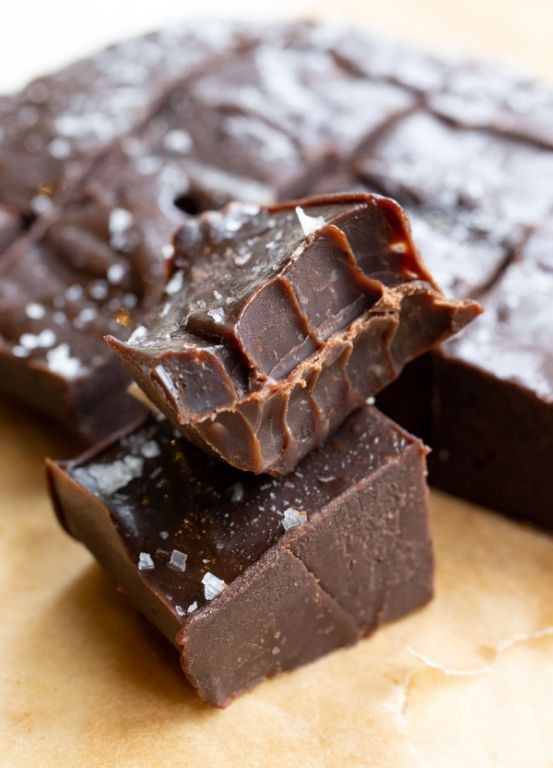
Radiant in their simplicity yet sophisticated in flavor, these keto fudge squares offer a moment of pure indulgence without compromise. Crafted with premium ingredients, each velvety square delivers the rich decadence of traditional fudge while maintaining impeccable nutritional standards. This elegant confection proves that restraint can yield extraordinary results.
Ingredients
– 1 cup premium unsweetened cocoa powder
– 1/2 cup European-style unsalted butter
– 1/2 cup pure MCT oil
– 1/2 cup powdered erythritol sweetener
– 1 teaspoon pure vanilla extract
– 1/4 teaspoon fine sea salt
– 1/2 cup raw almond butter
– 1/4 cup crushed pecans
Instructions
1. Line an 8×8-inch baking pan with parchment paper, ensuring the paper extends over two opposite sides for easy removal.
2. Combine 1 cup premium unsweetened cocoa powder, 1/2 cup powdered erythritol sweetener, and 1/4 teaspoon fine sea salt in a medium heatproof bowl, whisking until thoroughly incorporated and free of lumps.
3. Melt 1/2 cup European-style unsalted butter with 1/2 cup pure MCT oil in a small saucepan over medium-low heat, swirling occasionally until fully liquefied and reaching 145°F on a candy thermometer.
4. Pour the warm butter mixture over the dry ingredients, stirring continuously with a silicone spatula until a thick, glossy paste forms.
5. Add 1/2 cup raw almond butter and 1 teaspoon pure vanilla extract, folding vigorously until the mixture achieves a uniform, silken consistency.
6. Transfer the fudge mixture to the prepared pan, using an offset spatula to spread it evenly into all corners and create a perfectly level surface.
7. Sprinkle 1/4 cup crushed pecans evenly across the top, gently pressing them into the surface with the flat side of the spatula to adhere.
8. Refrigerate the pan for exactly 2 hours until the fudge is firm to the touch and easily releases from the parchment paper.
9. Using the parchment paper handles, lift the fudge block from the pan and place it on a cutting board.
10. Warm a sharp chef’s knife under hot water, wipe it dry, and cut the fudge into 16 uniform squares, cleaning the knife between each cut for pristine edges.
Offering a remarkably smooth mouthfeel with subtle nutty undertones, these squares feature a dense, creamy texture that melts luxuriously on the tongue. The deep chocolate intensity is beautifully balanced by the delicate crunch of toasted pecans, creating a sophisticated flavor profile that evolves with each bite. For an elegant presentation, arrange the squares on a marble slab and garnish with edible gold leaf or serve alongside freshly brewed espresso.
No-Sugar Added Marshmallows
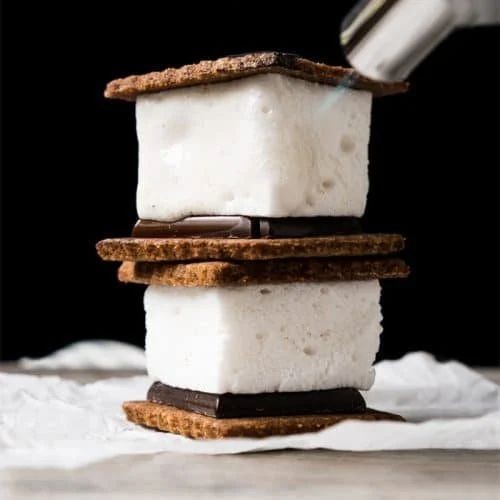
Revered for their ethereal texture yet often laden with refined sugars, marshmallows receive a sophisticated transformation in this no-sugar-added rendition. Crafted with premium ingredients and meticulous technique, these confections offer cloud-like softness without compromising on elegance. They elevate the humble marshmallow to a refined treat suitable for both everyday indulgence and special occasions.
Ingredients
- 3/4 cup cold filtered water, divided
- 3 tablespoons unflavored grass-fed gelatin powder
- 1 cup pure maple syrup, grade A dark amber
- 1/4 teaspoon fine sea salt
- 2 teaspoons pure vanilla extract
- 1/4 cup arrowroot powder
- 1/4 cup organic powdered erythritol
Instructions
- Pour 1/2 cup cold filtered water into the bowl of a stand mixer fitted with the whisk attachment.
- Sprinkle 3 tablespoons unflavored grass-fed gelatin powder evenly over the water’s surface and allow it to bloom for 10 minutes until the granules absorb the liquid completely.
- Combine 1 cup pure maple syrup, remaining 1/4 cup cold filtered water, and 1/4 teaspoon fine sea salt in a heavy-bottomed saucepan over medium heat.
- Attach a candy thermometer to the saucepan and cook the syrup mixture without stirring until it reaches precisely 240°F (soft-ball stage), which typically takes 8-10 minutes.
- With the mixer on low speed, carefully pour the hot syrup in a thin, steady stream down the side of the bowl into the gelatin mixture.
- Gradually increase the mixer speed to high and whip for 12-15 minutes until the marshmallow cream becomes thick, glossy, and triples in volume.
- Add 2 teaspoons pure vanilla extract during the final minute of whipping to incorporate evenly throughout the mixture.
- Lightly grease an 8×8-inch baking pan and dust it with a mixture of 1/4 cup arrowroot powder and 1/4 cup organic powdered erythritol, reserving the excess for coating.
- Transfer the marshmallow mixture to the prepared pan using a silicone spatula, smoothing the top into an even layer.
- Allow the marshmallows to set at room temperature for 4-6 hours, uncovered, until firm to the touch.
- Dust a cutting board with the remaining arrowroot-erythritol mixture and turn the set marshmallow slab out onto it.
- Cut the marshmallows into 1-inch squares using a sharp knife lightly coated with the dusting mixture to prevent sticking.
- Toss each marshmallow in the remaining dusting mixture to coat all surfaces completely.
Exquisitely light and delicately sweet, these marshmallows possess a sophisticated flavor profile with nuanced caramel notes from the maple syrup. Their pillowy texture melts luxuriously on the tongue, making them perfect for elevating hot cocoa or creating elegant s’mores with dark chocolate and homemade graham crackers. For an unexpected presentation, skewer them with fresh rosemary sprigs and lightly toast over a flame for a fragrant, gourmet treat.
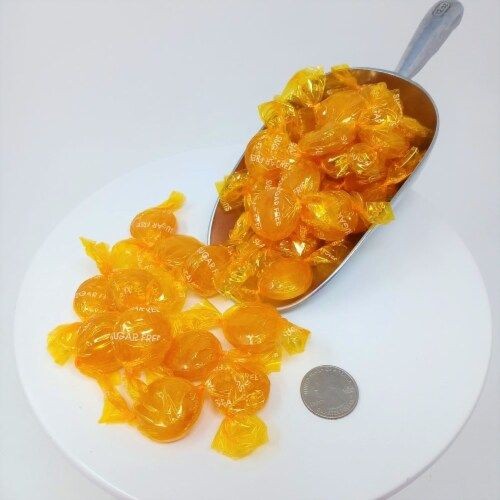
Sugar Free Lemon Drops with Monk Fruit
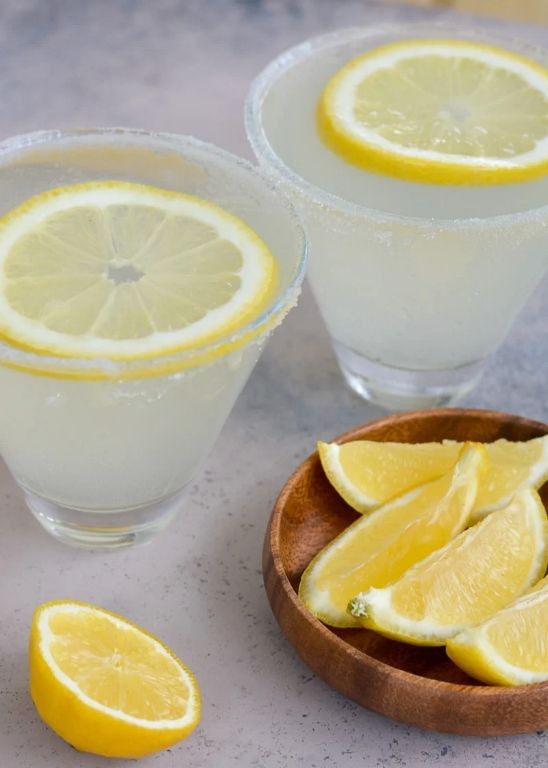
Nothing captures the essence of sun-drenched citrus groves quite like these refined sugar-free lemon drops, where the bright acidity of fresh lemons harmonizes beautifully with the natural sweetness of monk fruit. Each delicate confection offers a sophisticated balance of tart and sweet, creating an elegant treat that satisfies without refined sugars. Perfect for afternoon tea or as a polished finish to any gathering, these lemon drops elevate simple ingredients into something truly special.
Ingredients
- 1 cup freshly squeezed lemon juice, strained
- 3/4 cup monk fruit sweetener, finely ground
- 1/4 cup unflavored grass-fed gelatin powder
- 2 tablespoons organic lemon zest, finely grated
- 1/4 cup cold filtered water
- 1/8 teaspoon fine sea salt
- 1/4 cup monk fruit sweetener for coating
Instructions
- Lightly grease a 8×8-inch baking pan with coconut oil and line with parchment paper, ensuring the paper overhangs on two sides for easy removal.
- Combine 1/4 cup cold filtered water and unflavored grass-fed gelatin powder in a small bowl, whisking until no dry spots remain, then let bloom for 5 minutes until thickened.
- Pour freshly squeezed lemon juice into a medium saucepan and add 3/4 cup finely ground monk fruit sweetener, organic lemon zest, and fine sea salt.
- Heat the lemon mixture over medium-low heat, stirring constantly with a silicone spatula until the monk fruit sweetener fully dissolves, about 3-4 minutes.
- Remove the saucepan from heat and immediately whisk in the bloomed gelatin mixture until completely smooth and no strands remain.
- Strain the mixture through a fine-mesh sieve into a liquid measuring cup to remove any zest or undissolved particles.
- Carefully pour the strained mixture into the prepared baking pan, using a spatula to spread it evenly into all corners.
- Refrigerate uncovered for at least 4 hours, or until the mixture is firm to the touch and pulls away slightly from the pan edges.
- Lift the set lemon mixture from the pan using the parchment overhang and transfer to a cutting board.
- Use a sharp knife dipped in hot water to cut the slab into 1-inch squares, wiping the blade clean between cuts for neat edges.
- Place 1/4 cup monk fruit sweetener for coating in a shallow bowl and gently toss each lemon drop to coat all sides evenly.
- Arrange the coated lemon drops in a single layer on a parchment-lined baking sheet and refrigerate for 15 minutes to set the coating.
Perfectly balanced between tart and sweet, these lemon drops offer a satisfyingly firm yet yielding texture that melts delicately on the tongue. The bright citrus notes shine through with remarkable clarity, while the monk fruit coating provides a subtle crystalline crunch. For an elegant presentation, serve them in petite paper cups alongside espresso, or layer them in glass jars as thoughtful edible gifts.
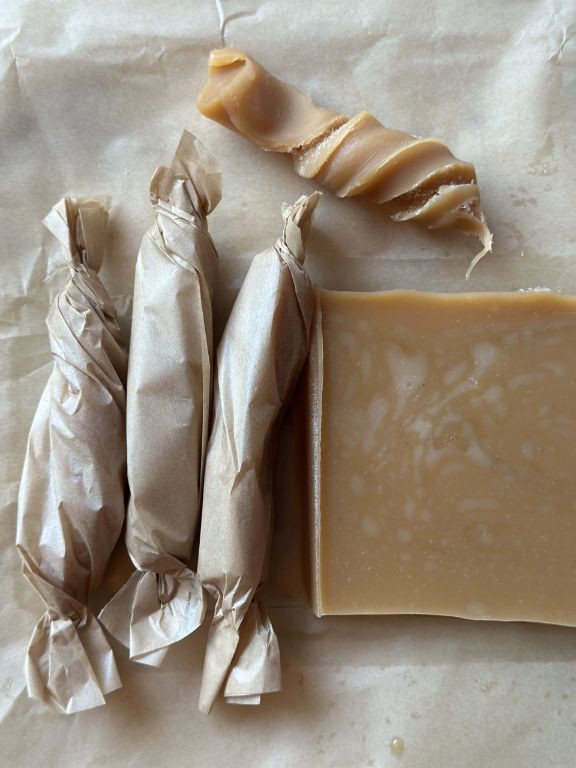
Homemade Sugar Free Taffy
Kindly consider this sophisticated confection: homemade sugar-free taffy offers a nostalgic indulgence reimagined for the modern palate, transforming simple ingredients into elegant, chewy delights that captivate both the eye and the taste buds. Crafted with premium sugar alternatives and artisanal flavorings, each piece promises a satisfying pull and melt-in-your-mouth finish. This refined treat proves that decadence need not compromise wellness, delivering pure confectionery joy in every delicate twist.
Ingredients
- 1 cup allulose syrup
- 1/2 cup erythritol, finely ground
- 1/4 cup unsalted butter, European-style
- 1/4 cup heavy cream, pasture-raised
- 1 tsp pure vanilla bean paste
- 1/4 tsp maldon sea salt flakes
- 2 drops lorann oil-based peppermint essence
Instructions
- Combine allulose syrup, finely ground erythritol, European-style unsalted butter, and pasture-raised heavy cream in a heavy-bottomed saucepan.
- Attach a digital candy thermometer to the saucepan, ensuring it does not touch the bottom.
- Heat the mixture over medium heat, stirring constantly with a silicone spatula until all ingredients are fully incorporated and the temperature reaches 250°F.
- Remove the saucepan immediately from heat and stir in pure vanilla bean paste, maldon sea salt flakes, and lorann oil-based peppermint essence until uniformly distributed.
- Pour the molten candy onto a marble slab or silicone mat lightly coated with avocado oil spray.
- Allow the candy to cool until it is safe to handle but still pliable, approximately 8-10 minutes.
- Butter your hands thoroughly with European-style unsalted butter to prevent sticking.
- Pull the candy repeatedly, stretching and folding it back onto itself until it develops a satiny sheen and lightens in color, about 5-7 minutes of continuous pulling.
- Roll the pulled taffy into a long rope approximately 1/2-inch in diameter on a clean surface.
- Using kitchen shears coated with avocado oil spray, snip the rope into 1-inch pieces.
- Individually wrap each piece in wax paper squares, twisting the ends securely to maintain freshness.
The finished taffy possesses a remarkably smooth, pliable texture with a satisfying chew that yields to gentle pressure. Its sophisticated flavor profile balances creamy vanilla notes with a refreshing hint of peppermint, elevated by the subtle crunch of artisanal salt. For an elegant presentation, arrange the wrapped candies in a crystal dish or tie them with silk ribbon as edible favors for dinner parties.
Low-Carb Chocolate Covered Strawberry Bites
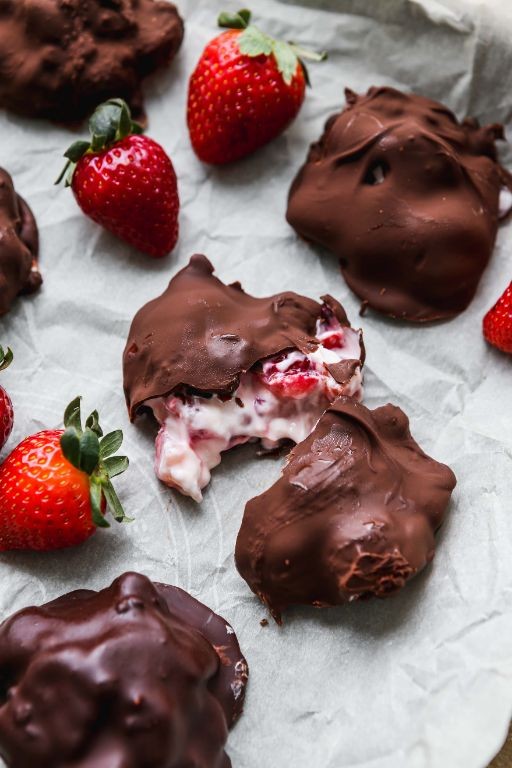
Lusciously decadent yet surprisingly virtuous, these chocolate-dipped strawberry morsels offer an elegant solution for those seeking indulgence without compromise. Each bite-sized creation marries the vibrant sweetness of peak-season berries with the sophisticated richness of premium dark chocolate. This refined confection transforms simple ingredients into an artful dessert worthy of any sophisticated gathering.
Ingredients
– 1 pound fresh organic strawberries, hulled and halved
– 8 ounces 70% dark chocolate couverture, finely chopped
– 2 tablespoons virgin coconut oil
– 1/4 cup roasted almond slivers, finely crushed
– 1/4 cup unsweetened shredded coconut
– Flaky sea salt for finishing
Instructions
1. Arrange strawberry halves cut-side down on a parchment-lined baking sheet.
2. Pat berries completely dry with paper towels to ensure chocolate adhesion.
3. Create a double boiler by placing a heatproof bowl over a saucepan with 1 inch of simmering water.
4. Combine chopped chocolate and coconut oil in the bowl, stirring constantly with a silicone spatula until fully melted and glossy.
5. Remove chocolate from heat immediately once smooth to prevent scorching.
6. Dip each strawberry halfway into the warm chocolate mixture, allowing excess to drip back into the bowl.
7. For textured variations, immediately roll some berries in crushed almonds while chocolate remains tacky.
8. Sprinkle remaining berries with shredded coconut before chocolate sets.
9. Return all dipped berries to parchment-lined sheet.
10. Finish each piece with a delicate pinch of flaky sea salt for flavor contrast.
11. Transfer baking sheet to refrigerator and chill for 25 minutes until chocolate fully hardens.
12. Arrange finished bites on a chilled serving platter for immediate presentation.
What emerges from this careful process is a dessert of remarkable contrasts—the crisp chocolate shell giving way to juicy berry interior, the bitter cocoa notes balanced by natural fruit sweetness. Consider presenting these gems atop crushed ice for dramatic effect, or pairing with sparkling rosé to elevate the experience. The sophisticated balance of textures and flavors makes these bites equally suited for formal dinners and intimate indulgences.
Sugar Free Butterscotch Candies
Temptingly glossy and sophisticated, these sugar-free butterscotch candies offer a guilt-free indulgence that rivals their traditional counterparts. Their deep amber hue and rich, caramel-like flavor profile make them an elegant addition to any confectionery collection. Crafted with premium ingredients, they deliver complex sweetness without refined sugars, perfect for those mindful of their dietary choices.
Ingredients
– 1 cup granulated erythritol
– ½ cup heavy cream, preferably organic
– 4 tablespoons unsalted European-style butter
– ¼ cup water
– 1 teaspoon pure vanilla extract
– ½ teaspoon maldon sea salt flakes
– ¼ teaspoon xanthan gum
Instructions
1. Combine 1 cup granulated erythritol, ½ cup heavy cream, 4 tablespoons unsalted European-style butter, and ¼ cup water in a heavy-bottomed saucepan.
2. Place the saucepan over medium heat and stir continuously with a silicone spatula until the erythritol fully dissolves, approximately 3-4 minutes.
3. Attach a candy thermometer to the side of the pan, ensuring it doesn’t touch the bottom.
4. Increase heat to medium-high and bring the mixture to 250°F (hard-ball stage), which should take 8-10 minutes without stirring.
5. Immediately remove the pan from heat and stir in 1 teaspoon pure vanilla extract and ½ teaspoon maldon sea salt flakes.
6. Sprinkle ¼ teaspoon xanthan gum over the surface and whisk vigorously for 30 seconds to prevent clumping.
7. Pour the hot butterscotch mixture into silicone candy molds, filling each cavity three-quarters full.
8. Allow the candies to cool at room temperature for 15 minutes until slightly firm.
9. Transfer the molds to the refrigerator and chill for 45 minutes until completely set.
10. Gently pop the candies from the molds and arrange them on parchment-lined trays.
Firm yet yielding to the bite, these candies release complex notes of browned butter and vanilla with a subtle salty finish. Their glass-like sheen makes them stunning when arranged in crystal bowls or wrapped in wax paper for gifting. The sophisticated balance of sweet and salty lingers pleasantly, making them ideal with after-dinner coffee or as a refined treat alongside aged cheeses.
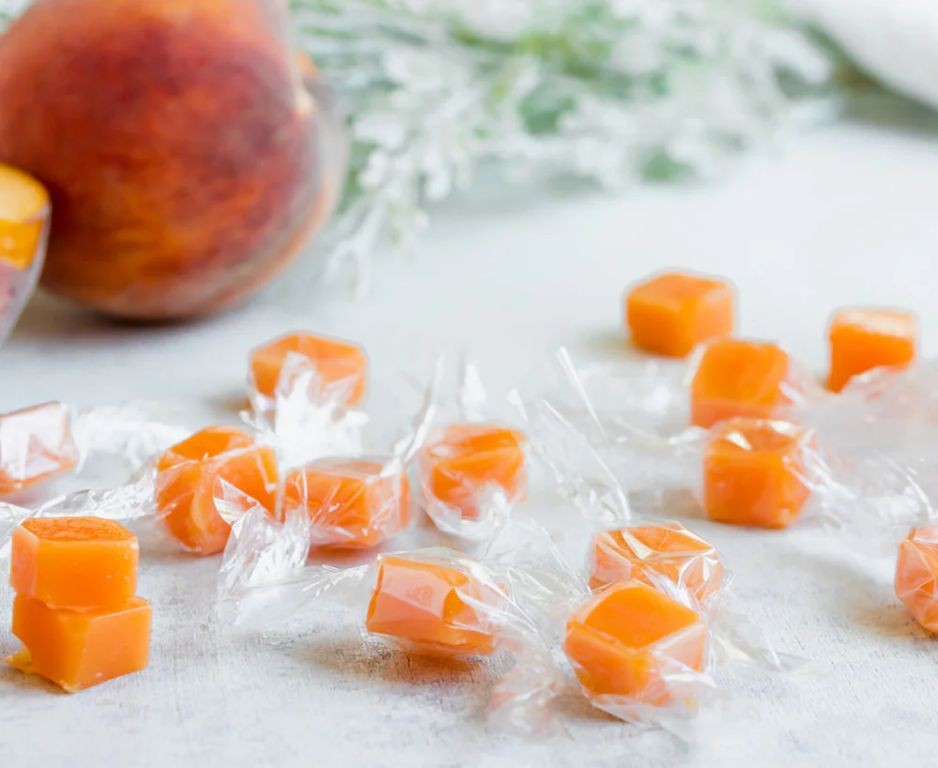
Healthy Sugar Free Jelly Beans
Heralding a new era of guilt-free confectionery, these sophisticated sugar-free jelly beans transform simple ingredients into vibrant, jewel-like treats that satisfy both the palate and the conscience. Each translucent bean captures the essence of pure fruit flavors while maintaining an elegant, refined appearance that belies its healthful nature. Crafting these delicate candies requires precision and patience, but the resulting gems offer a sublime textural experience that rivals their traditional counterparts.
Ingredients
– 1 cup filtered water, divided
– 2 tablespoons grass-fed gelatin powder
– 1/4 cup monk fruit sweetener
– 1/4 teaspoon malic acid
– 1/2 teaspoon pure vanilla extract
– Natural fruit powder blends (strawberry, lemon, orange, grape)
– Food-grade mineral oil
Instructions
1. Combine 1/2 cup filtered water with grass-fed gelatin powder in a small saucepan and let bloom for 5 minutes until the gelatin absorbs the liquid completely.
2. Heat the gelatin mixture over low heat (120°F) while stirring constantly with a silicone spatula until fully dissolved and the liquid becomes clear, about 3-4 minutes.
3. Whisk in monk fruit sweetener and continue heating at 130°F until the sweetener completely dissolves, creating a smooth, viscous syrup.
4. Remove from heat and stir in malic acid and pure vanilla extract until thoroughly incorporated.
5. Divide the mixture equally among four small bowls and whisk in different natural fruit powder blends until each achieves vibrant, uniform color.
6. Lightly brush food-grade mineral oil into jelly bean molds using a pastry brush to ensure easy release later.
7. Using a small piping bag, carefully fill each mold cavity halfway with one flavored mixture, then pipe a second layer of contrasting flavor to create layered beans.
8. Refrigerate the filled molds for exactly 2 hours at 38°F until the beans firm completely and release cleanly from the molds.
9. Gently unmold the jelly beans and arrange them in a single layer on a parchment-lined baking sheet.
10. Allow the beans to air-dry at room temperature for 8 hours, rotating occasionally to ensure even texture development.
Just moments after tasting, the delightful snap of these jewel-toned confections gives way to a surprisingly tender chew that releases bursts of authentic fruit essence. Their translucent quality catches the light beautifully when arranged in crystal bowls or scattered across dessert plates as edible garnishes. For an elegant presentation, consider pairing complementary flavors in separate small vessels or creating a rainbow assortment that showcases the artistry of sugar-free candy making.
Keto Sugar Free Caramel Apples
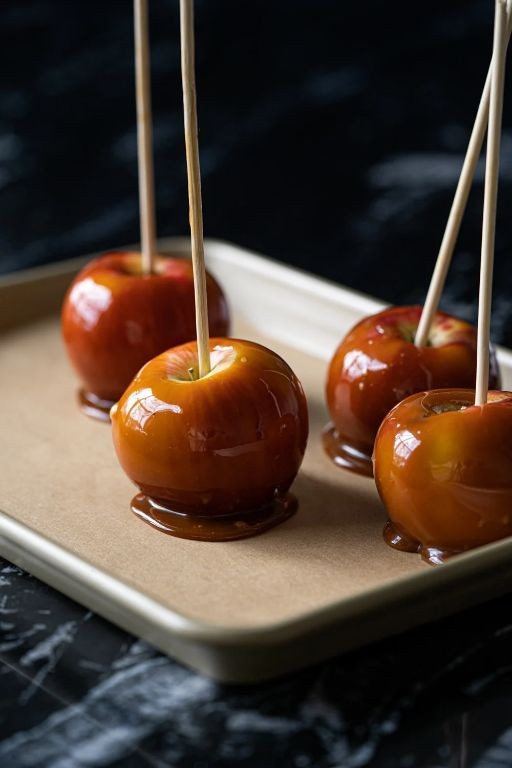
Vividly capturing the essence of autumn without compromising dietary principles, these keto caramel apples transform the classic fairground treat into an elegant, sugar-free indulgence. Crafted with artisanal precision, they balance rich, buttery caramel notes against the crisp tartness of Granny Smith apples, creating a sophisticated dessert experience that delights both palate and conscience. Each bite offers the nostalgic comfort of caramel apples reimagined through a contemporary, health-conscious lens.
Ingredients
– 4 medium Granny Smith apples, thoroughly washed and dried
– 8 wooden craft sticks
– 1 cup granulated erythritol sweetener
– 1/2 cup heavy whipping cream, at room temperature
– 1/4 cup unsalted European-style butter, cubed
– 1/4 cup water
– 1 teaspoon pure vanilla extract
– 1/4 teaspoon xanthan gum
– 1/4 teaspoon Maldon sea salt flakes
Instructions
1. Insert one wooden craft stick firmly into the stem end of each washed and dried Granny Smith apple, ensuring it penetrates about two-thirds through the fruit for secure handling.
2. Line a baking sheet with parchment paper and lightly coat it with non-stick cooking spray to prevent the caramel apples from adhering during setting.
3. Combine 1 cup granulated erythritol sweetener, 1/4 cup water, and 1/4 cup cubed unsalted European-style butter in a heavy-bottomed saucepan over medium heat, stirring constantly with a silicone spatula until the sweetener fully dissolves and the mixture begins to simmer.
4. Attach a candy thermometer to the saucepan and continue cooking without stirring until the mixture reaches precisely 240°F (soft-ball stage), which typically takes 6-8 minutes and indicates proper caramelization.
5. Remove the saucepan from heat and immediately whisk in 1/2 cup room-temperature heavy whipping cream in a slow, steady stream—the mixture will bubble vigorously, so exercise caution while ensuring thorough incorporation.
6. Sprinkle 1/4 teaspoon xanthan gum over the caramel sauce while continuously whisking to prevent clumping and create the desired thickening effect for proper coating consistency.
7. Return the saucepan to low heat and cook for exactly 2 minutes, whisking constantly, until the caramel thickens to a velvety, coating consistency that ribbons off the whisk.
8. Remove from heat and stir in 1 teaspoon pure vanilla extract and 1/4 teaspoon Maldon sea salt flakes until fully integrated, enhancing both flavor complexity and textural contrast.
9. Working quickly before the caramel sets, tilt the saucepan and carefully dip each prepared apple, rotating to achieve complete coverage while allowing excess caramel to drip back into the pan.
10. Place each coated apple upright on the prepared parchment-lined baking sheet and immediately transfer to the refrigerator to chill for 45-60 minutes until the caramel shell is firm to the touch. Ultimately, these keto caramel apples achieve a remarkable textural symphony—the glass-like snap of the caramel shell gives way to the juicy crunch of tart apple beneath. The sophisticated balance of sweet erythritol caramel against the bright acidity of Granny Smith apples creates a dessert that feels simultaneously indulgent and refined. For an elegant presentation, consider drizzling with sugar-free dark chocolate or serving alongside artisanal cheeses for a striking dessert board centerpiece.
Sugar Free Vanilla Cream Bonbons
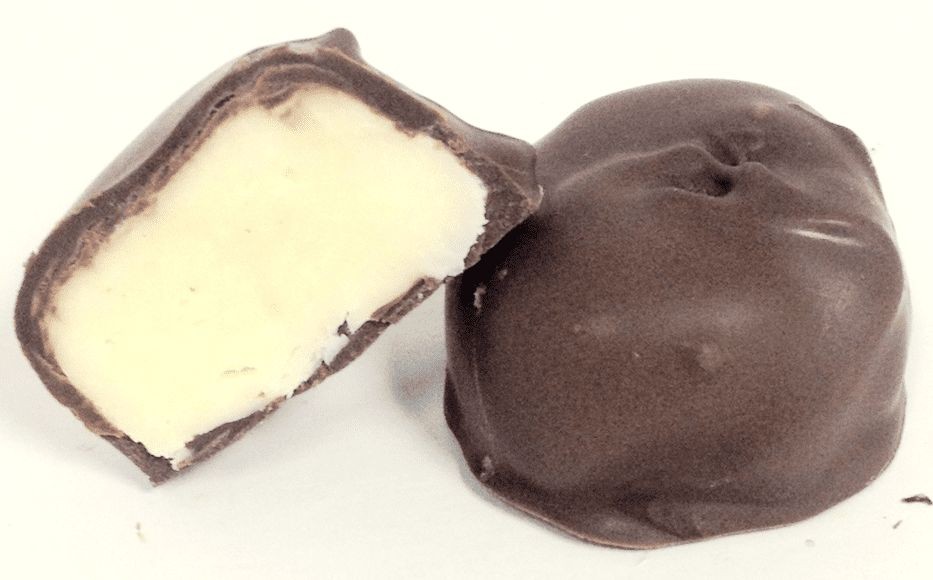
These sophisticated sugar-free confections offer a luxurious alternative for those seeking indulgence without refined sweeteners. Their delicate vanilla cream centers, enrobed in rich chocolate, provide an elegant treat perfect for special occasions or mindful snacking. Crafted with premium ingredients, each bonbon delivers a refined sweetness that satisfies both palate and conscience.
Ingredients
- 8 ounces high-quality sugar-free dark chocolate, finely chopped
- 1/2 cup heavy cream, preferably organic
- 2 tablespoons European-style unsalted butter, at room temperature
- 1 tablespoon pure vanilla bean paste
- 1/4 teaspoon fine sea salt
- 2 tablespoons powdered erythritol, sifted
Instructions
- Place the finely chopped sugar-free dark chocolate in a heatproof bowl set over a saucepan of gently simmering water, ensuring the bottom of the bowl doesn’t touch the water.
- Stir the chocolate continuously with a silicone spatula until completely melted and smooth, approximately 4-5 minutes, then remove from heat immediately.
- Pour the heavy cream into a small saucepan and heat over medium-low until small bubbles form around the edges, reaching precisely 180°F on a digital thermometer.
- Gradually pour the heated cream over the room-temperature butter while whisking constantly to create an emulsion.
- Whisk in the pure vanilla bean paste, fine sea salt, and sifted powdered erythritol until fully incorporated and the mixture appears glossy.
- Cover the bowl with plastic wrap, pressing it directly onto the surface of the cream mixture to prevent skin formation.
- Refrigerate the mixture for exactly 2 hours, or until firm enough to hold its shape when scooped.
- Using a melon baller or small scoop, portion the chilled cream mixture into 1-inch spheres and place them on a parchment-lined baking sheet.
- Return the shaped spheres to the refrigerator for 15 minutes to firm completely before coating.
- Working with a few spheres at a time, use two forks to dip each one into the tempered chocolate, allowing excess to drip back into the bowl.
- Place the coated bonbons back on the parchment-lined sheet and immediately transfer to the refrigerator.
- Chill the completed bonbons for at least 30 minutes, or until the chocolate shell is completely set and firm to the touch.
Perfectly tempered chocolate yields a satisfying snap when bitten, revealing the silken vanilla cream center that melts luxuriously on the tongue. The sophisticated balance of rich chocolate and aromatic vanilla creates a dessert experience that feels both indulgent and refined. For an elegant presentation, arrange these delicate confections in petite paper cups and serve alongside freshly brewed espresso or herbal tea.
Easy Sugar Free Coconut Macaroons
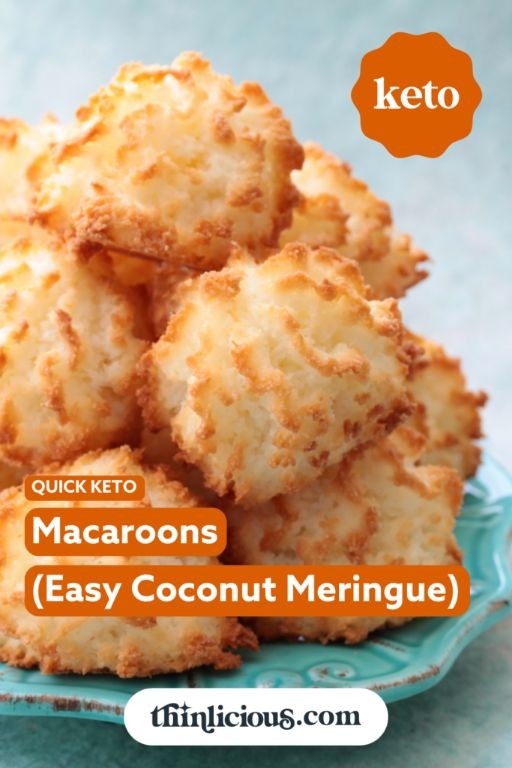
These delicate confections transform humble coconut into elegant morsels that satisfy sweet cravings without refined sugars. Their snowy appearance and crisp-chewy texture make them perfect for afternoon tea or as a sophisticated gluten-free dessert option.
Ingredients
– 3 cups unsweetened shredded coconut
– 4 large pasture-raised egg whites, at room temperature
– 1/2 cup erythritol sweetener
– 1 teaspoon pure vanilla extract
– 1/4 teaspoon fine sea salt
– 2 tablespoons coconut oil, melted
Instructions
1. Preheat your oven to 325°F and line a baking sheet with parchment paper.
2. In a medium mixing bowl, combine the unsweetened shredded coconut, erythritol sweetener, and fine sea salt.
3. Add the pasture-raised egg whites, pure vanilla extract, and melted coconut oil to the dry ingredients.
4. Mix thoroughly until the coconut is evenly coated and the mixture holds together when pressed.
5. Using a 1-tablespoon cookie scoop, portion the mixture onto the prepared baking sheet, spacing them 1 inch apart.
6. Gently shape each portion into a compact pyramid using your fingertips.
7. Bake for 18-20 minutes until the edges turn golden brown and the tops appear dry.
8. Rotate the baking sheet halfway through baking to ensure even browning.
9. Transfer the macaroons to a wire cooling rack and allow them to cool completely for 30 minutes.
Crisp on the exterior with a delightfully chewy interior, these macaroons offer subtle vanilla notes against the rich coconut flavor. For an elegant presentation, drizzle with melted sugar-free dark chocolate or serve alongside fresh berries for a sophisticated dessert platter that impresses without overwhelming the palate.
Summary
Finally, you can enjoy sweet treats without the guilt! These 18 sugar-free candy recipes prove that healthy eating doesn’t mean sacrificing flavor. I’d love to hear which recipes become your favorites—drop a comment below and share your creations on Pinterest so other sweet lovers can discover these delicious alternatives too!