Zesty, sweet, and completely sugar-free—yes, it’s possible! If you’re craving something indulgent without the guilt, you’ve come to the right place. We’ve rounded up 20 delicious dessert recipes that prove healthy treats can be just as satisfying. From creamy cheesecakes to rich chocolate bites, get ready to delight your taste buds and nourish your body. Dive in and discover your new favorite sugar-free sweet!
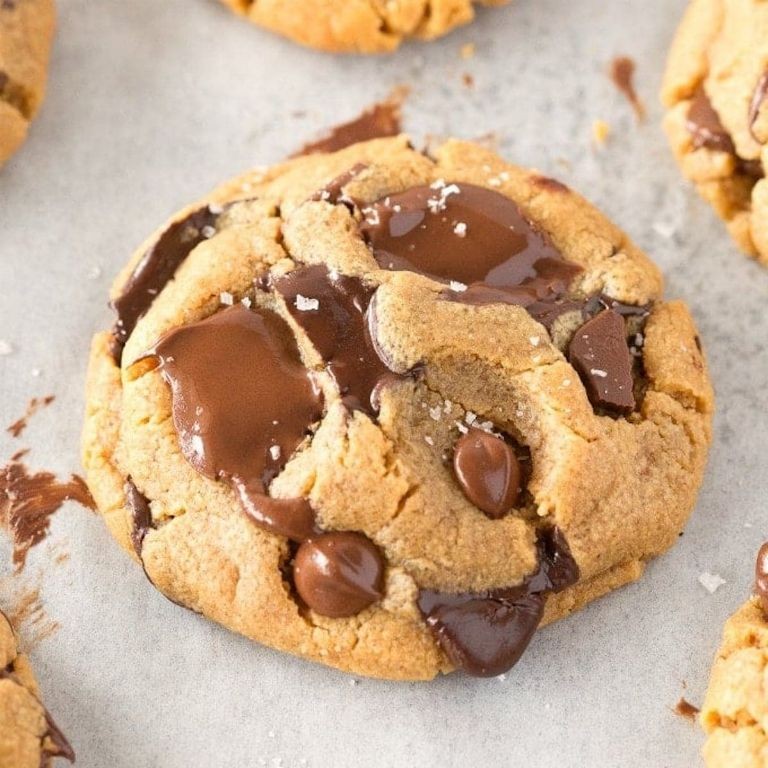
Banana Oat Cookies
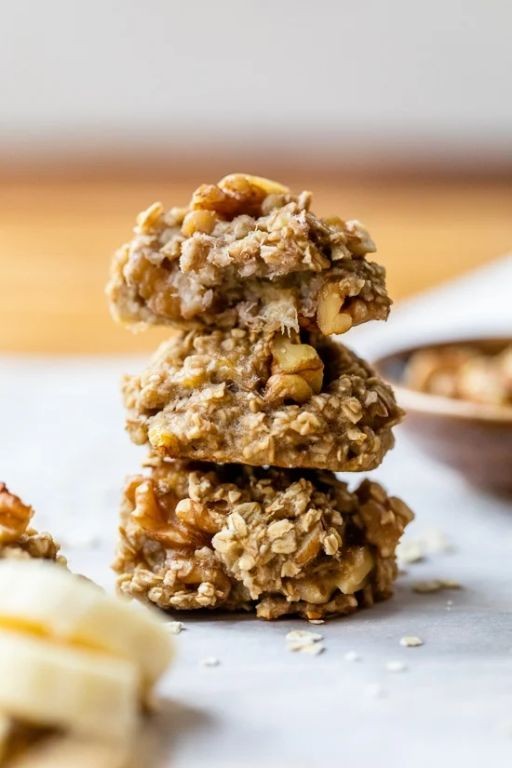
Just when you think bananas are past their prime, they become the star of these wholesome cookies. You’ll love how simple these come together with pantry staples, and they’re perfect for that afternoon slump when you need something satisfying but not too sweet.
Ingredients
– 2 very ripe medium bananas (the spottier, the sweeter they’ll make your cookies)
– 1 cup old-fashioned rolled oats (I like the texture better than quick oats here)
– 1/4 cup creamy peanut butter (the natural kind gives the best flavor)
– 1/4 cup chocolate chips (I always add a few extra because why not?)
– 1 teaspoon vanilla extract (pure vanilla makes all the difference)
– 1/2 teaspoon cinnamon (this warm spice really elevates the banana flavor)
Instructions
1. Preheat your oven to 350°F and line a baking sheet with parchment paper.
2. In a medium bowl, mash the bananas with a fork until no large chunks remain.
3. Add the peanut butter and vanilla extract to the mashed bananas, stirring until completely combined.
4. Mix in the oats and cinnamon, folding everything together until the oats are fully coated.
5. Gently stir in the chocolate chips, being careful not to overmix the batter.
6. Using a tablespoon, drop rounded scoops of dough onto your prepared baking sheet, spacing them about 2 inches apart.
7. Flatten each cookie slightly with the back of your spoon—they won’t spread much while baking.
8. Bake for 15-18 minutes until the edges are golden brown and the tops look set.
9. Let the cookies cool on the baking sheet for 5 minutes before transferring to a wire rack.
Every bite delivers that perfect chewy texture with little bursts of melted chocolate. These cookies stay wonderfully soft for days if they last that long—try crumbling one over Greek yogurt for breakfast or packing them in lunchboxes for a healthier treat.
Strawberry Yogurt Popsicles
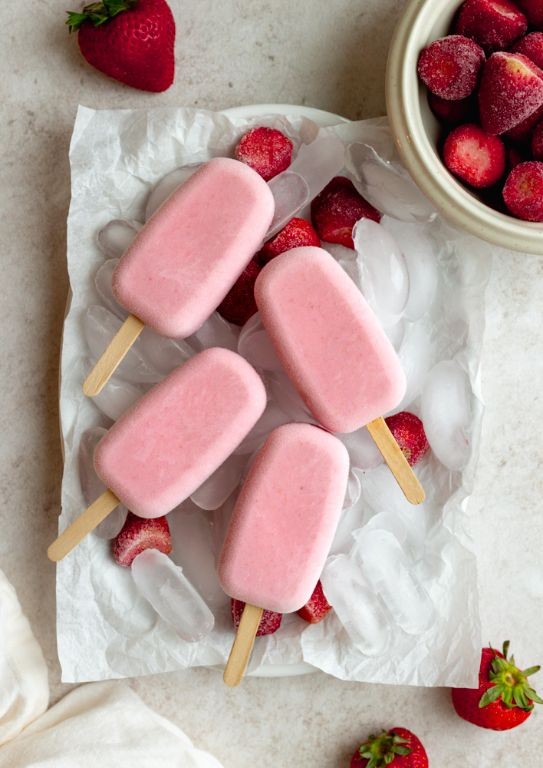
Very few things beat the simple joy of a homemade frozen treat on a warm day. You’ll love how these strawberry yogurt popsicles come together with just a few ingredients and minimal effort. They’re the perfect way to use up those extra berries sitting in your fridge.
Ingredients
– 2 cups fresh strawberries, hulled and sliced (I find ripe, sweet berries work best here)
– 1 cup plain Greek yogurt (I prefer full-fat for creamier popsicles)
– 1/4 cup honey (local honey adds such nice floral notes)
– 1 tsp vanilla extract (pure vanilla makes all the difference)
– 1 tbsp fresh lemon juice (just a squeeze to brighten everything up)
Instructions
1. Combine 2 cups sliced strawberries, 1 cup Greek yogurt, 1/4 cup honey, 1 tsp vanilla extract, and 1 tbsp lemon juice in a blender.
2. Blend on high speed for 45-60 seconds until completely smooth and no strawberry chunks remain.
3. Tap the blender container gently on the counter to release any air bubbles—this helps prevent icy pockets in your finished popsicles.
4. Carefully pour the mixture into 6 standard popsicle molds, leaving about 1/4 inch of space at the top for expansion.
5. Insert popsicle sticks into each mold, making sure they’re centered and straight.
6. Freeze the popsicles for at least 6 hours, or overnight for best results—they should be completely solid when ready.
7. To unmold, run warm water over the outside of the molds for 15-20 seconds, then gently pull on the sticks.
8. Serve immediately or store in an airtight container in the freezer for up to 2 months. These creamy popsicles have the perfect balance of sweet strawberry flavor and tangy yogurt. They’re wonderfully smooth without being icy, and the honey adds just the right amount of natural sweetness. Try crumbling some graham crackers over the top for a fun strawberry shortcake variation!
Peanut Butter Protein Bites
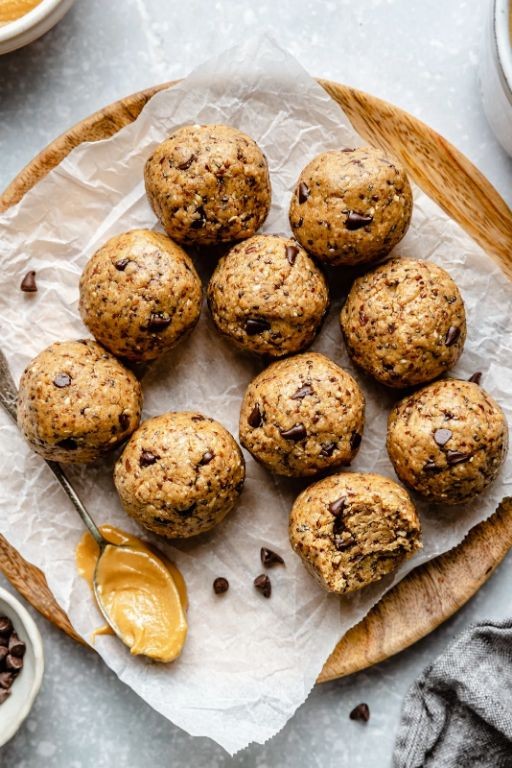
Busy days call for easy snacks, and these peanut butter protein bites are my absolute go-to. You’ll love how simple they are to whip up when you need a quick energy boost. Seriously, they’ve saved me from many afternoon slumps!
Ingredients
– 1 cup creamy peanut butter (I always use natural for better texture)
– ½ cup honey (local if you can find it – the flavor is amazing)
– 1 cup old-fashioned oats (not quick-cook, they hold up better)
– ½ cup vanilla protein powder (whey works great but plant-based is fine too)
– ¼ cup mini chocolate chips (I like the semi-sweet ones for balance)
– 1 teaspoon vanilla extract (pure vanilla makes all the difference)
Instructions
1. Measure 1 cup creamy peanut butter and ½ cup honey into a medium mixing bowl.
2. Heat the peanut butter and honey mixture in the microwave for 30 seconds to make it easier to mix.
3. Stir the warmed peanut butter and honey together until completely smooth and well combined.
4. Add 1 teaspoon vanilla extract to the mixture and stir until incorporated.
5. Measure 1 cup old-fashioned oats and ½ cup vanilla protein powder into the bowl.
6. Mix all ingredients together until a thick, uniform dough forms.
7. Fold in ¼ cup mini chocolate chips until evenly distributed throughout the dough.
8. Chill the mixture in the refrigerator for 20 minutes to make it easier to handle.
9. Scoop tablespoon-sized portions of the chilled dough using a cookie scoop.
10. Roll each portion between your palms to form smooth, round balls.
11. Arrange the formed balls in a single layer on a parchment-lined baking sheet.
12. Refrigerate the protein bites for at least 1 hour until firm and set.
13. Transfer the chilled protein bites to an airtight container for storage.
Great texture comes from that perfect chill time – you’ll love the firm yet chewy consistency. The peanut butter flavor really shines through with just the right sweetness from the honey. Try keeping a batch in your freezer for an extra-cold treat that’s perfect for hot days!
Baked Apples with Cinnamon
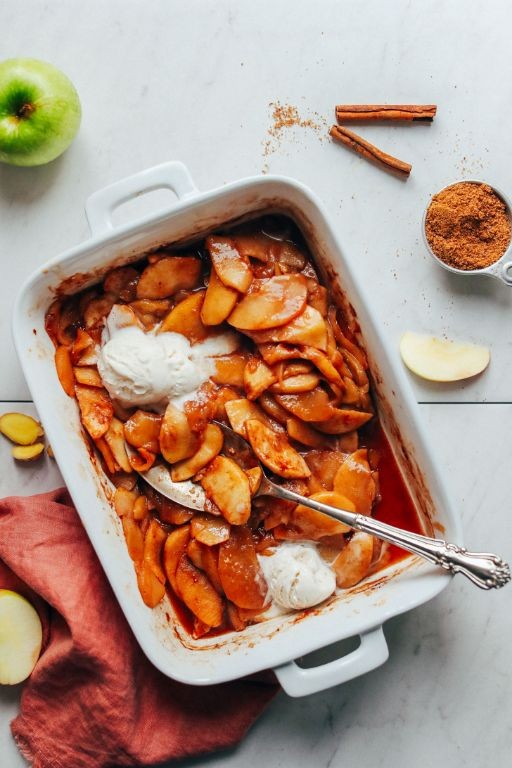
Ever find yourself craving something sweet and comforting that won’t keep you in the kitchen for hours? Baked apples with cinnamon are your answer. They’re like a warm hug in dessert form, perfect for cozy evenings or impressing last-minute guests.
Ingredients
– 4 large apples (I like Honeycrisp for their perfect balance of sweet and tart)
– 1/4 cup brown sugar (pack it firmly—this creates that lovely caramel-like sauce)
– 1 tsp ground cinnamon (don’t be shy with it!)
– 2 tbsp unsalted butter, cold and cubed (cold butter helps create pockets of richness)
– 1/4 cup old-fashioned rolled oats (they add a wonderful chewy texture)
– 1/2 cup water (just enough to create steam and prevent sticking)
Instructions
1. Preheat your oven to 375°F—this ensures even cooking from the moment the apples go in.
2. Core all 4 apples completely, leaving the bottoms intact to create little cups (a melon baller works perfectly for this).
3. In a small bowl, combine the brown sugar, cinnamon, and rolled oats until thoroughly mixed.
4. Stuff each apple cavity generously with the sugar-oat mixture, packing it down lightly.
5. Top each stuffed apple with equal portions of the cold, cubed butter.
6. Place the apples in an 8×8 inch baking dish, spacing them evenly.
7. Pour the 1/2 cup water into the bottom of the baking dish around the apples (this creates steam and prevents burning).
8. Bake at 375°F for 35-40 minutes, until the apples are tender when pierced with a fork but still hold their shape.
9. Remove from oven and let rest for 5 minutes—this allows the juices to thicken slightly.
Just imagine breaking through that tender apple skin into the warm, spiced filling. The cinnamon-scented steam that escapes is pure autumn magic. Try serving them with a scoop of vanilla ice cream melting into the caramel-like juices, or enjoy them warm for breakfast with Greek yogurt.
Lemon Ricotta Cheesecake
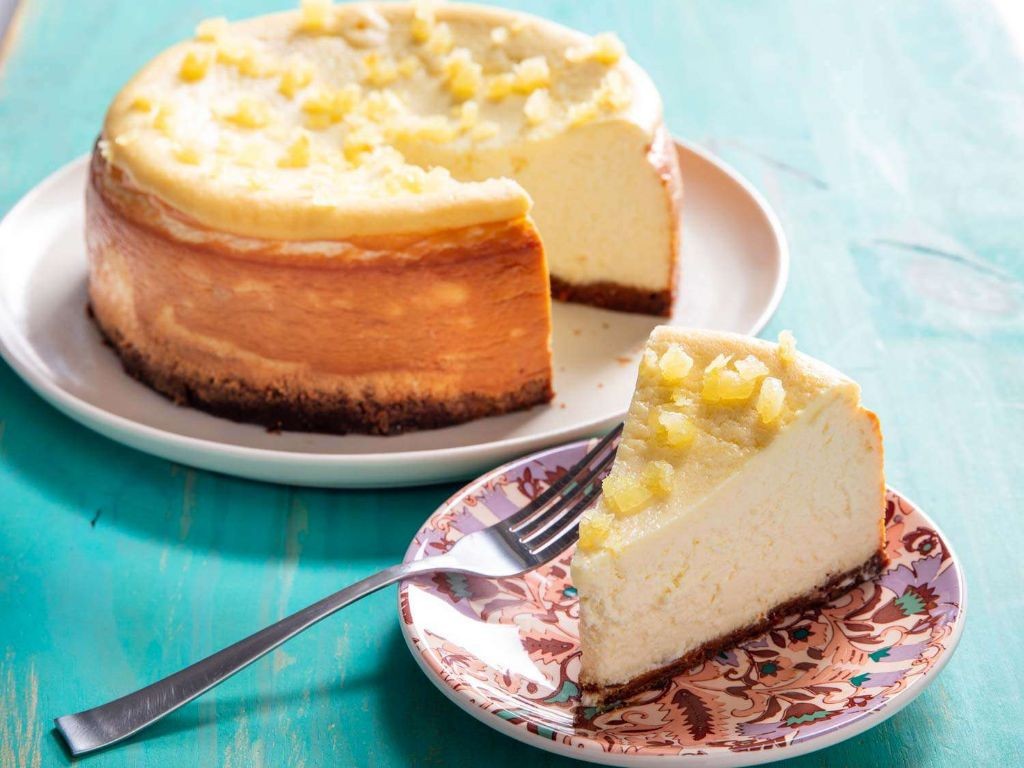
Believe me when I say this lemon ricotta cheesecake will become your new favorite dessert. It’s creamy, bright, and surprisingly simple to make. You’ll love how the ricotta gives it this incredible lightness that traditional cheesecake just can’t match.
Ingredients
– 1 ½ cups graham cracker crumbs (I always crush mine fresh for better texture)
– ⅓ cup unsalted butter, melted (salted works too if that’s what you have)
– 16 oz whole milk ricotta cheese (drain any excess liquid first)
– 8 oz cream cheese, softened (room temp makes blending so much easier)
– ¾ cup granulated sugar
– 3 large eggs (I prefer room temp eggs here for smoother mixing)
– ¼ cup fresh lemon juice (about 2 lemons – bottled just doesn’t compare)
– 1 tbsp lemon zest (use a microplane for the finest zest)
– 1 tsp pure vanilla extract
– ¼ cup all-purpose flour
– Pinch of salt
Instructions
1. Preheat your oven to 325°F and grease a 9-inch springform pan.
2. Combine graham cracker crumbs and melted butter in a medium bowl until the mixture resembles wet sand.
3. Press the crumb mixture firmly into the bottom of the prepared pan using the bottom of a measuring cup for even compression.
4. Bake the crust for 10 minutes at 325°F until lightly golden around the edges.
5. While the crust bakes, beat the ricotta and cream cheese together in a large bowl until completely smooth and no lumps remain.
6. Add sugar and beat for 2 minutes until the mixture becomes light and fluffy.
7. Crack eggs into a separate bowl first to avoid shell fragments, then add them one at a time, mixing just until incorporated after each addition.
8. Stir in lemon juice, lemon zest, and vanilla extract until fully combined.
9. Sift flour and salt directly into the wet ingredients to prevent lumps, then fold gently until no white streaks remain.
10. Pour the filling over the pre-baked crust and smooth the top with a spatula.
11. Bake at 325°F for 45-50 minutes until the edges are set but the center still has a slight jiggle when you gently shake the pan.
12. Turn off the oven, crack the door open about 1 inch, and let the cheesecake cool slowly inside for 1 hour to prevent cracking.
13. Remove from oven and run a thin knife around the edge to loosen it from the pan.
14. Refrigerate for at least 4 hours, though overnight chilling gives the best texture and flavor development.
Let this cheesecake chill completely before slicing – the wait is worth it for that perfect creamy texture. Lemon zest sprinkled over each slice adds a fresh pop of flavor that complements the rich ricotta base beautifully. Serve it with fresh berries or a dollop of whipped cream for an extra special treat.
Carrot Cake Bites
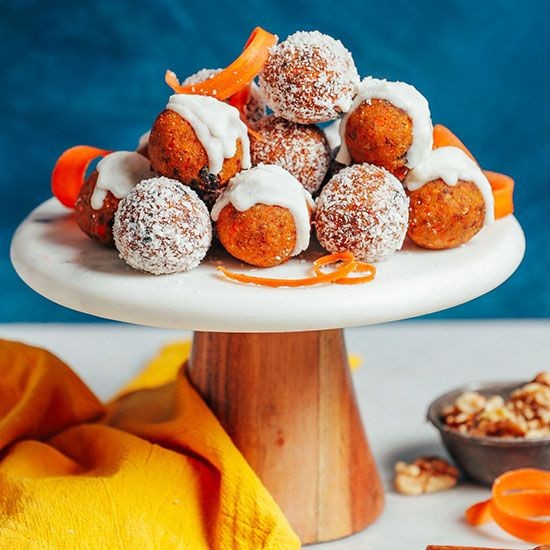
Hey, you know those days when you want something sweet but don’t want to commit to a whole cake? Here’s your solution. These carrot cake bites give you all the cozy spice and moist texture you love in carrot cake, but in perfectly portioned little treats that come together in no time.
Ingredients
– 1 cup grated carrots (I like to use the fine side of my box grater for the best texture)
– 1 cup old-fashioned rolled oats (not quick oats—they hold their shape better)
– ½ cup almond flour (this gives such a nice tender crumb)
– ¼ cup pure maple syrup (the real stuff makes all the difference)
– 2 tablespoons melted coconut oil (unrefined has that subtle tropical flavor)
– 1 teaspoon vanilla extract (I always splurge on the good Mexican vanilla)
– 1 teaspoon cinnamon (freshly ground if you have it)
– ¼ teaspoon nutmeg (just a hint for warmth)
– ⅛ teaspoon salt (balances the sweetness perfectly)
Instructions
1. Preheat your oven to 350°F and line a baking sheet with parchment paper.
2. Squeeze excess moisture from the grated carrots using paper towels or a clean kitchen towel.
3. Combine oats, almond flour, cinnamon, nutmeg, and salt in a medium bowl.
4. In a separate bowl, whisk together maple syrup, melted coconut oil, and vanilla extract until smooth.
5. Add the grated carrots to the wet ingredients and stir until fully coated.
6. Pour the wet mixture into the dry ingredients and mix until everything is well combined.
7. Scoop tablespoon-sized portions of the mixture and roll into compact balls between your palms.
8. Place the balls on the prepared baking sheet, spacing them about 1 inch apart.
9. Bake for 15-18 minutes until the edges are lightly golden and the tops look set.
10. Transfer the bites to a wire rack and let them cool completely before serving.
But these little gems are even better the next day when the flavors have melded together. The texture stays wonderfully moist thanks to the carrots, with just enough chew from the oats. Try serving them with a drizzle of cream cheese frosting for that classic carrot cake experience, or pack them in lunchboxes for a wholesome snack.
Pistachio Date Truffles
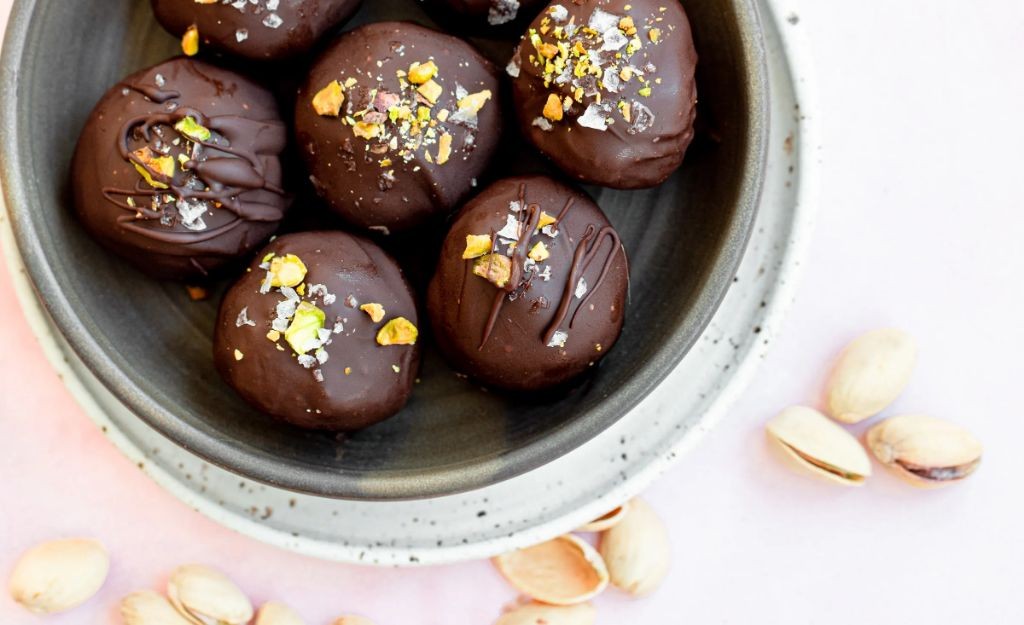
Keeping your sweet tooth satisfied doesn’t have to be complicated. You’ll love how these pistachio date truffles come together with just a few simple ingredients, and they’re perfect for when you need a quick energy boost or a little treat with your afternoon coffee. Seriously, they’re so easy you might just make them every week.
Ingredients
– 1 cup Medjool dates, pitted (I always look for the soft, sticky ones—they blend so much better)
– 1/2 cup raw pistachios (shelled, because nobody has time for that extra work)
– 2 tablespoons unsweetened cocoa powder (the good stuff makes all the difference)
– 1/4 cup shredded coconut (I prefer unsweetened to let the natural sweetness shine)
– 1 teaspoon vanilla extract (real vanilla, not imitation—trust me on this)
– Pinch of sea salt (just a tiny bit to balance all that sweetness)
Instructions
1. Place the pitted dates in a food processor and pulse for 30 seconds until they form a sticky paste.
2. Add the raw pistachios to the food processor and pulse for 45 seconds until they’re finely chopped but still have some texture.
3. Sprinkle in the cocoa powder, shredded coconut, vanilla extract, and sea salt.
4. Process everything together for 60-90 seconds until the mixture comes together into a thick, uniform dough that holds together when pressed.
5. Scoop out tablespoon-sized portions of the mixture and roll them between your palms to form smooth, round balls.
6. If the mixture feels too sticky, chill it in the refrigerator for 15 minutes—this makes rolling much easier.
7. Arrange the formed truffles on a parchment-lined baking sheet.
8. Refrigerate the truffles for at least 30 minutes to help them firm up and hold their shape.
9. For extra crunch, you can roll the chilled truffles in additional chopped pistachios before serving.
Zesty with rich chocolate notes and that wonderful crunch from the pistachios, these truffles have this amazing fudgy texture that just melts in your mouth. They’re fantastic straight from the fridge, but I also love rolling them in extra cocoa powder for a more intense chocolate experience. Try serving them alongside your morning coffee or packing them in lunch boxes for a natural energy boost.
Black Bean Fudge Brownies
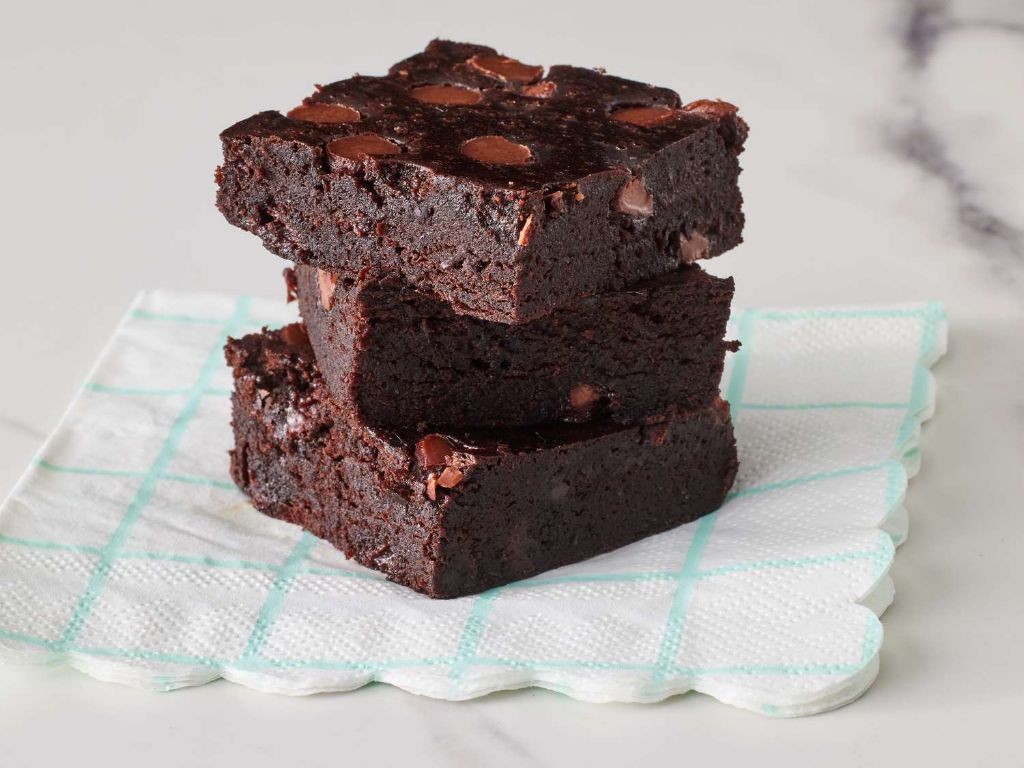
Kind of skeptical about beans in brownies? I was too, until I tried these fudgy wonders that somehow make dessert feel almost virtuous. You won’t believe how rich and chocolatey these turn out—they’re the perfect solution when you’re craving something decadent but want to keep things somewhat wholesome.
Ingredients
– 1 (15 oz) can black beans, rinsed and drained (I find organic beans have the best texture)
– 3 large eggs at room temperature (they incorporate much better when not cold)
– ¾ cup granulated sugar (I sometimes swap half with coconut sugar for deeper flavor)
– ½ cup unsweetened cocoa powder (use the good stuff—it makes all the difference)
– ⅓ cup coconut oil, melted (this gives such a lovely subtle tropical note)
– 2 tsp vanilla extract (always pure, never imitation)
– ½ tsp baking powder
– ¼ tsp salt
– ⅔ cup semi-sweet chocolate chips (I like the mini ones for better distribution)
Instructions
1. Preheat your oven to 350°F and line an 8×8 inch baking pan with parchment paper.
2. Combine the rinsed black beans, room temperature eggs, sugar, cocoa powder, melted coconut oil, vanilla extract, baking powder, and salt in a blender.
3. Blend on high speed for exactly 60 seconds until the mixture is completely smooth with no bean bits visible.
4. Pour the batter into a medium mixing bowl and let it rest for 5 minutes—this helps the ingredients fully hydrate.
5. Fold in the semi-sweet chocolate chips using a spatula until evenly distributed throughout the batter.
6. Transfer the batter to your prepared baking pan and spread it into an even layer with the spatula.
7. Bake at 350°F for 25-28 minutes until the edges are set but the center still appears slightly soft.
8. Remove the pan from the oven and place it on a wire cooling rack.
9. Let the brownies cool completely in the pan for at least 2 hours before slicing—they’ll firm up beautifully as they cool.
These brownies come out incredibly fudgy with a deep chocolate flavor that completely hides any bean taste. The texture is dense and moist, almost like flourless chocolate cake but with a satisfying chew. Try serving them slightly warmed with a scoop of vanilla ice cream, or cut them into small squares for a sophisticated party dessert that’ll have everyone guessing your secret ingredient.
Cashew Butter Cookies
Sometimes you just need a cookie that feels both indulgent and wholesome—these cashew butter cookies hit that perfect sweet spot. They’re wonderfully chewy with a rich, nutty flavor that’ll have you reaching for just one more. You’ll love how simple they are to whip up when that cookie craving strikes.
Ingredients
– 1 cup creamy cashew butter (I prefer the natural kind you have to stir—it gives better texture)
– ¾ cup light brown sugar, packed (dark brown works too if you want deeper molasses notes)
– 1 large egg, at room temperature (this helps everything blend smoothly)
– 1 tsp vanilla extract (pure vanilla makes all the difference here)
– ½ tsp baking soda
– ¼ tsp fine sea salt (I like how it balances the sweetness)
– ½ cup roasted cashews, roughly chopped (for that extra crunch and nutty burst)
Instructions
1. Preheat your oven to 350°F and line a baking sheet with parchment paper.
2. In a medium bowl, combine the cashew butter, brown sugar, egg, and vanilla extract—mix until fully incorporated and smooth.
3. Sprinkle the baking soda and salt over the dough, then stir until just combined.
4. Fold in the chopped cashews until they’re evenly distributed throughout the dough.
5. Scoop tablespoon-sized portions of dough and roll them into balls with your hands.
6. Place the dough balls 2 inches apart on the prepared baking sheet.
7. Use a fork to gently press down on each ball, creating a crisscross pattern—this helps them bake evenly.
8. Bake for 10–12 minutes, until the edges are lightly golden but the centers still look slightly soft.
9. Let the cookies cool on the baking sheet for 5 minutes before transferring them to a wire rack.
Zesty with a hint of saltiness, these cookies have a tender, chewy center and crisp edges that make them utterly addictive. Try crumbling one over vanilla ice cream or simply enjoy them with your afternoon coffee for the perfect little treat.
Peach Cobbler with Almond Crumble
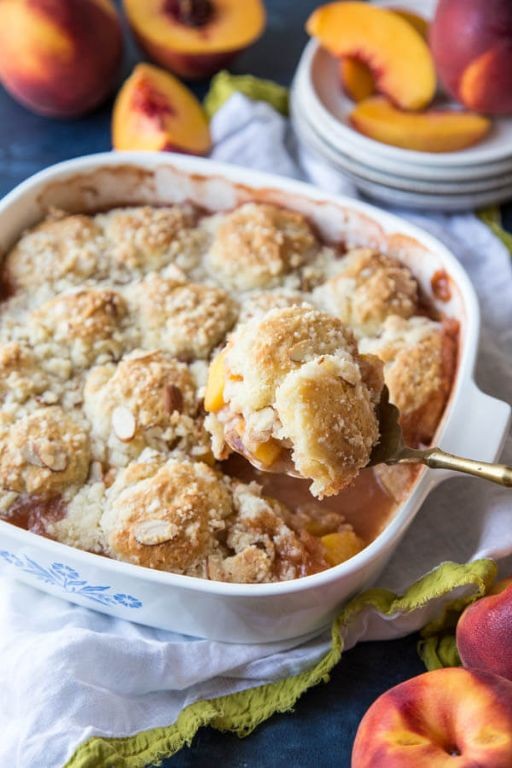
Gosh, is there anything more comforting than the smell of warm peaches and cinnamon filling your kitchen? This peach cobbler with almond crumble is my absolute go-to when I want something cozy but impressive. You’re going to love how simple it is to throw together.
Ingredients
- 4 cups sliced fresh peaches (I leave the skins on for extra fiber and color)
- 1 cup granulated sugar (divided—half for the peaches, half for the topping)
- 1 tsp vanilla extract (the real stuff makes all the difference)
- 1 cup all-purpose flour (spooned and leveled to avoid a dense topping)
- 1/2 cup sliced almonds (toasted first for maximum crunch)
- 1/2 cup unsalted butter, cold and cubed (this keeps the crumble from getting greasy)
- 1/2 tsp cinnamon (I always add an extra pinch because why not?)
- 1/4 tsp salt (just a bit to balance the sweetness)
Instructions
- Preheat your oven to 375°F and lightly grease an 8×8 inch baking dish.
- In a medium bowl, toss the sliced peaches with 1/2 cup of the granulated sugar and the vanilla extract until evenly coated.
- Spread the peach mixture evenly in the prepared baking dish.
- In another bowl, whisk together the remaining 1/2 cup sugar, flour, toasted sliced almonds, cinnamon, and salt.
- Add the cold, cubed butter to the flour mixture.
- Use your fingers or a pastry cutter to work the butter into the dry ingredients until pea-sized crumbs form. Tip: Don’t overmix—those butter bits create flaky pockets as it bakes.
- Sprinkle the almond crumble evenly over the peaches, covering them completely.
- Bake for 35–40 minutes, or until the topping is golden brown and the peach filling is bubbly around the edges. Tip: Place a baking sheet on the rack below to catch any drips and avoid a messy oven.
- Remove the cobbler from the oven and let it cool on a wire rack for at least 15 minutes. Tip: Resting time lets the juices thicken so it’s not too runny when you serve it.
That almond crumble bakes up so crisp and nutty against the soft, syrupy peaches. Try serving it warm with a scoop of vanilla bean ice cream melting over the top—it’s pure heaven. You’ll love how the flavors deepen if you have any leftovers the next day.
Summary
Whether you’re managing dietary needs or simply craving something sweet without the sugar rush, these 20 delicious sugar-free desserts prove healthy indulgence is totally possible. We hope you find new favorites to whip up in your kitchen! Don’t forget to leave a comment telling us which recipe you loved most and share this roundup on Pinterest to inspire other home cooks.