During uncertain times, having a collection of reliable, pantry-friendly recipes can bring both comfort and confidence to your kitchen. These 18 essential survival food recipes are designed to be simple, nourishing, and adaptable—perfect for stretching ingredients and keeping your family well-fed. Let’s dive into these practical dishes that will help you feel prepared and inspired, no matter what comes your way.
Hardtack Biscuits

Hardtack biscuits have always felt like edible history to me, these simple crackers carrying stories of sailors and settlers in their sturdy, unpretentious form. Here in my quiet kitchen, I find something meditative about creating food that asks for so little yet gives so much durability.
Ingredients
– 4 cups all-purpose flour (I prefer unbleached for its slightly nutty character)
– 2 teaspoons salt (fine sea salt dissolves more evenly through the dry mixture)
– 1 ½ cups cold water (straight from the tap works perfectly)
Instructions
1. Preheat your oven to 375°F and line a baking sheet with parchment paper.
2. Whisk together 4 cups of all-purpose flour and 2 teaspoons of salt in a large mixing bowl until fully combined.
3. Gradually pour 1 ½ cups of cold water into the flour mixture while stirring with a wooden spoon.
4. Continue mixing until a stiff, shaggy dough forms that pulls away from the sides of the bowl.
5. Turn the dough out onto a lightly floured surface and knead for exactly 3 minutes until smooth and cohesive.
6. Roll the dough to a consistent ½-inch thickness using a rolling pin.
7. Cut the dough into 3-inch squares using a sharp knife or pastry cutter.
8. Use a wooden skewer to poke 4 rows of 4 holes each (16 holes total) through each biscuit, going completely through the dough.
9. Arrange the biscuits on the prepared baking sheet, leaving 1 inch of space between them.
10. Bake at 375°F for 30 minutes until the biscuits are pale golden with firm edges.
11. Flip each biscuit carefully using tongs or a spatula.
12. Return to the oven and bake for another 30 minutes until completely hard and dry to the touch.
13. Transfer the baked biscuits to a wire cooling rack and let them cool completely for at least 2 hours.
Zesty as they are plain, these biscuits transform when paired with strong cheeses or dipped in olive oil with herbs. Their satisfying crunch gives way to a wheaty simplicity that feels both ancient and comforting, perfect for stocking the pantry or taking on outdoor adventures where their durability truly shines.
Pemmican Energy Bars

A quiet afternoon finds me reaching for something substantial, something that carries both nourishment and memory in each bite—these pemmican bars feel like edible history, simple yet deeply satisfying. As the golden light filters through my kitchen window, I’m reminded how the most elemental foods often sustain us best, connecting us to traditions far older than our modern hurry.
Ingredients
– 1 cup dried bison jerky, finely chopped (I find the leaner cuts work best here, yielding a cleaner flavor)
– 1/2 cup dried cranberries (tart ones balance the richness beautifully)
– 1/3 cup rendered beef tallow, melted (I keep mine in a mason jar—it smells wonderfully earthy when warmed)
– 2 tablespoons raw honey (local if you can find it, for that subtle floral note)
– 1/4 cup crushed pecans (toasted first, because they release such a warm, buttery aroma)
Instructions
1. Place the dried bison jerky in a food processor and pulse for 45 seconds until it forms coarse, sand-like crumbs.
2. Transfer the jerky crumbs to a medium mixing bowl and add the dried cranberries and crushed pecans.
3. Heat the rendered beef tallow in a small saucepan over low heat for 2–3 minutes until it becomes completely liquid and measures 110°F on a kitchen thermometer.
4. Pour the warm tallow and raw honey over the dry ingredients in the mixing bowl.
5. Use a rubber spatula to fold the mixture for 1–2 minutes until every particle is evenly coated and the mixture holds together when pressed.
6. Line a small loaf pan with parchment paper, letting the edges overhang for easy removal.
7. Firmly press the pemmican mixture into the prepared pan using the back of a measuring cup, applying even pressure to create a compact, 1-inch thick layer.
8. Refrigerate the pan for exactly 2 hours until the bars are firm and slice cleanly.
9. Lift the parchment to remove the slab from the pan and cut into 8 even rectangles using a sharp knife wiped clean between cuts.
Now these bars settle into their final form—dense and crumbly with a satisfying resistance that gives way to rich, savory depth. The cranberries burst with tart sweetness against the earthy tallow, while the pecans add their toasty whisper. I sometimes crumble one over morning yogurt or simply let a square melt slowly on my tongue during long afternoon walks, each bite connecting me to simpler ways of eating.
Beef Jerky

Venturing into the quiet rhythm of dehydrating transforms simple ingredients into something deeply satisfying, like preserving memories in thin, flavorful slices. There’s something meditative about watching beef slowly transform over hours, filling the kitchen with that warm, savory scent that promises patience will be rewarded. This process connects us to older ways of preserving food, turning a practical need into a quiet culinary ritual.
Ingredients
– 2 pounds lean beef round, sliced ¼-inch thick against the grain (I find this thickness gives the perfect chew without being tough)
– ½ cup soy sauce (I prefer low-sodium to better control the saltiness)
– ¼ cup Worcestershire sauce
– 2 tablespoons brown sugar
– 1 tablespoon liquid smoke
– 2 teaspoons black pepper, freshly ground
– 1 teaspoon onion powder
– 1 teaspoon garlic powder
– ½ teaspoon smoked paprika
Instructions
1. Place all beef slices in a single layer in a glass baking dish.
2. Whisk together soy sauce, Worcestershire sauce, brown sugar, liquid smoke, black pepper, onion powder, garlic powder, and smoked paprika in a medium bowl until the sugar fully dissolves.
3. Pour the marinade evenly over the beef slices, ensuring each piece is completely coated.
4. Cover the dish tightly with plastic wrap and refrigerate for exactly 8 hours—this timing develops the deepest flavor penetration.
5. Remove the beef from the refrigerator and discard all remaining marinade.
6. Pat each beef slice completely dry with paper towels—this crucial step ensures proper dehydration rather than steaming.
7. Arrange the beef slices in a single layer on dehydrator trays, ensuring no pieces overlap.
8. Set the dehydrator to 160°F and dehydrate for 4-6 hours.
9. Check the beef jerky after 4 hours by bending a piece—it should crack but not break completely.
10. Continue dehydrating in 30-minute increments until all pieces pass the bend test.
11. Transfer the finished jerky to a cooling rack and let it rest for 30 minutes—this resting period helps equalize moisture throughout.
12. Store the completely cooled jerky in an airtight container.
Keeping this jerky in your pantry means having that perfect savory snack ready whenever hunger strikes unexpectedly. The texture achieves that ideal balance between firm and pliable, with the smoke and soy creating a deep umami flavor that lingers pleasantly. I love crumbling it over salads for protein-packed crunch or packing it in hiking bags where its compact energy feels like a secret treasure.
Canned Bean Stew

As the afternoon light slants through my kitchen window, I find myself reaching for those humble cans in the pantry, remembering how this simple stew became my quiet comfort during those transitional autumn evenings when the world outside slows its pace.
Ingredients
– 2 tablespoons extra virgin olive oil (my go-to for its fruity notes that deepen during cooking)
– 1 medium yellow onion, diced (I like mine finely chopped so they melt into the broth)
– 2 cloves garlic, minced (freshly crushed releases more aromatic oils)
– 1 (15-ounce) can diced tomatoes with their juices (the liquid adds natural sweetness)
– 2 (15-ounce) cans kidney beans, drained and rinsed (rinsing removes that tinny taste I never quite liked)
– 1 teaspoon smoked paprika (this particular spice makes the whole kitchen smell like a cozy fireplace)
– 4 cups vegetable broth (homemade if you have it, but store-bought works beautifully too)
– 1 teaspoon salt (I add this early to help the onions release their moisture)
– ½ teaspoon black pepper (freshly ground catches in the light like tiny specks of stardust)
Instructions
1. Heat olive oil in a large Dutch oven over medium heat until it shimmers when you tilt the pan.
2. Add diced onion and cook for 6-8 minutes, stirring occasionally, until the pieces turn translucent with golden edges.
3. Stir in minced garlic and cook for exactly 60 seconds until fragrant but not browned—this prevents bitterness.
4. Sprinkle smoked paprika over the onion mixture and stir continuously for 30 seconds to toast the spices.
5. Pour in diced tomatoes with their juices, scraping any browned bits from the bottom of the pot.
6. Add drained kidney beans, distributing them evenly throughout the tomato mixture.
7. Pour vegetable broth into the pot, watching as it swirls around the beans in cloudy ribbons.
8. Season with salt and pepper, stirring gently to incorporate all ingredients.
9. Bring the stew to a boil over high heat, then immediately reduce to a simmer.
10. Cover partially and simmer for 25 minutes, until the broth thickens slightly and coats the back of a spoon.
11. Remove from heat and let rest uncovered for 5 minutes to allow flavors to meld.
Now the stew settles into itself, beans softening just enough to yield between your teeth while the broth carries the smokiness through each spoonful. Nothing compares to ladling it over thick slices of crusty bread that soak up the liquid like autumn leaves drinking rain, or watching steam rise from the bowl in delicate curls that carry the scent of paprika and memory.
Rice and Lentil Survival Mix

Vaguely, as the afternoon light slants through my kitchen window, I find myself reaching for this simple combination—rice and lentils, a quiet promise of nourishment that feels both ancient and immediate, like a whispered secret from generations past.
Ingredients
– 1 cup long-grain white rice (I love how it stays fluffy and separate)
– 1 cup brown lentils (these hold their shape beautifully, unlike red ones)
– 4 cups vegetable broth (homemade if you have it, but boxed works just fine)
– 1 medium yellow onion, finely diced (I always shed a tear or two, it’s part of the ritual)
– 2 cloves garlic, minced (freshly crushed releases the most fragrance)
– 2 tablespoons olive oil (extra virgin is my go-to for its fruity notes)
– 1 teaspoon cumin seeds (toasting them first makes all the difference)
– ½ teaspoon smoked paprika (for that gentle, smoky warmth)
– Salt, to taste (I use about 1 teaspoon, but adjust as you go)
Instructions
1. Heat the olive oil in a medium saucepan over medium heat until it shimmers lightly.
2. Add the cumin seeds and toast for 30 seconds, until fragrant—this deepens their flavor.
3. Stir in the diced onion and cook for 5 minutes, until softened and translucent.
4. Add the minced garlic and cook for 1 more minute, stirring to prevent burning.
5. Rinse the rice and lentils together in a fine-mesh strainer under cold water until it runs clear.
6. Add the rice and lentils to the saucepan and stir to coat with the onion mixture.
7. Pour in the vegetable broth and sprinkle in the smoked paprika and salt.
8. Bring the mixture to a boil over high heat, then immediately reduce to a low simmer.
9. Cover the saucepan with a tight-fitting lid and cook for 18 minutes—resist peeking to keep the steam in.
10. Remove the saucepan from the heat and let it rest, covered, for 5 minutes to finish absorbing liquid.
11. Fluff the mixture gently with a fork to separate the grains.
Kindly, this dish settles into a tender, pebbly texture with the lentils lending an earthy depth against the rice’s mild sweetness. I love it topped with a fried egg for a creamy contrast, or folded into warmed tortillas with a sprinkle of fresh cilantro.
Dehydrated Fruit Leather

Lately, I’ve been finding quiet joy in preserving the fleeting sweetness of summer, turning ripe fruit into something that lasts. Dehydrated fruit leather feels like capturing sunshine in edible form, a simple treat that reminds me of slow afternoons and patient hands. It’s a gentle process, one that rewards attention with chewy, vibrant strips of pure fruit essence.
Ingredients
– 4 cups fresh strawberries, hulled (I love using ripe, local berries for their intense flavor)
– 2 tablespoons honey (raw honey adds a lovely floral note, but any kind works)
– 1 tablespoon fresh lemon juice (just a squeeze to brighten everything up)
– Pinch of sea salt (a tiny dash to balance the sweetness)
Instructions
1. Preheat your oven to 170°F and line a rimmed baking sheet with parchment paper.
2. Combine the strawberries, honey, lemon juice, and sea salt in a blender.
3. Blend on high speed for 60 seconds until completely smooth and no chunks remain.
4. Pour the fruit puree onto the prepared baking sheet, spreading it evenly into a ¼-inch thick layer with a spatula.
5. Place the baking sheet in the preheated oven and dehydrate for 4–6 hours.
6. Check the fruit leather after 4 hours by gently touching the center—it should feel dry and slightly tacky, not wet.
7. Rotate the baking sheet halfway through drying to ensure even dehydration, especially if your oven has hot spots.
8. Remove the baking sheet from the oven when the edges are firm and the center no longer sticks to your finger.
9. Let the fruit leather cool completely on the baking sheet for 30 minutes at room temperature.
10. Peel the cooled fruit leather from the parchment paper and cut it into strips using kitchen scissors or a sharp knife.
Yielding supple, translucent sheets, this fruit leather has a concentrated berry flavor that bursts with each chew. I love rolling the strips into loose scrolls for picnics or crumbling them over morning yogurt for a touch of natural sweetness. It’s a humble, wholesome snack that carries the memory of summer long after the season has faded.
Bannock Bread

T
There’s something quietly comforting about bannock bread, this simple fried dough that feels like a warm embrace on a crisp autumn afternoon. I find myself returning to this recipe whenever I need a moment of stillness in the kitchen, the rhythmic patting of dough becoming a gentle meditation.
Ingredients
– 2 cups all-purpose flour (I always use unbleached for that lovely cream color)
– 1 tablespoon baking powder (make sure yours is fresh for the best rise)
– 1 teaspoon salt (I prefer fine sea salt for even distribution)
– 3/4 cup warm water (about 110°F – warm to the touch but not hot)
– 2 tablespoons vegetable oil (plus extra for frying – I keep a small bottle dedicated to this purpose)
Instructions
1. Combine 2 cups all-purpose flour, 1 tablespoon baking powder, and 1 teaspoon salt in a medium mixing bowl, whisking thoroughly to distribute the leavening evenly.
2. Create a well in the center of the dry ingredients and pour in 3/4 cup warm water and 2 tablespoons vegetable oil all at once.
3. Use a fork to gradually incorporate the flour mixture into the liquid, working from the center outward until a shaggy dough forms.
4. Turn the dough out onto a lightly floured surface and knead gently for about 30 seconds – just until the dough comes together smoothly without overworking it.
5. Divide the dough into 4 equal portions and shape each into a 1/2-inch thick round disc, pressing gently with your palms.
6. Heat 1/4 inch of vegetable oil in a heavy skillet over medium heat until it reaches 350°F, testing with a drop of dough that should sizzle immediately.
7. Carefully place one dough disc into the hot oil and fry for 3-4 minutes until the bottom develops deep golden-brown spots.
8. Flip the bannock using tongs and fry the second side for another 3-4 minutes until equally golden and cooked through.
9. Transfer the fried bannock to a wire rack set over a baking sheet to drain excess oil while you repeat with remaining dough.
10. Let the bannock rest for 2 minutes before serving to allow the interior to set properly.
The finished bannock emerges with a crisp, speckled exterior that gives way to a tender, cake-like crumb inside. I love splitting one warm and slathering it with honey butter, though it’s equally wonderful torn into pieces and dipped into stew. This bread carries the subtle sweetness of properly fried dough, a humble pleasure that feels both ancient and immediately comforting.
Wild Edible Greens Salad
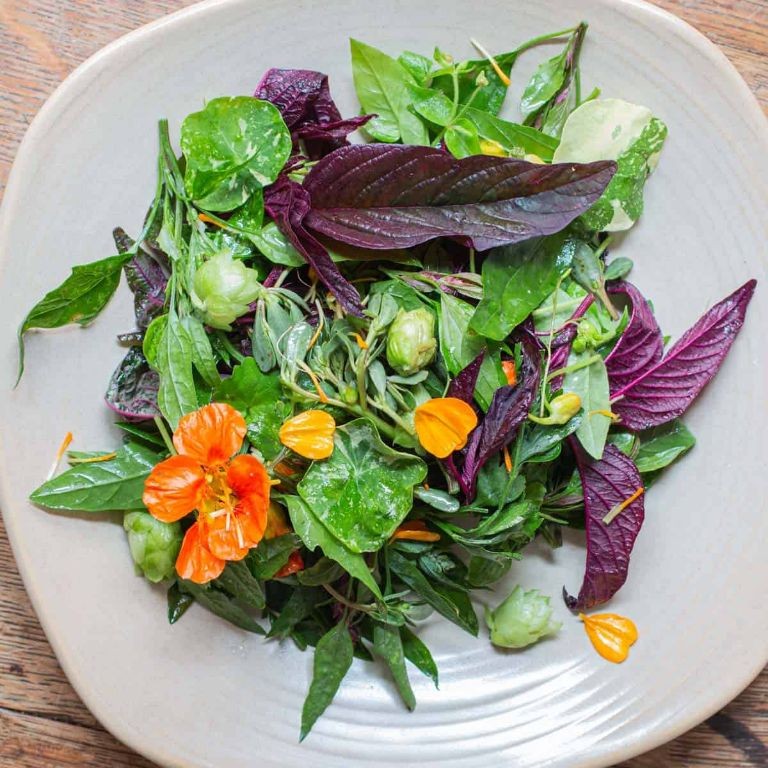
Often, I find myself wandering through overgrown fields, my basket growing heavy with the day’s treasures—wild greens that taste of earth and sunshine. On days like this, I crave something simple, something that honors these humble finds without fuss. This salad is my quiet tribute to those peaceful moments of gathering.
Ingredients
– 4 cups mixed wild edible greens (I love the peppery bite of young dandelion leaves, but any foraged mix works beautifully)
– 1/2 cup toasted walnuts (I always toast extra—they disappear quickly from my kitchen)
– 1/4 cup crumbled goat cheese (a creamy, tangy local variety is my preference)
– 2 tablespoons extra virgin olive oil (this is my go-to for its fruity notes)
– 1 tablespoon fresh lemon juice (I squeeze it right before using for maximum brightness)
– 1/4 teaspoon fine sea salt (I keep a small jar by the stove for moments like this)
Instructions
1. Rinse the wild edible greens thoroughly under cold running water to remove any dirt or debris.
2. Gently pat the greens dry using a clean kitchen towel or salad spinner—this helps the dressing cling better.
3. Toast the walnuts in a dry skillet over medium heat for 3–4 minutes, shaking the pan frequently, until fragrant and lightly golden.
4. Let the toasted walnuts cool completely on a plate, about 5 minutes, to prevent them from softening in the salad.
5. Whisk together the extra virgin olive oil, fresh lemon juice, and fine sea salt in a small bowl until emulsified.
6. Place the dried greens in a large mixing bowl and drizzle with the dressing.
7. Toss the greens gently with your hands or salad tongs until evenly coated with the dressing.
8. Sprinkle the cooled toasted walnuts and crumbled goat cheese over the dressed greens.
9. Serve immediately on individual plates or in a wide, shallow bowl.
Unsurprisingly, the salad arrives with a delightful contrast—creamy cheese against crisp greens, crunchy walnuts yielding to tender leaves. Each forkful carries the bright tang of lemon, the richness of olive oil, and the earthy depth of foraged greens. I sometimes serve it alongside crusty bread for a complete, rustic meal that feels both nourishing and deeply personal.
Acorn Flour Pancakes

A quiet morning calls for something earthy and grounding, these acorn flour pancakes emerging like autumn’s gentle whisper from the mixing bowl, connecting us to ancient traditions with each warm, nutty bite.
Ingredients
– 1 cup acorn flour (I love the deep, toasty aroma it develops)
– 1 cup all-purpose flour (for that perfect fluffy structure)
– 2 tablespoons maple syrup (the real stuff makes all the difference)
– 1 large egg, room temperature (it blends so much smoother this way)
– 1 cup whole milk (creamy richness is key here)
– 2 tablespoons melted butter (I always use unsalted for better control)
– 2 teaspoons baking powder (freshness matters for good rise)
– ½ teaspoon salt (just enough to balance the sweetness)
– Butter for cooking (my cast iron loves a good butter coating)
Instructions
1. Whisk together 1 cup acorn flour, 1 cup all-purpose flour, 2 teaspoons baking powder, and ½ teaspoon salt in a large bowl until fully combined.
2. In a separate bowl, beat 1 large room temperature egg until pale and frothy, about 1 minute of vigorous whisking.
3. Stir 2 tablespoons maple syrup, 1 cup whole milk, and 2 tablespoons melted butter into the beaten egg until the mixture is smooth and uniform.
4. Pour the wet ingredients into the dry ingredients and gently fold together until just combined—tiny lumps are perfectly fine and prevent tough pancakes.
5. Let the batter rest undisturbed for 5 minutes to allow the baking powder to activate and the flours to hydrate properly.
6. Heat a non-stick skillet or griddle over medium heat (350°F if using an electric griddle) and melt enough butter to coat the surface lightly.
7. Pour ¼ cup portions of batter onto the hot surface, leaving space between each pancake for easy flipping.
8. Cook until bubbles form across the entire surface and the edges look set, about 2-3 minutes—this visual cue means the bottom is perfectly golden.
9. Flip each pancake carefully and cook for another 1-2 minutes until the second side is golden brown and the center springs back when gently pressed.
10. Transfer cooked pancakes to a warm plate and repeat with remaining batter, adding more butter to the cooking surface as needed.
These pancakes emerge with a wonderfully tender crumb and subtle nuttiness that pairs beautifully with autumn fruits—try them stacked high with sliced pears and a drizzle of honey, the earthy flavors creating a breakfast that feels both rustic and deeply comforting.
Smoked Fish
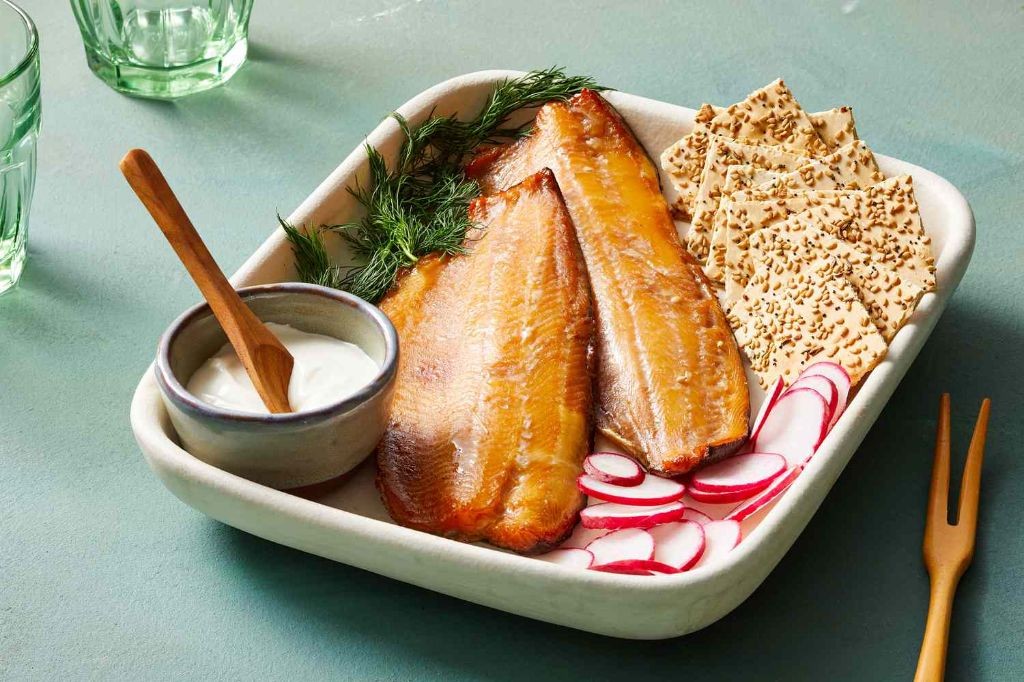
Perhaps there’s something quietly profound about the way smoke transforms simple fish into something layered and complex. I find myself returning to this method when I need cooking to feel more like meditation than task, watching the gentle curls of smoke work their slow magic.
Ingredients
- 2 lbs firm white fish fillets (I love using thick cod pieces – they hold up beautifully)
- 1/4 cup brown sugar (the deep molasses notes complement the smoke so well)
- 2 tbsp kosher salt (I always use Diamond Crystal – it dissolves more evenly)
- 1 tsp black peppercorns, freshly cracked (the aroma fills my kitchen every time)
- 2 cups wood chips (hickory is my preference for that classic smoky flavor)
- 1 cup ice water in a spray bottle (this little trick keeps everything moist)
Instructions
- Pat the fish fillets completely dry with paper towels, ensuring no moisture remains on the surface.
- Combine brown sugar, kosher salt, and cracked black peppercorns in a small bowl, mixing thoroughly with your fingers.
- Rub the seasoning mixture evenly over all sides of each fish fillet, pressing gently to help it adhere.
- Place the seasoned fish on a wire rack set over a baking sheet, then refrigerate uncovered for exactly 2 hours to form a pellicle.
- Soak wood chips in cold water for 30 minutes while the fish chills – this prevents them from burning too quickly.
- Prepare your smoker by heating it to 180°F, using a thermometer to verify the temperature is accurate.
- Drain the wood chips completely and scatter them over the hot coals or in the smoker box.
- Arrange the fish fillets in a single layer on the smoker rack, leaving 1 inch between each piece for proper air circulation.
- Close the smoker lid and smoke the fish for 3 hours, resisting the urge to peek and lose precious heat.
- Lightly mist the fish with ice water every 45 minutes to maintain moisture and help the smoke adhere.
- Check for doneness by inserting a thermometer into the thickest part – it should read 145°F exactly.
- Remove the fish from the smoker using tongs and transfer to a clean platter to rest for 10 minutes.
Cool smoked fish develops the most wonderful flaky texture that separates into tender layers at the slightest touch. The gentle smokiness permeates every bite without overwhelming the fish’s natural sweetness. Consider serving it alongside creamy scrambled eggs for breakfast or flaked over crisp greens with a bright lemon vinaigrette – both ways let the careful smoking shine through.
Trail Mix with Nuts and Seeds
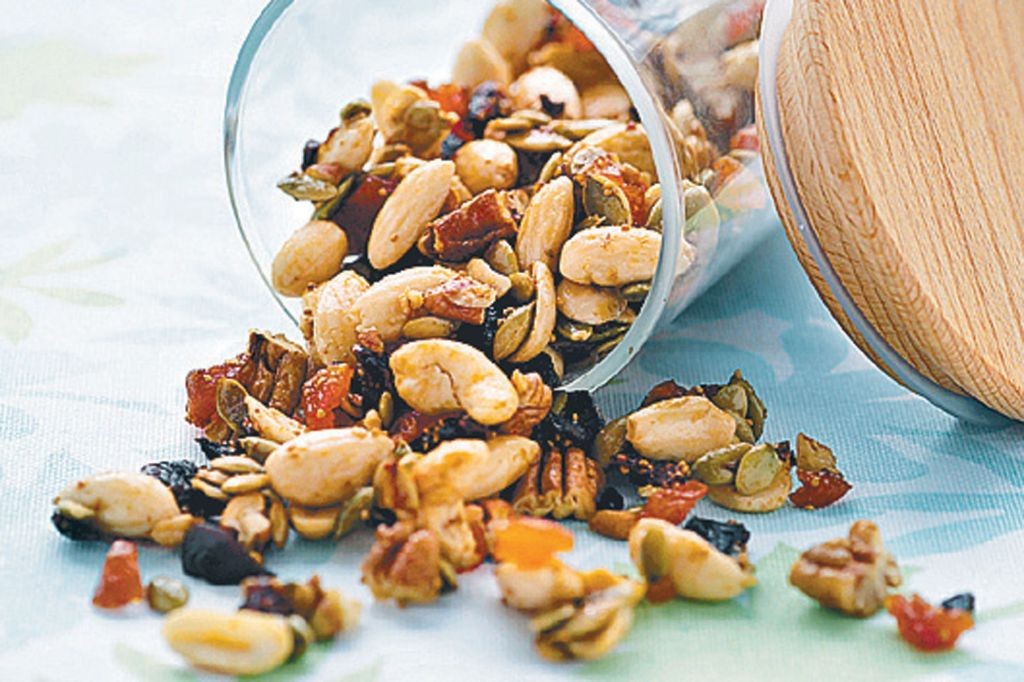
Wandering through the kitchen this quiet afternoon, I found myself craving something simple yet deeply satisfying—a homemade trail mix that feels like a warm embrace in snack form. There’s something meditative about measuring out each ingredient, watching the colors and textures mingle in the bowl like autumn leaves gathering on a forest path. This blend of nuts and seeds has become my go-to companion for quiet moments and gentle adventures alike.
Ingredients
– 1 cup raw almonds (I love their sturdy crunch)
– 1 cup raw walnuts (these break so beautifully when toasted)
– ½ cup raw pumpkin seeds (their green edges toast to perfection)
– ½ cup raw sunflower seeds (these little golden gems are my favorite)
– 2 tablespoons pure maple syrup (the real stuff makes all the difference)
– 1 tablespoon melted coconut oil (it gives everything a gentle sheen)
– ½ teaspoon sea salt (I prefer the flaky kind for texture)
– ¼ teaspoon cinnamon (just a whisper for warmth)
Instructions
1. Preheat your oven to 325°F and line a baking sheet with parchment paper.
2. Combine almonds, walnuts, pumpkin seeds, and sunflower seeds in a medium mixing bowl.
3. Drizzle the melted coconut oil and maple syrup over the nut and seed mixture.
4. Sprinkle the sea salt and cinnamon evenly across the surface.
5. Use a spatula to fold everything together until each piece glistens with coating.
6. Spread the mixture in a single layer on your prepared baking sheet.
7. Bake for 18 minutes, pausing at the 9-minute mark to stir everything thoroughly.
8. Watch closely during the final 3 minutes as the pumpkin seeds will begin to puff slightly.
9. Remove from oven when the walnuts turn golden brown at the edges.
10. Let the trail mix cool completely on the baking sheet for about 45 minutes.
11. Transfer to an airtight container once completely cool to the touch.
Perfect for tucking into your backpack or keeping by your reading chair, this trail mix settles into a wonderful harmony of crisp walnuts, toasty almonds, and those delightful pumpkin seeds that pop with each bite. I sometimes scatter it over morning yogurt or simply enjoy it by the handful while watching the light change through the window.
Sun-Dried Tomato and Herb Flatbread

Remembering how the afternoon light used to fall across my grandmother’s kitchen table, I find myself reaching for the same simple ingredients she would have—flour, yeast, olive oil—wanting to recreate that same feeling of quiet contentment with this sun-dried tomato and herb flatbread. There’s something deeply comforting about working dough with your hands, watching it rise slowly in a warm spot, knowing that good things take their own sweet time. Today feels like one of those days where the process matters as much as the result, where each step becomes its own small meditation.
Ingredients
– 2 cups all-purpose flour (I like to use unbleached for its slightly nutty flavor)
– 1 teaspoon active dry yeast (check the expiration date—fresh yeast makes all the difference)
– 3/4 cup warm water (around 110°F, just warm to the touch but not hot)
– 2 tablespoons extra virgin olive oil (my go-to for its fruity notes)
– 1 teaspoon honey (a little sweetness to help the yeast along)
– 1/2 cup chopped sun-dried tomatoes (the oil-packed ones have such concentrated flavor)
– 2 tablespoons fresh rosemary, finely chopped (I grow mine in a pot by the window)
– 1 teaspoon coarse sea salt (it adds such lovely texture and bursts of flavor)
– 1/4 cup grated Parmesan cheese (I always grate it fresh for better melting)
Instructions
1. Combine the warm water, honey, and yeast in a small bowl and let it sit for 5 minutes until foamy.
2. Tip: If your yeast doesn’t foam, it may be inactive—start over with fresh yeast for best results.
3. Place the flour in a large mixing bowl and make a well in the center.
4. Pour the yeast mixture and olive oil into the flour well.
5. Mix with a wooden spoon until a shaggy dough forms.
6. Turn the dough out onto a lightly floured surface.
7. Knead the dough for 8 minutes until smooth and elastic.
8. Tip: The dough is ready when it springs back slowly when poked with your finger.
9. Place the dough in a lightly oiled bowl and cover with a damp kitchen towel.
10. Let the dough rise in a warm place for 1 hour until doubled in size.
11. Preheat your oven to 425°F and place a pizza stone or baking sheet inside to heat.
12. Punch down the risen dough to release air bubbles.
13. Roll the dough into a 12-inch circle on a floured surface.
14. Transfer the dough to a piece of parchment paper.
15. Brush the entire surface with 1 tablespoon olive oil.
16. Sprinkle the sun-dried tomatoes evenly over the dough.
17. Scatter the fresh rosemary across the tomatoes.
18. Sprinkle the coarse sea salt over the herbs.
19. Top with the grated Parmesan cheese.
20. Slide the parchment with the flatbread onto the preheated baking surface.
21. Bake for 12-15 minutes until the edges are golden and the cheese is melted.
22. Tip: For extra crispness, bake directly on the pizza stone if you have one.
23. Remove from the oven and let cool for 5 minutes before slicing.
How the crisp edges give way to a slightly chewy center creates such satisfying texture, while the sun-dried tomatoes offer little bursts of intense sweetness against the earthy rosemary. I love serving this torn into rustic pieces with a simple green salad, or sometimes I’ll drizzle it with a little more olive oil right before serving for extra richness.
Root Vegetable Mash

Zestfully embracing the quiet comfort of autumn afternoons, I find myself drawn to the earthy simplicity of root vegetables. There’s something profoundly grounding about transforming humble roots into a velvety mash that feels like a warm embrace on crisp days. This recipe has become my seasonal ritual, a gentle reminder that the most satisfying meals often emerge from the simplest ingredients.
Ingredients
– 2 pounds mixed root vegetables (I love the sweet earthiness of carrots, parsnips, and rutabaga in equal parts)
– 4 tablespoons unsalted butter, cut into cubes (I always keep mine chilled until the very last moment)
– 1/2 cup heavy cream, warmed gently (room temperature cream incorporates more smoothly)
– 1 teaspoon fine sea salt (I prefer the clean taste over iodized salt)
– 1/4 teaspoon freshly ground black pepper (freshly cracked makes all the difference)
– 1 tablespoon pure maple syrup (the real stuff, never imitation)
– Fresh thyme sprigs for garnish (from my windowsill herb garden)
Instructions
1. Peel all root vegetables thoroughly, removing any tough outer layers.
2. Cut vegetables into uniform 1-inch cubes to ensure even cooking.
3. Place vegetable cubes in a large pot and cover with cold water by 2 inches.
4. Add 1 teaspoon sea salt to the cooking water to season from within.
5. Bring water to a rolling boil over high heat, then reduce to medium.
6. Simmer vegetables for 20-25 minutes until fork-tender but not mushy.
7. Drain vegetables completely in a colander, letting steam escape for 2 minutes.
8. Return dry vegetables to the warm pot over turned-off burner.
9. Mash vegetables with a potato masher until no large chunks remain.
10. Add chilled butter cubes and continue mashing until incorporated.
11. Pour in warmed heavy cream gradually while stirring constantly.
12. Stir in maple syrup until the mixture becomes silky and cohesive.
13. Season with black pepper and additional salt if needed.
14. Transfer mash to serving bowl and garnish with fresh thyme.
You’ll notice the maple syrup creates a beautiful caramel hue while balancing the earthiness perfectly. The texture should be creamy enough to hold its shape yet light enough to melt on the tongue. I sometimes serve this nestled beside roasted chicken or as a bed for braised short ribs, where it soaks up all the delicious juices.
Emergency Ration Oatmeal

Gently, on mornings when the world feels too loud and my kitchen too quiet, I find myself reaching for this simple bowl—a warm, steadying presence that asks for little but gives so much in return.
Ingredients
– 1 cup old-fashioned rolled oats (I love the heartier texture these provide)
– 2 cups water (cold from the tap works perfectly)
– 1/4 teaspoon fine sea salt (just enough to make the oats sing)
– 2 tablespoons maple syrup (the real, dark amber kind—it makes all the difference)
– 1/2 teaspoon vanilla extract (a splash of warmth that transforms everything)
– 1/4 cup whole milk (or your favorite non-dairy alternative, though I find whole milk adds a lovely creaminess)
Instructions
1. Combine 1 cup old-fashioned rolled oats, 2 cups water, and 1/4 teaspoon fine sea salt in a medium saucepan.
2. Place the saucepan over medium-high heat and bring the mixture to a gentle boil, which should take about 3–4 minutes.
3. Once boiling, immediately reduce the heat to low and cover the saucepan with a lid.
4. Simmer the oats for 5 minutes exactly, resisting the urge to stir—this helps them cook evenly without becoming gummy.
5. Remove the saucepan from the heat and let it stand, still covered, for 2 additional minutes to allow the oats to fully absorb the liquid.
6. Uncover the saucepan and stir in 2 tablespoons maple syrup, 1/2 teaspoon vanilla extract, and 1/4 cup whole milk until fully incorporated.
7. For extra creaminess, let the oatmeal rest for 1 minute off the heat before serving—this allows the starches to relax and the flavors to meld beautifully.
8. Spoon the oatmeal into bowls and serve immediately. When you lift the lid after resting, you’ll notice the surface has a delicate, almost silky sheen—that’s your cue it’s perfectly ready. What emerges is a bowl that’s neither too thick nor too thin, with the maple weaving through each spoonful like a sweet, amber thread. I sometimes top it with a handful of toasted walnuts or a sprinkle of cinnamon, but honestly, it’s complete just as it is.
Wild Berry Jam

Once in a while, a quiet morning finds me standing at the kitchen counter with a bowl of wild berries, their deep purples and blues promising something sweet and slow. There’s a gentle magic in turning these fleeting summer gems into a jar of wild berry jam, each spoonful holding the memory of sun-warmed fields and patient hands. It’s a simple ritual that feels like preserving a little piece of the season, one bubble at a time.
Ingredients
– 4 cups mixed wild berries (I love a blend of blackberries, blueberries, and raspberries for their balanced tartness and sweetness)
– 2 cups granulated sugar (using organic sugar gives the jam a slightly deeper, caramel-like note)
– 1/4 cup fresh lemon juice (squeezed from about 2 lemons—room temperature lemons yield more juice, so I always set them out first)
– 1 teaspoon unsalted butter (a tiny pat helps reduce foaming, making the jam clearer and smoother)
Instructions
1. Rinse the 4 cups of mixed wild berries gently under cool water in a colander, then pat them dry with a clean kitchen towel to remove excess moisture.
2. Combine the berries, 2 cups granulated sugar, and 1/4 cup fresh lemon juice in a heavy-bottomed, non-reactive pot like stainless steel.
3. Let the mixture sit undisturbed for 30 minutes at room temperature to allow the sugar to draw out the berries’ natural juices.
4. Place the pot over medium heat and stir slowly with a wooden spoon until the sugar fully dissolves, which should take about 5–7 minutes.
5. Increase the heat to medium-high and bring the mixture to a rolling boil, where bubbles cover the entire surface vigorously.
6. Stir in 1 teaspoon unsalted butter to minimize foaming, which helps achieve a clearer jam without skimming.
7. Continue boiling for exactly 15 minutes, stirring occasionally to prevent sticking, until the jam thickens and reaches 220°F on a candy thermometer.
8. Test for doneness by placing a small spoonful of jam on a chilled plate—if it wrinkles when pushed with a finger, it’s ready.
9. Remove the pot from heat and let the jam cool in the pot for 10 minutes to allow the fruit to settle evenly.
10. Ladle the hot jam into sterilized jars, leaving 1/4 inch of headspace, and seal tightly with lids.
This jam sets with a soft, spreadable texture and a vibrant flavor that balances the berries’ natural tartness with just enough sweetness. Try it swirled into yogurt for breakfast or spooned over vanilla ice cream for a simple dessert that tastes like summer in a jar.
Homemade Granola

There’s something quietly satisfying about filling the kitchen with the warm, cinnamon-spiced aroma of homemade granola on a slow morning. This recipe has become my weekend ritual, a simple meditation that yields week’s worth of breakfasts and snacks. Today, I’ll walk you through my favorite version, perfected over many batches.
Ingredients
– 3 cups old-fashioned rolled oats (the thick-cut kind create wonderful clusters)
– 1 cup raw almonds, roughly chopped (I leave some halves intact for texture)
– 1/2 cup pure maple syrup (the real stuff makes all the difference)
– 1/4 cup coconut oil, melted (it gives the granola a lovely subtle sweetness)
– 1 teaspoon vanilla extract (I always splash in a little extra)
– 1 1/2 teaspoons ground cinnamon (my comfort spice)
– 1/2 teaspoon fine sea salt
– 1/2 cup dried cranberries (I love their tart contrast)
Instructions
1. Preheat your oven to 325°F and line a large baking sheet with parchment paper.
2. In a large mixing bowl, combine the 3 cups rolled oats and 1 cup chopped almonds.
3. In a separate small bowl, whisk together 1/2 cup maple syrup, 1/4 cup melted coconut oil, 1 teaspoon vanilla extract, 1 1/2 teaspoons cinnamon, and 1/2 teaspoon sea salt until fully incorporated.
4. Pour the liquid mixture over the oat-almond mixture and stir thoroughly with a spatula until every piece is evenly coated.
5. Spread the granola mixture in a single, even layer on your prepared baking sheet.
6. Bake at 325°F for 20 minutes, then rotate the baking sheet 180 degrees for even browning.
7. Continue baking for another 10-15 minutes, watching closely during the final minutes until the granola turns golden brown and the kitchen smells wonderfully toasty.
8. Remove the baking sheet from the oven and let the granola cool completely on the sheet without stirring—this is crucial for forming those perfect clusters.
9. Once completely cool, gently break the granola into clusters of your desired size.
10. Stir in the 1/2 cup dried cranberries, distributing them evenly throughout the mixture.
Using this granola transforms ordinary yogurt into something special, with clusters that stay remarkably crisp even when mixed with creamy dairy. The gentle cinnamon warmth pairs beautifully with the tart cranberries, creating a balance that feels both nourishing and indulgent. I often find myself nibbling it straight from the jar throughout the day, appreciating how something so simple can bring such consistent comfort.
Salt-Cured Meat

Perhaps there’s something quietly profound about the slow transformation of simple ingredients into something that can sustain us through seasons. Preserving meat this way feels like honoring traditions that predate our modern rush, a gentle reminder that some things simply cannot be hurried.
Ingredients
– 3 lbs pork belly, skin removed (I find the thicker cuts hold up better during curing)
– 1 cup kosher salt (I prefer Diamond Crystal for its flaky texture)
– 1/2 cup granulated sugar (this small amount balances without making it sweet)
– 2 tbsp black peppercorns, freshly cracked (the aroma fills the kitchen wonderfully)
– 4 bay leaves, crumbled (these add that subtle earthy note I love)
– 2 tsp pink curing salt (this ensures food safety while giving that classic color)
Instructions
1. Place the pork belly on a clean cutting board and pat it completely dry with paper towels.
2. Combine kosher salt, granulated sugar, cracked black peppercorns, crumbled bay leaves, and pink curing salt in a medium bowl.
3. Rub the salt mixture thoroughly over every surface of the pork belly, pressing firmly to adhere.
4. Place the coated pork belly in a large resealable plastic bag, pressing out excess air before sealing.
5. Set the bag on a rimmed baking sheet and refrigerate at 38°F for exactly 7 days.
6. Flip the bag over every 24 hours to redistribute the curing liquid that forms.
7. After 7 days, remove the pork belly from the bag and rinse thoroughly under cold running water.
8. Pat the meat completely dry with fresh paper towels.
9. Hang the pork belly in a well-ventilated area at 55°F with 70% humidity for 3 weeks.
10. Check weekly for any signs of mold, wiping any white mold with vinegar (this is normal and safe).
Zesty and complex, the finished meat develops a firm, sliceable texture that yields to gentle pressure. When thinly sliced, it reveals beautiful marbling and releases an earthy, savory aroma that fills the room. I love serving it draped over warm polenta or alongside sharp cheeses and pickled vegetables for contrast.
Campfire Ash Cakes

Zigzagging through memories of childhood summers, I find myself returning to the simple magic of campfire cooking, where flour and fire transform into something quietly extraordinary. There’s a gentle rhythm to making these ash cakes—a slow, mindful process that feels like a whispered secret between you and the flames. Each one emerges from the embers carrying the faint scent of smoke and the warmth of shared moments.
Ingredients
– 2 cups all-purpose flour (I always use unbleached—it gives the cakes a slightly heartier texture)
– 1 tablespoon baking powder (freshness matters here, so I give the can a quick sniff before using)
– 1 teaspoon salt (a fine sea salt is my preference, it dissolves evenly into the dough)
– 1 cup water (cool, not cold—it helps the dough come together without overworking it)
– 2 tablespoons vegetable oil (any neutral oil works, but I keep a small bottle just for campfire recipes)
Instructions
1. Combine 2 cups all-purpose flour, 1 tablespoon baking powder, and 1 teaspoon salt in a medium bowl, whisking gently to distribute the leavening evenly.
2. Pour 1 cup cool water and 2 tablespoons vegetable oil into the dry ingredients, stirring with a wooden spoon until a shaggy dough forms—it should be moist but not sticky.
3. Lightly flour your hands and knead the dough in the bowl for about 30 seconds, just until it holds together smoothly (over-kneading makes tough cakes).
4. Divide the dough into 6 equal portions, rolling each into a ball before flattening gently into ½-inch thick discs.
5. Rake hot campfire embers into an even layer, checking that no large flames remain—the ideal ember temperature is around 400°F.
6. Place dough discs directly onto the embers, spacing them at least 2 inches apart to allow for expansion.
7. Cook for 4-5 minutes until the bottoms develop deep golden-brown spots and the edges look set.
8. Flip each cake using long-handled tongs, cooking for another 3-4 minutes until both sides are speckled with dark amber patches.
9. Transfer cakes to a clean towel, brushing off any loose ash with gentle strokes (a soft-bristle brush works wonders here).
10. Let rest for 2 minutes before serving—this brief wait allows the interior steam to finish cooking the centers. When broken open, they reveal a tender, biscuit-like crumb with a faintly smoky fragrance. Warm from the fire, they’re perfect split and drizzled with honey, or simply enjoyed plain while watching embers fade to gray.
Summary
Whether you’re preparing for emergencies or just want reliable, delicious meals, these 18 survival food recipes are your kitchen allies. We hope you find comfort and confidence in these tried-and-true dishes. Give them a try, share your favorites in the comments below, and don’t forget to pin this article on Pinterest to help others discover these essential recipes!