Something magical happens when Thanksgiving rolls around—the comforting aromas of roasting turkey, savory stuffing, and sweet pies fill the air. If you’re looking to create that classic holiday feast, you’re in the right place! We’ve gathered 20 timeless traditional recipes that will make your Thanksgiving table unforgettable. Let’s dive into these delicious dishes that have been delighting families for generations.
Roast Turkey with Herb Butter
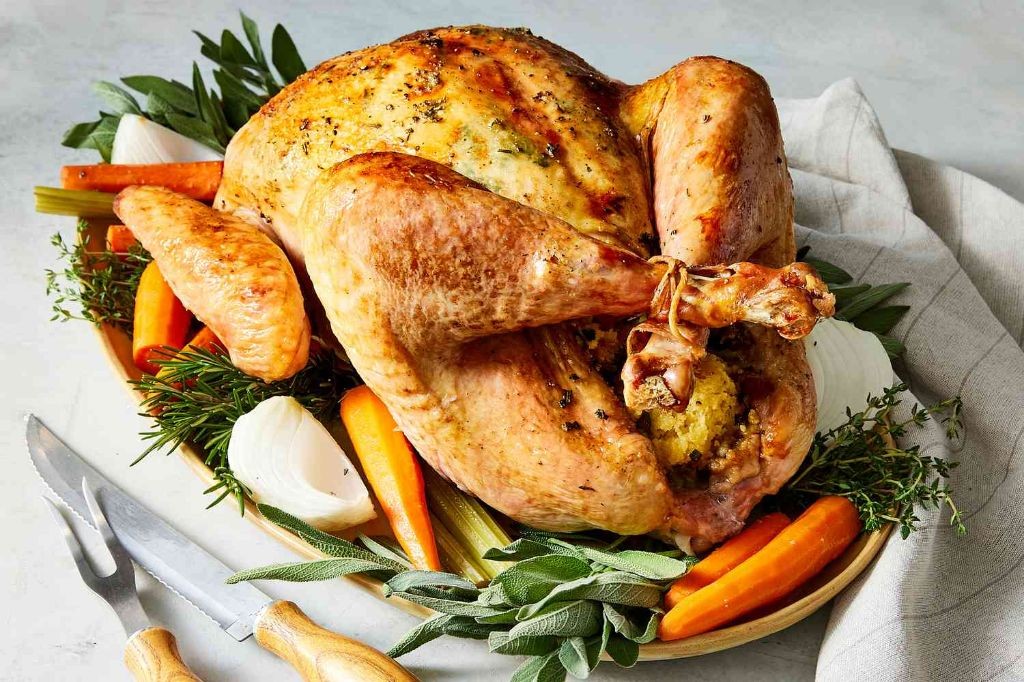
Keeping holiday meals simple yet impressive starts with this herb-butter roasted turkey. Key to juicy results is proper preparation and timing. Follow these precise steps for a perfectly golden bird every time.
Ingredients
– 12-14 lb turkey, thawed completely (pat dry thoroughly for crispy skin)
– 1 cup unsalted butter, softened (salted works but reduce added salt)
– 1/4 cup fresh parsley, finely chopped (dried can substitute at 1 tbsp)
– 2 tbsp fresh sage, finely chopped (or 2 tsp dried)
– 1 tbsp fresh thyme leaves (or 1 tsp dried)
– 2 tsp kosher salt (adjust if using salted butter)
– 1 tsp black pepper, freshly ground
– 1 medium yellow onion, quartered (white or red onion alternatives)
– 2 celery stalks, cut into 2-inch pieces
– 1 cup chicken broth (or turkey broth for enhanced flavor)
Instructions
1. Preheat your oven to 325°F and position rack in lower third.
2. Combine softened butter, parsley, sage, thyme, salt, and pepper in a medium bowl.
3. Carefully separate turkey skin from breast meat using your fingers, creating pockets.
4. Spread half of herb butter evenly under the skin directly onto breast meat.
5. Rub remaining herb butter over entire exterior of turkey, including legs and wings.
6. Stuff cavity loosely with quartered onion and celery pieces.
7. Truss turkey legs together with kitchen twine for even cooking.
8. Place turkey breast-side up on rack in roasting pan; pour broth into pan bottom.
9. Roast at 325°F for approximately 3-3.5 hours until internal temperature reaches 165°F in thickest part of thigh.
10. Baste turkey with pan juices every 45 minutes using a baster or spoon.
11. Check temperature after 3 hours; tent with foil if browning too quickly.
12. Remove from oven when thermometer reads 165°F and transfer to cutting board.
13. Let turkey rest uncovered for 30 minutes before carving to redistribute juices.
Expect crackling golden skin giving way to exceptionally moist, herb-infused meat. The butter creates a flavorful crust while keeping the breast tender throughout. Serve slices over mashed potatoes to catch the rich pan juices, or shred leftovers for next-day sandwiches with cranberry sauce.
Creamy Mashed Potatoes

Warm, creamy mashed potatoes are the ultimate comfort food that transforms any meal. This foolproof method yields perfectly smooth potatoes every time. Follow these precise steps for restaurant-quality results at home.
Ingredients
– 2 lbs Yukon Gold potatoes (peeled and quartered)
– 4 tbsp unsalted butter (cut into cubes)
– 1/2 cup heavy cream (warmed to 110°F)
– 1 tsp kosher salt (adjust to taste)
– 1/4 tsp white pepper (or black pepper)
– 1/4 cup whole milk (warmed to 110°F)
Instructions
1. Place peeled and quartered potatoes in a large pot.
2. Cover potatoes with cold water by 1 inch.
3. Add 1 teaspoon of kosher salt to the water.
4. Bring water to a rolling boil over high heat.
5. Reduce heat to maintain a gentle boil.
6. Cook potatoes for 15-18 minutes until fork-tender.
7. Drain potatoes completely in a colander.
8. Return hot potatoes to the dry pot over low heat.
9. Stir potatoes for 1 minute to evaporate excess moisture.
10. Pass potatoes through a ricer into a large bowl.
11. Add cubed butter to the hot riced potatoes.
12. Stir until butter melts completely.
13. Warm heavy cream and milk together to 110°F.
14. Gradually pour warm cream mixture into potatoes.
15. Fold gently with a rubber spatula until incorporated.
16. Season with remaining salt and white pepper.
17. Mix until smooth and creamy, about 1 minute.
18. Serve immediately in a warmed serving bowl.
These mashed potatoes achieve a velvety texture that holds its shape beautifully. The Yukon Gold potatoes provide natural creaminess while the white pepper adds subtle heat without dark specks. Try topping with crispy fried shallots or swirling in roasted garlic paste for extra flavor dimensions.
Traditional Bread Stuffing
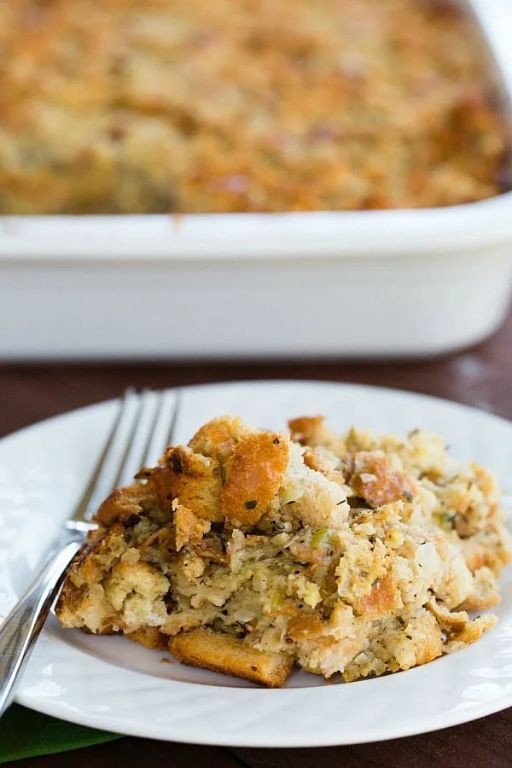
Unbelievably simple yet deeply satisfying, traditional bread stuffing anchors holiday meals with its comforting aroma and texture. Using day-old bread creates the perfect foundation for absorbing rich flavors without turning mushy. This classic version balances savory herbs with buttery richness.
Ingredients
– 8 cups cubed day-old bread (about 1 loaf, preferably slightly stale)
– 1 cup unsalted butter (or substitute with olive oil for dairy-free)
– 2 cups diced yellow onion (about 1 large onion)
– 1½ cups diced celery (4-5 stalks)
– 3 cloves garlic, minced (adjust to preference)
– 2 large eggs, beaten
– 2 cups chicken broth (vegetable broth works for vegetarian)
– 1 tbsp fresh sage, chopped (or 1 tsp dried sage)
– 1 tbsp fresh thyme leaves (or 1 tsp dried thyme)
– 1 tsp salt
– ½ tsp black pepper
Instructions
1. Preheat your oven to 350°F and grease a 9×13 inch baking dish with butter or cooking spray.
2. Spread bread cubes in a single layer on a baking sheet and toast for 10 minutes until lightly crisp but not browned.
3. Melt butter in a large skillet over medium heat until foaming subsides.
4. Add diced onion and celery to the skillet, cooking for 8 minutes until softened but not browned.
5. Stir in minced garlic and cook for 1 minute until fragrant, being careful not to burn it.
6. Remove skillet from heat and stir in sage, thyme, salt, and pepper until evenly distributed.
7. Transfer toasted bread cubes to a large mixing bowl, breaking any large pieces with your hands.
8. Pour the vegetable and herb mixture over the bread, tossing thoroughly to coat every piece.
9. Whisk together beaten eggs and chicken broth in a separate bowl until fully combined.
10. Pour the liquid mixture over the bread mixture, folding gently until all bread is moistened.
11. Tip: Let the mixture sit for 10 minutes to allow bread to fully absorb the liquid before baking.
12. Transfer the stuffing to the prepared baking dish, spreading it evenly without packing it down.
13. Cover tightly with aluminum foil and bake at 350°F for 30 minutes.
14. Remove the foil and continue baking for 20-25 minutes until the top is golden brown and crisp.
15. Tip: Check for doneness by inserting a knife in the center—it should come out moist but not wet.
16. Tip: For extra crispness, broil for 2-3 minutes at the end, watching carefully to prevent burning.
17. Let the stuffing rest for 10 minutes before serving to allow flavors to settle.
Hearty and aromatic, this stuffing develops a crisp golden crust while remaining moist and tender inside. The combination of savory herbs and buttery bread creates layers of comforting flavor that pairs perfectly with roasted turkey or chicken. Consider serving it alongside cranberry sauce for a sweet contrast, or use leftovers to make stuffing waffles the next morning.
Sweet Potato Casserole with Marshmallows
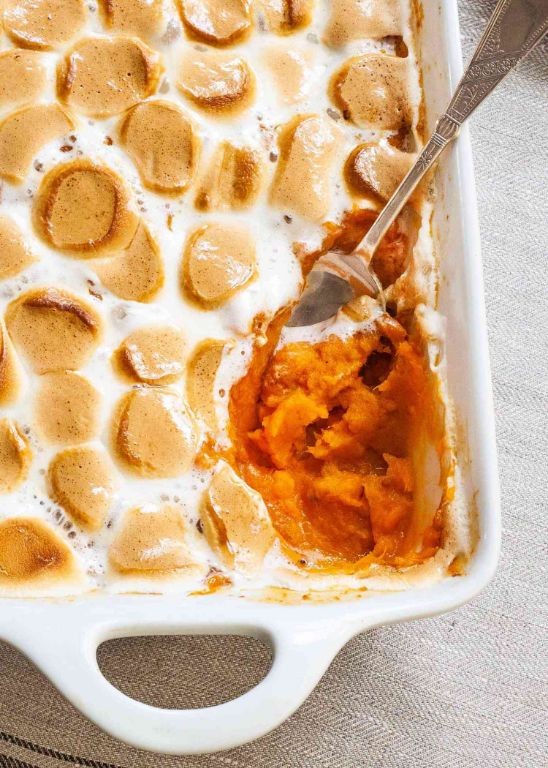
Only the most nostalgic Thanksgiving table feels complete without this classic side. Our version balances creamy sweet potatoes with that signature toasted marshmallow topping. You’ll want seconds guaranteed.
Ingredients
– 3 lbs sweet potatoes, peeled and cubed (about 4-5 medium potatoes)
– 4 tbsp unsalted butter, softened (or salted butter, reduce added salt)
– 1/2 cup brown sugar, packed
– 1/4 cup heavy cream
– 1 tsp vanilla extract
– 1/2 tsp cinnamon
– 1/4 tsp salt
– 2 cups mini marshmallows
Instructions
1. Preheat your oven to 375°F.
2. Place cubed sweet potatoes in a large pot and cover with cold water by 1 inch.
3. Bring water to a boil over high heat, then reduce to a simmer.
4. Cook potatoes for 15-20 minutes until fork-tender.
5. Drain potatoes thoroughly in a colander.
6. Transfer hot potatoes to a large mixing bowl.
7. Add softened butter, brown sugar, heavy cream, vanilla, cinnamon, and salt.
8. Mash mixture with a potato masher until smooth.
9. Spread sweet potato mixture evenly into a 9×13-inch baking dish.
10. Scatter mini marshmallows evenly across the entire surface.
11. Bake at 375°F for 15-20 minutes until marshmallows are golden brown.
12. Let casserole rest for 5 minutes before serving.
Velvety sweet potatoes create a creamy base that contrasts beautifully with the crackly toasted marshmallow crust. The caramelized sugar notes from the brown sugar deepen the autumnal flavors perfectly. Try serving individual portions in ramekins for an elegant holiday presentation that keeps the topping intact.
Homemade Gravy
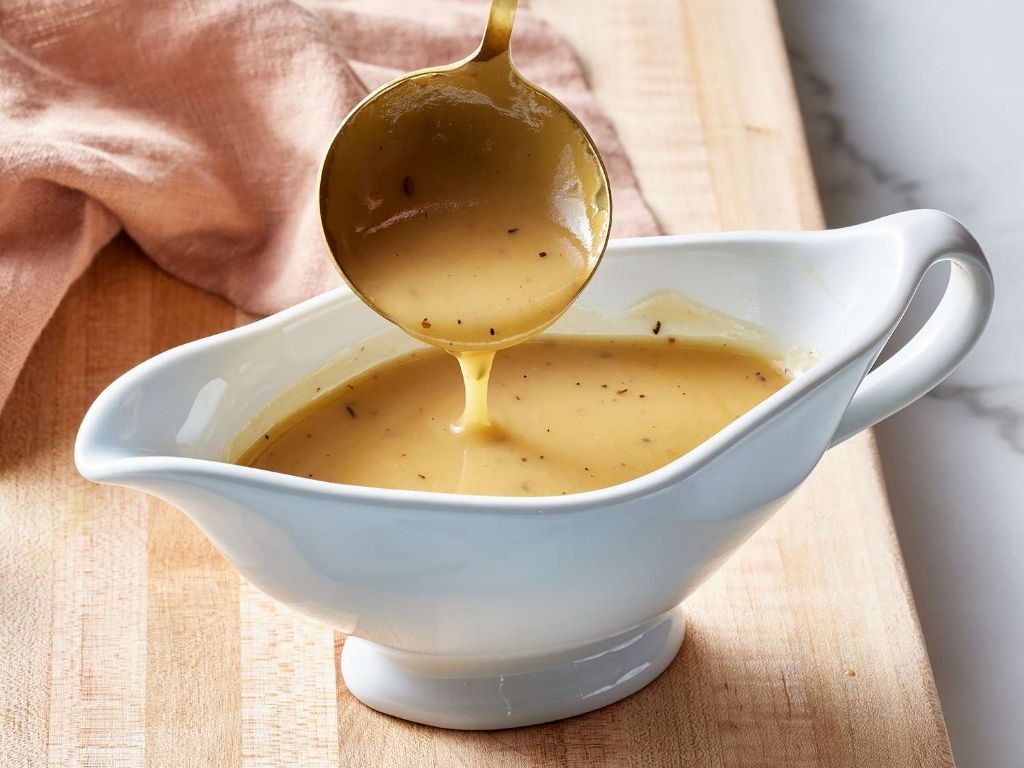
Making rich, flavorful gravy from scratch transforms any meal. Master this simple technique for perfect results every time.
Ingredients
– 4 tbsp unsalted butter (or pan drippings for deeper flavor)
– 1/4 cup all-purpose flour
– 2 cups chicken broth (warm for smoother incorporation)
– 1/2 cup whole milk (or heavy cream for extra richness)
– 1/2 tsp black pepper (freshly ground preferred)
– 1/2 tsp salt (adjust after tasting)
Instructions
1. Melt butter in saucepan over medium heat until fully liquid.
2. Whisk flour into melted butter continuously for 2 minutes to create roux.
3. Cook roux while whisking until it turns light golden brown, about 3-4 minutes.
4. Gradually pour warm chicken broth into roux while whisking constantly.
5. Continue whisking until mixture thickens and becomes smooth, approximately 3 minutes.
6. Reduce heat to low and stir in whole milk completely.
7. Simmer gravy for 5 minutes, stirring occasionally to prevent sticking.
8. Season with salt and black pepper, then simmer 2 more minutes.
9. Remove from heat when gravy coats back of spoon thickly. Pour this velvety gravy over mashed potatoes for classic comfort, or try it with biscuits for Southern-style breakfast. The silky texture carries savory notes that enhance roasted meats beautifully.
Buttery Dinner Rolls
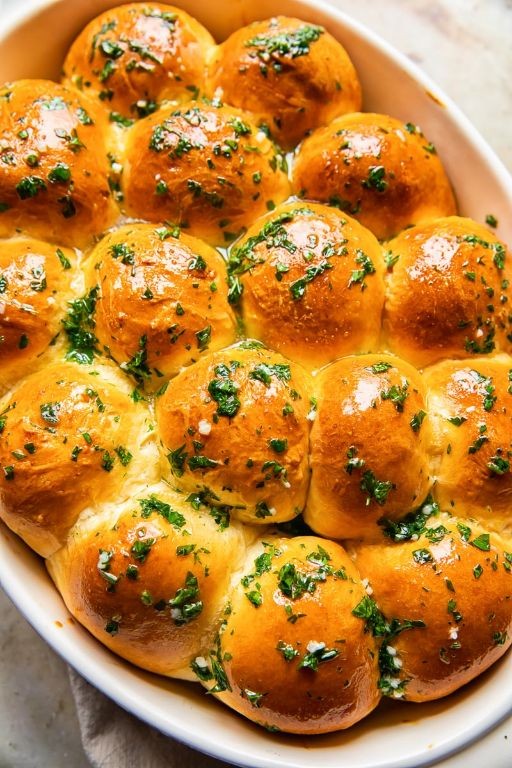
Unbelievably soft and rich, these buttery dinner rolls require minimal effort for maximum reward. They’re perfect for holiday tables or weeknight meals when you want something special. Your kitchen will smell incredible as they bake.
Ingredients
– 4 cups all-purpose flour, plus extra for dusting
– 1 cup whole milk, warmed to 110°F
– ½ cup unsalted butter, melted and cooled slightly
– ¼ cup granulated sugar
– 2¼ tsp active dry yeast (1 packet)
– 1 large egg, at room temperature
– 1½ tsp salt
– 2 tbsp softened butter for brushing
Instructions
1. Combine warmed milk, yeast, and sugar in a large bowl. Let sit for 5 minutes until foamy.
2. Add melted butter, egg, and salt to the yeast mixture. Whisk until fully combined.
3. Gradually mix in flour until a shaggy dough forms. Tip: Don’t add all flour at once to prevent over-flouring.
4. Knead dough on a floured surface for 8 minutes until smooth and elastic.
5. Place dough in a greased bowl, cover with a damp towel, and let rise in a warm place for 1 hour until doubled.
6. Punch down dough and divide into 16 equal pieces. Tip: Use a kitchen scale for perfectly even rolls.
7. Shape each piece into a smooth ball and place in a greased 9×13-inch baking pan.
8. Cover rolls and let rise for 30 minutes until puffy. Meanwhile, preheat oven to 375°F.
9. Bake for 18-20 minutes until golden brown and internal temperature reaches 190°F.
10. Immediately brush hot rolls with softened butter. Tip: Brushing while hot helps the butter soak in for maximum flavor.
Nothing beats pulling apart these warm, cloud-like rolls with their delicate, buttery crumb. The golden-brown crust gives way to an impossibly soft interior that melts in your mouth. Serve them alongside roasted meats or use them as slider buns for leftover holiday sandwiches.
Pumpkin Pie with Whipped Cream
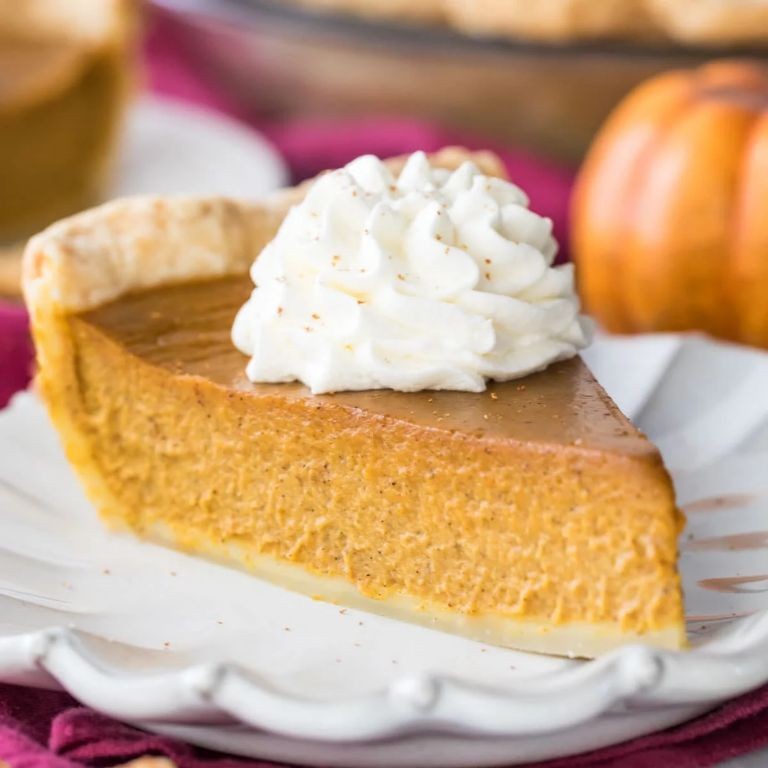
Mouthwatering pumpkin pie with fluffy whipped cream is the ultimate fall dessert. This classic recipe delivers perfect spiced filling in a buttery crust. Make it ahead for stress-free holiday entertaining.
Ingredients
– 1 ½ cups all-purpose flour (spooned and leveled)
– ½ cup cold unsalted butter, cubed (keep refrigerated until use)
– 3-4 tbsp ice water (add gradually as needed)
– 1 can (15 oz) pumpkin puree (not pumpkin pie filling)
– ¾ cup granulated sugar (adjust sweetness to preference)
– 2 large eggs, room temperature
– 1 cup heavy cream, divided (½ cup for filling, ½ cup for topping)
– 1 tsp ground cinnamon
– ½ tsp ground ginger
– ¼ tsp ground nutmeg
– ¼ tsp salt
Instructions
1. Combine flour and cubed cold butter in a food processor.
2. Pulse until mixture resembles coarse crumbs, about 10 pulses.
3. Add ice water 1 tablespoon at a time while pulsing.
4. Stop when dough just comes together when pressed between fingers.
5. Form dough into a disk, wrap in plastic, and refrigerate for 30 minutes.
6. Preheat oven to 375°F with rack in center position.
7. Roll chilled dough to 12-inch circle on floured surface.
8. Transfer dough to 9-inch pie plate without stretching.
9. Trim edges leaving 1-inch overhang, then fold under and crimp.
10. Prick bottom and sides with fork 15 times to prevent puffing.
11. Line crust with parchment and fill with pie weights or dried beans.
12. Blind bake for 15 minutes until edges are lightly golden.
13. Remove weights and parchment, then bake 5 more minutes.
14. Whisk pumpkin puree, sugar, eggs, ½ cup cream, and spices in bowl.
15. Pour filling into warm crust and smooth top with spatula.
16. Reduce oven temperature to 350°F.
17. Bake pie for 45-50 minutes until center jiggles slightly when shaken.
18. Cool completely on wire rack for 4 hours minimum.
19. Whip remaining ½ cup cream with electric mixer until stiff peaks form.
20. Serve slices with dollop of whipped cream.
Ultimate creamy texture contrasts with crisp crust in every bite. Warm spices balance the sweet pumpkin filling perfectly. Try serving with caramel drizzle or toasted pecans for extra crunch.
Apple Pie with Cinnamon
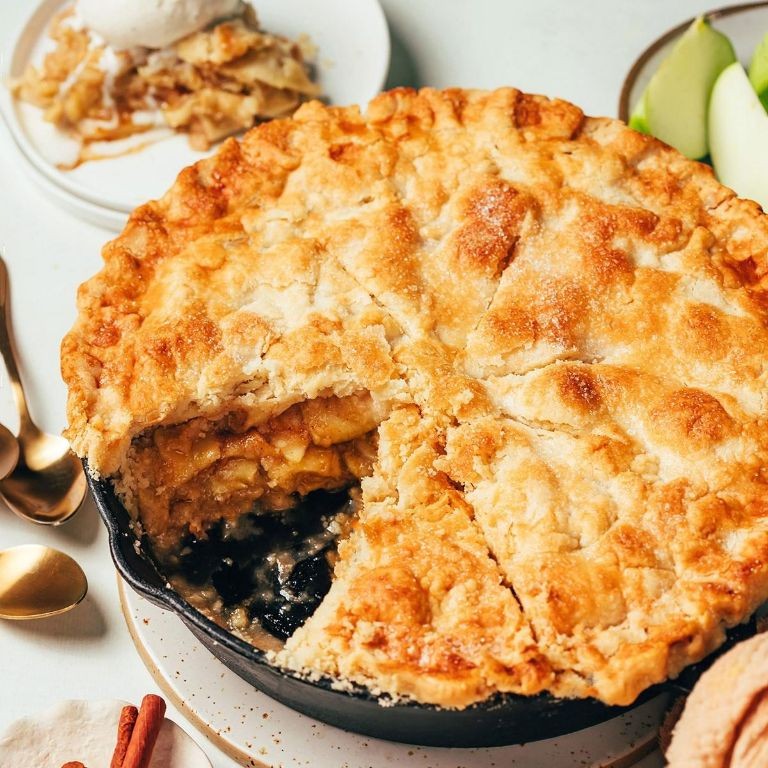
Perfect fall baking calls for this classic apple pie with warm cinnamon. Packed with tender, spiced apples in a flaky crust, it’s a crowd-pleaser every time. Let’s get straight to the recipe.
Ingredients
– 2 ½ cups all-purpose flour, plus extra for dusting
– 1 cup unsalted butter, cold and cubed
– 1 tsp salt
– 6–8 tbsp ice water, as needed
– 6–7 medium apples, peeled and sliced (use a mix like Granny Smith and Honeycrisp)
– ¾ cup granulated sugar, adjust for sweetness
– 2 tsp ground cinnamon
– ¼ tsp nutmeg, optional for extra warmth
– 1 tbsp lemon juice, to prevent browning
– 1 egg, beaten for egg wash
– 1 tbsp coarse sugar, for sprinkling
Instructions
1. Combine 2 ½ cups flour and 1 tsp salt in a large bowl.
2. Cut in 1 cup cold, cubed butter until pea-sized crumbs form.
3. Gradually add 6–8 tbsp ice water, 1 tbsp at a time, mixing until dough just comes together.
4. Divide dough in half, shape into discs, wrap in plastic, and chill for 30 minutes.
5. Preheat oven to 375°F (190°C).
6. Roll out one dough disc on a floured surface to fit a 9-inch pie dish.
7. Transfer dough to the pie dish, trim edges, and set aside.
8. In a bowl, toss 6–7 sliced apples with ¾ cup sugar, 2 tsp cinnamon, ¼ tsp nutmeg, and 1 tbsp lemon juice.
9. Tip: Let the apple mixture sit for 10 minutes to release juices, which prevents a soggy crust.
10. Pour apple filling into the pie crust, mounding it slightly in the center.
11. Roll out the second dough disc and place it over the filling.
12. Crimp the edges to seal and cut slits in the top crust for steam.
13. Brush the top with beaten egg and sprinkle with 1 tbsp coarse sugar.
14. Tip: Place the pie on a baking sheet to catch any drips and ensure even baking.
15. Bake at 375°F for 45–55 minutes, until the crust is golden brown and filling is bubbly.
16. Tip: Cover the edges with foil halfway through if they brown too quickly.
17. Cool the pie on a wire rack for at least 2 hours before slicing.
Hearty and comforting, this pie features a flaky, buttery crust with soft, cinnamon-spiced apples. Serve it warm with a scoop of vanilla ice cream for a classic treat, or enjoy it chilled for a firmer slice that holds its shape beautifully.
Pecan Pie
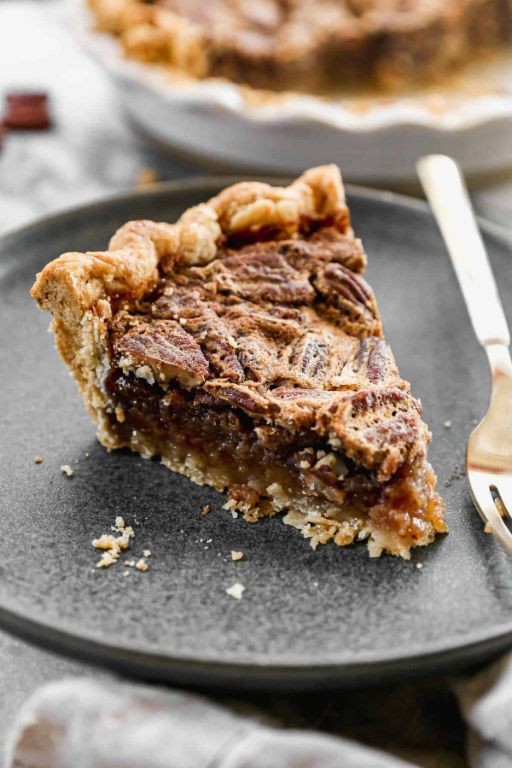
Very few desserts capture the essence of American tradition like pecan pie. This classic features a flaky crust filled with sweet, nutty goodness. It’s surprisingly straightforward to make from scratch.
Ingredients
– 1 9-inch unbaked pie crust (homemade or store-bought)
– 3 large eggs, at room temperature
– 1 cup light corn syrup
– 1 cup granulated sugar
– 2 tablespoons unsalted butter, melted
– 1 teaspoon vanilla extract
– 1/4 teaspoon salt
– 2 cups pecan halves
Instructions
1. Preheat your oven to 350°F (175°C).
2. Place the 9-inch unbaked pie crust into a pie dish and crimp the edges.
3. In a large bowl, whisk the 3 large eggs until they are fully beaten and uniform in color.
4. Add the 1 cup light corn syrup, 1 cup granulated sugar, 2 tablespoons melted unsalted butter, 1 teaspoon vanilla extract, and 1/4 teaspoon salt to the beaten eggs.
5. Whisk all ingredients together until the mixture is completely smooth and well combined.
6. Stir in the 2 cups pecan halves, ensuring they are evenly distributed throughout the filling.
7. Pour the pecan filling mixture into the prepared pie crust, spreading it evenly.
8. Bake the pie in the preheated oven at 350°F for 50-60 minutes.
9. Check for doneness by gently shaking the pie—the center should be set with a slight jiggle, not liquid.
10. Remove the pie from the oven and place it on a wire rack to cool completely, which will take about 2-3 hours.
Creamy and rich, the filling contrasts beautifully with the crunchy pecans. Serve it slightly warm with a scoop of vanilla ice cream for a classic pairing, or enjoy it chilled for a firmer slice that holds its shape perfectly.
Cornbread Dressing
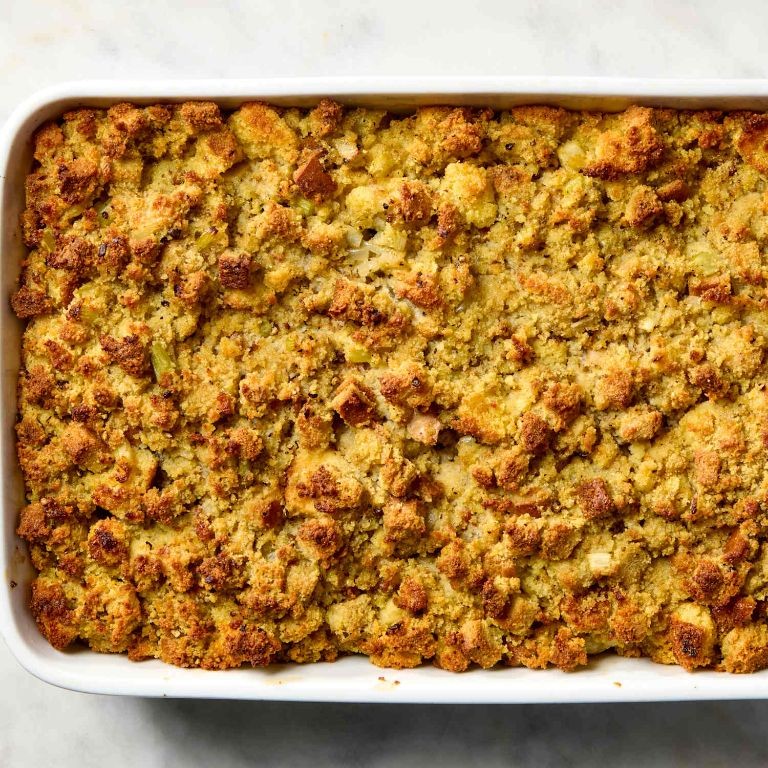
Ditch the boxed stuff—this cornbread dressing delivers homemade flavor with minimal fuss. Crisp edges give way to a soft, savory interior that pairs perfectly with roasted meats or stands strong on its own. Make it ahead and reheat for even deeper flavor development.
Ingredients
– 6 cups crumbled day-old cornbread (stale works best for absorption)
– 1 cup diced yellow onion (½-inch pieces)
– 1 cup diced celery (½-inch pieces)
– 2 large eggs, beaten
– 2 cups chicken broth (low-sodium preferred)
– 4 tbsp unsalted butter (or olive oil for dairy-free)
– 1 tsp dried sage (rubbed between fingers before adding)
– ½ tsp black pepper (freshly cracked for best flavor)
– ½ tsp salt (adjust after tasting)
Instructions
1. Preheat oven to 375°F and grease a 9×13-inch baking dish with butter or cooking spray.
2. Melt 4 tbsp butter in a large skillet over medium heat until foaming subsides.
3. Add 1 cup diced onion and 1 cup diced celery to the skillet, stirring to coat in butter.
4. Sauté vegetables for 8-10 minutes until onions are translucent and celery is tender-crisp.
5. Transfer cooked vegetables to a large mixing bowl, scraping all butter from the skillet.
6. Add 6 cups crumbled cornbread to the bowl with vegetables.
7. Sprinkle 1 tsp dried sage, ½ tsp salt, and ½ tsp black pepper over the cornbread mixture.
8. Pour 2 cups chicken broth over the mixture and stir gently to combine.
9. Let mixture sit for 5 minutes to allow cornbread to absorb the broth.
10. Stir 2 beaten eggs into the dressing mixture until fully incorporated.
11. Transfer dressing to the prepared baking dish and spread evenly with a spatula.
12. Bake at 375°F for 35-40 minutes until top is golden brown and edges are crisp.
13. Let rest for 10 minutes before serving to allow dressing to set properly.
Lightly crispy on top with a moist, tender center, this dressing balances savory herbs with sweet cornbread notes. Leftovers reheat beautifully—crisp individual portions in a skillet for breakfast alongside eggs. For a festive twist, bake in muffin tins for single-serving portions that develop extra crusty edges.
Brussels Sprouts with Bacon
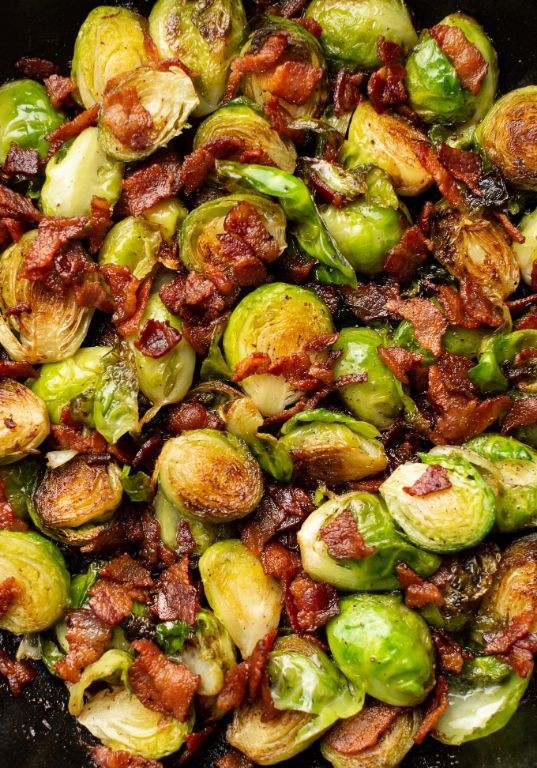
Many home cooks overlook Brussels sprouts, but pairing them with crispy bacon transforms this humble vegetable into a crave-worthy side dish. Mastering this recipe requires just a few ingredients and straightforward techniques. The result is perfectly caramelized sprouts with smoky, savory bacon in every bite.
Ingredients
– 1 lb Brussels sprouts, trimmed and halved (choose similar-sized sprouts for even cooking)
– 4 slices thick-cut bacon, chopped (regular bacon works but yields less rendered fat)
– 2 tbsp olive oil (or any neutral oil if bacon fat is insufficient)
– 2 cloves garlic, minced (fresh garlic preferred over powdered)
– 1 tbsp maple syrup (optional, for subtle sweetness)
– ½ tsp black pepper (adjust to preference)
– ¼ tsp salt (add after tasting, as bacon contributes saltiness)
Instructions
1. Preheat your oven to 400°F and line a baking sheet with parchment paper for easy cleanup.
2. Cook chopped bacon in a large skillet over medium heat for 6–8 minutes until crispy, stirring occasionally.
3. Use a slotted spoon to transfer bacon to a paper towel-lined plate, reserving 1 tablespoon of bacon fat in the skillet.
4. Toss halved Brussels sprouts with olive oil and reserved bacon fat in a large bowl, ensuring all cut surfaces are coated to promote browning.
5. Spread sprouts in a single layer on the prepared baking sheet, placing them cut-side down to maximize caramelization.
6. Roast at 400°F for 15 minutes until bottoms are golden brown and edges begin to crisp.
7. Remove baking sheet and flip sprouts using tongs for even cooking on both sides.
8. Sprinkle minced garlic evenly over sprouts, as adding garlic later prevents burning.
9. Return to oven and roast 5–7 more minutes until sprouts are tender when pierced with a fork.
10. Transfer roasted sprouts to a serving bowl and immediately toss with crispy bacon, maple syrup (if using), black pepper, and salt.
Perfectly caramelized Brussels sprouts offer a satisfying crisp-tender texture against smoky bacon bits. The optional maple syrup adds a subtle sweetness that balances the savory notes beautifully. Serve immediately alongside roasted chicken or fold into grain bowls for a hearty meal.
Glazed Carrots with Honey
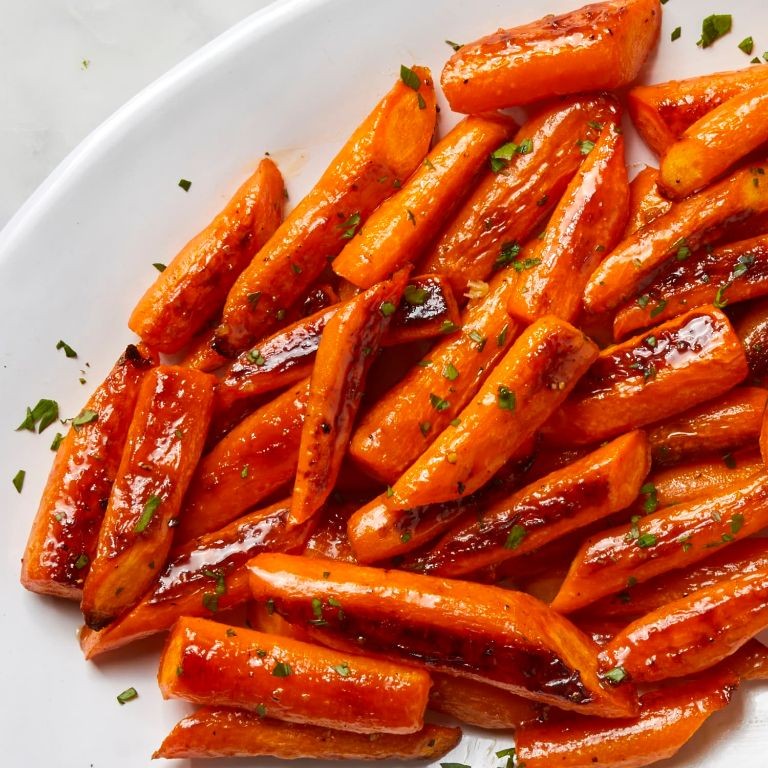
These glazed carrots transform a simple side into something special with minimal effort. They caramelize beautifully while keeping their tender bite. You’ll love how the honey glaze clings to each piece.
Ingredients
– 1 lb carrots, peeled and sliced into 1/2-inch rounds (uniform size for even cooking)
– 2 tbsp unsalted butter (or olive oil for dairy-free)
– 2 tbsp honey (adjust for sweetness preference)
– 1/4 cup water (helps steam carrots initially)
– 1/2 tsp salt (enhances natural sweetness)
– 1/4 tsp black pepper (freshly ground preferred)
– 1 tbsp fresh parsley, chopped (optional garnish)
Instructions
1. Place carrots in a large skillet in a single layer.
2. Add butter, honey, water, salt, and pepper to the skillet.
3. Bring mixture to a boil over medium-high heat, then immediately reduce to medium.
4. Cover skillet and simmer for 8 minutes until carrots are fork-tender but still firm.
5. Remove lid and increase heat to medium-high to evaporate remaining liquid.
6. Cook uncovered for 4-6 minutes, stirring occasionally, until liquid reduces to a thick glaze.
7. Continue cooking for 2-3 more minutes until carrots develop golden-brown spots.
8. Remove from heat and toss with chopped parsley if using.
9. Serve immediately while hot.
Sweet caramelized edges contrast with the tender interior, creating wonderful texture variation. The honey glaze intensifies the carrots’ natural sweetness without being cloying. Try serving them alongside roasted chicken or stirring into grain bowls for a colorful, flavorful addition.
Baked Macaroni and Cheese
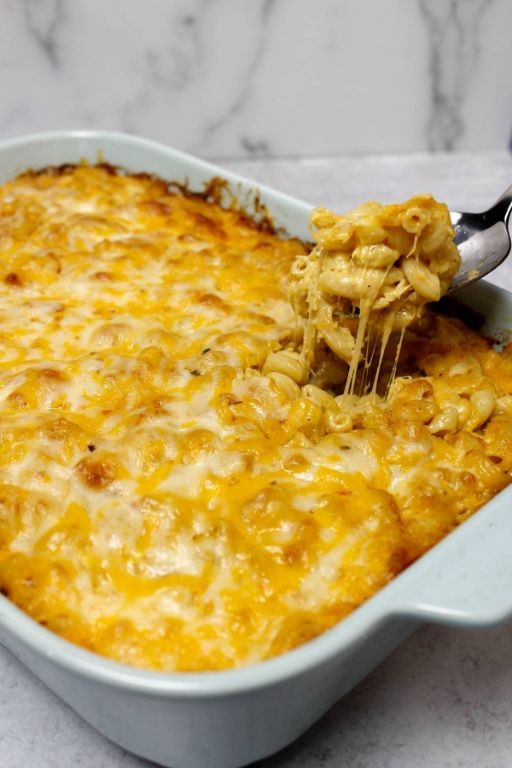
Everyone needs a reliable baked mac and cheese recipe. This version delivers creamy comfort with a crispy, golden top. Expect rich flavor and perfect texture every time.
Ingredients
– 1 lb elbow macaroni
– 4 tbsp unsalted butter
– 1/4 cup all-purpose flour
– 3 cups whole milk, warmed
– 1 tsp dry mustard
– 1/2 tsp paprika
– 1/2 tsp garlic powder
– 4 cups shredded sharp cheddar cheese, divided
– 1 cup panko breadcrumbs
– 1/4 cup grated Parmesan cheese
– 1 tbsp olive oil
– Salt to taste
Instructions
1. Preheat oven to 375°F.
2. Bring a large pot of salted water to a rolling boil.
3. Add elbow macaroni and cook for 7 minutes until al dente.
4. Drain pasta thoroughly and set aside.
5. Melt butter in a large saucepan over medium heat.
6. Whisk in flour and cook for 1 minute until golden.
7. Gradually whisk in warm milk until smooth.
8. Cook sauce for 5 minutes, stirring constantly, until thickened.
9. Remove saucepan from heat.
10. Stir in dry mustard, paprika, and garlic powder.
11. Add 3 cups cheddar cheese and stir until melted.
12. Season cheese sauce with salt to taste.
13. Combine cooked macaroni and cheese sauce in the pot.
14. Transfer macaroni mixture to a 9×13-inch baking dish.
15. Sprinkle remaining 1 cup cheddar cheese evenly over top.
16. Mix panko breadcrumbs, Parmesan, and olive oil in a small bowl.
17. Spread breadcrumb mixture over the cheese layer.
18. Bake for 25 minutes until bubbly and golden brown.
19. Let rest for 10 minutes before serving.
Creamy interior contrasts beautifully with the crunchy topping. The sharp cheddar provides tangy depth that balances the rich sauce. Try serving alongside crisp green salad or topping with crispy bacon bits for extra texture.
Deviled Eggs
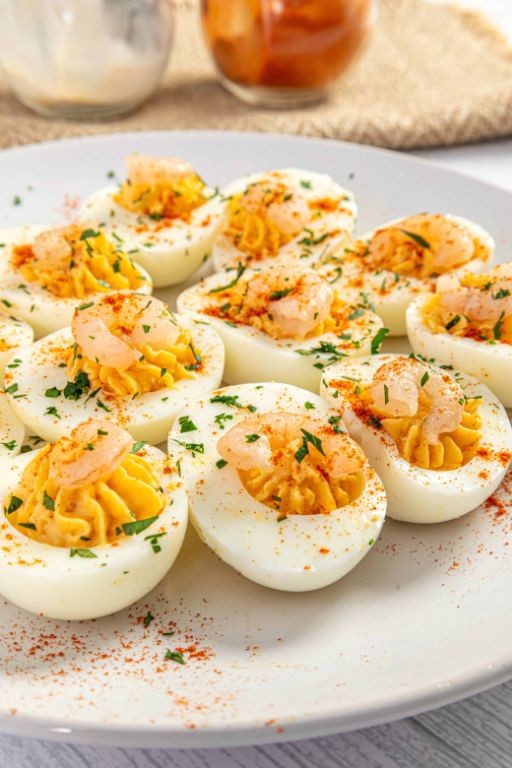
Kick off any gathering with these classic deviled eggs. Perfectly creamy filling pairs with that signature tang. They disappear fast, so make extra.
Ingredients
– 6 large eggs
– 1/4 cup mayonnaise
– 1 tsp yellow mustard
– 1 tsp white vinegar
– 1/8 tsp paprika, plus more for garnish
– Salt, to season
Instructions
1. Place 6 large eggs in a single layer in a saucepan.
2. Cover eggs with cold water by 1 inch.
3. Bring water to a rolling boil over high heat.
4. Immediately remove pan from heat and cover with a tight-fitting lid.
5. Let eggs stand in hot water for 12 minutes exactly.
6. Transfer eggs to an ice water bath using a slotted spoon.
7. Cool eggs for 15 minutes until completely cold to prevent rubbery whites.
8. Tap each egg gently on counter to crack the shell all over.
9. Peel eggs under cool running water to help remove shell cleanly.
10. Slice eggs in half lengthwise with a sharp knife.
11. Carefully pop out yolks into a medium bowl using your fingers.
12. Arrange empty egg white halves on a serving platter.
13. Mash yolks thoroughly with a fork until no large chunks remain.
14. Add 1/4 cup mayonnaise, 1 tsp yellow mustard, and 1 tsp white vinegar.
15. Mix vigorously until completely smooth and creamy.
16. Season filling with salt until properly balanced.
17. Spoon or pipe filling into egg white cavities using a piping bag for neat presentation.
18. Sprinkle each egg with paprika for color and mild smokiness.
19. Chill deviled eggs for 30 minutes before serving to allow flavors to meld.
Velvety smooth filling contrasts with firm egg whites for perfect texture balance. The vinegar and mustard provide bright acidity that cuts through the rich mayonnaise. Serve them on a bed of microgreens or top with crispy bacon bits for extra crunch.
Spiced Roasted Nuts
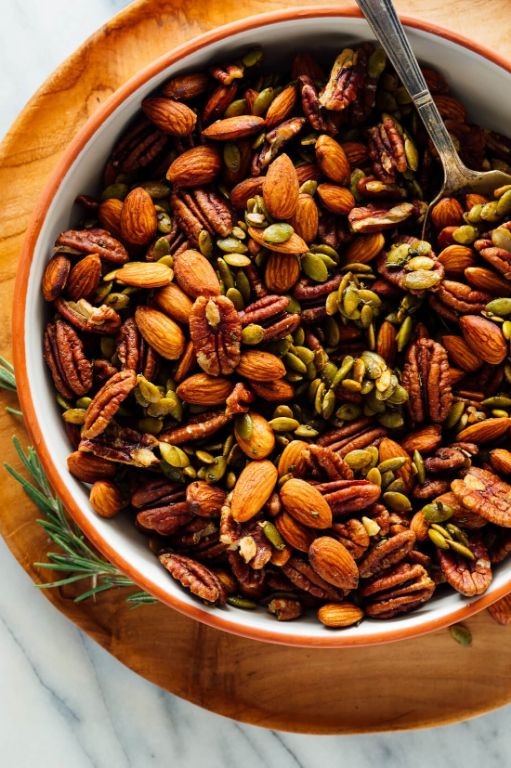
Grab these spiced roasted nuts when you need a quick snack that packs serious flavor. They come together in minutes with pantry staples and deliver that perfect sweet-savory crunch. This recipe scales easily for parties or gifts.
Ingredients
– 2 cups mixed raw nuts (almonds, pecans, walnuts), or any combination you prefer
– 2 tbsp olive oil, or any neutral oil
– 2 tbsp maple syrup
– 1 tsp smoked paprika
– 1/2 tsp cayenne pepper, adjust to taste
– 1/2 tsp garlic powder
– 1 tsp kosher salt
Instructions
1. Preheat your oven to 325°F and line a baking sheet with parchment paper.
2. Combine all nuts in a medium mixing bowl.
3. Drizzle olive oil over the nuts and toss until evenly coated.
4. Add maple syrup and toss again to coat all nuts.
5. Sprinkle smoked paprika, cayenne pepper, garlic powder, and kosher salt over the nut mixture.
6. Toss thoroughly until spices are evenly distributed, using a spatula to scrape the bowl.
7. Spread nuts in a single layer on the prepared baking sheet.
8. Roast for 15-18 minutes, stirring halfway through for even browning.
9. Remove from oven when nuts are fragrant and lightly browned.
10. Let nuts cool completely on the baking sheet, about 20 minutes, to crisp up.
11. Transfer cooled nuts to an airtight container. Very satisfying with their crispy texture and smoky-sweet heat, these nuts make excellent salad toppers or cocktail companions. Try crumbling them over vanilla ice cream for an unexpected dessert twist.
Maple-Glazed Ham
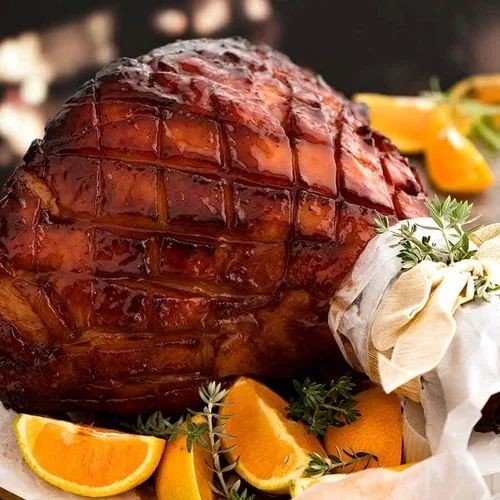
Glazed ham transforms holiday meals with minimal effort. This maple version balances sweet and savory perfectly. Follow these precise steps for impressive results.
Ingredients
– 1 (8-10 lb) fully cooked bone-in ham
– 1 cup pure maple syrup (not pancake syrup)
– 1/4 cup Dijon mustard
– 2 tbsp apple cider vinegar
– 1 tsp ground cloves (optional for extra spice)
– 1/2 tsp black pepper (freshly ground preferred)
Instructions
1. Preheat oven to 325°F and position rack in lower third.
2. Place ham cut-side down in roasting pan with 1 cup water in bottom.
3. Score ham surface in 1-inch diamond pattern, cutting 1/4-inch deep.
4. Whisk maple syrup, Dijon mustard, apple cider vinegar, cloves, and black pepper in bowl.
5. Brush half of glaze evenly over ham surface, getting into scored lines.
6. Cover ham tightly with foil and bake for 1 hour 30 minutes.
7. Remove foil and brush with remaining glaze.
8. Increase oven temperature to 400°F and bake uncovered for 20 minutes.
9. Check internal temperature reaches 140°F using instant-read thermometer.
10. Transfer ham to cutting board and rest for 15 minutes before slicing.
11. Pour pan juices into saucepan and simmer for 5 minutes to create sauce.
12. Slice ham against the grain and serve with reduced pan sauce. Beyond the glossy exterior lies tender, juicy meat with caramelized edges. The maple glaze creates a sticky-sweet crust that contrasts beautifully with the salty ham. Serve thick slices alongside roasted sweet potatoes or use leftovers for next-day sandwiches.
Warm Mulled Cider

You’ve probably had hot apple cider, but mulled cider takes it to another level. This spiced version transforms simple apple cider into a complex, aromatic drink perfect for chilly evenings. It’s surprisingly easy to make and fills your home with incredible holiday scents.
Ingredients
– 8 cups apple cider (fresh or bottled both work)
– 2 cinnamon sticks (or 1 tbsp ground cinnamon)
– 1 tsp whole cloves (use a spice bag for easy removal)
– 1 orange, sliced into rounds (unpeeled for more flavor)
– 1/4 cup brown sugar (adjust sweetness to preference)
– 1/4 tsp ground nutmeg (freshly grated tastes best)
Instructions
1. Pour 8 cups of apple cider into a large saucepan.
2. Add 2 cinnamon sticks and 1 teaspoon of whole cloves to the cider.
3. Slice 1 orange into 1/4-inch thick rounds and add them to the saucepan.
4. Measure 1/4 cup of brown sugar and stir it into the mixture.
5. Sprinkle 1/4 teaspoon of ground nutmeg over the cider.
6. Heat the saucepan over medium heat until the cider reaches 180°F, about 8-10 minutes.
7. Reduce heat to low and maintain temperature between 160-180°F for 20 minutes.
8. Stir the cider every 5 minutes to distribute spices evenly.
9. Remove the saucepan from heat when the cider is deeply aromatic and spices have infused.
10. Strain the cider through a fine-mesh sieve to remove solid spices and orange slices.
11. Ladle the warm cider into mugs immediately.
The finished cider has a smooth texture with subtle spice particles that settle at the bottom. Its flavor balances sweet apple notes with warm cinnamon and citrus undertones. Serve it in heatproof glasses with an extra cinnamon stick for stirring, or spike it with bourbon for an adult version.
Summary
Ultimately, these 20 classic recipes capture the heart of Thanksgiving—warm, comforting, and made for sharing. We hope you find inspiration to create your own delicious traditions! Give these recipes a try, then leave a comment with your favorites and share this roundup on Pinterest. Happy cooking!