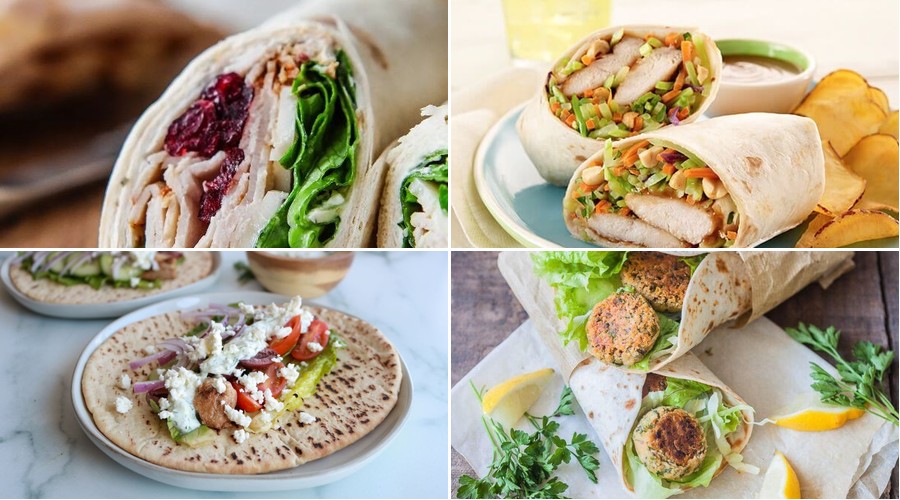
Ready to revolutionize your lunch routine? We’ve gathered 20 delicious wrap recipes perfect for busy days. From zesty chicken to fresh veggie options, these easy-to-make wraps are packed with flavor and designed for on-the-go convenience. Say goodbye to boring lunches and hello to tasty, portable meals that’ll keep you energized all day. Dive in and find your new favorite!
Grilled Chicken Caesar Wrap
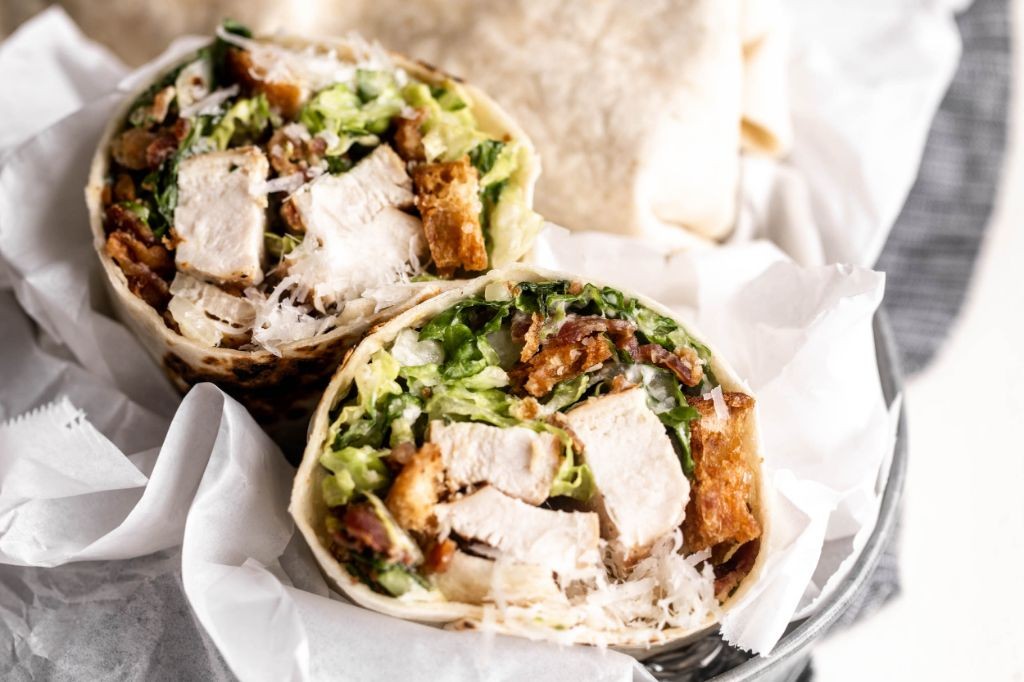
Crisp romaine and grilled chicken come together in this handheld Caesar wrap that’s perfect for lunch on the go. I love making these ahead for busy weekdays when I need something satisfying but don’t have time to cook. The combination of creamy dressing and smoky chicken never gets old.
Ingredients
– 1 lb boneless, skinless chicken breasts (I always pound them to an even thickness for quicker, more even cooking)
– 2 tbsp extra virgin olive oil (my go-to for grilling)
– 1 tsp garlic powder
– 1/2 tsp black pepper
– 1/2 tsp salt
– 1/2 cup Caesar dressing (I prefer the creamy bottled kind for convenience)
– 4 large flour tortillas (10-inch size works best for easy rolling)
– 2 cups chopped romaine lettuce (make sure it’s thoroughly dried so your wrap doesn’t get soggy)
– 1/4 cup grated Parmesan cheese (freshly grated melts better)
Instructions
1. Preheat your grill to medium-high heat (about 400°F).
2. Brush both sides of chicken breasts with olive oil.
3. Season chicken evenly with garlic powder, black pepper, and salt.
4. Grill chicken for 6-7 minutes per side until internal temperature reaches 165°F.
5. Remove chicken from grill and let rest for 5 minutes before slicing.
6. Slice grilled chicken into thin strips against the grain.
7. Warm tortillas in a dry skillet for 15 seconds per side to make them pliable.
8. Spread 2 tablespoons of Caesar dressing evenly over each tortilla.
9. Arrange romaine lettuce in a horizontal line across the center of each tortilla.
10. Divide sliced chicken evenly among the four tortillas.
11. Sprinkle Parmesan cheese over the chicken on each tortilla.
12. Fold the bottom edge of each tortilla up over the filling.
13. Fold the sides inward tightly.
14. Roll each wrap away from you, applying gentle pressure to keep it compact.
15. Slice each wrap in half diagonally before serving.
Every bite delivers that satisfying crunch from the romaine against the tender, smoky chicken. The creamy Caesar dressing ties everything together without making the tortilla soggy. Try serving these with sweet potato fries or a simple fruit salad for a complete meal that feels anything but basic.
Spicy Black Bean and Avocado Wrap

You’ve probably stared into your pantry wondering what to make with those canned black beans. This spicy black bean and avocado wrap comes together in minutes and delivers serious flavor. Your lunch routine just got a major upgrade.
Ingredients
– 1 large flour tortilla (I always warm mine slightly for better flexibility)
– 1 cup canned black beans, rinsed and drained (this removes excess sodium)
– 1/2 ripe avocado, sliced (choose one that yields gently to pressure)
– 1/4 cup shredded Monterey Jack cheese (I prefer the melty quality of this over cheddar)
– 2 tbsp plain Greek yogurt (it adds creaminess without overwhelming tang)
– 1 tbsp hot sauce (I keep Cholula on hand for its balanced heat)
– 1 tsp lime juice, freshly squeezed (bottled just doesn’t compare)
– 1/4 tsp ground cumin (toasting whole seeds and grinding them elevates the flavor)
– 1/4 tsp chili powder
– 1 tbsp chopped fresh cilantro (stems removed for better texture)
Instructions
1. Place the flour tortilla on a clean, dry surface.
2. In a small bowl, combine the black beans, Greek yogurt, hot sauce, lime juice, cumin, and chili powder.
3. Mash the bean mixture gently with a fork until about half the beans are broken down—this creates a spreadable texture while maintaining some whole beans for bite.
4. Spread the bean mixture evenly over the center of the tortilla, leaving a 2-inch border around the edges.
5. Arrange the avocado slices in a single layer over the bean mixture.
6. Sprinkle the shredded Monterey Jack cheese evenly over the avocado.
7. Scatter the chopped cilantro over the cheese layer.
8. Fold the bottom edge of the tortilla up over the filling, then fold in the sides tightly.
9. Roll the wrap away from you, applying gentle pressure to create a compact cylinder.
10. Heat a non-stick skillet over medium heat for 2 minutes until a drop of water sizzles immediately.
11. Place the wrap seam-side down in the dry skillet and cook for 3 minutes until golden brown and lightly crisped.
12. Flip the wrap carefully using a spatula and cook for another 2 minutes until the second side is golden and the cheese has melted.
13. Transfer the wrap to a cutting board and let it rest for 1 minute—this allows the fillings to set for cleaner slicing.
14. Cut the wrap in half diagonally with a sharp serrated knife to prevent squishing.
Creamy avocado balances the spiced beans, while the crisped tortilla provides satisfying texture. Serve these wraps immediately with extra hot sauce for dipping, or pack them whole for a lunch that travels well without getting soggy.
Mediterranean Hummus and Veggie Wrap
Munching on this Mediterranean hummus and veggie wrap feels like a sunny escape. Packed with fresh vegetables and creamy hummus, it’s a quick, satisfying lunch that never disappoints. Make it ahead for busy days or slice it into pinwheels for a party appetizer.
Ingredients
– 1 large whole wheat tortilla (I always warm it slightly for flexibility)
– ½ cup hummus (go for roasted garlic flavor if you have it)
– ½ cup thinly sliced cucumber (I prefer English cucumbers for fewer seeds)
– ½ cup shredded carrots (pre-shredded saves time)
– ¼ cup crumbled feta cheese (sheep’s milk feta adds tang)
– 2 tbsp chopped Kalamata olives (pitted, so you don’t bite into a surprise)
– 1 tbsp extra virgin olive oil (my go-to for drizzling)
– 1 tsp dried oregano (rubbed between your palms to wake up the flavor)
Instructions
1. Lay the whole wheat tortilla flat on a clean cutting board.
2. Spread the hummus evenly over the entire surface, leaving a 1-inch border around the edges.
3. Layer the thinly sliced cucumber in a single row across the center third of the tortilla.
4. Sprinkle the shredded carrots evenly over the cucumber layer.
5. Scatter the crumbled feta cheese over the carrots.
6. Distribute the chopped Kalamata olives evenly across the fillings.
7. Drizzle the extra virgin olive oil in a zigzag pattern over the assembled ingredients.
8. Sprinkle the dried oregano evenly over the top.
9. Fold the two shorter sides of the tortilla inward by about 1 inch to contain the fillings.
10. Tightly roll the tortilla away from you, starting from the edge closest to you, applying gentle pressure as you go.
11. Wrap the rolled tortilla snugly in parchment paper, twisting the ends to secure it.
12. Slice the wrap in half diagonally with a sharp serrated knife for clean cuts.
Perfectly portable, this wrap offers a satisfying crunch from the fresh veggies against the creamy hummus. The salty feta and briny olives balance the mild sweetness of the carrots. For a fun twist, slice it into 1-inch rounds and secure with toothpicks for easy party bites.
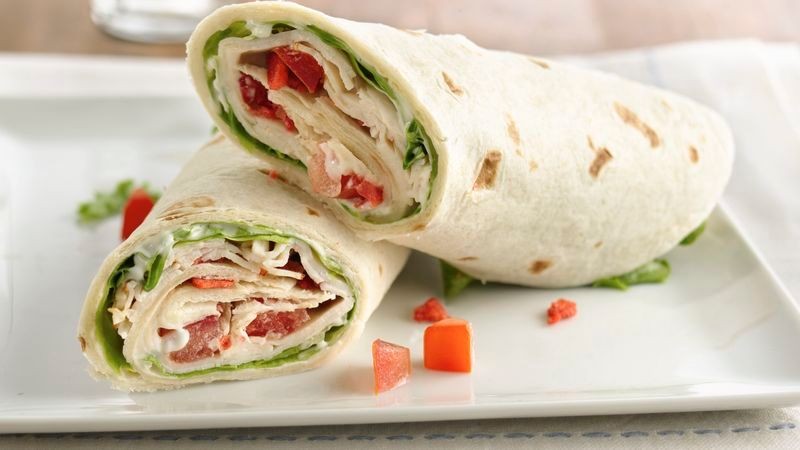
Turkey and Cranberry Cream Cheese Wrap
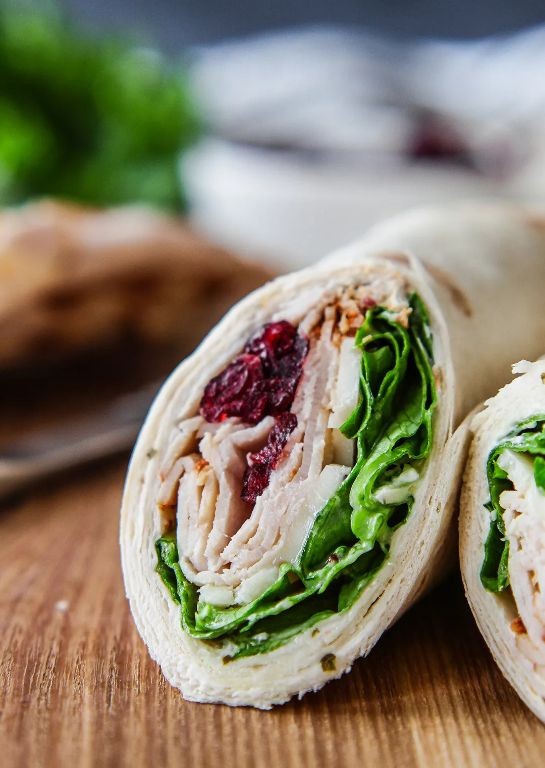
Zesty and satisfying, these turkey and cranberry cream cheese wraps make for the perfect quick lunch or light dinner. They come together in minutes but deliver big on flavor and texture. I love how the creamy, tangy, and savory elements play off each other.
Ingredients
- 4 large flour tortillas (I always warm them slightly for better flexibility)
- 8 oz cream cheese, softened (room temp spreads so much easier)
- 1/2 cup whole-berry cranberry sauce (the kind with whole berries gives the best texture)
- 12 oz sliced roasted turkey breast (I prefer the thicker deli slices for substance)
- 2 cups fresh spinach leaves (rinsed and thoroughly dried to prevent sogginess)
- 1/4 cup chopped pecans (toasted first for maximum crunch)
Instructions
- Lay one flour tortilla flat on a clean work surface.
- Spread 2 oz of softened cream cheese evenly over the entire tortilla, leaving a 1-inch border around the edges.
- Spoon 2 tbsp of whole-berry cranberry sauce in a horizontal line across the center of the tortilla.
- Layer 3 oz of sliced roasted turkey breast evenly over the cranberry sauce.
- Place 1/2 cup of fresh spinach leaves over the turkey in an even layer.
- Sprinkle 1 tbsp of chopped pecans evenly over the spinach.
- Fold the bottom edge of the tortilla up over the filling, then fold in the sides tightly.
- Roll the wrap away from you, applying gentle pressure to create a tight cylinder.
- Repeat steps 1-8 with remaining tortillas and ingredients.
- Cut each wrap in half diagonally with a sharp serrated knife for clean cuts.
Ultimate texture comes from the contrast between creamy filling and crunchy pecans. The sweet-tart cranberry cuts through the rich cream cheese beautifully. Serve these chilled for a refreshing lunch or pack them for picnics—they travel exceptionally well without getting soggy.
Thai Peanut Chicken Wrap
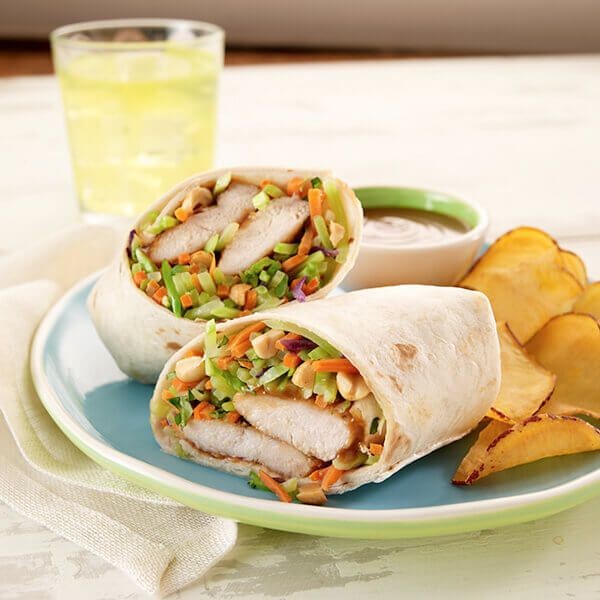
You’ve probably tried every chicken wrap variation out there, but this Thai peanut version will make your lunch rotation exciting again. The creamy peanut sauce and fresh veggies create a perfect balance in every bite.
Ingredients
- 2 large flour tortillas – I prefer the burrito-sized ones for maximum filling capacity
- 1 lb chicken breast, sliced thin – cutting against the grain ensures tenderness
- 1/2 cup creamy peanut butter – the natural kind gives better flavor than processed
- 2 tbsp soy sauce – low sodium works perfectly here
- 1 tbsp rice vinegar – this adds the essential tang
- 1 tsp sesame oil – just a splash makes all the difference
- 1/4 tsp red pepper flakes – adjust based on your heat preference
- 1 cup shredded carrots – I buy pre-shredded to save time
- 1/2 cup sliced cucumber – English cucumbers have fewer seeds
- 1/4 cup chopped cilantro – fresh is non-negotiable for that bright flavor
- 2 tbsp vegetable oil – for that perfect sear on the chicken
Instructions
- Whisk together peanut butter, soy sauce, rice vinegar, sesame oil, and red pepper flakes in a small bowl until smooth. Tip: If the sauce seems too thick, add 1 tablespoon of warm water to thin it out.
- Heat vegetable oil in a large skillet over medium-high heat until it shimmers, about 2 minutes.
- Add sliced chicken to the hot skillet in a single layer, cooking for 4-5 minutes per side until golden brown and internal temperature reaches 165°F.
- Remove chicken from skillet and toss with 3/4 of the peanut sauce until thoroughly coated.
- Warm tortillas in a dry skillet for 30 seconds per side or microwave between damp paper towels for 20 seconds. Tip: Warming makes them more pliable and less likely to tear.
- Spread remaining peanut sauce evenly over the center of each tortilla, leaving 2-inch borders on all sides.
- Divide the sauced chicken evenly between the two tortillas, arranging it in a horizontal line down the center.
- Top chicken with shredded carrots, sliced cucumber, and chopped cilantro. Tip: Keep fillings centered to prevent spillage when rolling.
- Fold the bottom edge of each tortilla up over the filling, then fold in the sides tightly.
- Roll each wrap away from you, applying gentle pressure to maintain a tight cylinder.
- Slice each wrap in half diagonally and serve immediately.
But the real magic happens when you take that first bite – the creamy peanut sauce clings to every ingredient while the fresh veggies provide satisfying crunch. These wraps travel beautifully for lunch, though I sometimes add extra chili flakes for those who like more heat.
Buffalo Chicken Ranch Wrap

Crisp, creamy, and packed with flavor, this buffalo chicken ranch wrap delivers that perfect game-day satisfaction without the fuss. You’ll love how the spicy buffalo sauce balances with cool ranch dressing in every bite. It’s my go-to lunch when I need something hearty but don’t want to spend hours in the kitchen.
Ingredients
– 2 large flour tortillas (I always warm them slightly first for better flexibility)
– 1 cup cooked shredded chicken (rotisserie chicken saves so much time)
– 1/4 cup buffalo sauce (Frank’s RedHot is my absolute favorite for authentic flavor)
– 1/4 cup ranch dressing (I prefer the bottled kind for consistency)
– 1 cup shredded iceberg lettuce (the crunch is essential)
– 1/2 cup shredded cheddar cheese (sharp cheddar gives the best melt)
– 2 tbsp unsalted butter (melted butter helps the tortillas crisp up beautifully)
Instructions
1. Preheat a large non-stick skillet over medium heat (350°F surface temperature).
2. In a medium bowl, combine shredded chicken and buffalo sauce until evenly coated.
3. Warm tortillas in the microwave for 15 seconds to make them more pliable.
4. Lay one tortilla flat and spread 2 tablespoons of ranch dressing evenly across the center.
5. Top with half of the buffalo chicken mixture, spreading it in a horizontal line.
6. Add half of the shredded lettuce and half of the cheddar cheese.
7. Fold the bottom edge of the tortilla up over the filling, then fold in the sides.
8. Roll tightly away from you to create a secure wrap.
9. Brush the outside of the wrap lightly with melted butter.
10. Place the wrap seam-side down in the preheated skillet.
11. Cook for 3-4 minutes until golden brown and crisp.
12. Flip carefully using a spatula and cook for another 3-4 minutes until both sides are evenly browned.
13. Repeat steps 4-12 with the second tortilla and remaining ingredients.
14. Remove wraps from skillet and let rest for 2 minutes before cutting.
The warm, crispy tortilla gives way to that signature buffalo kick tempered by cool ranch creaminess. I sometimes serve these quartered with extra ranch for dipping, or pack them whole for a mess-free lunch on the go.
Greek Gyro-Style Wrap with Tzatziki
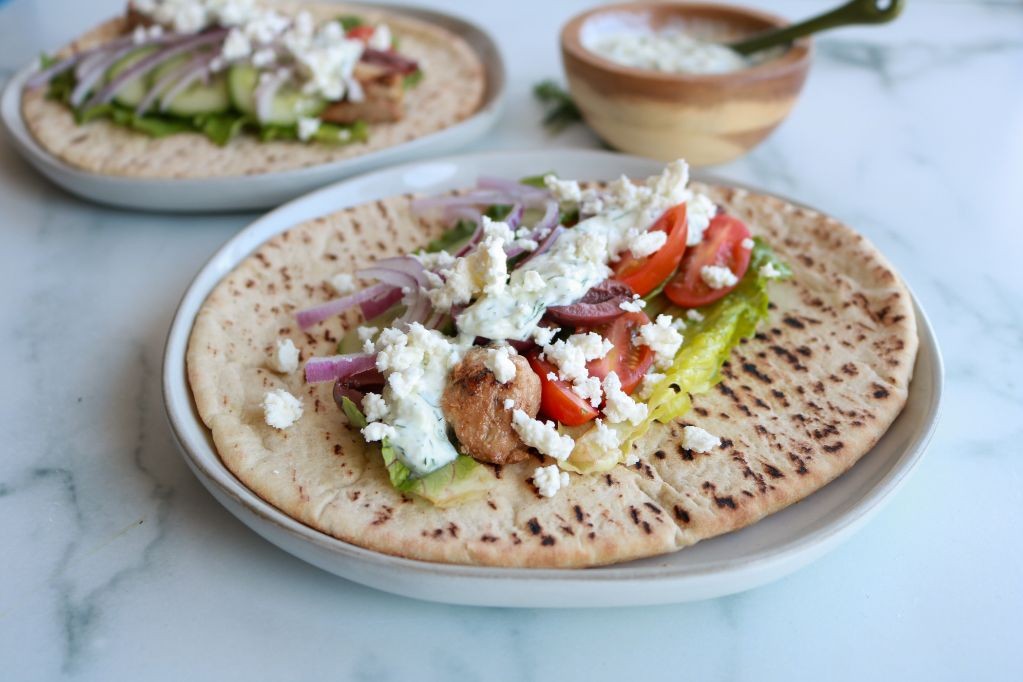
Making Greek gyro-style wraps at home is easier than you think. My version skips the vertical rotisserie but delivers all that savory-spiced flavor. Marinate the meat overnight for maximum tenderness.
Ingredients
- 1 lb boneless lamb shoulder, thinly sliced (I ask my butcher to slice it paper-thin for me)
- 2 tbsp extra virgin olive oil, my go-to for Mediterranean dishes
- 2 tsp dried oregano, preferably Greek variety for authentic flavor
- 1 tsp garlic powder, the quick alternative to fresh when marinating overnight
- 4 large flour tortillas, I like the burrito-size for generous wrapping
- 1 cup plain Greek yogurt, full-fat version creates the creamiest tzatziki
- 1 medium cucumber, peeled and seeded (I remove the watery center for thicker sauce)
- 1 tbsp fresh lemon juice, freshly squeezed makes all the difference
- 1 clove garlic, minced (use a microplane for super fine texture)
Instructions
- Combine lamb slices, olive oil, oregano, and garlic powder in a resealable bag, massaging thoroughly to coat every piece.
- Refrigerate the marinating lamb for at least 4 hours, though overnight develops deeper flavor penetration.
- Grate the peeled cucumber using the large holes of a box grater into a clean kitchen towel.
- Squeeze the grated cucumber tightly in the towel to remove excess liquid—this prevents watery tzatziki.
- Mix the drained cucumber with Greek yogurt, lemon juice, and minced garlic in a medium bowl.
- Season the tzatziki with ½ tsp salt and refrigerate for 30 minutes to allow flavors to meld.
- Heat a large cast-iron skillet over medium-high heat until droplets of water sizzle immediately.
- Cook the marinated lamb in a single layer for 3-4 minutes per side until browned and cooked through.
- Warm tortillas directly over a gas flame for 15 seconds per side, or in a dry skillet until pliable.
- Spread ¼ cup tzatziki down the center of each warm tortilla, leaving 2-inch borders at the edges.
- Divide the cooked lamb evenly among the tortillas, arranging it over the tzatziki layer.
- Fold the bottom edge of each tortilla up over the filling, then roll tightly from left to right.
Crisp-edged lamb contrasts beautifully with the cool, creamy tzatziki in every bite. Consider serving these wrapped in parchment paper for easy handling during casual gatherings. The garlicky yogurt sauce cuts through the rich meat perfectly.
BBQ Pulled Pork and Coleslaw Wrap
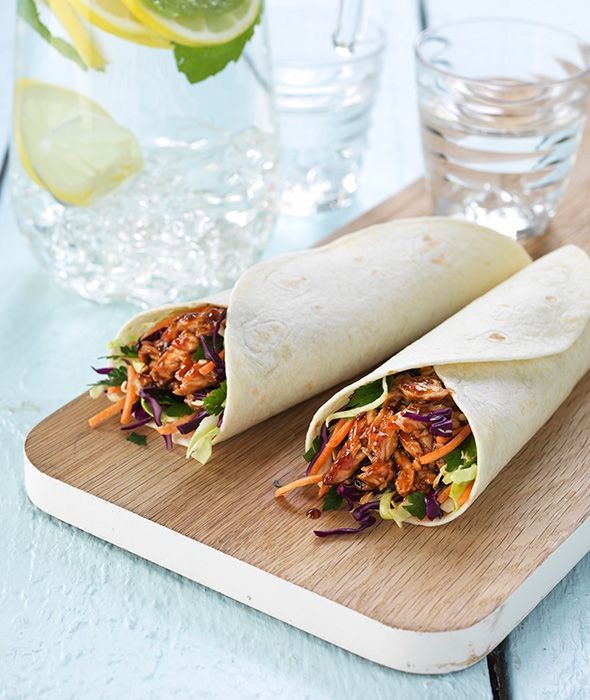
A perfect lunch solution that transforms leftover pulled pork into something spectacular. These wraps combine smoky, tender meat with crisp, tangy slaw for a handheld meal that satisfies every craving. They come together in minutes but taste like you spent hours in the kitchen.
Ingredients
– 2 cups leftover BBQ pulled pork (I always make extra for this purpose)
– 1 cup pre-made coleslaw mix (the crunchy cabbage-carrot blend saves so much time)
– 1/2 cup coleslaw dressing (I prefer the creamy buttermilk style for richness)
– 4 large flour tortillas (10-inch size gives you the perfect wrap-to-filling ratio)
– 1/4 cup BBQ sauce (keep your favorite brand handy for extra sauciness)
– 2 tbsp butter, softened (room temperature spreads evenly without tearing)
Instructions
1. Warm the pulled pork in a microwave-safe bowl for 90 seconds at full power, stirring halfway through.
2. Spread 1/2 tablespoon of softened butter evenly across one side of each flour tortilla.
3. Heat a large skillet over medium heat until a drop of water sizzles immediately.
4. Place one tortilla butter-side down in the hot skillet and cook for 45 seconds until golden spots appear.
5. Flip the tortilla and immediately spoon 1/2 cup of warmed pulled pork in a horizontal line across the center.
6. Drizzle 1 tablespoon of BBQ sauce directly over the pulled pork using a squeeze bottle for precision.
7. In a separate bowl, combine coleslaw mix with coleslaw dressing, tossing until every strand is coated.
8. Place 1/4 cup of dressed coleslaw directly on top of the sauced pulled pork.
9. Fold the bottom edge of the tortilla up over the filling, then tightly roll from left to right to form a secure wrap.
10. Repeat steps 4-9 with remaining tortillas and filling components.
11. Cut each wrap diagonally across the middle to showcase the colorful layers inside.
The tender, warm pork contrasts beautifully with the cool, crunchy slaw in every bite. These wraps stay remarkably neat thanks to the double-fold technique, making them ideal for picnics or packed lunches. Try serving them with pickle spears and extra BBQ sauce for dipping to elevate the experience.
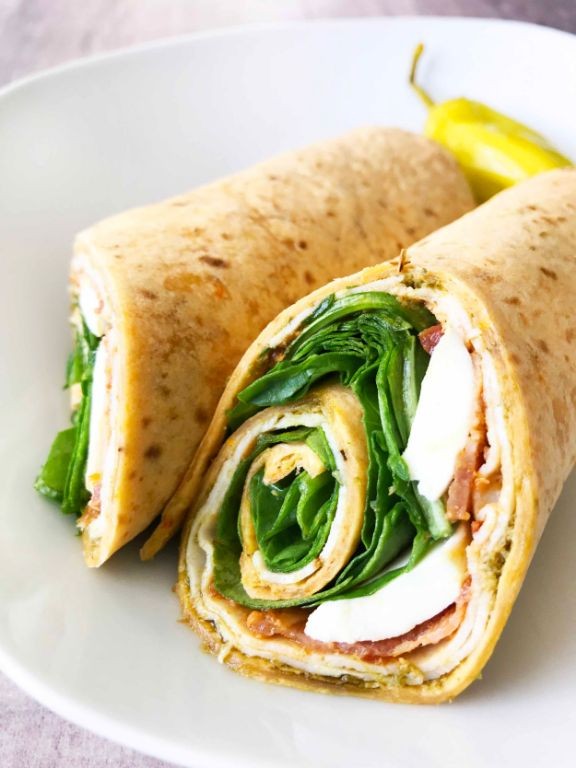
Caprese Wrap with Balsamic Glaze
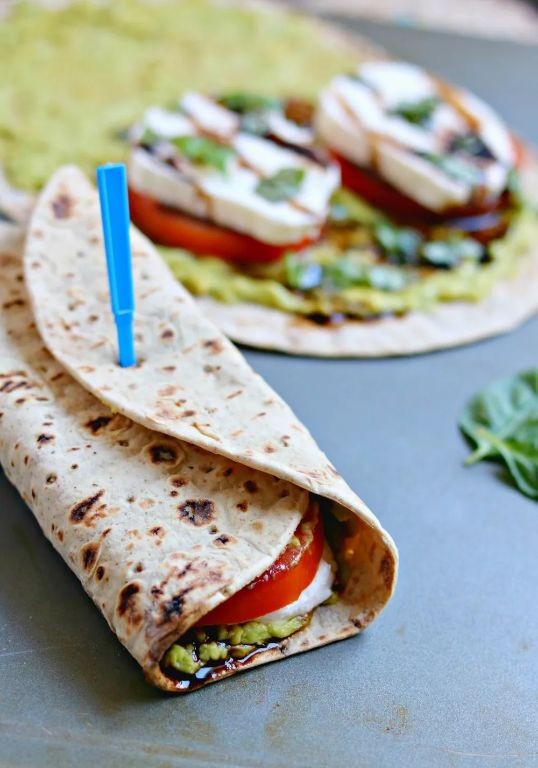
Mornings get hectic, but this wrap brings fresh flavors fast. Perfect for lunch prep or a quick dinner solution. It’s my go-to when tomatoes are at their peak.
Ingredients
– 2 large flour tortillas (I prefer the burrito-size for easier rolling)
– 8 oz fresh mozzarella cheese, sliced ¼-inch thick (get the good stuff packed in water)
– 2 medium ripe tomatoes, sliced ¼-inch thick (heirloom varieties add great color)
– 1 cup fresh basil leaves (tear them right before using for maximum aroma)
– 2 tbsp extra virgin olive oil (my everyday workhorse oil)
– 2 tbsp balsamic glaze (the thick, syrupy kind that clings to ingredients)
– ½ tsp kosher salt (I always use Diamond Crystal for better control)
– ¼ tsp freshly ground black pepper
Instructions
1. Lay two flour tortillas flat on a clean work surface.
2. Drizzle 1 tablespoon of extra virgin olive oil evenly over each tortilla.
3. Arrange 4 ounces of fresh mozzarella slices in a single layer across the center third of each tortilla.
4. Layer tomato slices over the mozzarella, slightly overlapping them.
5. Sprinkle ¼ teaspoon of kosher salt and ⅛ teaspoon of black pepper evenly over the tomatoes on each wrap.
6. Tear ½ cup of fresh basil leaves by hand and scatter over each assembly.
7. Drizzle 1 tablespoon of balsamic glaze in zigzag pattern over the fillings.
8. Fold the bottom edge of each tortilla up over the fillings, tucking it snugly.
9. Fold the left and right sides inward toward the center, creating an envelope shape.
10. Roll each wrap tightly away from you, applying even pressure to compact the ingredients.
11. Cut each wrap diagonally through the center at a 45-degree angle.
Zesty balsamic cuts through the creamy mozzarella while the basil provides fresh bursts in every bite. The tortilla holds everything together without getting soggy if eaten within two hours. Serve these wraps with extra glaze for dipping or add sliced avocado for extra creaminess.
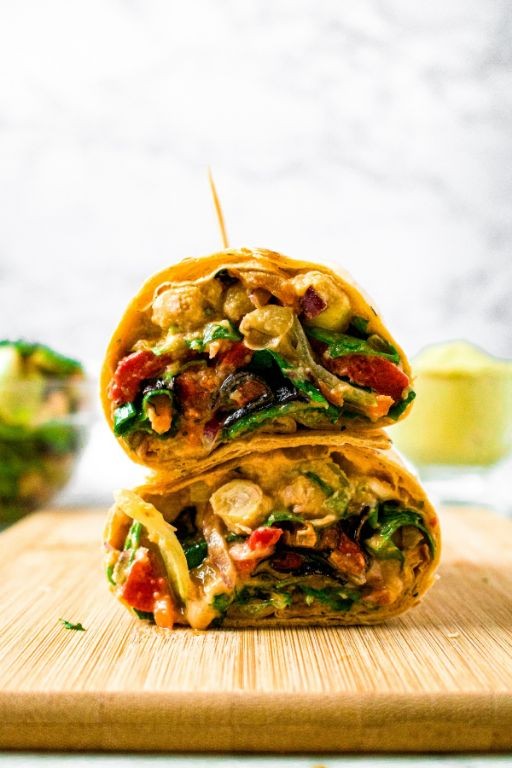
Southwest Chipotle Veggie Wrap

Tired of boring lunch options? This Southwest Chipotle Veggie Wrap delivers bold flavor in minutes. Perfect for meal prep or a quick weeknight dinner that actually satisfies.
Ingredients
– 1 large flour tortilla (I always warm mine slightly for better flexibility)
– 1/2 cup canned black beans, rinsed and drained (the liquid can make things soggy)
– 1/4 cup frozen corn, thawed (fresh works too if you have it)
– 1/4 red bell pepper, thinly sliced (I like the color contrast)
– 2 tbsp chipotle mayo (store-bought or homemade with 1 tbsp mayo + 1 tsp chipotle in adobo)
– 1/4 cup shredded Monterey Jack cheese (pepper Jack adds nice heat)
– 1 cup fresh spinach leaves (pack it in for extra greens)
– 1 tbsp olive oil (extra virgin is my go-to for better flavor)
Instructions
1. Heat olive oil in a skillet over medium-high heat until it shimmers, about 1 minute.
2. Add sliced red bell pepper and cook until slightly softened with char marks, 2-3 minutes.
3. Stir in black beans and corn, cooking until heated through, about 2 more minutes.
4. Warm tortilla in a dry skillet for 20 seconds per side or microwave for 15 seconds wrapped in a damp paper towel.
5. Spread chipotle mayo evenly across the center of the warmed tortilla, leaving 1-inch borders.
6. Layer spinach leaves over the mayo to create a moisture barrier against sogginess.
7. Spoon the vegetable mixture evenly over the spinach layer.
8. Sprinkle shredded cheese over the vegetables while they’re still warm to help it melt slightly.
9. Fold the bottom edge of the tortilla up over the filling, then fold in the sides tightly.
10. Roll the wrap away from you, applying gentle pressure to maintain a compact shape.
11. Cut the wrap diagonally in half for easier handling and visual appeal.
Just assembled, this wrap offers a satisfying crunch from the fresh vegetables against the creamy chipotle spread. The slight warmth helps the cheese melt into the bean mixture beautifully. Serve with extra chipotle mayo for dipping or pack it chilled for a lunch that travels well.
Tuna Salad and Spinach Wrap
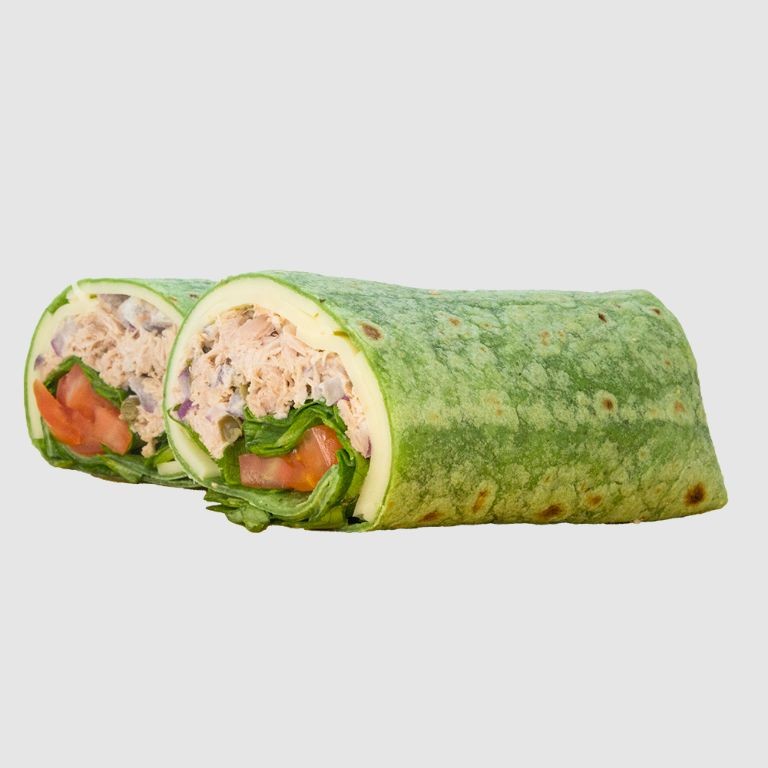
Bursting with fresh flavors and perfect for on-the-go lunches, this tuna salad wrap combines protein-packed tuna with crisp spinach in a soft tortilla. It comes together in minutes and keeps you satisfied for hours. I make this weekly when I need something quick yet nourishing.
Ingredients
– 2 (5 oz) cans solid white tuna in water, drained well (I prefer chunk light for better texture)
– 1/3 cup mayonnaise (Duke’s is my go-to for its tangy flavor)
– 1 tbsp lemon juice, freshly squeezed (bottled works in a pinch)
– 1/4 cup finely chopped red onion (soak in ice water for 5 minutes to reduce sharpness)
– 2 cups fresh baby spinach leaves (stems removed for better texture)
– 2 large flour tortillas, 10-inch size (I like Mission brand for their flexibility)
– 1/4 tsp black pepper, freshly ground
Instructions
1. Drain both cans of tuna thoroughly in a fine mesh strainer, pressing out excess liquid with a spoon.
2. Combine drained tuna, mayonnaise, lemon juice, chopped red onion, and black pepper in a medium bowl.
3. Mix ingredients with a fork until evenly combined, breaking up any large tuna chunks.
4. Lay both tortillas flat on a clean work surface.
5. Arrange 1 cup of spinach leaves in the center of each tortilla, leaving 2 inches bare at the edges.
6. Divide tuna salad mixture evenly between the two tortillas, spreading it over the spinach.
7. Fold the bottom edge of each tortilla up over the filling, then fold in both sides.
8. Roll each wrap tightly away from you, applying gentle pressure to compact the filling.
9. Cut each wrap in half diagonally with a sharp serrated knife to prevent tearing.
You’ll love the contrast between the creamy tuna salad and crisp spinach in every bite. The lemon brightens everything up without overpowering. Try serving these with pickle spears or carrot sticks for a complete lunch.
Falafel and Tahini Wrap
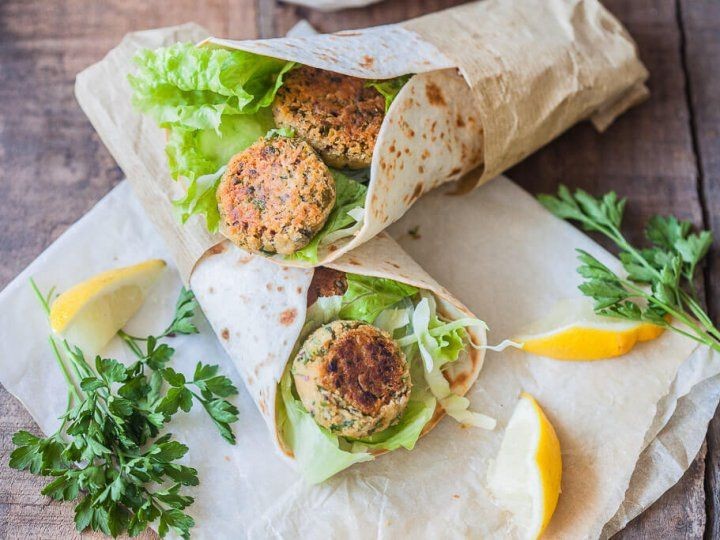
Bite into this crispy, protein-packed falafel wrap that comes together faster than takeout. Fresh herbs and warm spices make each mouthful vibrant and satisfying. This handheld meal is perfect for busy weeknights when you crave something wholesome yet effortless.
Ingredients
– 1 (15-oz) can chickpeas, drained and rinsed—I give them a good pat dry to prevent soggy falafel
– 1/4 cup fresh parsley, packed—don’t skimp, it adds a bright, grassy kick
– 2 cloves garlic, minced—fresh is best for that pungent zing
– 1 tsp ground cumin—toasted cumin seeds, if you have them, deepen the flavor
– 1/2 tsp baking powder—this little trick keeps the centers fluffy
– 3 tbsp all-purpose flour—just enough to bind without making them dense
– 1/4 cup tahini—I always use well-stirred, runny tahini for a smoother sauce
– 2 tbsp lemon juice—freshly squeezed balances the richness
– 4 large flour tortillas—warmed briefly so they don’t crack when folded
– 2 tbsp olive oil—extra virgin gives a fruity note for frying
Instructions
1. Add chickpeas, parsley, garlic, cumin, and baking powder to a food processor.
2. Pulse 10–12 times until the mixture is coarse but holds together when pressed.
3. Sprinkle in flour and pulse 3–4 times until just combined—overmixing makes falafel tough.
4. Scoop 2-tablespoon portions and roll into 12 firm balls; flatten slightly into patties.
5. Heat olive oil in a skillet over medium heat until it shimmers, about 350°F.
6. Fry falafel in batches for 3–4 minutes per side until golden brown and crisp.
7. Transfer to a paper towel-lined plate to drain excess oil.
8. Whisk tahini and lemon juice in a small bowl until smooth and creamy.
9. Warm tortillas in a dry skillet for 20 seconds per side to make them pliable.
10. Spread 1 tablespoon tahini sauce down the center of each tortilla.
11. Place 3 falafel patties in a row over the sauce.
12. Fold sides of tortilla inward, then roll tightly from the bottom to enclose filling.
Firm, crunchy falafel contrasts beautifully with the soft tortilla and creamy tahini. Serve these wraps immediately while the falafel are still warm and crisp, or pack them for a picnic—just keep the sauce separate until ready to eat to avoid sogginess.
Teriyaki Tofu and Veggie Wrap
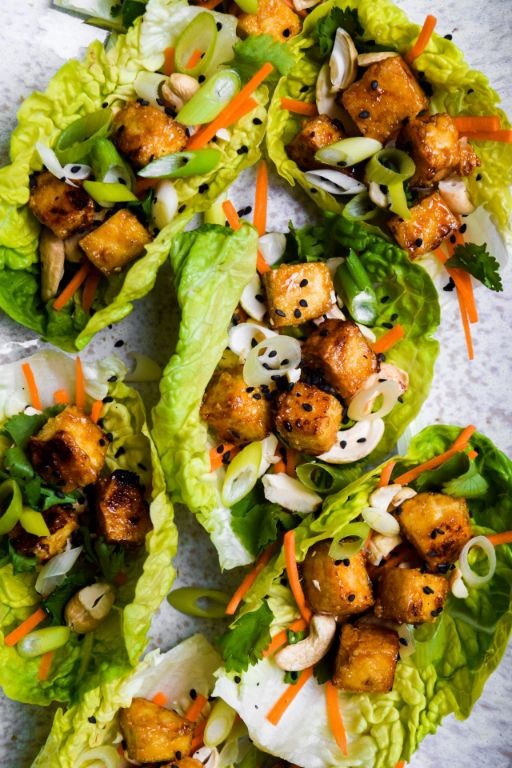
A perfectly portable lunch that satisfies both vegetarians and meat-eaters alike. These teriyaki tofu wraps come together quickly and pack serious flavor. Always a hit for meal prep or last-minute dinners.
Ingredients
– 1 block (14 oz) extra-firm tofu, pressed for 30 minutes—this makes all the difference in texture
– 2 tbsp cornstarch for that crispy coating I can’t get enough of
– 2 tbsp vegetable oil, my neutral choice for high-heat cooking
– 1 red bell pepper, thinly sliced into strips
– 1 cup shredded carrots, the pre-shredded bag saves me every time
– 2 cups fresh spinach leaves, packed tight
– 4 large flour tortillas (10-inch), I warm them slightly for easier rolling
– 1/3 cup teriyaki sauce, bottled works perfectly here
– 1 tbsp sesame seeds for that final crunch
Instructions
1. Cut pressed tofu into 1/2-inch cubes and pat completely dry with paper towels.
2. Toss tofu cubes with cornstarch until evenly coated on all surfaces.
3. Heat vegetable oil in large skillet over medium-high heat until shimmering (about 350°F).
4. Add tofu to hot oil in single layer, cooking undisturbed for 4 minutes.
5. Flip each tofu piece and cook additional 4 minutes until golden brown and crisp.
6. Transfer crispy tofu to plate and reduce skillet heat to medium.
7. Add bell pepper strips to same skillet, cooking 3 minutes until slightly softened.
8. Add shredded carrots, cooking 2 more minutes while stirring frequently.
9. Pour teriyaki sauce over vegetables, stirring to coat completely.
10. Return tofu to skillet, tossing gently to combine with saucy vegetables.
11. Remove skillet from heat and fold in fresh spinach until just wilted.
12. Warm tortillas in dry skillet for 15 seconds per side for flexible rolling.
13. Divide tofu-vegetable mixture evenly among four tortillas, placing filling in center.
14. Sprinkle sesame seeds over filling before rolling.
15. Fold bottom edge of tortilla over filling, then fold sides inward, rolling tightly away from you.
Fresh from the skillet, these wraps offer contrasting textures—crispy tofu against tender vegetables wrapped in soft tortillas. The sweet-savory teriyaki glaze soaks into every component for balanced bites. Serve them whole for handheld meals or slice diagonally to show off the colorful filling for gatherings.
Chicken Fajita Wrap with Peppers and Onions
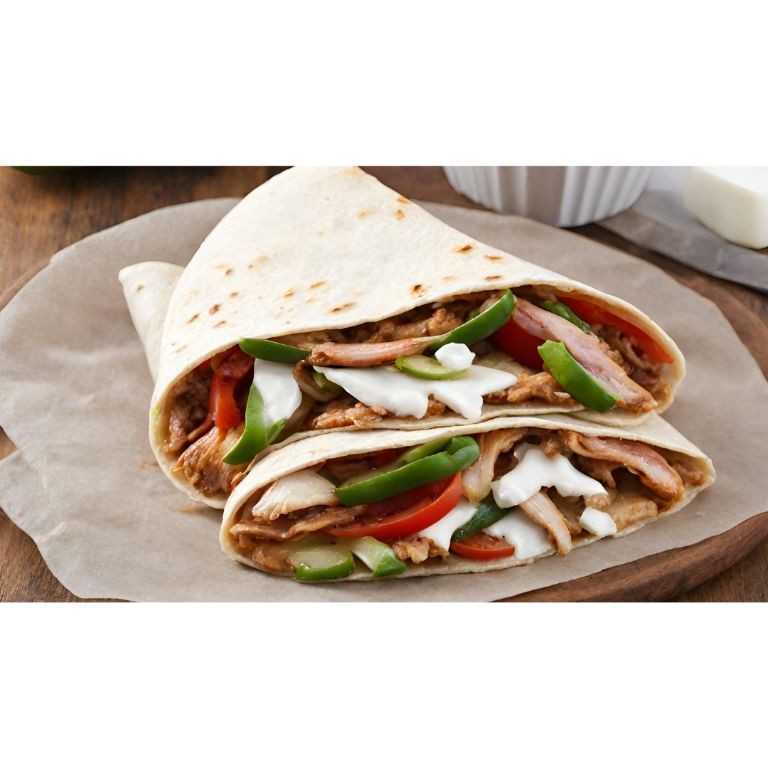
Perfect for busy weeknights, these chicken fajita wraps come together in under 30 minutes. Packed with colorful peppers and caramelized onions, they deliver restaurant-quality flavor with minimal effort.
Ingredients
- 1 lb chicken breast, sliced thin against the grain for tenderness
- 2 tbsp olive oil, my go-to for high-heat cooking
- 1 large bell pepper, I like using a mix of red and green for color
- 1 medium yellow onion, sliced thin for quick caramelization
- 2 cloves garlic, minced fresh for maximum flavor
- 1 tsp chili powder, adjust if you prefer more heat
- 1/2 tsp cumin, toasty and essential for that fajita flavor
- 1/4 tsp smoked paprika, my secret for that smoky depth
- 4 large flour tortillas, warmed slightly so they don’t tear
- 1/2 cup shredded Monterey Jack cheese, melty and mild
- 1/4 cup sour cream, full-fat for creaminess
- Fresh cilantro, a generous handful for brightness
- 1 lime, cut into wedges for squeezing over at the end
Instructions
- Heat 1 tablespoon olive oil in a large skillet over medium-high heat until shimmering, about 2 minutes.
- Add sliced chicken breast in a single layer and cook undisturbed for 4 minutes to develop a golden sear.
- Flip chicken pieces and cook for another 3 minutes until fully cooked through and no longer pink.
- Transfer chicken to a clean plate, leaving any drippings in the skillet.
- Add remaining 1 tablespoon olive oil to the hot skillet and immediately add sliced onions and bell peppers.
- Cook vegetables undisturbed for 2 minutes to develop some char, then stir and continue cooking for 5 minutes until softened and edges are browned.
- Add minced garlic and cook for exactly 30 seconds until fragrant but not burned.
- Sprinkle chili powder, cumin, and smoked paprika directly over the vegetables and stir constantly for 1 minute to toast the spices.
- Return cooked chicken to the skillet and toss with the vegetable-spice mixture until evenly coated.
- Warm tortillas in a dry skillet over medium heat for 20 seconds per side until pliable.
- Divide the chicken and vegetable mixture evenly among the 4 warmed tortillas, arranging it in a horizontal line down the center.
- Sprinkle 2 tablespoons shredded Monterey Jack cheese over each portion of filling.
- Dollop 1 tablespoon sour cream over the cheese on each tortilla.
- Scatter fresh cilantro leaves generously over the fillings.
- Fold the bottom edge of each tortilla up over the filling, then fold in the sides and roll tightly away from you to form secure wraps.
Vibrant and satisfying, these wraps offer a fantastic contrast between the warm, spiced filling and cool, creamy toppings. The tender chicken and sweet caramelized peppers pair beautifully with the sharp bite of fresh lime. For a fun twist, slice them in half diagonally and serve with extra lime wedges for squeezing over each bite.
Egg Salad and Arugula Wrap

Looking for a quick lunch that actually satisfies? This egg salad and arugula wrap delivers protein-packed freshness in minutes. Let’s get straight to it.
Ingredients
– 4 large eggs (I prefer room temp eggs here—they peel so much easier)
– 1/4 cup mayonnaise (Duke’s is my go-to for that perfect tang)
– 1 tsp Dijon mustard
– 1/4 tsp paprika
– 1/4 tsp garlic powder
– 1/4 tsp salt
– 1/8 tsp black pepper
– 1 cup fresh arugula (that peppery bite is essential)
– 2 large flour tortillas (I always warm them slightly for better flexibility)
Instructions
1. Place 4 large eggs in a single layer in a saucepan.
2. Cover eggs with cold water by 1 inch—this prevents cracking during heating.
3. Bring water to a rolling boil over high heat.
4. Immediately remove saucepan from heat and cover tightly with a lid.
5. Let eggs stand in hot water for 12 minutes for perfectly cooked yolks.
6. Transfer eggs to an ice water bath and cool for 5 minutes to stop the cooking process.
7. Peel eggs under cool running water—the water helps loosen stubborn shells.
8. Chop eggs into 1/4-inch pieces using a sharp knife or pastry blender.
9. Combine chopped eggs, 1/4 cup mayonnaise, 1 tsp Dijon mustard, 1/4 tsp paprika, 1/4 tsp garlic powder, 1/4 tsp salt, and 1/8 tsp black pepper in a medium bowl.
10. Stir mixture gently until just combined—overmixing makes the salad mushy.
11. Warm 2 large flour tortillas in a dry skillet over medium heat for 15 seconds per side.
12. Divide egg salad mixture evenly between the two warmed tortillas.
13. Top each with 1/2 cup fresh arugula, spreading it evenly over the egg salad.
14. Fold bottom edge of tortilla up over the filling, then fold in sides and roll tightly away from you.
15. Cut each wrap in half diagonally for easier handling and presentation.
But the real magic happens when you bite in—creamy egg salad meets peppery arugula in a soft tortilla that holds everything together perfectly. These wraps travel beautifully for picnics or make an impressive quick lunch when sliced and arranged on a platter.
Roasted Veggie and Goat Cheese Wrap

Craving something fresh yet satisfying? This roasted veggie and goat cheese wrap hits all the right notes—it’s quick, packed with flavor, and perfect for lunch on the go. Customize it with your favorite seasonal vegetables for a personal twist.
Ingredients
– 1 large bell pepper, sliced thin (I like using a mix of red and yellow for color)
– 1 medium zucchini, cut into half-moons (don’t slice too thin or they’ll get mushy)
– 1 small red onion, thinly sliced (it caramelizes beautifully)
– 2 tbsp extra virgin olive oil (my go-to for roasting)
– 1/2 tsp garlic powder (adds depth without chopping fresh)
– 1/4 tsp smoked paprika (for a subtle smoky kick)
– Salt and black pepper, to taste (I’m generous with both)
– 4 large flour tortillas (the burrito-sized ones hold everything best)
– 4 oz goat cheese, crumbled (room temp spreads easier)
– 2 cups fresh baby spinach (washed and dried well)
– 1/4 cup balsamic glaze (for drizzling—store-bought is fine)
Instructions
1. Preheat your oven to 425°F and line a baking sheet with parchment paper.
2. In a large bowl, toss the bell pepper, zucchini, and red onion with olive oil, garlic powder, smoked paprika, salt, and black pepper until evenly coated.
3. Spread the vegetables in a single layer on the prepared baking sheet.
4. Roast for 20–25 minutes, stirring halfway, until the edges are lightly charred and tender.
5. Tip: Don’t overcrowd the pan—this ensures crisp-tender veggies instead of steaming.
6. Warm the tortillas in a dry skillet over medium heat for 20 seconds per side to make them pliable.
7. Spread 1 oz of goat cheese evenly over the center of each tortilla, leaving a 1-inch border.
8. Top each with 1/2 cup baby spinach, avoiding overfilling to prevent tearing.
9. Divide the roasted vegetables evenly among the tortillas, placing them over the spinach.
10. Tip: Let the veggies cool slightly so the spinach doesn’t wilt too much.
11. Drizzle 1 tbsp of balsamic glaze over the vegetables on each tortilla.
12. Fold the sides of each tortilla inward, then roll tightly from the bottom to enclose the filling.
13. Tip: If packing for later, wrap in foil to hold its shape and keep it fresh.
14. Slice each wrap in half diagonally before serving if desired.
Ultimate satisfaction comes from that contrast of creamy goat cheese and smoky roasted veggies. The balsamic glaze adds a tangy sweetness that ties it all together. Serve it warm with a side of crisp apple slices for a refreshing crunch.
Pesto Chicken and Sun-Dried Tomato Wrap
Never underestimate the power of a well-stuffed wrap for busy weeknights. Packed with Mediterranean flavors, this pesto chicken version comes together in under 30 minutes. Perfect for meal prep or feeding a hungry crowd quickly.
Ingredients
– 1 lb boneless, skinless chicken breasts (I always pound them to even thickness for consistent cooking)
– 4 large flour tortillas (the burrito-sized ones hold everything better)
– 1/2 cup basil pesto (homemade tastes fresher, but store-bought works in a pinch)
– 1/3 cup sun-dried tomatoes in oil (drained and chopped – the oil-packed ones have superior flavor)
– 1 cup fresh spinach leaves (baby spinach is more tender here)
– 1/2 cup shredded mozzarella cheese (I prefer whole milk for better melting)
– 2 tbsp olive oil (extra virgin is my go-to for sautéing)
– 1/4 tsp salt
– 1/4 tsp black pepper
Instructions
1. Place chicken breasts between plastic wrap and pound to 1/2-inch uniform thickness using a meat mallet or rolling pin.
2. Season both sides of chicken with salt and pepper.
3. Heat olive oil in a large skillet over medium-high heat until shimmering, about 2 minutes.
4. Add chicken breasts and cook for 6-7 minutes until golden brown on bottom.
5. Flip chicken and cook another 6-7 minutes until internal temperature reaches 165°F on an instant-read thermometer.
6. Transfer chicken to cutting board and let rest for 5 minutes to retain juices.
7. Slice chicken against the grain into 1/2-inch strips.
8. Warm tortillas in a dry skillet over medium heat for 30 seconds per side until pliable.
9. Spread 2 tablespoons pesto evenly over center of each tortilla, leaving 2-inch border.
10. Layer spinach leaves over pesto, covering the spread area.
11. Arrange chicken strips in a single layer over spinach.
12. Sprinkle sun-dried tomatoes evenly over chicken.
13. Top with shredded mozzarella cheese.
14. Fold bottom edge of tortilla up over filling, then fold in sides and roll tightly away from you.
15. Cut each wrap diagonally in half for serving. Let these wraps rest for a minute before cutting – the cheese will set and prevent spillage. Last night’s dinner becomes today’s perfect packed lunch when wrapped tightly in foil. The contrast between the tender chicken, creamy pesto, and chewy sun-dried tomatoes makes every bite satisfying.
Shrimp and Avocado Wrap with Lime Dressing
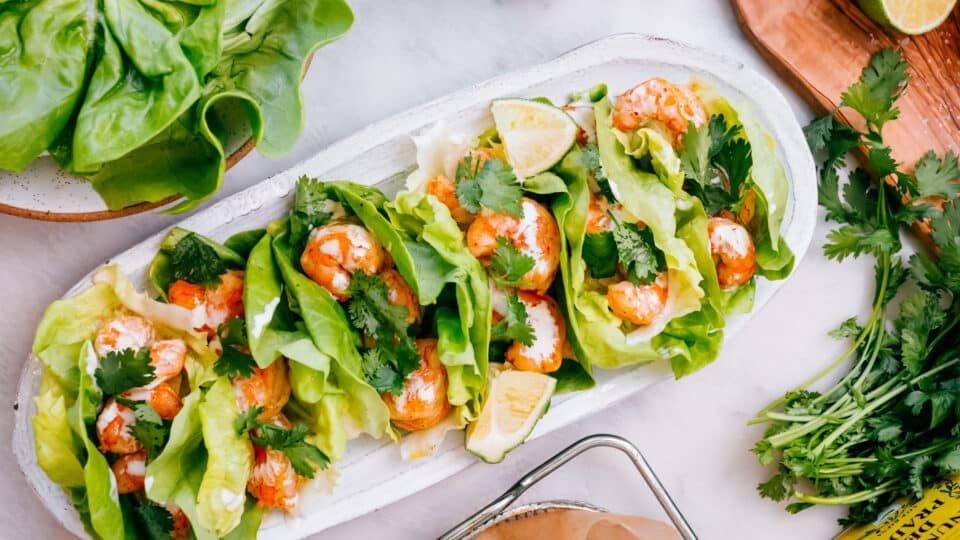
Hitting that midday slump? This shrimp and avocado wrap delivers fresh flavors in minutes. Perfect for busy days when you want something satisfying without the fuss.
Ingredients
– 8 large raw shrimp, peeled and deveined (I prefer wild-caught for better flavor)
– 1 ripe avocado, pitted and sliced (choose one that yields slightly to pressure)
– 2 large flour tortillas (the burrito-sized ones hold everything better)
– 1 cup shredded romaine lettuce (crisp leaves work best here)
– 1/4 cup chopped red onion (soak in ice water for 5 minutes to mellow the bite)
– 2 tbsp fresh lime juice (about 1 juicy lime)
– 1 tbsp extra virgin olive oil (my go-to for dressings)
– 1/4 tsp chili powder
– Salt to taste (I use about 1/2 tsp kosher salt)
Instructions
1. Pat the shrimp completely dry with paper towels—this ensures a good sear. 2. Season shrimp evenly with chili powder and 1/4 tsp salt. 3. Heat olive oil in a skillet over medium-high heat until shimmering, about 1 minute. 4. Cook shrimp for 2 minutes per side until pink and opaque. 5. Transfer cooked shrimp to a cutting board and let rest for 2 minutes. 6. Chop shrimp into bite-sized pieces while warm. 7. Whisk together lime juice and remaining 1/4 tsp salt in a small bowl. 8. Warm tortillas in a dry skillet for 20 seconds per side until pliable. 9. Arrange lettuce evenly down the center of each tortilla. 10. Layer avocado slices over the lettuce, slightly overlapping. 11. Scatter chopped red onion over the avocado. 12. Distribute shrimp pieces evenly across both wraps. 13. Drizzle lime dressing generously over the fillings. 14. Fold the bottom edge of each tortilla up over the fillings. 15. Fold in both sides tightly, then roll away from you to seal. 16. Slice each wrap diagonally in half with a sharp knife. Pack these wraps for lunch and enjoy the contrast of warm shrimp against cool, creamy avocado. The lime dressing cuts through the richness beautifully, making each bite refreshing and balanced.
Curried Chickpea and Mango Wrap
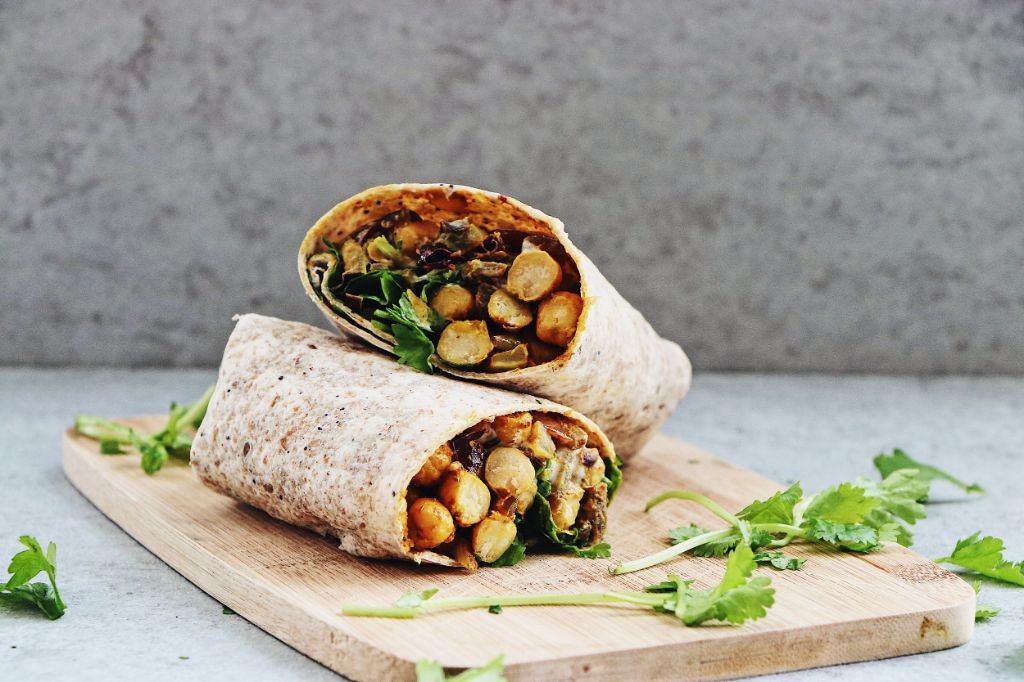
Wraps make the perfect quick lunch, and this curried chickpea version with sweet mango hits all the right notes. It’s filling, fresh, and comes together in minutes when you’re short on time.
Ingredients
– 1 (15 oz) can chickpeas, drained and rinsed—I like to pat them dry with a paper towel for better texture
– 1 large ripe mango, peeled and diced into ½-inch pieces
– 2 tbsp plain Greek yogurt—I use full-fat for creaminess
– 1 tbsp curry powder
– 1 tbsp olive oil
– 1 tsp lemon juice
– 4 large flour tortillas
– 2 cups fresh spinach leaves
– ¼ cup chopped fresh cilantro
– Salt to taste—I add a generous pinch
Instructions
1. Heat 1 tbsp olive oil in a skillet over medium heat for 1 minute.
2. Add the drained chickpeas and 1 tbsp curry powder to the skillet.
3. Cook the chickpeas for 5 minutes, stirring occasionally, until lightly browned and fragrant.
4. Transfer the chickpeas to a medium bowl and let them cool for 3 minutes.
5. Add 1 diced mango, 2 tbsp Greek yogurt, and 1 tsp lemon juice to the bowl with the chickpeas.
6. Gently fold everything together until evenly combined.
7. Warm 4 flour tortillas in a dry skillet over low heat for 30 seconds per side, or until pliable.
8. Place ½ cup fresh spinach leaves in the center of each warmed tortilla.
9. Divide the chickpea-mango mixture evenly among the tortillas, spreading it over the spinach.
10. Top each wrap with 1 tbsp chopped fresh cilantro.
11. Fold the bottom edge of each tortilla up over the filling, then fold in the sides and roll tightly away from you.
12. Slice each wrap in half diagonally before serving.
Vibrant and satisfying, these wraps offer a creamy crunch from the chickpeas against the juicy sweetness of mango. The curry warmth balances the fresh cilantro, making it ideal for picnics or sliced into pinwheels for parties. Serve immediately while the tortillas are still warm and pliable.
BLT Wrap with Garlic Aioli
Let’s be real—sometimes you just need lunch in your hands, not on a plate. This BLT wrap with garlic aioli delivers that perfect grab-and-go satisfaction, combining crispy bacon, fresh veggies, and a creamy homemade sauce all rolled into one. It’s my go-to when I want something fast but still feels special.
Ingredients
– 4 slices thick-cut bacon (I always go for thick-cut—it stays crispier)
– 1 large flour tortilla (10-inch size works best for easy rolling)
– 2 tbsp mayonnaise (I use full-fat for the richest aioli base)
– 1 garlic clove, minced (fresh is key here, not jarred)
– 1 tsp lemon juice (a squeeze of fresh lemon brightens everything up)
– 1 cup shredded romaine lettuce (crisp and cold straight from the fridge)
– 1 medium tomato, thinly sliced (I like Roma tomatoes—fewer seeds, less sogginess)
– Salt and black pepper (a pinch of each to layer the flavors)
Instructions
1. Arrange bacon slices in a single layer in a cold skillet.
2. Cook bacon over medium heat for 8–10 minutes, flipping halfway, until crispy and browned.
3. Transfer bacon to a paper towel-lined plate to drain excess grease.
4. In a small bowl, combine mayonnaise, minced garlic, and lemon juice to make the aioli.
5. Lay the tortilla flat on a clean surface and spread the garlic aioli evenly across the center, leaving a 1-inch border.
6. Layer shredded romaine lettuce over the aioli.
7. Place tomato slices in a single row over the lettuce.
8. Sprinkle salt and black pepper directly over the tomatoes.
9. Break cooked bacon into pieces and arrange them over the tomatoes.
10. Fold the sides of the tortilla inward, then tightly roll from the bottom edge upward, pressing gently to seal.
11. Slice the wrap in half diagonally for easier handling.
The crisp bacon and cool, crunchy lettuce play off the creamy, garlicky aioli in every bite. For a fun twist, try adding sliced avocado or serving it with a side of sweet potato fries—it’s a lunch that never gets old.
Summary
Kickstart your lunch routine with these 20 delicious wrap recipes! Whether you’re craving something fresh, hearty, or packed with protein, there’s a wrap here for every taste. We hope these ideas inspire you to get creative in the kitchen. Don’t forget to leave a comment with your favorite recipe and share this roundup on Pinterest to help other busy food lovers discover these tasty lunch solutions!