Blog

  • 20 Crispy Air Fryer Rotisserie Chicken Recipes Delicious

    20 Crispy Air Fryer Rotisserie Chicken Recipes Delicious

    Are you tired of the same old boring chicken recipes? Look no further! Air fryer rotisserie chicken is a game-changer, and we’re here to take your taste buds on a delicious journey. With its crispy skin and juicy meat, this dish is sure to become a family favorite. And the best part? It’s incredibly easy to make!

    From classic herbs to spicy cajun seasoning, we’ve gathered 20 mouth-watering air fryer rotisserie chicken recipes that are sure to satisfy your cravings. Whether you’re in the mood for something tangy and citrusy or smoky and savory, there’s a recipe on this list that’s perfect for you.

    In this article, we’ll dive into each of these amazing recipes, sharing tips and tricks to help you achieve that perfect balance of crispy skin and tender meat. So what are you waiting for? Let’s get cooking!

    Classic Air Fryer Rotisserie Chicken with Herbs
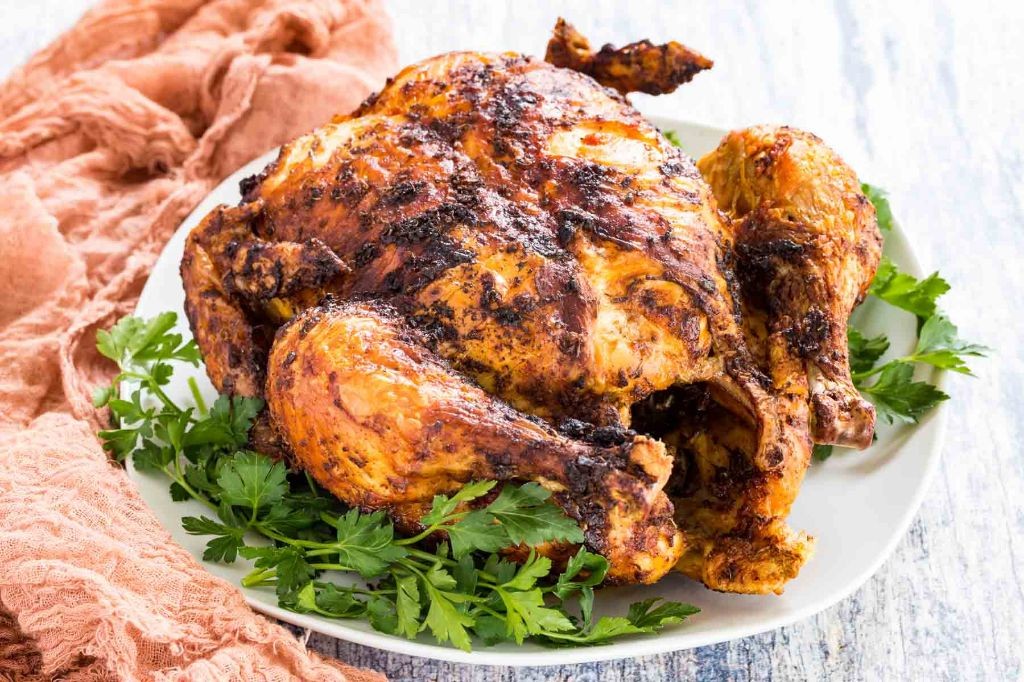
    Classic Air Fryer Rotisserie Chicken with Herbs
    Elevate your air fryer game with this mouthwatering rotisserie-style chicken, infused with fresh herbs and a hint of garlic.

    Ingredients:
    • 1 whole chicken (3-4 lbs)
    • 2 tbsp olive oil
    • 2 cloves garlic, minced
    • 2 tbsp chopped fresh rosemary
    • 2 tbsp chopped fresh thyme
    • Salt and pepper to taste

    Instructions:

    1. Preheat the air fryer to 400°F (200°C).
    2. Rinse the chicken and pat dry with paper towels.
    3. In a small bowl, mix together olive oil, garlic, rosemary, thyme, salt, and pepper.
    4. Rub the mixture all over the chicken, making sure to get some under the skin as well.
    5. Place the chicken in the air fryer basket, breast side up.
    6. Cook for 25-30 minutes or until the internal temperature reaches 165°F (74°C).
    7. Baste with pan juices and rotate every 10 minutes for even browning.

    Cooking Time: 25-30 minutes

    Spicy Air Fryer Rotisserie Chicken with Cajun Seasoning
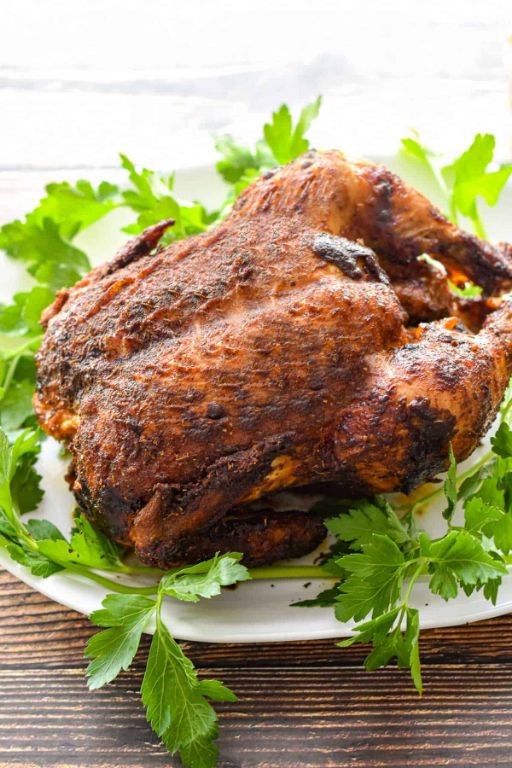
    Spicy Air Fryer Rotisserie Chicken with Cajun Seasoning
    Get ready to experience the bold flavors of Louisiana in every bite! This Spicy Air Fryer Rotisserie Chicken recipe is a game-changer, packed with spicy kick and aromatic spices.

    Ingredients:

    – 1 whole rotisserie chicken (3-4 lbs)
    – 2 tbsp Cajun seasoning
    – 1 tsp paprika
    – 1/2 tsp garlic powder
    – 1/2 tsp onion powder
    – 1/4 tsp cayenne pepper
    – Salt and pepper to taste
    – 2 tbsp olive oil

    Instructions:

    1. Preheat the air fryer to 400°F (200°C).
    2. Rinse the chicken and pat dry with paper towels.
    3. In a small bowl, mix together Cajun seasoning, paprika, garlic powder, onion powder, and cayenne pepper.
    4. Rub the spice mixture all over the chicken, making sure to get some under the skin as well.
    5. Drizzle olive oil over the chicken and season with salt and pepper to taste.
    6. Place the chicken in the air fryer basket and cook for 30 minutes at 400°F (200°C).
    7. Flip the chicken halfway through cooking and continue to cook for an additional 15-20 minutes, or until cooked through.

    Cooking Time: 45-50 minutes

    Garlic Butter Air Fryer Rotisserie Chicken
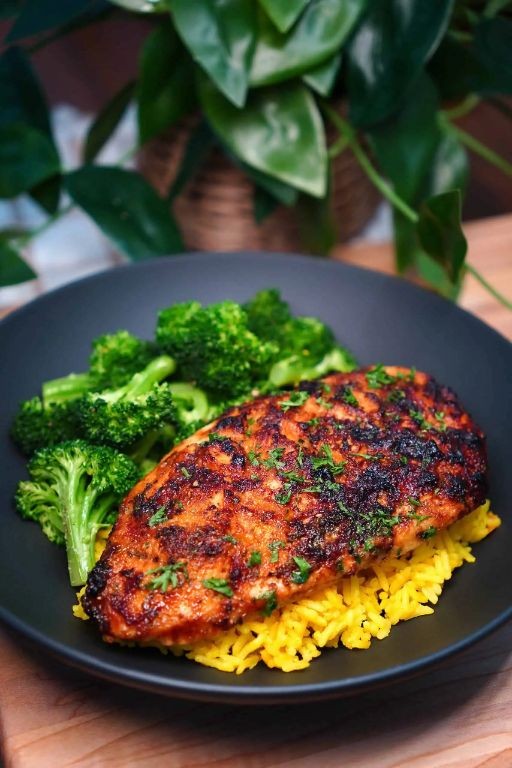
    Garlic Butter Air Fryer Rotisserie Chicken
    Elevate your chicken game with this easy and impressive recipe that combines the flavors of garlic, butter, and rotisserie-style cooking. Perfect for a weeknight dinner or special occasion.

    Ingredients:

    – 1 whole chicken (3-4 lbs)
    – 2 cloves of garlic, minced
    – 2 tbsp unsalted butter, softened
    – 1 tsp dried thyme
    – Salt and pepper to taste

    Instructions:

    1. Preheat the air fryer to 375°F (190°C).
    2. Rinse the chicken and pat dry with paper towels.
    3. In a small bowl, mix together minced garlic and softened butter.
    4. Rub the garlic butter mixture all over the chicken, making sure to get some under the skin as well.
    5. Season with salt, pepper, and thyme.
    6. Place the chicken in the air fryer basket, breast side up.
    7. Cook for 25-30 minutes or until the internal temperature reaches 165°F (74°C).
    8. Let rest for 5-10 minutes before carving and serving.

    Cooking Time: 25-30 minutes

    Lemon Pepper Air Fryer Rotisserie Chicken
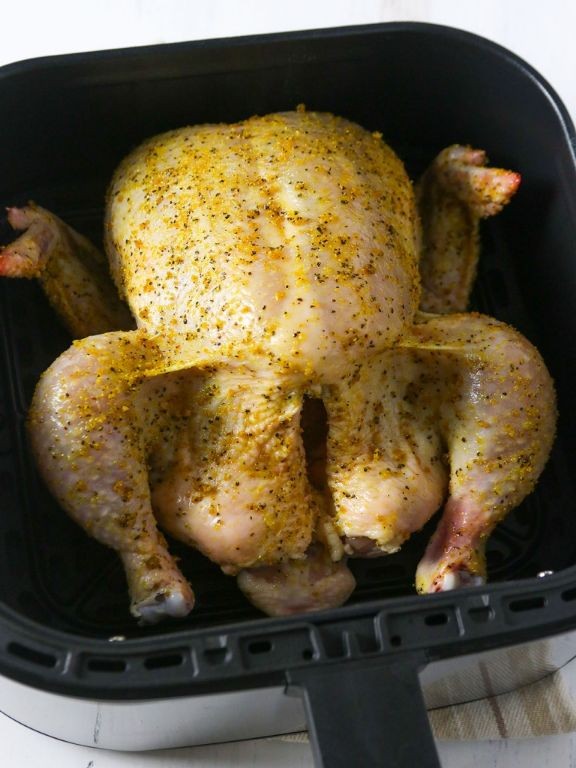
    Lemon Pepper Air Fryer Rotisserie Chicken
    Elevate your weeknight dinner with this tangy and aromatic air fryer chicken recipe.

    Ingredients:

    – 1 whole rotisserie-style chicken (3-4 lbs)
    – 2 tbsp freshly squeezed lemon juice
    – 1 tsp black pepper, divided
    – 1 tsp garlic powder
    – 1 tsp paprika
    – 1/2 tsp salt
    – 2 tbsp olive oil

    Instructions:

    1. Preheat the air fryer to 375°F (190°C).
    2. In a small bowl, whisk together lemon juice, 1/2 tsp black pepper, garlic powder, paprika, and salt.
    3. Rub the mixture all over the chicken, making sure it’s evenly coated.
    4. Place the chicken in the air fryer basket, breast side up.
    5. Cook for 20 minutes, then rotate the chicken to the opposite side.
    6. Continue cooking for an additional 15-20 minutes, or until the internal temperature reaches 165°F (74°C).
    7. Remove from the air fryer and let rest for 5 minutes before serving.

    Cooking Time: 35-40 minutes

    Honey Glazed Air Fryer Rotisserie Chicken
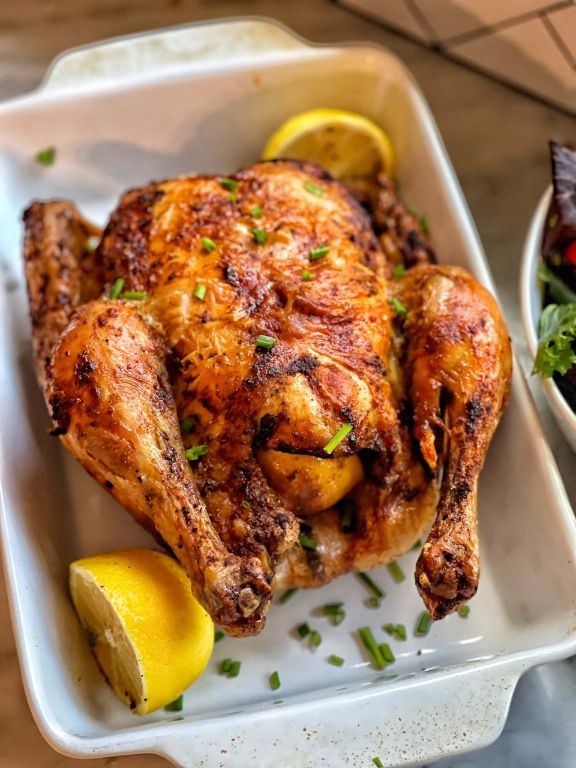
    Honey Glazed Air Fryer Rotisserie Chicken
    Elevate your chicken game with this sweet and savory honey glazed air fryer rotisserie chicken recipe. With just a few simple ingredients and steps, you’ll be enjoying a deliciously moist and flavorful bird that’s perfect for any occasion.

    Ingredients:

    – 1 whole rotisserie-style chicken (3-4 lbs)
    – 2 tbsp honey
    – 1 tsp Dijon mustard
    – 1 tsp olive oil
    – 1 tsp salt
    – 1/2 tsp black pepper
    – 1/4 cup chopped fresh thyme

    Instructions:

    1. Preheat the air fryer to 400°F (200°C).
    2. Rinse the chicken and pat dry with paper towels.
    3. In a small bowl, mix together honey, mustard, olive oil, salt, and pepper.
    4. Brush the glaze all over the chicken, making sure to get some under the skin as well.
    5. Place the chicken in the air fryer basket, breast side up.
    6. Cook for 25-30 minutes or until the internal temperature reaches 165°F (74°C).
    7. Remove from heat and sprinkle with thyme.

    Cooking Time: 25-30 minutes

    BBQ Air Fryer Rotisserie Chicken with Smoky Flavors
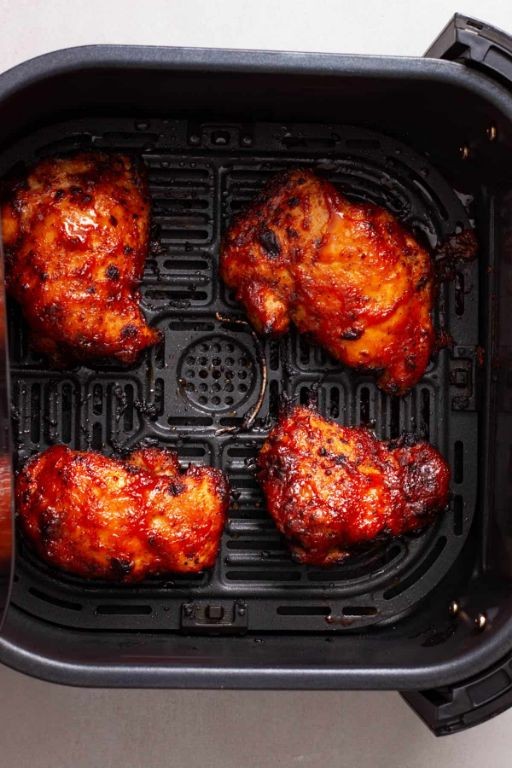
    BBQ Air Fryer Rotisserie Chicken with Smoky Flavors
    Elevate your air fryer game with this mouthwatering rotisserie-style chicken recipe, infused with the rich flavors of smoky BBQ. This easy and impressive dish is perfect for a weeknight dinner or weekend gathering.

    Ingredients:

    – 1 whole chicken (3-4 lbs)
    – 2 tbsp BBQ rub
    – 1 tsp smoked paprika
    – 1 tsp garlic powder
    – 1 tsp onion powder
    – 1/4 cup BBQ sauce
    – 2 tbsp brown sugar
    – Salt and pepper, to taste

    Instructions:

    1. Preheat air fryer to 400°F (200°C).
    2. In a small bowl, mix together BBQ rub, smoked paprika, garlic powder, onion powder, salt, and pepper.
    3. Rub the spice mixture all over the chicken, making sure to get some under the skin as well.
    4. Place the chicken in the air fryer basket, breast side up.
    5. Cook for 20 minutes at 400°F (200°C).
    6. Brush with BBQ sauce and sprinkle with brown sugar during the last 10 minutes of cooking.
    7. Let the chicken rest for 5 minutes before carving and serving.

    Cooking Time: 30 minutes

    Air Fryer Rotisserie Chicken with Rosemary and Thyme
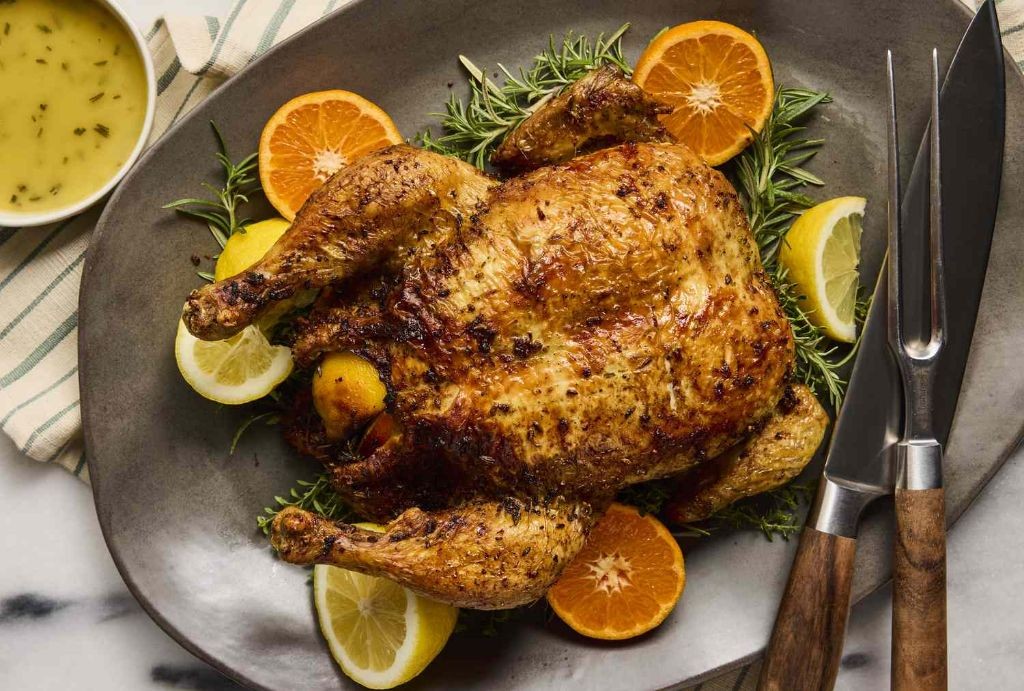
    Air Fryer Rotisserie Chicken with Rosemary and Thyme
    This recipe brings the flavors of a traditional rotisserie chicken to your air fryer, with the added bonus of being healthier and easier to make. The rosemary and thyme add a savory and aromatic touch that will leave you wanting more.

    Ingredients:

    – 1 whole chicken (3-4 lbs)
    – 2 tbsp olive oil
    – 2 sprigs fresh rosemary, chopped
    – 1 tsp dried thyme
    – Salt and pepper to taste

    Instructions:

    1. Preheat the air fryer to 375°F.
    2. Rinse the chicken and pat it dry with paper towels.
    3. In a small bowl, mix together olive oil, chopped rosemary, and dried thyme.
    4. Rub the mixture all over the chicken, making sure to get some under the skin as well.
    5. Season with salt and pepper to taste.
    6. Place the chicken in the air fryer basket, breast side up.
    7. Cook for 25-30 minutes, or until the internal temperature reaches 165°F.

    Cooking Time: 25-30 minutes

    Asian-Style Air Fryer Rotisserie Chicken with Soy and Ginger
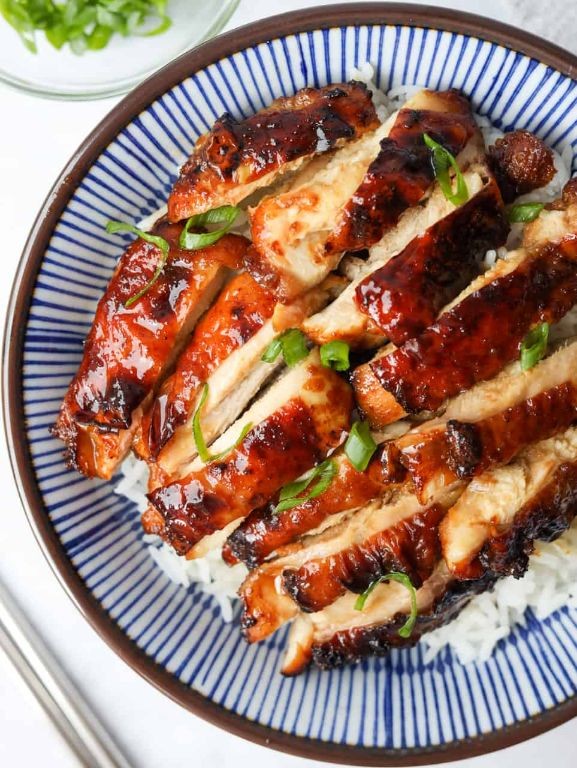
    Asian-Style Air Fryer Rotisserie Chicken with Soy and Ginger
    This recipe combines the convenience of air frying with the bold flavors of Asia, resulting in a mouthwatering rotisserie-style chicken. With just a few ingredients and simple steps, you’ll be enjoying a deliciously glazed and crispy chicken dish in no time.

    Ingredients:

    – 1 whole chicken (3-4 lbs), giblets removed
    – 2 tbsp soy sauce
    – 1 tbsp honey
    – 2 tsp grated ginger
    – 1 tsp sesame oil
    – Salt, to taste

    Instructions:

    1. Preheat the air fryer to 400°F (200°C).
    2. Rinse the chicken and pat dry with paper towels.
    3. In a small bowl, whisk together soy sauce, honey, ginger, and sesame oil.
    4. Brush the glaze all over the chicken, making sure it’s fully coated.
    5. Place the chicken in the air fryer basket, breast side up.
    6. Cook for 25-30 minutes or until the internal temperature reaches 165°F (74°C).
    7. Baste with the pan juices every 10 minutes to keep the chicken moist and crispy.

    Cooking Time: 25-30 minutes

    Air Fryer Rotisserie Chicken with Paprika and Garlic
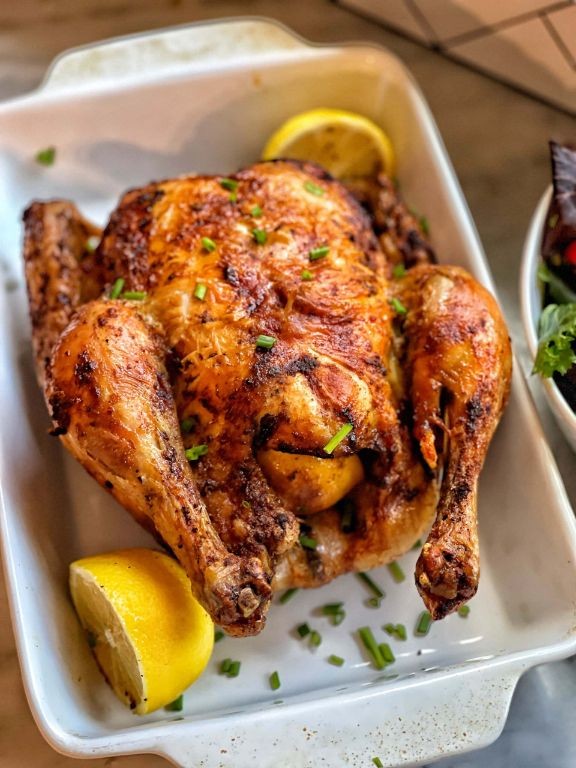
    Air Fryer Rotisserie Chicken with Paprika and Garlic
    Elevate your chicken game with this mouthwatering air fryer recipe, infused with the rich flavors of paprika and garlic. Perfect for a quick weeknight dinner or a satisfying snack.

    Ingredients:

    – 1 whole rotisserie chicken (3-4 lbs)
    – 2 tbsp olive oil
    – 1 tsp smoked paprika
    – 1 tsp garlic powder
    – Salt and pepper to taste

    Instructions:

    1. Preheat the air fryer to 375°F (190°C).
    2. Rinse the chicken and pat dry with paper towels.
    3. In a small bowl, mix together olive oil, smoked paprika, garlic powder, salt, and pepper.
    4. Rub the spice mixture all over the chicken, making sure to get some under the skin as well.
    5. Place the chicken in the air fryer basket, breast side up.
    6. Cook for 30 minutes, then flip and cook for an additional 10-15 minutes, or until the internal temperature reaches 165°F (74°C).
    7. Let the chicken rest for 5-10 minutes before carving and serving.

    Cooking Time: 40-45 minutes

    Herbed Air Fryer Rotisserie Chicken with Lemon Zest
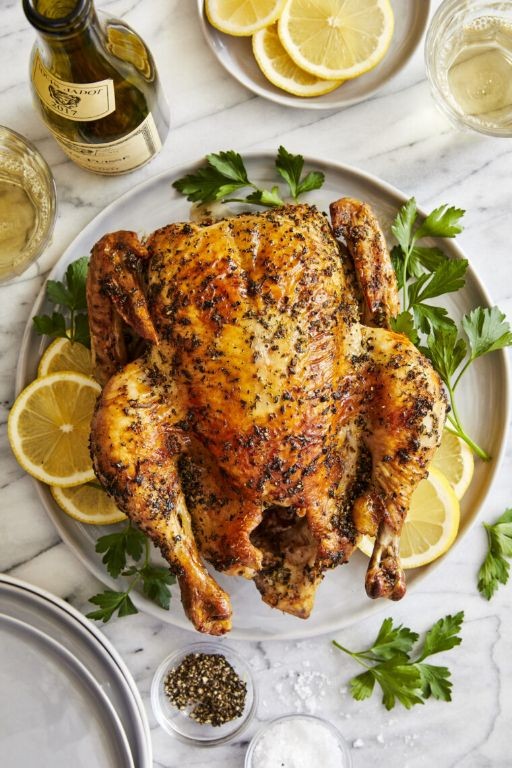
    Herbed Air Fryer Rotisserie Chicken with Lemon Zest
    Elevate your air fryer game with this flavorful and aromatic rotisserie-style chicken dish, infused with the brightness of lemon zest and a blend of herbs.

    Ingredients:

    – 1 (3-4 pound) whole chicken
    – 2 tablespoons olive oil
    – 2 cloves garlic, minced
    – 1 tablespoon chopped fresh rosemary
    – 1 tablespoon chopped fresh thyme
    – 1 teaspoon salt
    – 1/2 teaspoon black pepper
    – 1/2 cup lemon zest (from about 2 lemons)
    – 1/4 cup white wine (optional)

    Instructions:

    1. Preheat the air fryer to 375°F (190°C).
    2. Rinse the chicken and pat dry with paper towels.
    3. In a small bowl, mix together olive oil, garlic, rosemary, thyme, salt, and pepper.
    4. Rub the mixture all over the chicken, making sure to get some under the skin as well.
    5. Place the lemon zest on top of the chicken, then drizzle with white wine (if using).
    6. Cook in the air fryer for 30-40 minutes or until cooked through, flipping halfway.

    Cooking Time: 30-40 minutes

    Air Fryer Rotisserie Chicken with Crispy Skin and Juicy Meat
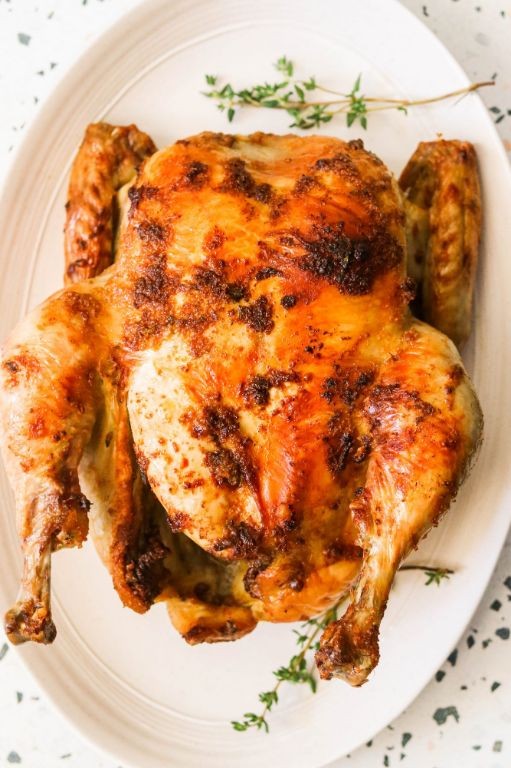
    Air Fryer Rotisserie Chicken with Crispy Skin and Juicy Meat
    Elevate your weeknight dinner game with this easy and impressive air fryer rotisserie chicken recipe, featuring crispy skin and juicy meat.

    Ingredients:

    – 1 whole chicken (3-4 lbs)
    – 2 tbsp olive oil
    – 1 tsp salt
    – 1 tsp garlic powder
    – 1 tsp paprika
    – 1/2 tsp black pepper
    – 1 lemon, cut into wedges (optional)

    Instructions:

    1. Preheat the air fryer to 400°F (200°C).
    2. Rinse and pat dry the chicken.
    3. In a small bowl, mix together olive oil, salt, garlic powder, paprika, and black pepper.
    4. Rub the mixture all over the chicken, making sure to get some under the skin as well.
    5. Place the chicken in the air fryer basket, breast side up.
    6. Cook for 20-22 minutes, or until the internal temperature reaches 165°F (74°C).
    7. Flip the chicken and cook for an additional 10-12 minutes, or until the skin is crispy and golden brown.

    Cooking Time: Approximately 32-35 minutes

    Air Fryer Rotisserie Chicken with Homemade Dry Rub
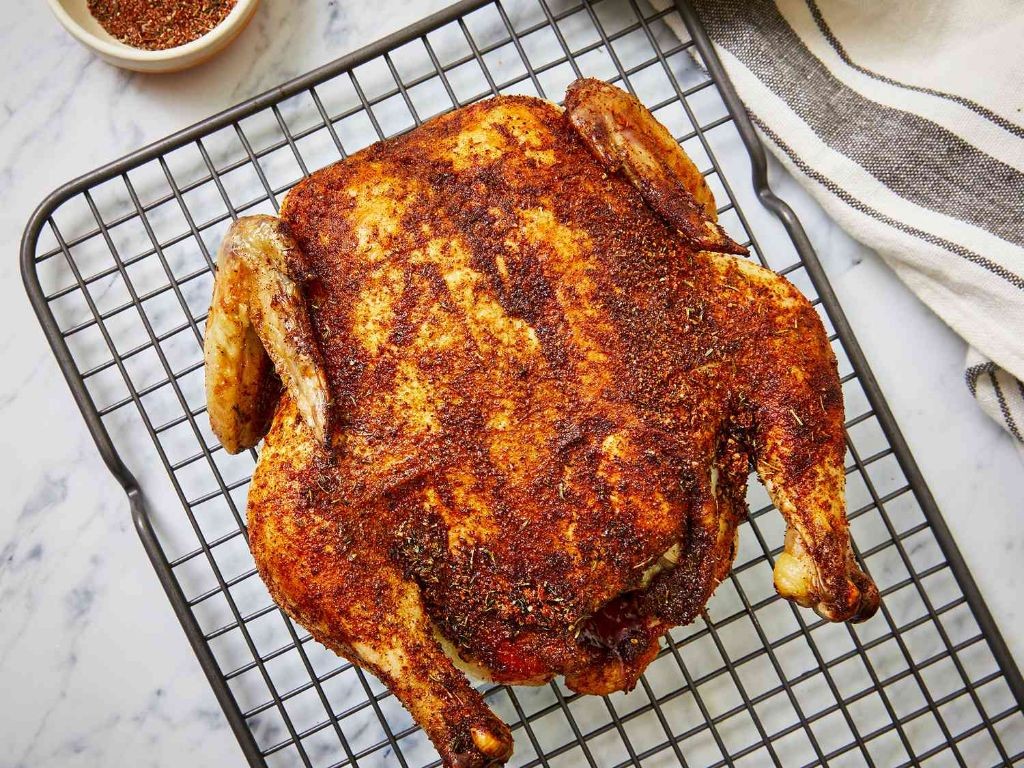
    Air Fryer Rotisserie Chicken with Homemade Dry Rub
    Elevate your air fryer game with this simple yet impressive recipe that yields tender, juicy chicken with a flavorful homemade dry rub.

    Ingredients:

    – 1 whole chicken (3-4 lbs)
    – Homemade Dry Rub (see below)
    – Air Fryer

    Homemade Dry Rub:

    – 2 tbsp paprika
    – 1 tbsp garlic powder
    – 1 tbsp onion powder
    – 1 tsp ground cumin
    – 1 tsp salt
    – 1/2 tsp black pepper
    – 1/4 tsp cayenne pepper (optional)

    Instructions:

    1. Preheat the air fryer to 375°F (190°C).
    2. In a small bowl, mix together the dry rub ingredients.
    3. Remove any giblets and pat the chicken dry with paper towels.
    4. Rub the homemade dry rub all over the chicken, making sure to coat evenly.
    5. Place the chicken in the air fryer basket, breast side up.
    6. Cook for 30 minutes, then rotate the chicken 90 degrees to ensure even cooking.
    7. Continue cooking for an additional 20-25 minutes or until the internal temperature reaches 165°F (74°C).
    8. Let the chicken rest for 5-10 minutes before carving and serving.

    Cooking Time: 50-55 minutes

    Air Fryer Rotisserie Chicken with Sweet and Spicy Glaze
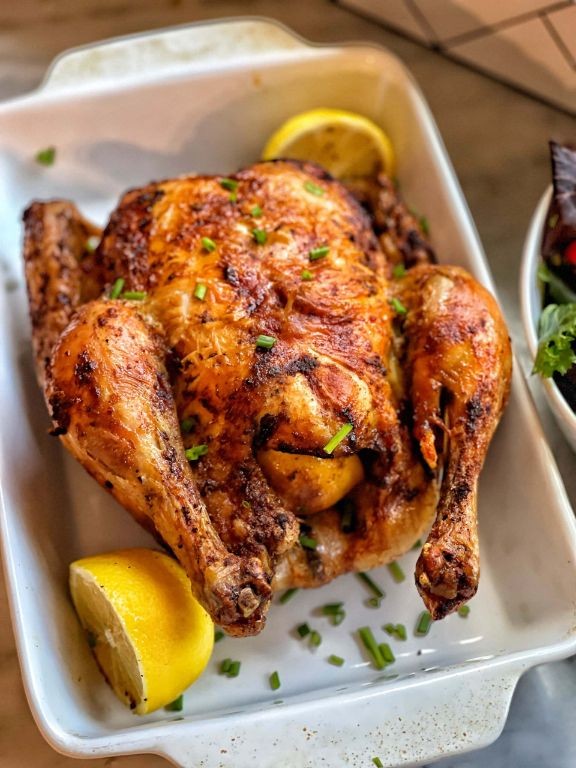
    Air Fryer Rotisserie Chicken with Sweet and Spicy Glaze
    Elevate your air fryer game with this mouthwatering recipe that combines the flavors of sweet and spicy. This dish is perfect for a quick weeknight dinner or a weekend gathering.

    Ingredients:

    – 1 whole chicken (3-4 lbs)
    – 2 tbsp olive oil
    – 1/4 cup honey
    – 1/4 cup apple cider vinegar
    – 2 tbsp soy sauce
    – 1 tsp smoked paprika
    – 1/2 tsp garlic powder
    – Salt and pepper, to taste
    – 1/4 cup sweet chili sauce

    Instructions:

    1. Preheat the air fryer to 375°F (190°C).
    2. Rinse the chicken and pat dry with paper towels.
    3. In a small bowl, whisk together olive oil, honey, apple cider vinegar, soy sauce, smoked paprika, garlic powder, salt, and pepper.
    4. Rub the mixture all over the chicken, making sure to get some under the skin as well.
    5. Place the chicken in the air fryer basket, breast side up.
    6. Cook for 20 minutes at 375°F (190°C).
    7. Brush with sweet chili sauce during the last 5 minutes of cooking.

    Cooking Time: 25 minutes

    Air Fryer Rotisserie Chicken with Fresh Sage and Butter
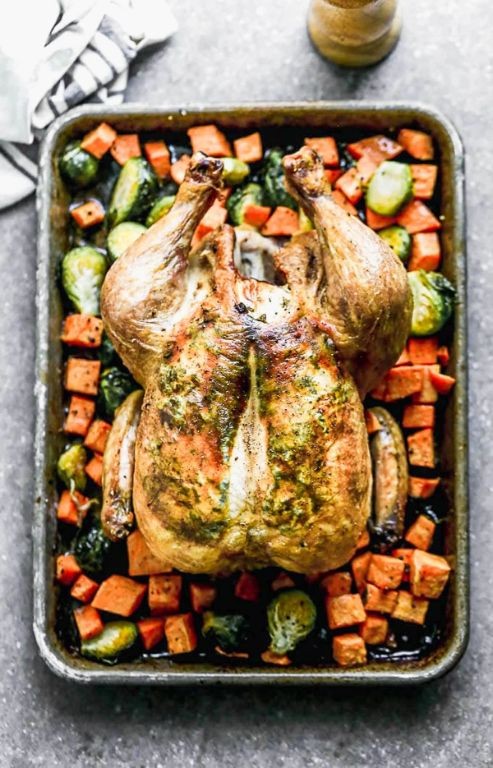
    Air Fryer Rotisserie Chicken with Fresh Sage and Butter

    Air Fryer Rotisserie Chicken with Fresh Sage and Butter

    Elevate your air fryer game with this easy and impressive recipe that combines the flavors of fresh sage, butter, and tender chicken. Perfect for a special occasion or everyday dinner.

    Ingredients:

    – 1 whole rotisserie-style chicken (3-4 lbs)
    – 2 tbsp unsalted butter, softened
    – 4 sprigs of fresh sage, chopped
    – Salt and pepper to taste

    Instructions:

    1. Preheat the air fryer to 400°F (200°C).
    2. Rinse the chicken and pat dry with paper towels.
    3. In a small bowl, mix together the softened butter and chopped sage.
    4. Rub the butter-sage mixture all over the chicken, making sure to get some under the skin as well.
    5. Season the chicken with salt and pepper to taste.
    6. Place the chicken in the air fryer basket, breast side up.
    7. Cook for 25-30 minutes or until the internal temperature reaches 165°F (74°C).
    8. Flip the chicken and cook for an additional 10-15 minutes or until crispy and golden brown.

    Cooking Time: 35-40 minutes

    Air Fryer Rotisserie Chicken with Citrus Marinade
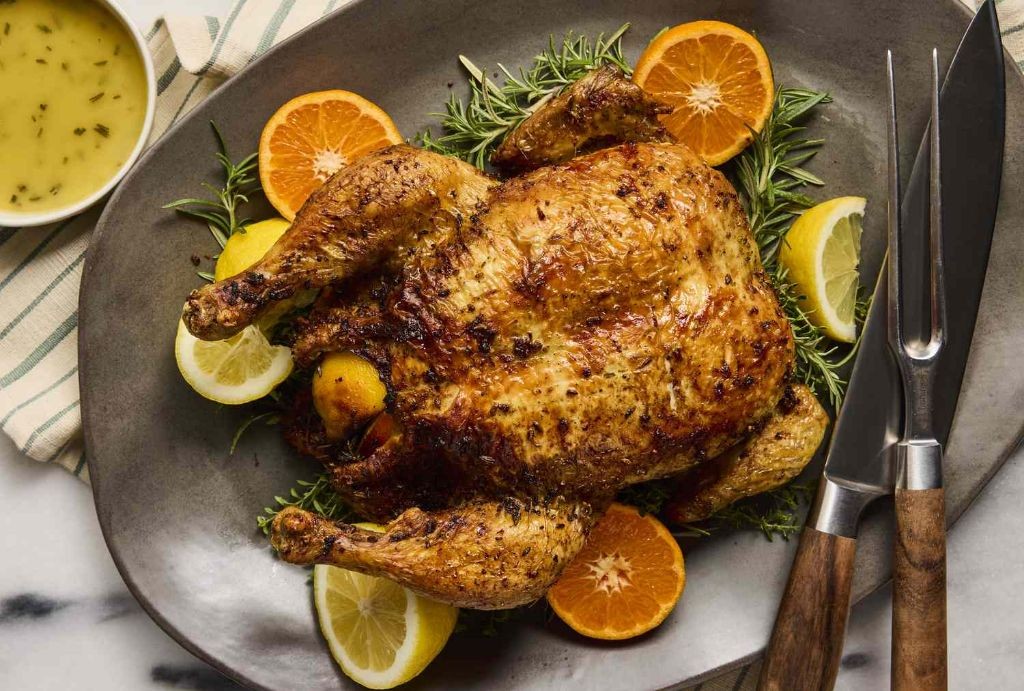
    Air Fryer Rotisserie Chicken with Citrus Marinade
    Elevate your dinner game with this flavorful air fryer recipe that combines the classic rotisserie chicken with a zesty citrus marinade.

    Ingredients:

    – 1 whole chicken (3-4 lbs)
    – 1/2 cup freshly squeezed orange juice
    – 1/4 cup freshly squeezed grapefruit juice
    – 2 tbsp olive oil
    – 2 cloves garlic, minced
    – 1 tsp dried thyme
    – Salt and pepper to taste

    Instructions:

    1. Preheat air fryer to 400°F (200°C).
    2. In a large bowl, whisk together orange and grapefruit juices, olive oil, garlic, and thyme.
    3. Add the chicken to the marinade, turning to coat evenly. Cover and refrigerate for at least 2 hours or overnight.
    4. Remove chicken from marinade, letting any excess liquid drip off.
    5. Place chicken in air fryer basket and cook for 20-22 minutes, or until internal temperature reaches 165°F (74°C).
    6. Baste with pan juices and let rest for 5 minutes before serving.

    Cooking Time: 20-22 minutes

    Air Fryer Rotisserie Chicken with Herb Infused Olive Oil
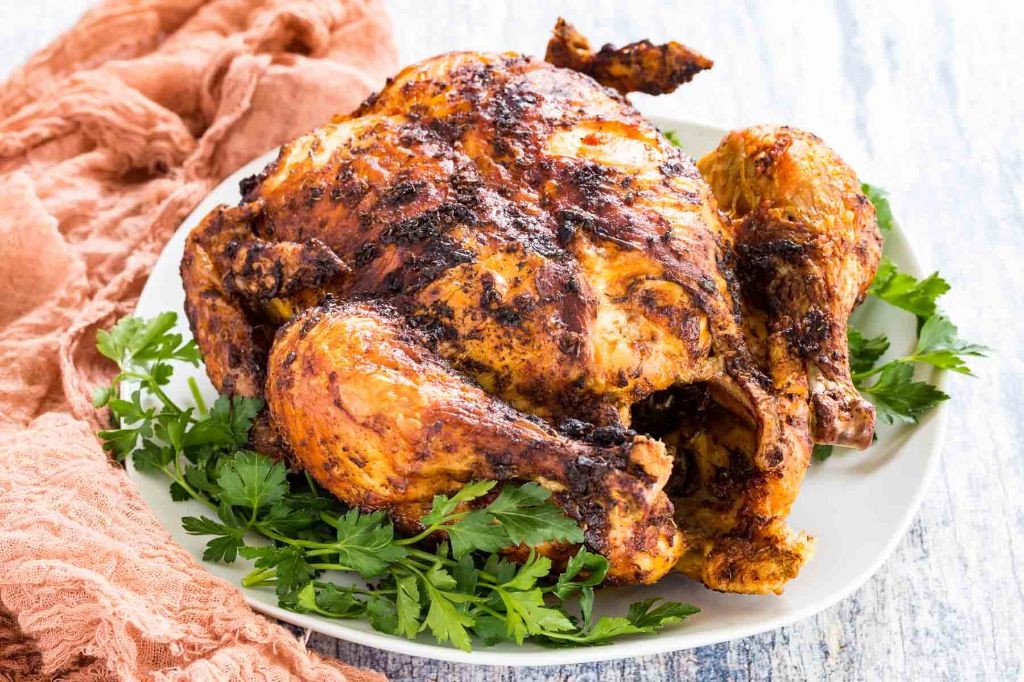
    Air Fryer Rotisserie Chicken with Herb Infused Olive Oil
    Elevate your chicken game with this simple and flavorful recipe that combines the best of air frying and rotisserie cooking. The addition of herb infused olive oil takes it to the next level!

    Ingredients:

    – 1 whole chicken (3-4 lbs)
    – 1/4 cup herb infused olive oil
    – 2 tbsp chopped fresh rosemary
    – 1 tsp garlic powder
    – Salt and pepper, to taste

    Instructions:

    1. Preheat Air Fryer to 400°F (200°C).
    2. Rinse the chicken and pat dry with paper towels.
    3. In a small bowl, mix together herb infused olive oil, chopped rosemary, and garlic powder.
    4. Rub the mixture all over the chicken, making sure to get some under the skin as well.
    5. Place the chicken in the Air Fryer basket, breast side up.
    6. Cook for 20-25 minutes, or until the internal temperature reaches 165°F (74°C).
    7. Let it rest for 5 minutes before carving and serving.

    Cooking Time: 20-25 minutes

    Air Fryer Rotisserie Chicken with Garlic Parmesan Crust
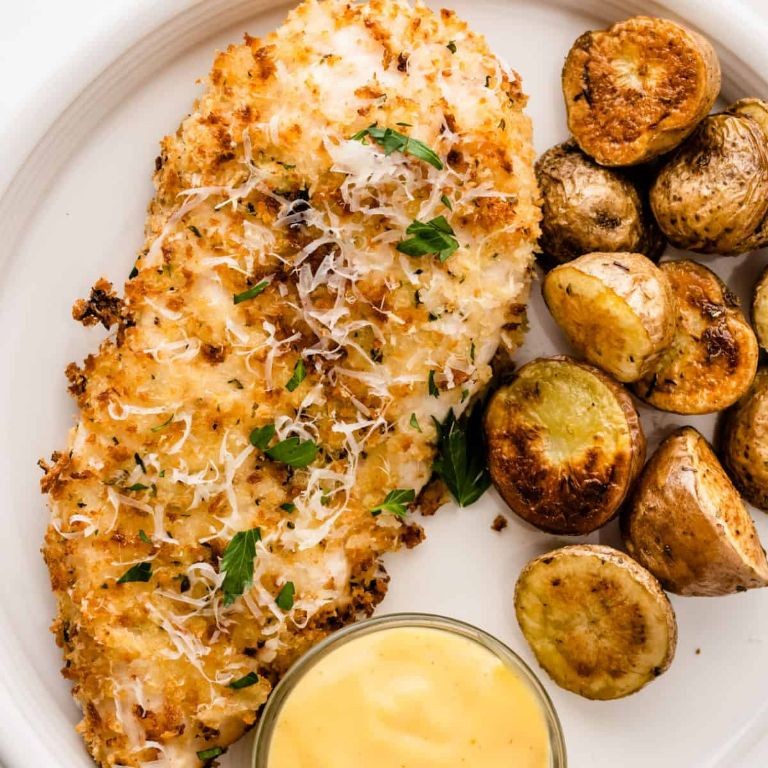
    Air Fryer Rotisserie Chicken with Garlic Parmesan Crust
    Get ready to elevate your air fryer game with this mouth-watering recipe! This crispy, flavorful chicken is a perfect blend of classic rotisserie and Italian-inspired flavors.

    Ingredients:

    – 1 whole chicken (3-4 lbs)
    – 2 cloves garlic, minced
    – 1/2 cup breadcrumbs
    – 1/4 cup grated Parmesan cheese
    – 1 tsp dried thyme
    – 1 tsp paprika
    – Salt and pepper to taste
    – 2 tbsp olive oil

    Instructions:

    1. Preheat air fryer to 375°F (190°C).
    2. Rinse the chicken and pat dry with paper towels.
    3. In a small bowl, mix together minced garlic, breadcrumbs, Parmesan cheese, thyme, paprika, salt, and pepper.
    4. Rub the mixture all over the chicken, making sure to coat evenly.
    5. Place the chicken in the air fryer basket and drizzle with olive oil.
    6. Cook for 25-30 minutes or until cooked through, shaking halfway.

    Cooking Time: 25-30 minutes

    Air Fryer Rotisserie Chicken with Smoked Paprika and Cumin
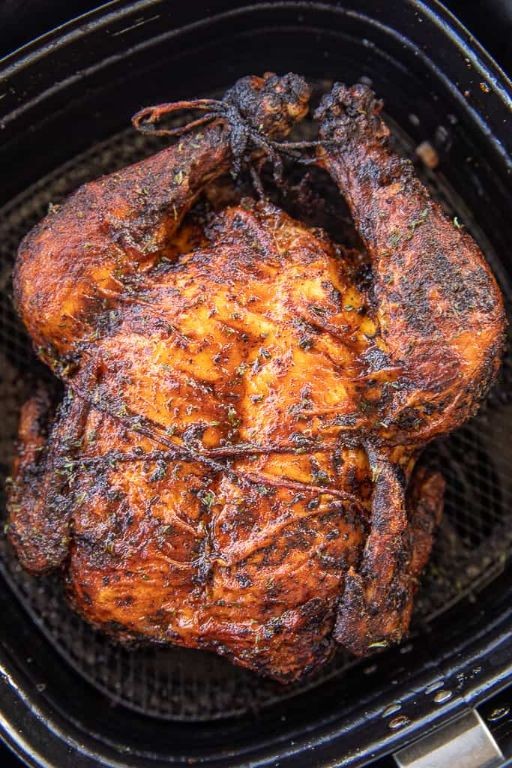
    Air Fryer Rotisserie Chicken with Smoked Paprika and Cumin
    Air Fryer Rotisserie Chicken with Smoked Paprika and Cumin

    Elevate your air fryer game with this flavorful rotisserie-inspired chicken dish, infused with the warm spices of smoked paprika and cumin. Perfect for a weeknight dinner or special occasion.

    Ingredients:

    – 1 whole chicken (3-4 lbs), patted dry
    – 2 tbsp olive oil
    – 1 tsp smoked paprika
    – 1 tsp ground cumin
    – Salt and pepper, to taste

    Instructions:

    1. Preheat the air fryer to 400°F (200°C).
    2. In a small bowl, mix together olive oil, smoked paprika, and cumin.
    3. Rub the spice mixture all over the chicken, making sure to get some under the skin as well.
    4. Season with salt and pepper to taste.
    5. Place the chicken in the air fryer basket, breast side up.
    6. Cook for 30 minutes at 400°F (200°C), then reduce heat to 375°F (190°C) and continue cooking for an additional 10-15 minutes, or until the internal temperature reaches 165°F (74°C).
    7. Let the chicken rest for 5-10 minutes before carving and serving.

    Cooking Time: Approximately 40-45 minutes

    Air Fryer Rotisserie Chicken with Tangy Mustard Sauce
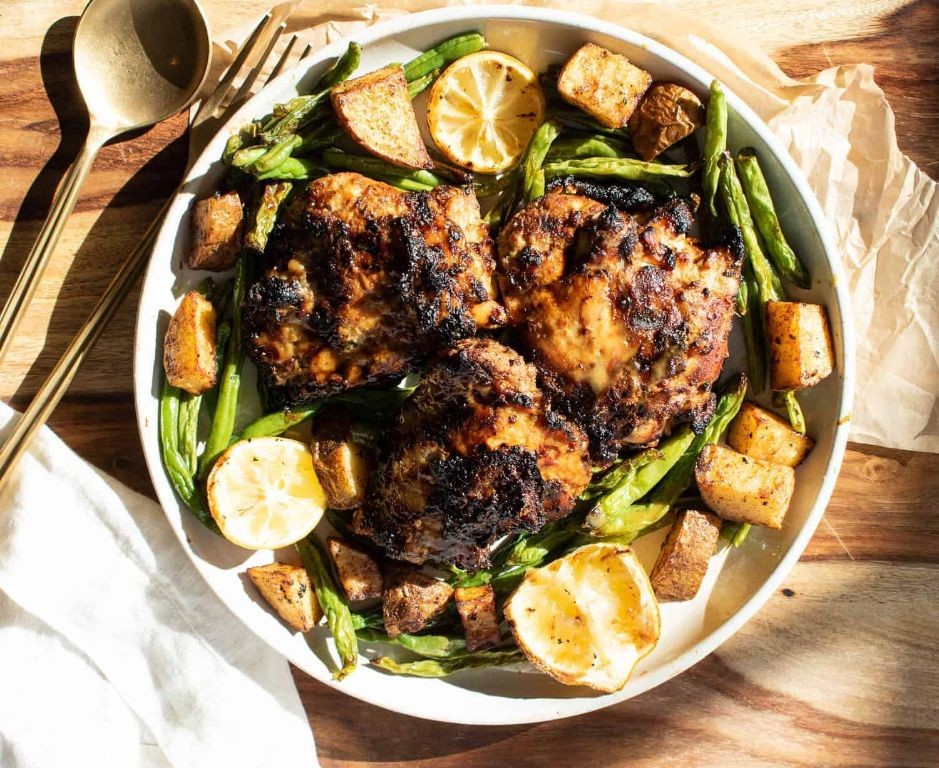
    Air Fryer Rotisserie Chicken with Tangy Mustard Sauce
    Elevate your dinner game with this mouthwatering Air Fryer Rotisserie Chicken recipe, perfectly paired with a tangy and savory mustard sauce.

    Ingredients:

    – 1 whole chicken (3-4 lbs)
    – 2 tbsp olive oil
    – 1 tsp salt
    – 1 tsp pepper
    – 1 tsp paprika
    – 1 tsp garlic powder
    – 1/4 cup tangy mustard sauce (store-bought or homemade)

    Instructions:

    1. Preheat the Air Fryer to 375°F (190°C).
    2. Rinse and pat dry the chicken.
    3. In a small bowl, mix together olive oil, salt, pepper, paprika, and garlic powder.
    4. Rub the mixture all over the chicken, making sure to get some under the skin as well.
    5. Place the chicken in the Air Fryer basket, breast side up.
    6. Cook for 25 minutes at 375°F (190°C).
    7. Baste with tangy mustard sauce and flip the chicken over. Cook for an additional 10-15 minutes, or until cooked through.

    Cooking Time: 35-40 minutes

    Enjoy your delicious Air Fryer Rotisserie Chicken with Tangy Mustard Sauce!

    Air Fryer Rotisserie Chicken with Fresh Herbs and Lemon
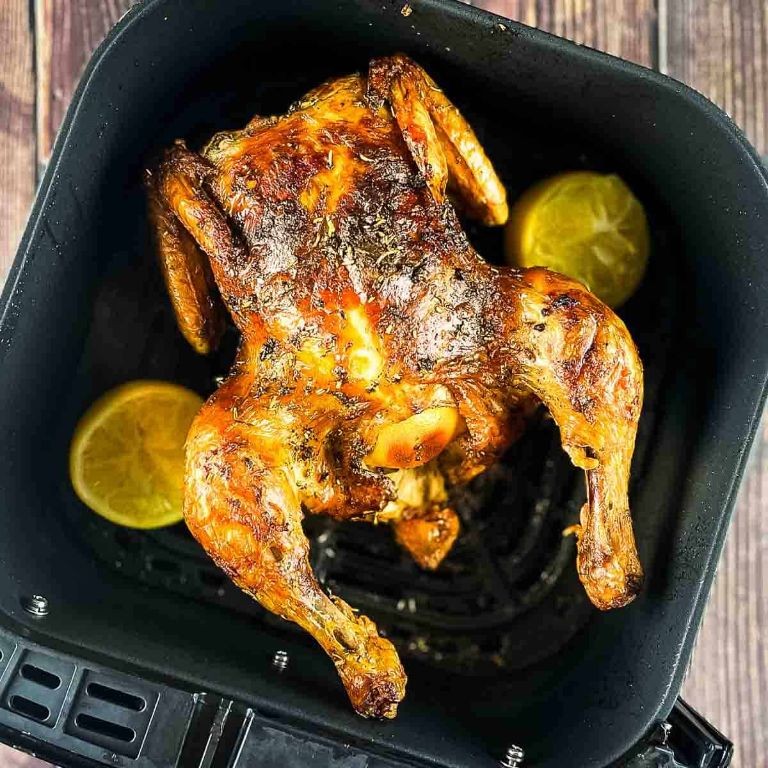
    Air Fryer Rotisserie Chicken with Fresh Herbs and Lemon
    Elevate your dinner game with this flavorful and easy-to-make Air Fryer Rotisserie Chicken recipe, infused with the brightness of fresh herbs and a squeeze of lemon.

    Ingredients:

    – 1 whole rotisserie chicken (3-4 lbs)
    – 2 tbsp olive oil
    – 2 lemons, juiced
    – 2 tbsp chopped fresh rosemary leaves
    – 1 tsp garlic powder
    – Salt and pepper to taste

    Instructions:

    1. Preheat the Air Fryer to 400°F (200°C).
    2. Rinse the chicken and pat dry with paper towels.
    3. In a small bowl, mix together olive oil, lemon juice, rosemary leaves, garlic powder, salt, and pepper.
    4. Rub the mixture all over the chicken, making sure to get some under the skin as well.
    5. Place the chicken in the Air Fryer basket, breast side up.
    6. Cook for 30 minutes at 400°F (200°C).
    7. Flip the chicken and continue cooking for an additional 20-25 minutes or until cooked through.

    Cooking Time: 50-55 minutes

    Summary

    Get ready to elevate your meal game with these 20 mouthwatering air fryer rotisserie chicken recipes! From classic herb-crusted perfection to spicy Cajun flair, and from sweet honey glaze to smoky BBQ, there’s something for everyone. Discover the perfect blend of flavors and techniques, including garlic butter, lemon pepper, paprika, and more. Whether you’re a busy home cook or a culinary enthusiast, these air fryer recipes will guide you in creating juicy, crispy, and utterly delicious rotisserie-style chicken every time.
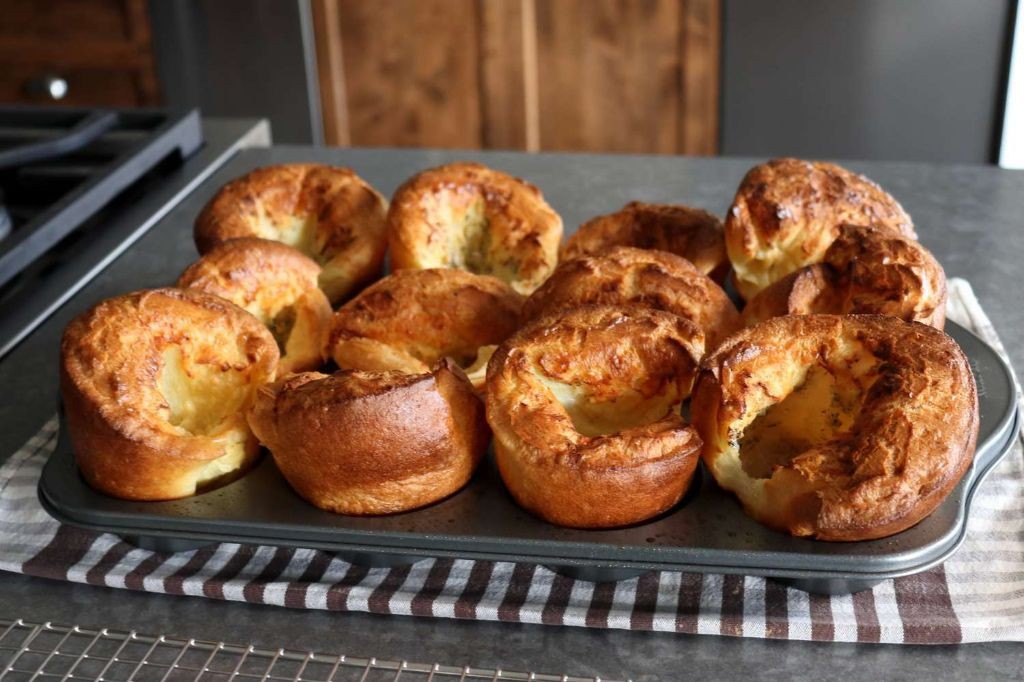
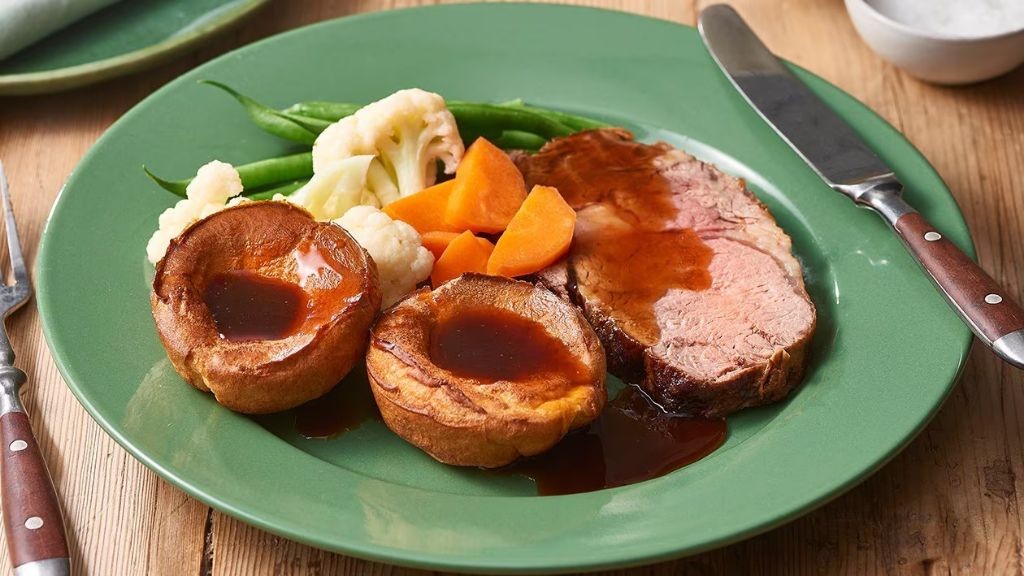
  • 20 Fluffy Yorkshire Pudding Recipes for Every Occasion

    20 Fluffy Yorkshire Pudding Recipes for Every Occasion

    Imagine a warm, flaky pastry that’s both savory and indulgent – that’s what you get with Yorkshire puddings. These beloved British treats have gained worldwide popularity for their light-as-air texture and versatility in accompanying various dishes. Whether it’s roast beef, sausage, or even sweet toppings like maple syrup, there’s a Yorkshire pudding recipe out there to satisfy your cravings.

    In this article, we’ll explore the world of Yorkshire puddings with 20 delicious recipes that cater to every palate and occasion. From classic combinations to bold flavor pairings and innovative twists, you’ll find inspiration for any meal or snack. So go ahead, get ready to indulge in the fluffiest, most divine Yorkshire puddings ever!

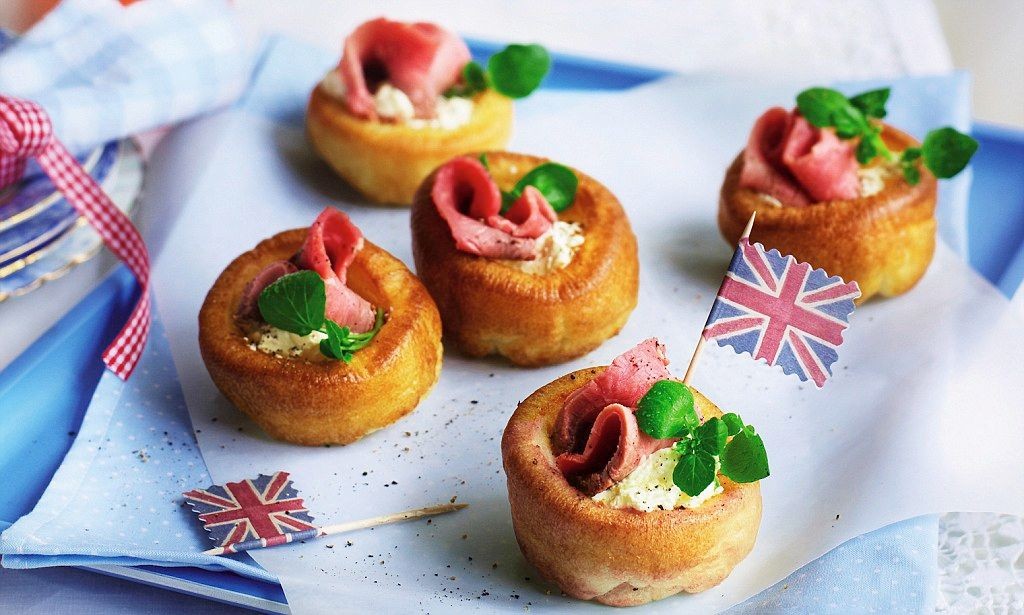
    Classic Yorkshire Pudding with Roast Beef

    Classic Yorkshire Pudding with Roast Beef
    A quintessential British combination that’s both elegant and satisfying. This recipe yields a light, airy Yorkshire pudding to accompany your perfectly roasted beef.

    Ingredients:

    – 1 cup all-purpose flour
    – 2 eggs
    – 1/2 cup whole milk
    – Salt and pepper, to taste
    – 2 tablespoons vegetable oil
    – 1 pound roast beef (cooked to desired level of doneness)

    Instructions:

    1. Preheat oven to 425°F (220°C).
    2. In a bowl, whisk together flour, eggs, and milk until smooth.
    3. Season with salt and pepper.
    4. Pour the batter into a greased 12-cup muffin tin or a 9×13-inch baking dish.
    5. Drizzle oil over the batter.
    6. Cook for 20-25 minutes (muffins) or 35-40 minutes (large pudding), until puffed and golden brown.

    Tips:

    – Serve Yorkshire pudding immediately after cooking, as it will start to deflate quickly.
    – Slice roast beef thinly against the grain, and serve with your freshly baked Yorkshire pudding.

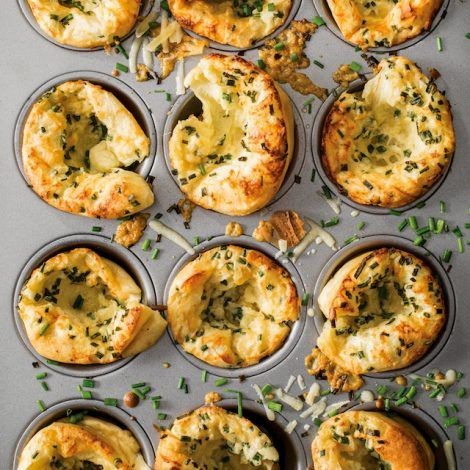
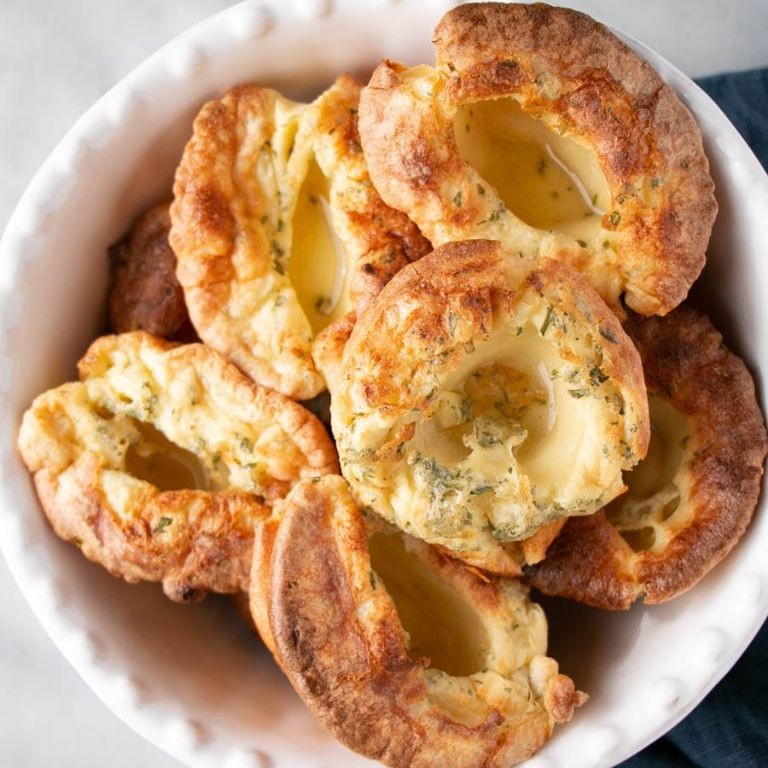
    Cheesy Garlic Yorkshire Pudding

    Cheesy Garlic Yorkshire Pudding
    Elevate your comfort food game with this decadent take on traditional Yorkshire pudding, infused with the rich flavors of cheese and garlic. Perfect as a side dish or main course.

    Ingredients:

    – 1 cup all-purpose flour
    – 2 eggs
    – 1/2 cup whole milk
    – 2 tablespoons butter, melted
    – 1 teaspoon salt
    – 1/4 cup grated cheddar cheese
    – 2 cloves garlic, minced

    Instructions:

    1. Preheat oven to 425°F (220°C).
    2. In a large bowl, whisk together flour, eggs, milk, and melted butter until smooth.
    3. Add salt, cheese, and garlic; stir until combined.
    4. Pour mixture into a greased 12-cup muffin tin or 9×13-inch baking dish.
    5. Cook for 15-20 minutes (muffins) or 25-30 minutes (large pan), or until puffed and golden brown.

    Cooking Time: 15-30 minutes

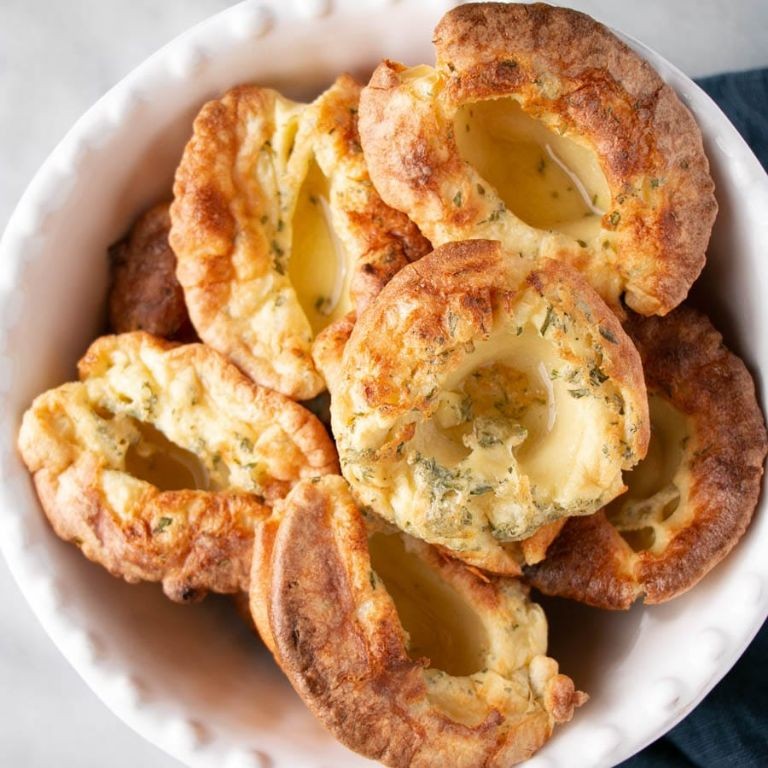
    Herb-Infused Yorkshire Pudding

    Herb-Infused Yorkshire Pudding
    Elevate your Sunday roast with this flavorful twist on the classic Yorkshire pudding recipe. Fresh herbs add a bright, aromatic flavor to this light and airy pastry.

    Ingredients:

    – 1 cup all-purpose flour
    – 2 teaspoons salt
    – 4 tablespoons butter, melted
    – 1 cup whole milk
    – 2 large eggs
    – 2 tablespoons chopped fresh thyme
    – 1 tablespoon chopped fresh rosemary
    – Cooking spray or oil

    Instructions:

    1. Preheat oven to 425°F (220°C).
    2. In a bowl, whisk together flour and salt.
    3. Add melted butter, milk, eggs, thyme, and rosemary to the dry ingredients. Whisk until smooth.
    4. Pour batter into a greased 12-cup muffin tin or a 9×13-inch baking dish.
    5. Cook for 20-25 minutes (muffins) or 35-40 minutes (baking dish), or until puffed and golden.
    6. Remove from oven and let cool for 5 minutes before serving.

    Cooking Time: 20-40 minutes

    Mini Yorkshire Puddings with Gravy

    Mini Yorkshire Puddings with Gravy
    A classic British treat gets a mini makeover! These bite-sized Yorkshire puddings are perfect for snacks or as part of a larger meal.

    Ingredients:

    – 1 cup all-purpose flour
    – 2 teaspoons salt
    – 4 teaspoons suet or vegetable fat, grated
    – 1/2 cup whole milk
    – 2 large eggs
    – Gravy (store-bought or homemade), for serving

    Instructions:

    1. Preheat oven to 425°F (220°C). Line a mini muffin tin with paper liners.
    2. In a bowl, whisk together flour and salt. Add suet or fat and rub into the flour until it resembles coarse breadcrumbs.
    3. In a separate bowl, whisk together milk and eggs.
    4. Pour wet ingredients into dry ingredients and mix until just combined (do not overmix).
    5. Divide batter evenly among muffin cups.
    6. Bake for 12-15 minutes, or until puffed and golden brown.
    7. Serve with your favorite gravy.

    Cooking Time: 12-15 minutes

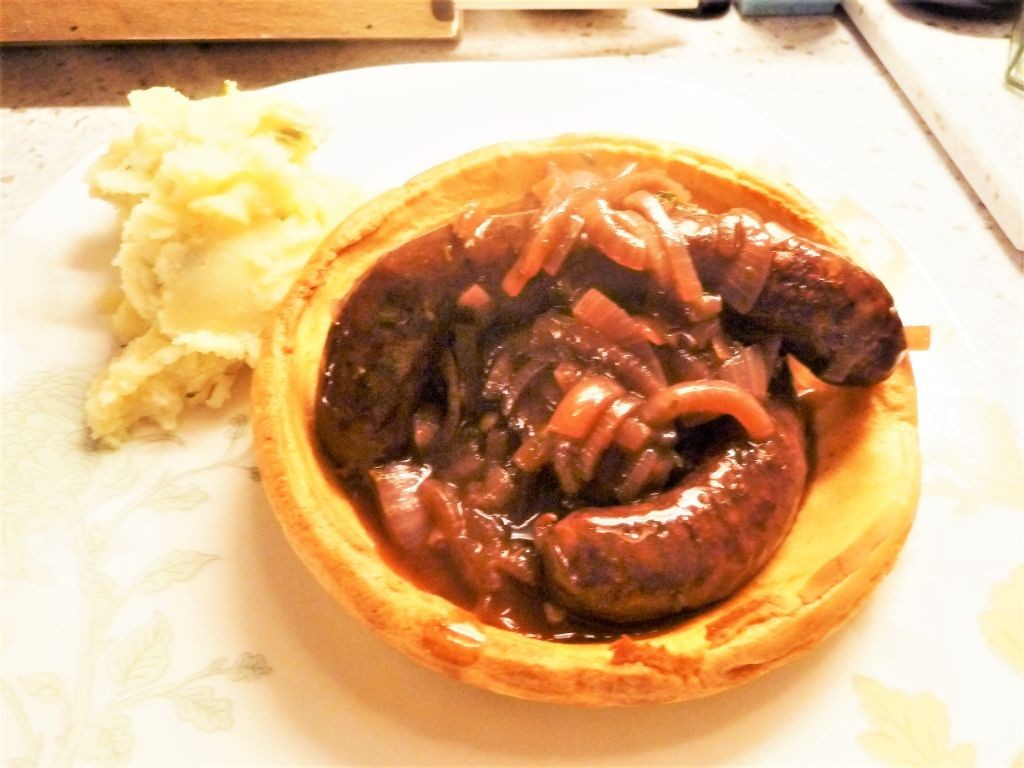
    Yorkshire Pudding with Sausage and Onion

    Yorkshire Pudding with Sausage and Onion
    This recipe combines the iconic British dish, Yorkshire pudding, with juicy sausages and caramelized onions for a satisfying meal.

    Ingredients:

    – 1 cup all-purpose flour
    – 2 teaspoons salt
    – 4 tablespoons butter, melted
    – 2 large eggs
    – 1/2 cup whole milk
    – 2 pork sausages (preferably bangers)
    – 1 medium onion, sliced

    Instructions:

    1. Preheat oven to 425°F (220°C).
    2. In a bowl, whisk together flour and salt. Add melted butter, eggs, and milk; whisk until smooth.
    3. Pour the batter into a greased 12-cup muffin tin or large Yorkshire pudding pan.
    4. Cook for 20-25 minutes, or until puffed and golden.
    5. While the pudding is cooking, cook sausages in a pan over medium heat until browned and cooked through.
    6. Add sliced onions to the same pan and cook until caramelized, stirring occasionally.
    7. Serve the Yorkshire pudding with sausages and onions on top.

    Cooking Time: 20-25 minutes (Yorkshire pudding), 15-20 minutes (sausages and onions)

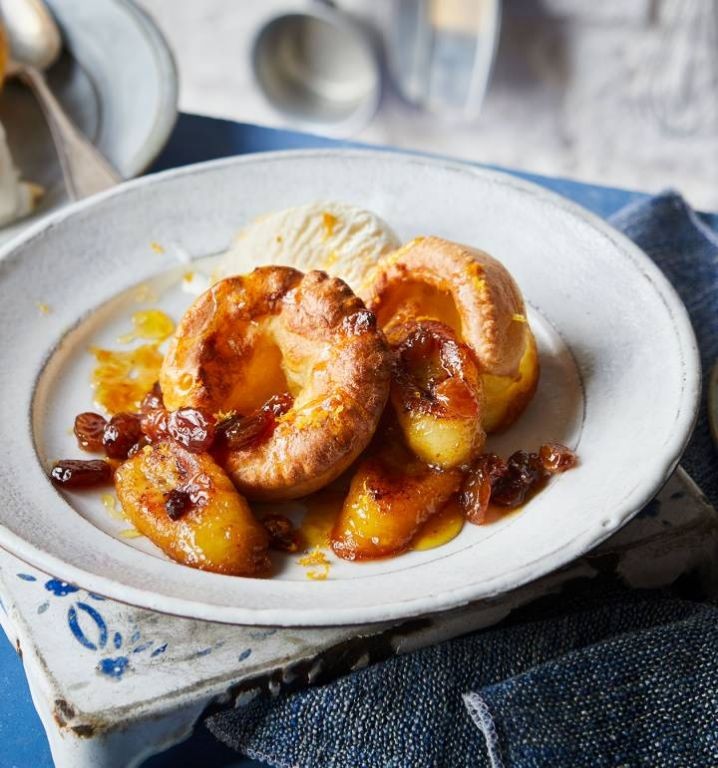
    Sweet Yorkshire Pudding with Maple Syrup

    Sweet Yorkshire Pudding with Maple Syrup
    Sweet Yorkshire Pudding with Maple Syrup: A classic English dessert gets a delicious twist with the addition of maple syrup!

    Ingredients:

    – 1 cup all-purpose flour
    – 2 teaspoons baking powder
    – 1/4 teaspoon salt
    – 1/2 cup whole milk
    – 2 large eggs
    – 2 tablespoons unsalted butter, melted
    – 2 tablespoons pure maple syrup

    Instructions:

    1. Preheat the oven to 425°F (220°C).
    2. In a medium bowl, whisk together flour, baking powder, and salt.
    3. In a separate bowl, whisk together milk, eggs, and melted butter.
    4. Add the dry ingredients to the wet ingredients and stir until smooth.
    5. Pour the batter into 6-8 cups of a muffin tin or a 9×13-inch baking dish.
    6. Bake for 20-25 minutes or until puffed and golden brown.
    7. Remove from the oven and let cool slightly.
    8. Drizzle with maple syrup and serve warm.

    Cooking Time: 20-25 minutes

    Bacon and Cheddar Yorkshire Pudding

    Bacon and Cheddar Yorkshire Pudding
    Elevate your brunch game with this savory twist on the classic British pastry. Crispy bacon, melted cheddar cheese, and a light-as-air Yorkshire pudding come together in perfect harmony.

    Ingredients:
    • 1 cup all-purpose flour
    • 2 teaspoons salt
    • 4 tablespoons butter, melted
    • 2 large eggs
    • 1/2 cup whole milk
    • 6 slices of cooked bacon, crumbled
    • 1/2 cup grated cheddar cheese

    Instructions:

    1. Preheat oven to 425°F (220°C).
    2. In a medium bowl, whisk together flour and salt.
    3. Add melted butter, eggs, and milk; whisk until smooth.
    4. Pour batter into a greased 12-cup muffin tin or 9×13-inch baking dish.
    5. Top each pudding with crumbled bacon and grated cheddar cheese.
    6. Bake for 20-25 minutes (muffins) or 35-40 minutes (large pudding).
    7. Serve warm, garnished with chopped fresh herbs if desired.

    Cooking Time: 20-40 minutes

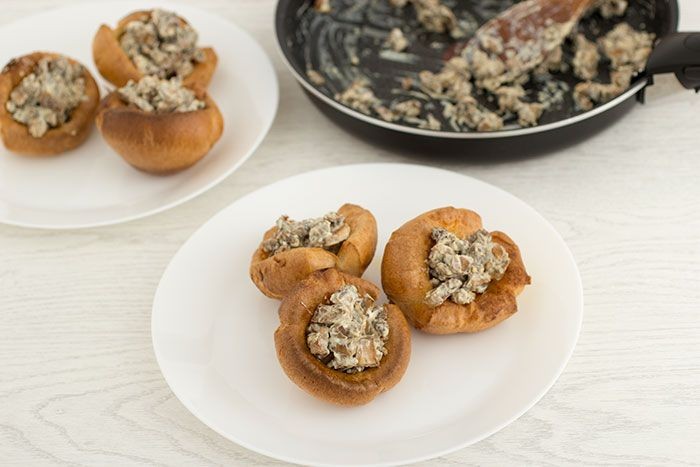
    Yorkshire Pudding with Mushroom Filling

    Yorkshire Pudding with Mushroom Filling
    Elevate your comfort food game with this indulgent twist on the classic Yorkshire pudding recipe, featuring a decadent mushroom filling. Perfect for a cozy dinner or special occasion.

    Ingredients:

    For the Yorkshire Pudding:

    – 1 cup all-purpose flour
    – 2 eggs
    – 1/2 cup whole milk
    – 1/4 teaspoon salt

    For the Mushroom Filling:

    – 8 oz mushrooms (button, cremini, or shiitake), sliced
    – 2 tablespoons butter
    – 1 small onion, finely chopped
    – 1 clove garlic, minced
    – 1 tablespoon all-purpose flour
    – 1/4 cup dry white wine (optional)
    – Salt and pepper to taste

    Instructions:

    1. Preheat oven to 425°F (220°C).
    2. In a large bowl, whisk together flour, eggs, milk, and salt for the Yorkshire Pudding.
    3. Pour into an ungreased 12-cup muffin tin or 9×13-inch baking dish.
    4. Bake for 20-25 minutes or until puffed and golden brown.
    5. Meanwhile, cook the mushroom filling in a skillet over medium heat with butter, onion, garlic, flour, and wine (if using). Season to taste.
    6. Serve the Yorkshire Pudding warm, filled with the savory mushroom mixture.

    Cooking Time: 40-50 minutes

    Rosemary and Sea Salt Yorkshire Pudding

    Rosemary and Sea Salt Yorkshire Pudding
    A savory twist on the classic Yorkshire pudding, this recipe combines the earthy flavor of rosemary with the crunch of sea salt. Perfect as a side dish or used to scoop up your favorite roast dinner.

    Ingredients:

    – 1 cup all-purpose flour
    – 2 teaspoons salt
    – 4 tablespoons butter, melted
    – 1/2 cup whole milk
    – 2 large eggs
    – 2 sprigs of fresh rosemary, chopped
    – 1/2 teaspoon sea salt

    Instructions:

    1. Preheat oven to 425°F (220°C).
    2. In a large bowl, whisk together flour and salt.
    3. Add melted butter, milk, eggs, and chopped rosemary to the dry ingredients. Whisk until smooth.
    4. Pour batter into a greased 12-cup muffin tin or a 9×13-inch baking dish.
    5. Sprinkle sea salt over the top of each Yorkshire pudding.
    6. Bake for 20-25 minutes, or until puffed and golden brown.

    Cooking Time: 20-25 minutes

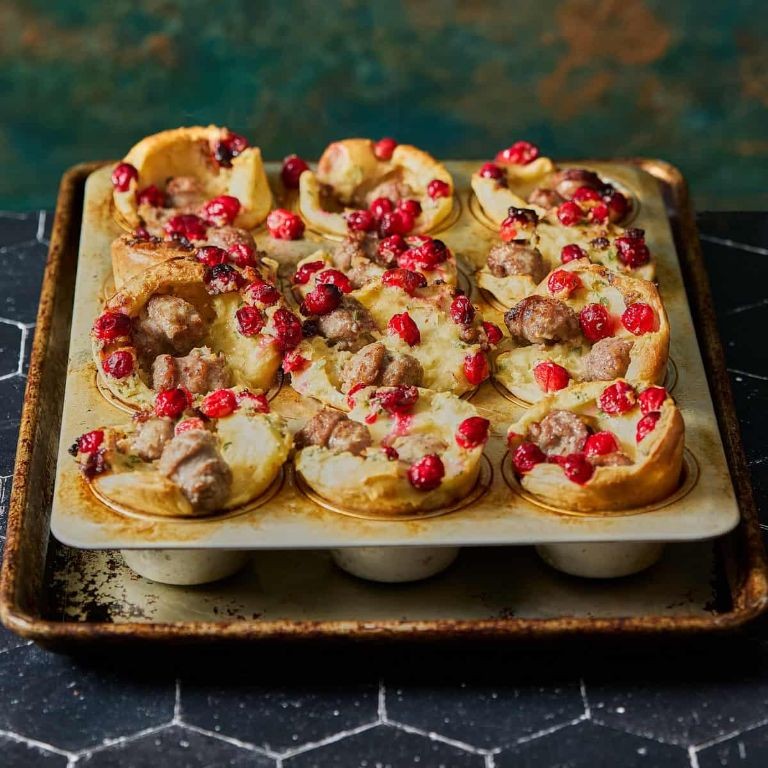
    Yorkshire Pudding with Cranberry Sauce

    Yorkshire Pudding with Cranberry Sauce
    Elevate your Sunday roast with this timeless combination of light, airy Yorkshire pudding and tangy cranberry sauce.

    Ingredients:

    For the Yorkshire Pudding:
    – 1 cup all-purpose flour
    – 2 teaspoons salt
    – 4 large eggs
    – 1/2 cup whole milk

    For the Cranberry Sauce:
    – 12 oz fresh or frozen cranberries
    – 1 cup granulated sugar
    – 1/4 cup orange juice
    – 1 tablespoon grated orange zest
    – 1/4 teaspoon ground cinnamon
    – 1/4 teaspoon salt
    – 2 tablespoons water

    Instructions:

    1. Preheat oven to 425°F (220°C).
    2. In a bowl, whisk together flour and salt.
    3. In another bowl, whisk eggs and milk until smooth.
    4. Gradually add dry ingredients to wet ingredients, whisking until combined.
    5. Pour mixture into a greased 12-cup muffin tin or 1 large baking dish.
    6. Cook Yorkshire pudding for 20-25 minutes (muffins) or 35-40 minutes (large dish).
    7. Meanwhile, combine cranberries, sugar, orange juice, zest, cinnamon, and salt in a saucepan. Bring to boil, then reduce heat and simmer for 10-12 minutes.
    8. Serve Yorkshire pudding warm with Cranberry Sauce spooned over the top.

    Cooking Time: Approximately 40-50 minutes.

    Vegan Yorkshire Pudding with Chickpea Flour

    Vegan Yorkshire Pudding with Chickpea Flour
    Vegan Yorkshire Pudding with Chickpea Flour: A Game-Changer for Traditionalists!

    This recipe is a plant-based twist on the classic British treat, using chickpea flour as a substitute for traditional wheat flour. The result is a lighter, more tender, and utterly delicious vegan Yorkshire pudding that’s perfect for Sunday roasts or as a side dish.

    Ingredients:

    • 1 cup chickpea flour
    • 1/2 cup non-dairy milk (such as almond or soy milk)
    • 1/4 teaspoon salt
    • 1/4 teaspoon baking powder
    • 1 tablespoon vegan butter or oil, melted
    • 1 egg replacement (such as flaxseed or chia seeds mixed with water)

    Instructions:

    1. In a large bowl, whisk together chickpea flour, non-dairy milk, salt, and baking powder.
    2. Add melted vegan butter or oil and stir until smooth.
    3. Combine egg replacement mixture and whisk until fully incorporated.
    4. Pour batter into a greased 12-cup muffin tin or a 9×13-inch baking dish.
    5. Bake at 425°F (220°C) for 20-25 minutes, or until puffed and golden brown.

    Cooking Time: 20-25 minutes

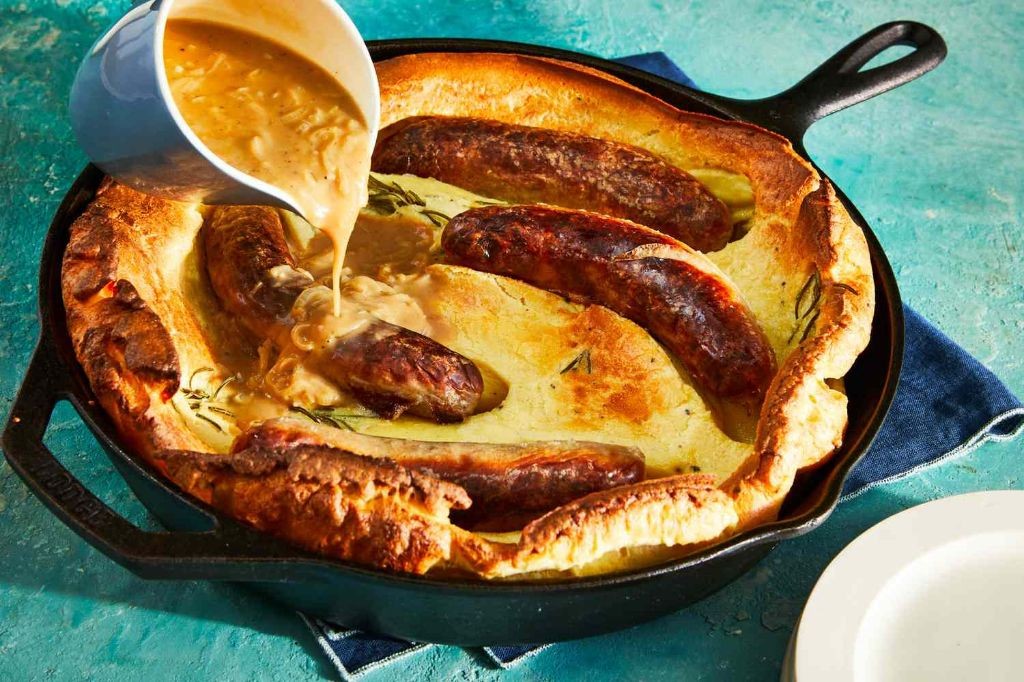
    Yorkshire Pudding Toad in the Hole

    Yorkshire Pudding Toad in the Hole
    A classic British comfort food, Yorkshire Pudding Toad in the Hole is a hearty dish that combines tender sausages and fluffy Yorkshire pudding within a crispy pastry crust. This recipe is perfect for a cozy evening meal or a satisfying lunch.

    Ingredients:

    – 4 pork sausages
    – 1 large onion, chopped
    – 2 cloves of garlic, minced
    – 1 cup all-purpose flour
    – 2 teaspoons salt
    – 4 tablespoons butter, melted
    – 1/2 cup whole milk
    – 2 eggs

    Instructions:

    1. Preheat oven to 425°F (220°C).
    2. In a large bowl, whisk together flour and salt.
    3. Add the chopped onion and minced garlic; mix well.
    4. Pour in the melted butter, milk, and beaten eggs; whisk until smooth.
    5. Grease a 12-cup muffin tin with cooking spray or butter.
    6. Pour the Yorkshire pudding batter into each cup, filling about 2/3 full.
    7. Place a sausage on top of the batter in each cup.
    8. Bake for 25-30 minutes or until the sausages are cooked through and the Yorkshire pudding is puffed and golden.

    Cooking Time: 25-30 minutes

    Caramelized Onion Yorkshire Pudding

    Caramelized Onion Yorkshire Pudding
    Caramelized Onion Yorkshire Pudding Recipe

    A sweet and savory twist on the classic Yorkshire pudding, this recipe combines the rich flavors of caramelized onions with a crispy, airy pastry.

    Ingredients:

    – 1 large onion, thinly sliced
    – 2 tablespoons olive oil
    – 2 cups all-purpose flour
    – 2 eggs
    – 1/2 cup whole milk
    – Salt and black pepper to taste

    Instructions:

    1. Preheat oven to 425°F (220°C).
    2. In a large skillet, cook the onion over medium-low heat for 30-40 minutes, stirring occasionally, until caramelized and golden brown.
    3. In a separate bowl, whisk together flour, eggs, milk, salt, and pepper to form the Yorkshire pudding batter.
    4. Pour the batter into a greased 12-cup muffin tin or a 9×13-inch baking dish.
    5. Top each cup with about 1 tablespoon of caramelized onions.
    6. Bake for 20-25 minutes, or until puffed and golden brown.

    Cooking Time: 45-50 minutes

    Spicy Jalapeño Yorkshire Pudding

    Spicy Jalapeño Yorkshire Pudding
    Elevate your brunch game with this savory and spicy take on the traditional Yorkshire pudding. The addition of jalapeños adds a bold, fiery kick that pairs perfectly with a hearty breakfast or lunch.

    Ingredients:

    – 1 cup all-purpose flour
    – 2 teaspoons salt
    – 4 large eggs
    – 1/2 cup whole milk
    – 1/4 cup water
    – 2 tablespoons butter, melted
    – 2 jalapeños, seeded and finely chopped
    – Cooking spray or oil

    Instructions:

    1. Preheat oven to 425°F (220°C).
    2. In a large bowl, whisk together flour and salt.
    3. In a separate bowl, whisk together eggs, milk, water, and melted butter.
    4. Add the chopped jalapeños to the wet ingredients and stir to combine.
    5. Pour the wet ingredients into the dry ingredients and whisk until smooth.
    6. Spray a 12-cup muffin tin with cooking spray or oil.
    7. Divide the batter evenly among the muffin cups.
    8. Bake for 20-25 minutes, or until puffed and golden.

    Cooking Time: 20-25 minutes

    Yorkshire Pudding with Smoked Salmon and Dill

    Yorkshire Pudding with Smoked Salmon and Dill
    This recipe combines the classic British pastry with the bright flavors of smoked salmon, dill, and cream. The result is a luxurious brunch dish that’s sure to impress.

    Ingredients:

    – 1 cup all-purpose flour
    – 2 eggs
    – 1/2 cup whole milk
    – Salt
    – 4 tablespoons butter, melted
    – 6 ounces smoked salmon, flaked
    – 1 tablespoon chopped fresh dill
    – 1/4 cup heavy cream

    Instructions:

    1. Preheat oven to 425°F (220°C).
    2. In a large bowl, whisk together flour and eggs.
    3. Add milk, salt, and melted butter; whisk until smooth.
    4. Pour batter into a greased 12-cup muffin tin or Yorkshire pudding pan.
    5. Bake for 20-25 minutes, or until puffed and golden.
    6. Meanwhile, mix flaked salmon with chopped dill and heavy cream.
    7. Split the warm Yorkshire puddings in half and top each with the salmon mixture.

    Cooking Time: 20-25 minutes

    Gluten-Free Yorkshire Pudding

    Gluten-Free Yorkshire Pudding
    Savor the classic flavors of Yorkshire pudding with this gluten-free adaptation, perfect for those requiring a wheat-free alternative.

    Ingredients:

    – 1 cup gluten-free all-purpose flour
    – 2 teaspoons salt
    – 4 tablespoons butter, melted
    – 1 cup whole milk
    – 2 large eggs

    Instructions:

    1. Preheat oven to 425°F (220°C). Grease a 12-cup muffin tin or 9×13-inch baking dish.
    2. In a large bowl, whisk together flour and salt.
    3. Add melted butter, milk, and eggs. Whisk until smooth, free of lumps.
    4. Pour batter into prepared muffin tin or baking dish.
    5. Bake for 20-25 minutes (muffins) or 30-35 minutes (large pudding).
    6. Remove from oven when puffed and golden brown.

    Tips: To prevent puddings from shrinking during cooking, ensure the oven is hot before adding the batter. For a crispy top, bake an additional 2-3 minutes.

    Yorkshire Pudding with Roasted Vegetables

    Yorkshire Pudding with Roasted Vegetables
    This recipe combines the classic British dish of Yorkshire pudding with a medley of roasted vegetables, creating a hearty and flavorful main course. Perfect for a chilly evening or special occasion.

    Ingredients:

    – 1 cup all-purpose flour
    – 2 eggs
    – 1/2 cup whole milk
    – 1/4 teaspoon salt
    – Vegetable oil for greasing the pan
    – Assorted vegetables, such as Brussels sprouts, carrots, and parsnips

    Instructions:

    1. Preheat oven to 425°F (220°C).
    2. In a bowl, whisk together flour, eggs, milk, and salt.
    3. Grease a 12-cup muffin tin with vegetable oil.
    4. Pour the Yorkshire pudding batter into the prepared muffin tin, filling each cup about 3/4 of the way full.
    5. Roast your chosen vegetables (e.g., Brussels sprouts, carrots, parsnips) in the oven at 425°F (220°C) for about 20-25 minutes, or until tender and caramelized.
    6. Place the muffin tin with Yorkshire pudding on the middle rack of the oven and cook for 15-18 minutes, or until puffed and golden brown.

    Cooking Time: Total cooking time: approximately 35-40 minutes.

    Yorkshire Pudding with Horseradish Cream

    Yorkshire Pudding with Horseradish Cream
    Elevate your roast dinner game with this classic British duo. Yorkshire pudding and horseradish cream are a match made in heaven, and this recipe makes it easy to bring the flavors together.

    Ingredients:
    – 1 cup all-purpose flour
    – 2 teaspoons salt
    – 4 tablespoons butter, melted
    – 2 large eggs
    – 1 cup whole milk
    – Horseradish cream (store-bought or homemade)

    Instructions:

    1. Preheat oven to 425°F (220°C).
    2. In a bowl, whisk together flour and salt.
    3. Add melted butter, eggs, and milk. Whisk until smooth.
    4. Pour batter into a greased 12-cup muffin tin.
    5. Bake for 20-25 minutes or until puffed and golden.
    6. Allow to cool before serving with horseradish cream.

    Cooking Time: 20-25 minutes

    Yorkshire Pudding with Apple and Cinnamon

    Yorkshire Pudding with Apple and Cinnamon
    Elevate your traditional Yorkshire pudding by adding a sweet twist with tender apples and warm cinnamon.

    Ingredients:

    – 1 cup all-purpose flour
    – 2 teaspoons salt
    – 4 tablespoons butter, melted
    – 1/2 cup whole milk
    – 2 eggs
    – 1 large apple, peeled and diced
    – 1/2 teaspoon ground cinnamon

    Instructions:

    1. Preheat oven to 425°F (220°C).
    2. In a bowl, whisk together flour, salt, and melted butter.
    3. Add milk and eggs, whisk until smooth batter forms.
    4. Pour batter into a greased 12-cup muffin tin or a 9×13-inch baking dish.
    5. Arrange diced apple on top of the batter.
    6. Sprinkle cinnamon evenly over the apples.
    7. Bake for 20-25 minutes (muffins) or 35-40 minutes (baking dish).
    8. Remove from oven and let cool slightly before serving.

    Cooking Time:

    – Muffin-sized Yorkshire puddings: 20-25 minutes
    – Large baking dish: 35-40 minutes

    Yorkshire Pudding with Blue Cheese and Walnuts

    Yorkshire Pudding with Blue Cheese and Walnuts
    Elevate your comfort food game with this decadent Yorkshire pudding recipe, topped with pungent blue cheese and crunchy walnuts. Perfect as a main course or side dish, this indulgent treat is sure to please.

    Ingredients:

    – 1 cup all-purpose flour
    – 2 eggs
    – 1/2 cup whole milk
    – 1/4 teaspoon salt
    – 1/2 cup grated blue cheese (such as Roquefort or Stilton)
    – 1/4 cup chopped walnuts
    – 2 tablespoons butter, melted

    Instructions:

    1. Preheat oven to 425°F (220°C).
    2. In a large bowl, whisk together flour and eggs until smooth.
    3. Gradually add milk, whisking until batter is free of lumps.
    4. Pour batter into a greased 12-cup muffin tin or a 9×13-inch baking dish.
    5. Bake for 20-25 minutes (muffins) or 35-40 minutes (large pudding).
    6. Remove from oven and let cool slightly.
    7. Top with blue cheese, walnuts, and melted butter.

    Cooking Time:

    – Muffins: 20-25 minutes
    – Large pudding: 35-40 minutes

    Summary

    Indulge in the richness of Yorkshire pudding with these 20 mouth-watering recipes! From classic pairings like roast beef to sweet treats with maple syrup, there’s something for every occasion. Get creative with cheese and garlic, herbs and spices, or go savory with sausage and onions. Plus, options for vegans, gluten-free enthusiasts, and even a Yorkshire pudding “toad in the hole” will satisfy any craving. Discover new flavor combinations and elevate your cooking with these innovative and delicious recipes.

  • 18 Delicious Whitefish Recipes for Every Occasion

    18 Delicious Whitefish Recipes for Every Occasion

    When it comes to cooking, there’s nothing quite like the versatility and flavor of whitefish. From delicate fillets to hearty chunks, this popular seafood choice can be prepared in a wide range of ways to suit any taste or occasion. Whether you’re looking for a quick weeknight dinner or an impressive special-occasion dish, we’ve got you covered with these 18 delicious whitefish recipes.

    In the following pages, we’ll explore everything from classic preparations like pan-seared whitefish and baked whitefish, to more adventurous dishes like crispy whitefish tacos and whitefish curry. We’ll also highlight some of the best ways to prepare whitefish for special occasions, such as grilled whitefish with Mediterranean vegetables or whitefish en papillote with lemon and dill.

    So dive in and discover the incredible world of whitefish recipes – we’re sure you’ll find something that will make your taste buds (and your guests) very happy!

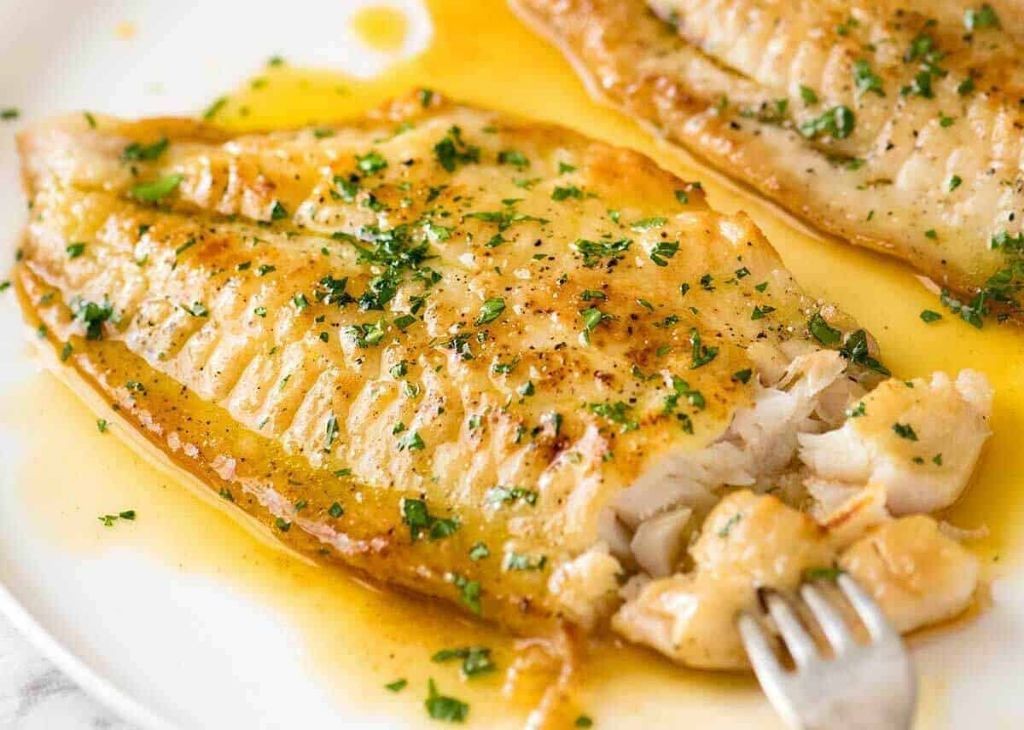
    Pan-Seared Whitefish with Lemon Butter Sauce

    Pan-Seared Whitefish with Lemon Butter Sauce
    A flavorful and elegant dish that combines the tenderness of whitefish with the brightness of lemon butter sauce, perfect for a weeknight dinner or special occasion.

    Ingredients:

    – 4 whitefish fillets (6 oz each)
    – 2 lemons, juiced
    – 1/4 cup unsalted butter, softened
    – 2 cloves garlic, minced
    – 1 tsp chopped fresh parsley
    – Salt and pepper to taste

    Instructions:

    1. Preheat skillet over medium-high heat.
    2. Season whitefish with salt and pepper.
    3. Add 1 tablespoon butter to the skillet and swirl until melted.
    4. Sear whitefish for 2-3 minutes per side, or until cooked through.
    5. Remove fish from skillet and set aside.
    6. Reduce heat to medium, add remaining butter to skillet.
    7. Stir in lemon juice, garlic, and parsley.
    8. Simmer sauce for 1-2 minutes, or until slightly thickened.
    9. Serve whitefish with lemon butter sauce spooned over the top.

    Cooking Time: 12-15 minutes

    Garlic Herb Baked Whitefish

    Garlic Herb Baked Whitefish
    A flavorful and healthy twist on traditional baked fish, this Garlic Herb Baked Whitefish recipe combines the richness of garlic with the brightness of herbs for a deliciously simple dinner.

    Ingredients:

    – 4 whitefish fillets (6 oz each)
    – 2 cloves of garlic, minced
    – 1 tablespoon olive oil
    – 1 tablespoon chopped fresh parsley
    – 1 tablespoon chopped fresh dill
    – Salt and pepper to taste

    Instructions:

    1. Preheat oven to 400°F (200°C).
    2. Line a baking sheet with parchment paper or aluminum foil.
    3. Place the whitefish fillets on the prepared baking sheet.
    4. In a small bowl, mix together the minced garlic, olive oil, parsley, and dill.
    5. Brush the garlic-herb mixture evenly over both sides of the fish fillets.
    6. Season with salt and pepper to taste.
    7. Bake for 12-15 minutes or until cooked through.

    Cooking Time: 12-15 minutes

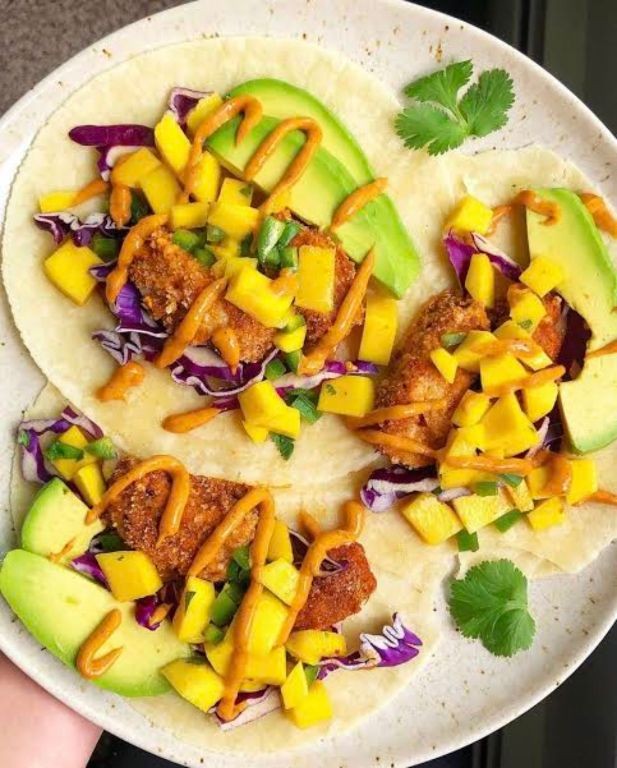
    Crispy Whitefish Tacos with Mango Salsa

    Crispy Whitefish Tacos with Mango Salsa
    Elevate your taco game with this refreshing and flavorful recipe, combining the crispiest whitefish with a sweet and tangy mango salsa.

    Ingredients:

    – 1 pound whitefish fillets (such as cod or tilapia), cut into small pieces
    – 1 cup all-purpose flour
    – 1/2 teaspoon paprika
    – 1/4 teaspoon cayenne pepper
    – 1/2 teaspoon salt
    – 1/4 teaspoon black pepper
    – Vegetable oil for frying
    – Taco shells (corn or flour)
    – Mango Salsa ingredients (below)

    Mango Salsa:

    – 2 ripe mangos, diced
    – 1/2 red onion, diced
    – 1 jalapeño pepper, seeded and finely chopped
    – 1 tablespoon lime juice
    – Salt to taste

    Instructions:

    1. In a shallow dish, mix together flour, paprika, cayenne pepper, salt, and black pepper.
    2. Dredge whitefish pieces in the flour mixture, shaking off excess.
    3. Heat about 1/4 inch of vegetable oil in a large skillet over medium-high heat. Fry fish for 2-3 minutes on each side, until crispy and golden brown.
    4. Warm taco shells according to package instructions.
    5. Assemble tacos by placing fried whitefish pieces onto the shells, then topping with Mango Salsa.

    Cooking Time: 15-20 minutes

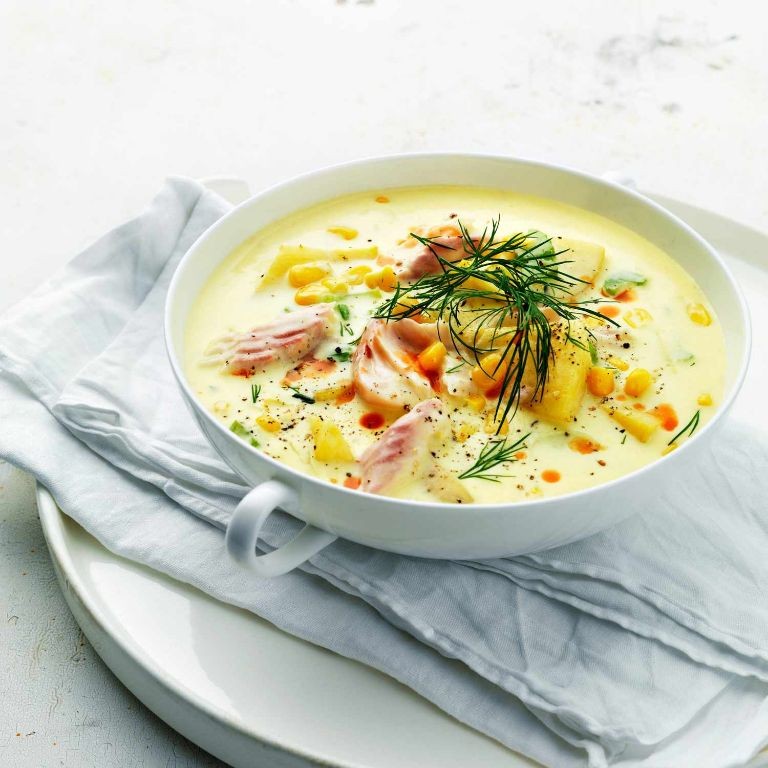
    Whitefish Chowder with Fresh Herbs

    Whitefish Chowder with Fresh Herbs
    This hearty chowder is a perfect blend of tender whitefish, fresh herbs, and creamy potatoes. A great way to warm up on a chilly day!

    Ingredients:

    – 1 pound whitefish fillets (such as cod or haddock), cut into bite-sized pieces
    – 2 medium potatoes, peeled and diced
    – 2 tablespoons butter
    – 1 onion, chopped
    – 3 cloves garlic, minced
    – 1/4 cup all-purpose flour
    – 1 cup fish stock
    – 1/2 cup heavy cream
    – Fresh parsley, chives, or dill for garnish

    Instructions:

    1. Melt butter in a large pot over medium heat. Add onion and cook until softened, about 3 minutes.
    2. Add garlic and cook for an additional minute.
    3. Gradually add flour, whisking to combine. Cook for 1-2 minutes.
    4. Add fish stock and bring to a simmer. Add whitefish pieces and cook until opaque and flaky, about 5-7 minutes.
    5. Stir in diced potatoes and cook until tender, about 10-12 minutes.
    6. Stir in heavy cream and adjust seasoning as needed.
    7. Serve hot, garnished with fresh herbs.

    Cooking Time: 20-25 minutes

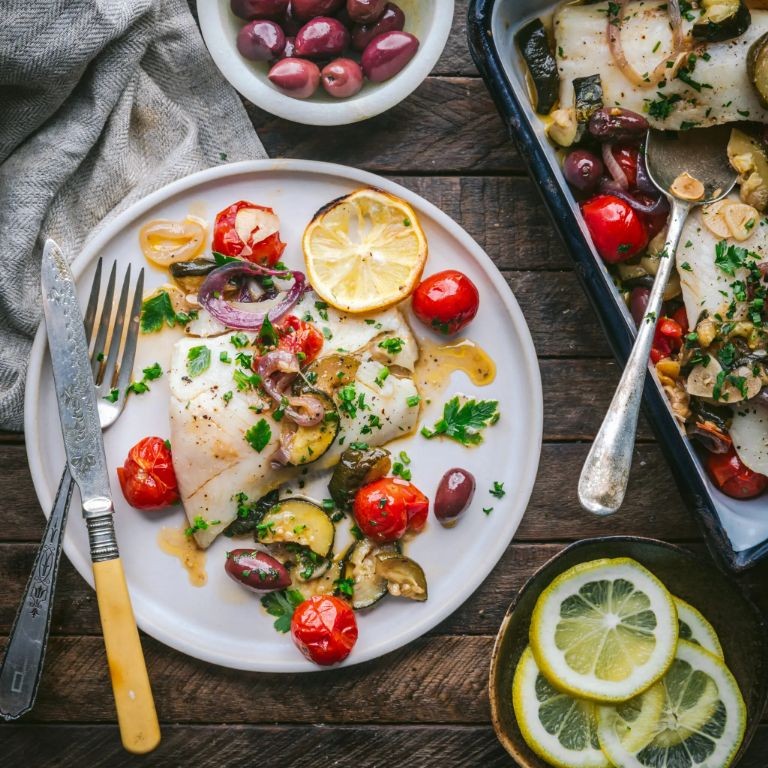
    Grilled Whitefish with Mediterranean Vegetables

    Grilled Whitefish with Mediterranean Vegetables
    Elevate your seafood game with this flavorful recipe that combines the freshness of whitefish with the bold flavors of the Mediterranean.

    Ingredients:

    – 4 whitefish fillets (6 oz each)
    – 2 tbsp olive oil
    – 1 large red bell pepper, sliced
    – 1 large yellow bell pepper, sliced
    – 1 large zucchini, sliced
    – 1/2 cup cherry tomatoes, halved
    – 2 cloves garlic, minced
    – 1 tsp dried oregano
    – Salt and pepper to taste
    – Lemon wedges (optional)

    Instructions:

    1. Preheat grill to medium-high heat.
    2. In a small bowl, whisk together olive oil, garlic, and oregano.
    3. Brush the mixture onto both sides of the whitefish fillets.
    4. Grill the fish for 4-5 minutes per side, or until cooked through.
    5. Meanwhile, brush the bell peppers, zucchini, and cherry tomatoes with olive oil and season with salt and pepper.
    6. Grill the vegetables alongside the fish for 3-4 minutes, or until tender.
    7. Serve the grilled whitefish with Mediterranean vegetables and a squeeze of lemon juice (if desired).

    Cooking Time: 15-20 minutes

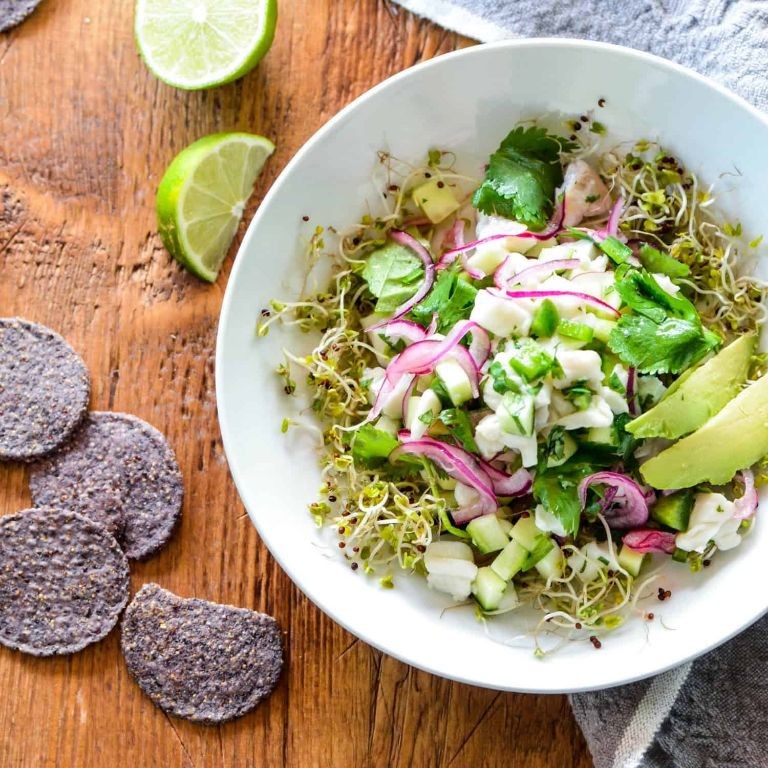
    Whitefish Ceviche with Lime and Cilantro

    Whitefish Ceviche with Lime and Cilantro
    This refreshing ceviche recipe combines the delicate flavor of whitefish with the brightness of lime juice and the freshness of cilantro. Perfect for a light and flavorful appetizer or snack.

    Ingredients:

    – 1 pound whitefish (such as cod or tilapia), cut into small pieces
    – 1/2 cup freshly squeezed lime juice
    – 1/4 cup chopped fresh cilantro
    – 1 jalapeño pepper, seeded and finely chopped
    – Salt, to taste

    Instructions:

    1. In a large bowl, combine the whitefish pieces, lime juice, cilantro, and jalapeño.
    2. Cover the bowl with plastic wrap and refrigerate for at least 30 minutes to allow the fish to “cook” in the lime juice.
    3. Just before serving, stir in a pinch of salt to taste.
    4. Serve chilled, garnished with additional cilantro if desired.

    Cooking Time: 30 minutes

    Whitefish Piccata with Capers and White Wine

    Whitefish Piccata with Capers and White Wine
    A classic Italian-inspired dish that’s quick to make and packed with flavor, this Whitefish Piccata recipe is perfect for a weeknight dinner. Thinly sliced whitefish is dredged in flour, then sautéed with garlic, capers, and a splash of white wine, resulting in a moist and tender filet.

    Ingredients:

    – 4 (6 oz) whitefish fillets (such as cod or tilapia)
    – 1 cup all-purpose flour
    – 2 cloves garlic, minced
    – 2 tbsp capers, chopped
    – 2 tbsp butter
    – 1/4 cup white wine
    – Salt and pepper to taste
    – Fresh parsley, chopped (optional)

    Instructions:

    1. Season the fish with salt and pepper.
    2. Dredge the fish in flour, shaking off excess.
    3. In a large skillet, melt 1 tbsp butter over medium-high heat. Add garlic and cook for 1 minute.
    4. Add the fish to the skillet and sauté for 3-4 minutes per side, or until cooked through.
    5. Remove the fish from the skillet and set aside.
    6. Reduce heat to medium-low and add remaining 1 tbsp butter. Stir in capers and white wine; simmer for 2-3 minutes or until sauce has thickened slightly.
    7. Serve the fish with the caper-white wine sauce spooned over the top. Garnish with chopped parsley, if desired.

    Cooking Time: 12-15 minutes

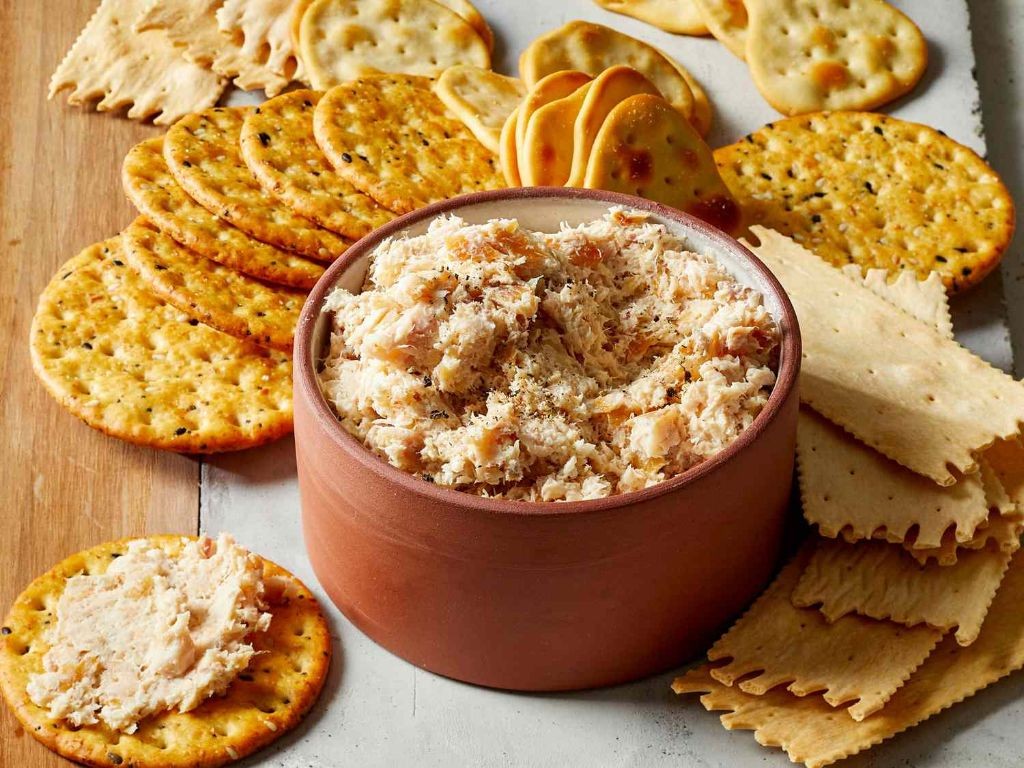
    Smoked Whitefish Dip with Crackers

    Smoked Whitefish Dip with Crackers
    Elevate your snack game with this creamy and savory smoked whitefish dip, perfectly paired with crunchy crackers.

    Ingredients:

    – 1 (8 oz) container of smoked whitefish, flaked
    – 1/2 cup mayonnaise
    – 1/4 cup sour cream
    – 1 tablespoon lemon juice
    – 1/2 teaspoon Worcestershire sauce
    – 1/2 teaspoon Old Bay seasoning
    – Salt and pepper to taste
    – 1 bag of crackers (such as Ritz or saltines)

    Instructions:

    1. In a medium bowl, combine the flaked whitefish, mayonnaise, sour cream, lemon juice, Worcestershire sauce, and Old Bay seasoning. Mix until smooth.
    2. Season with salt and pepper to taste.
    3. Cover and refrigerate for at least 30 minutes to allow flavors to meld.
    4. Serve chilled with crackers.

    Cooking Time: None

    Serves: 8-10 people

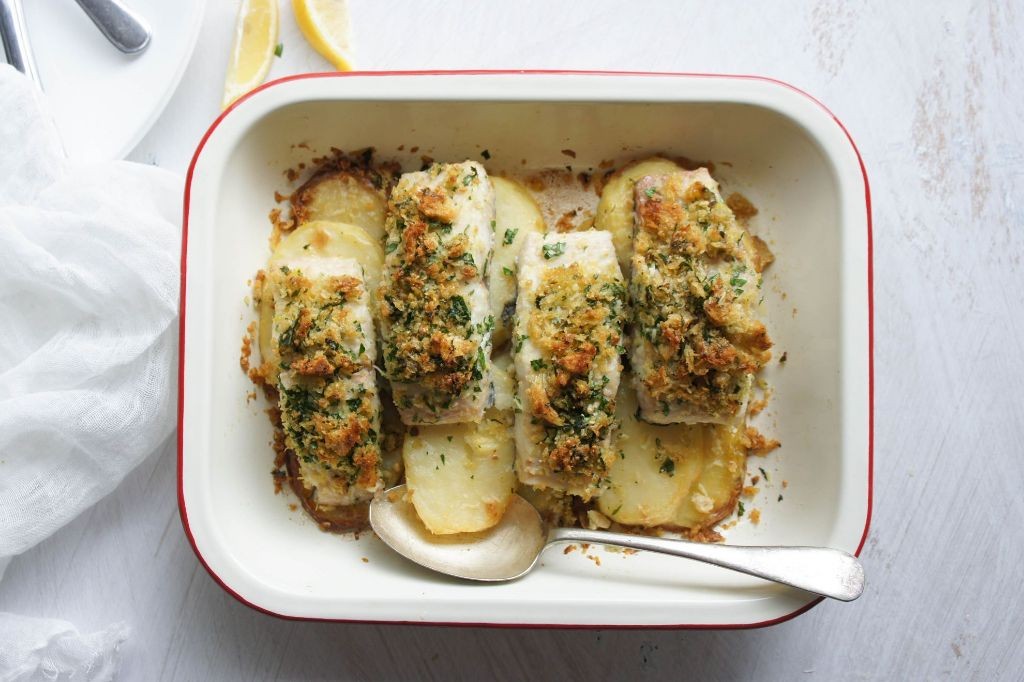
    Whitefish and Potato Bake with Parmesan Crust

    Whitefish and Potato Bake with Parmesan Crust
    Whitefish and Potato Bake with Parmesan Crust: A creamy and crispy twist on a classic comfort food dish. This recipe combines flaky whitefish, tender potatoes, and a crunchy Parmesan crust for a satisfying meal.

    Ingredients:

    – 4 whitefish fillets (6 oz each)
    – 2 large potatoes, peeled and thinly sliced
    – 1/4 cup unsalted butter, melted
    – 1 cup grated Parmesan cheese
    – 1/2 cup all-purpose flour
    – Salt and pepper to taste

    Instructions:

    1. Preheat oven to 375°F (190°C).
    2. In a large bowl, combine the whitefish fillets, sliced potatoes, melted butter, salt, and pepper. Toss until the fish and potatoes are well coated.
    3. Transfer the mixture to a 9×13-inch baking dish and set aside.
    4. In a small bowl, mix together the Parmesan cheese and flour.
    5. Sprinkle the Parmesan crust evenly over the top of the whitefish and potatoes.
    6. Bake for 25-30 minutes or until the fish is cooked through and the potatoes are tender.

    Cooking Time: 25-30 minutes

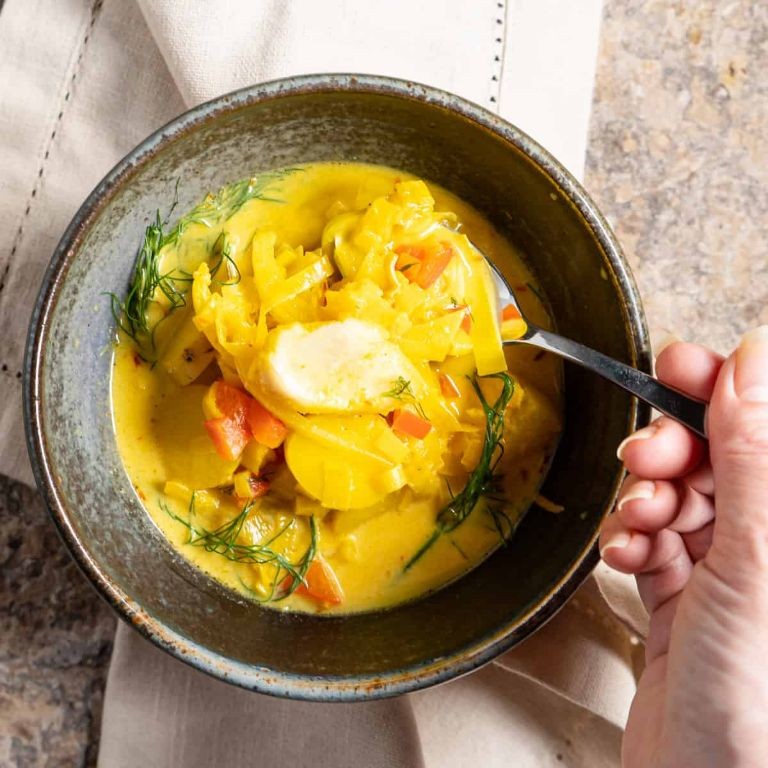
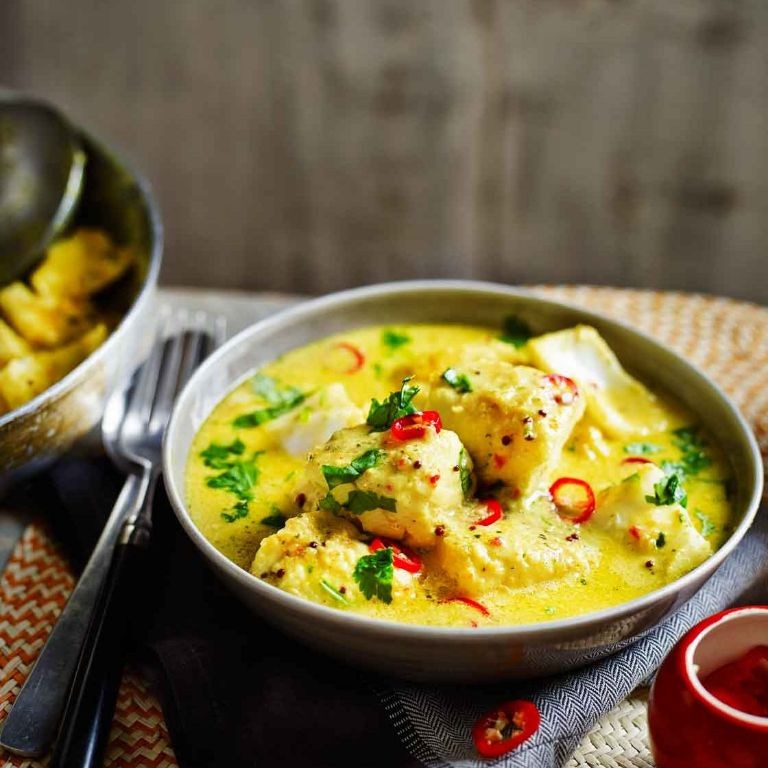
    Whitefish Curry with Coconut Milk

    Whitefish Curry with Coconut Milk
    Experience the warm, comforting flavors of India with this creamy whitefish curry made with coconut milk and a blend of aromatic spices.

    Ingredients:

    – 1 pound whitefish fillets (such as cod or tilapia), cut into bite-sized pieces
    – 2 medium onions, diced
    – 3 cloves garlic, minced
    – 1 tablespoon grated fresh ginger
    – 1 teaspoon ground cumin
    – 1 teaspoon curry powder
    – 1/2 teaspoon turmeric
    – 1/4 teaspoon cayenne pepper (optional)
    – 1 can (14 oz) coconut milk
    – Salt and pepper to taste
    – Fresh cilantro leaves for garnish

    Instructions:

    1. Heat oil in a large skillet over medium-high heat.
    2. Add onions, garlic, and ginger; cook until onions are translucent, about 3-4 minutes.
    3. Add cumin, curry powder, turmeric, and cayenne pepper (if using); cook for 1 minute, stirring constantly.
    4. Add whitefish pieces and cook until pink and flaky, about 5-6 minutes.
    5. Stir in coconut milk; bring to a simmer.
    6. Reduce heat to medium-low and let curry simmer for 5-7 minutes or until the sauce has thickened slightly.
    7. Season with salt and pepper to taste.
    8. Garnish with cilantro leaves.

    Cooking Time: 20-25 minutes

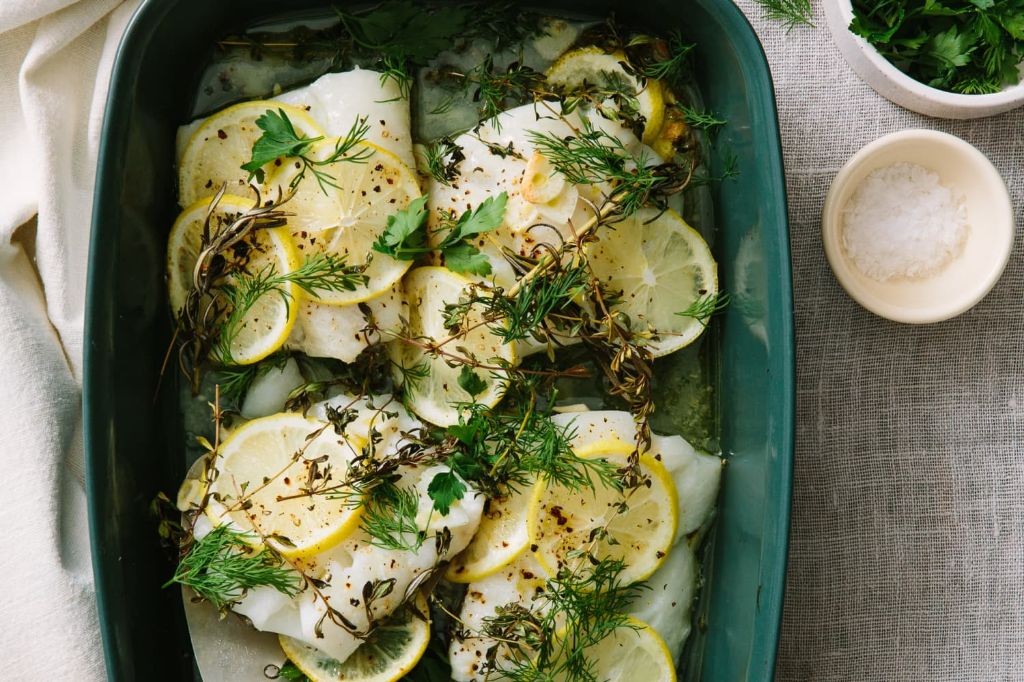
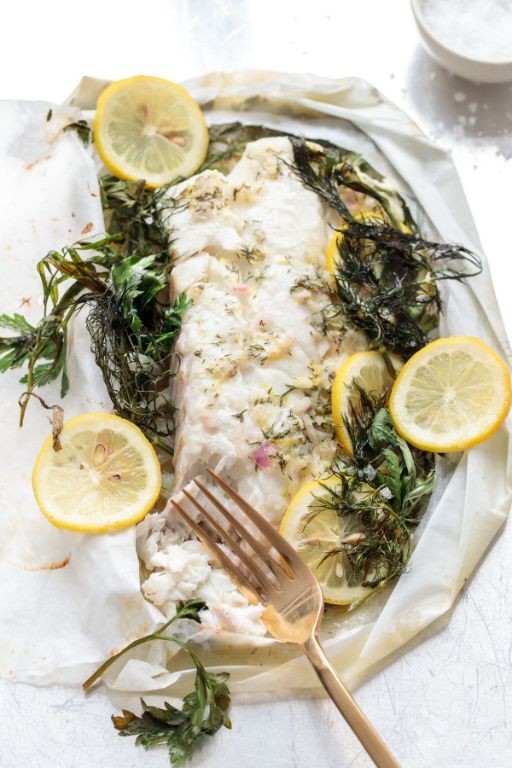
    Whitefish en Papillote with Lemon and Dill

    Whitefish en Papillote with Lemon and Dill
    A flavorful and moist whitefish dish wrapped in parchment paper, infused with the brightness of lemon and the freshness of dill.

    Ingredients:

    – 4 whitefish fillets (6 oz each)
    – 1/2 cup freshly squeezed lemon juice
    – 1/4 cup olive oil
    – 2 tbsp chopped fresh dill
    – 2 cloves garlic, minced
    – Salt and pepper to taste

    Instructions:

    1. Preheat oven to 375°F (190°C).
    2. In a small bowl, mix together lemon juice, olive oil, chopped dill, garlic, salt, and pepper.
    3. Place a whitefish fillet on a piece of parchment paper, leaving a 1-inch border around the fish.
    4. Spoon the lemon-dill mixture evenly over the fish.
    5. Fold the parchment paper over the fish to create a sealed packet.
    6. Repeat with the remaining fillets and ingredients.
    7. Bake for 12-15 minutes or until the fish is cooked through.

    Cooking Time: 12-15 minutes

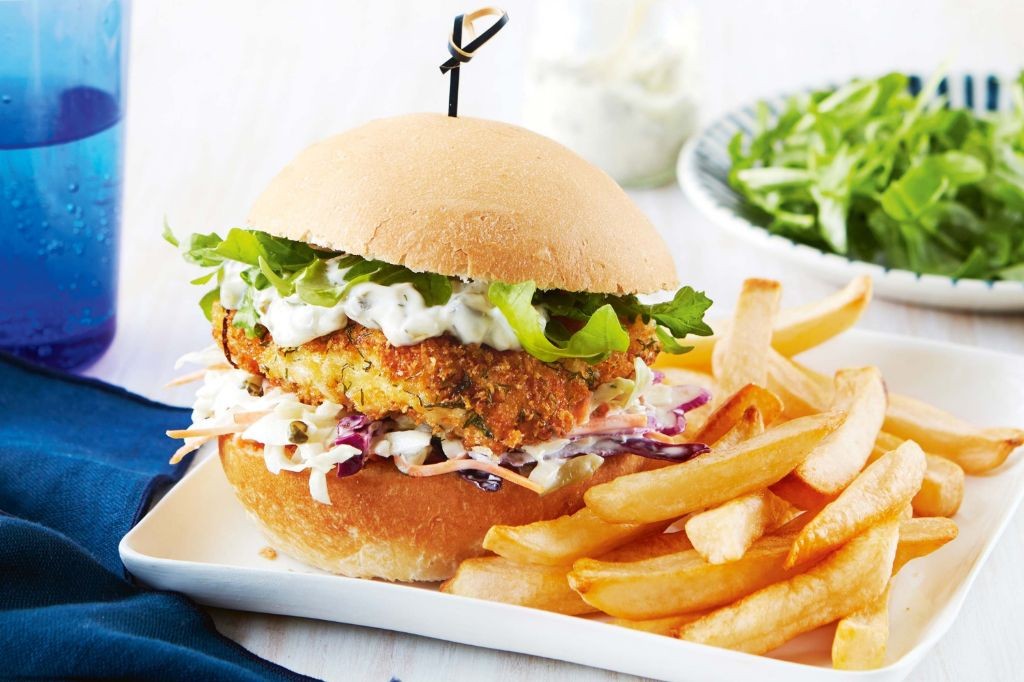
    Whitefish Burgers with Tartar Sauce

    Whitefish Burgers with Tartar Sauce
    Elevate your burger game with these flavorful and refreshing whitefish burgers, paired with a tangy tartar sauce. Perfect for a light and satisfying meal or as an appetizer.

    Ingredients:

    – 1 pound whitefish fillets (such as cod or tilapia), finely chopped
    – 1/2 cup panko breadcrumbs
    – 1 tablespoon lemon juice
    – 1 egg, lightly beaten
    – 1/4 teaspoon salt
    – 1/8 teaspoon black pepper
    – 4 hamburger buns
    – Lettuce, tomato, and cheese (optional)
    – Tartar Sauce:
    + 1 cup mayonnaise
    + 2 tablespoons chopped pickle relish
    + 1 tablespoon lemon juice
    + Salt and pepper to taste

    Instructions:

    1. Preheat a non-stick skillet or grill over medium-high heat.
    2. In a bowl, combine whitefish, panko breadcrumbs, lemon juice, egg, salt, and pepper. Mix well.
    3. Form into 4-6 patties, depending on desired size.
    4. Cook burgers for 3-4 minutes per side, or until cooked through.
    5. Meanwhile, prepare tartar sauce by mixing mayonnaise, pickle relish, lemon juice, salt, and pepper in a bowl.
    6. Assemble burgers with lettuce, tomato, cheese (if using), and tartar sauce on top.

    Cooking Time: 12-15 minutes

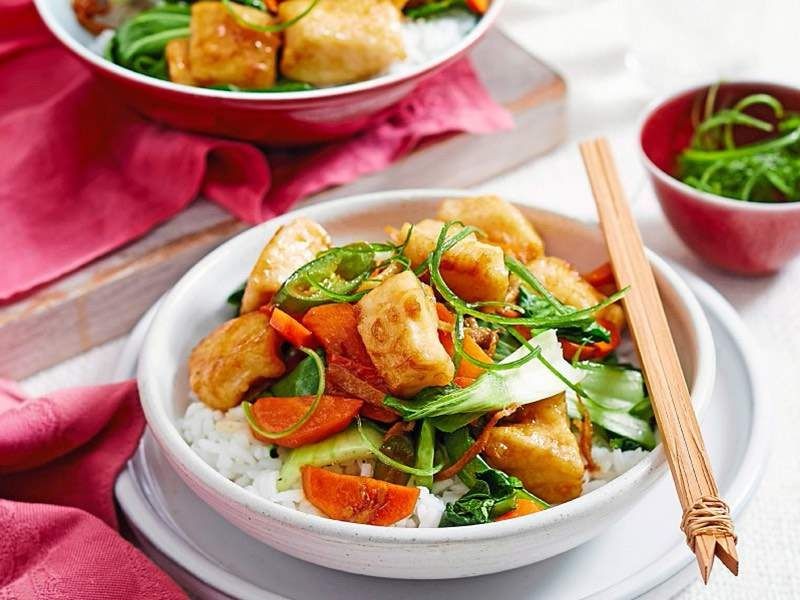
    Whitefish Stir-Fry with Ginger and Soy

    Whitefish Stir-Fry with Ginger and Soy
    A flavorful and nutritious stir-fry recipe that combines the delicate taste of whitefish with the warmth of ginger and the savory goodness of soy sauce. This dish is perfect for a quick weeknight dinner or a special occasion.

    Ingredients:

    – 1 lb whitefish fillets (such as cod or tilapia)
    – 2 inches fresh ginger, sliced
    – 2 cloves garlic, minced
    – 1 tablespoon vegetable oil
    – 2 tablespoons soy sauce
    – 1 teaspoon sesame oil
    – Salt and pepper to taste
    – Chopped scallions for garnish (optional)

    Instructions:

    1. Heat the vegetable oil in a large skillet or wok over medium-high heat.
    2. Add the sliced ginger and cook for 1 minute, until fragrant.
    3. Add the whitefish fillets and cook for 3-4 minutes per side, until cooked through.
    4. Remove the fish from the pan and set aside.
    5. In the same pan, add the minced garlic and cook for 30 seconds, until fragrant.
    6. Stir in the soy sauce and sesame oil.
    7. Return the whitefish to the pan and stir to coat with the sauce.
    8. Season with salt and pepper to taste.
    9. Garnish with chopped scallions, if desired.
    10. Serve immediately and enjoy!

    Cooking Time: 12-15 minutes

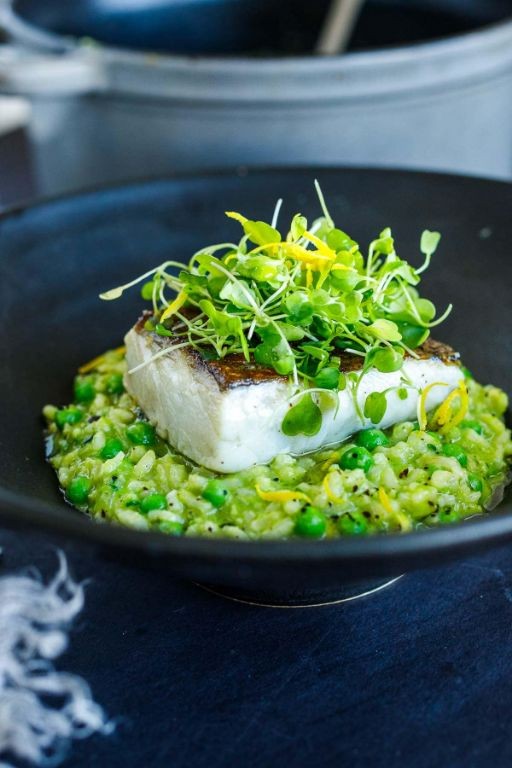
    Whitefish Risotto with Peas and Lemon Zest

    Whitefish Risotto with Peas and Lemon Zest
    This creamy risotto pairs perfectly with the delicate flavor of whitefish, adding a burst of freshness from lemon zest and sweetness from peas. A comforting yet elegant dish for any occasion.

    Ingredients:

    – 1 pound whitefish fillets (such as cod or tilapia)
    – 2 cups Arborio rice
    – 4 cups vegetable broth, warmed
    – 2 tablespoons olive oil
    – 1 small onion, finely chopped
    – 2 cloves garlic, minced
    – 1 cup fresh peas
    – 2 tablespoons white wine (optional)
    – 2 tablespoons freshly squeezed lemon juice
    – 1 teaspoon grated lemon zest
    – Salt and pepper, to taste
    – Grated Parmesan cheese, for serving (optional)

    Instructions:

    1. Cook whitefish according to package instructions; set aside.
    2. In a large skillet, heat oil over medium-high. Add onion and garlic; cook until softened, 3-4 minutes.
    3. Add Arborio rice; cook for 1 minute, stirring constantly.
    4. Gradually add warmed broth, stirring continuously and allowing each portion to absorb before adding the next.
    5. After 20-25 minutes of cooking, stir in peas, lemon juice, and zest. Cook an additional 2-3 minutes or until peas are tender.
    6. Serve whitefish on top of risotto; sprinkle with Parmesan cheese if desired.

    Cooking Time: 30-40 minutes

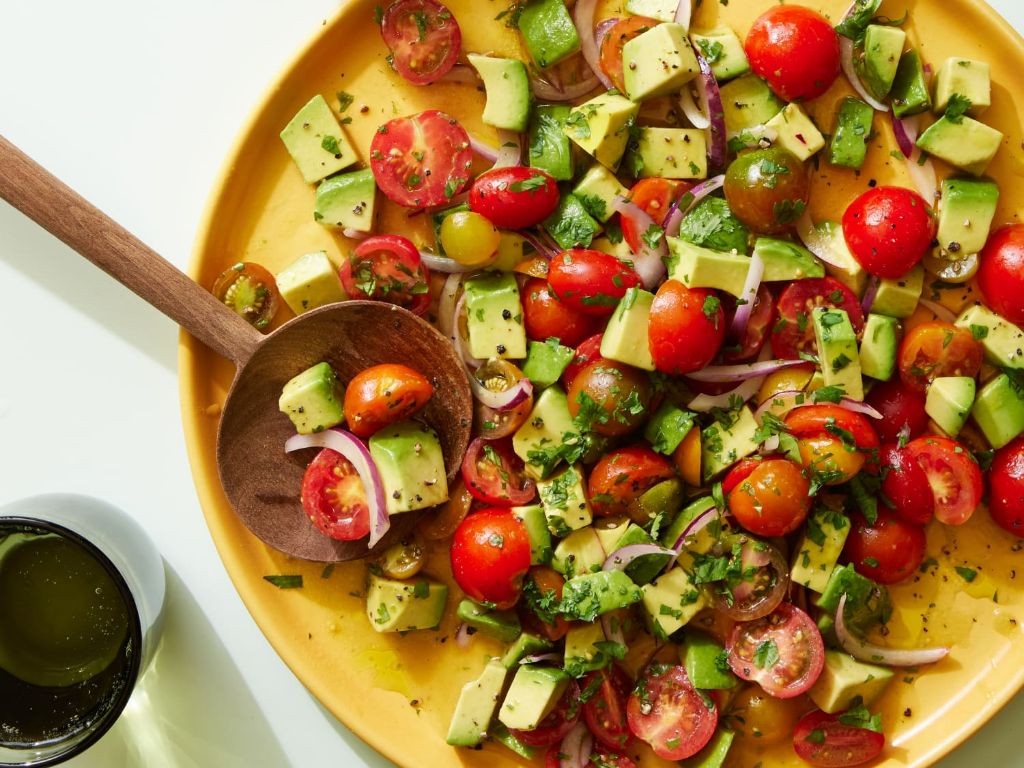
    Whitefish Salad with Avocado and Cherry Tomatoes

    Whitefish Salad with Avocado and Cherry Tomatoes
    This refreshing salad combines the flaky whitefish with creamy avocado, sweet cherry tomatoes, and a hint of lemon, perfect for a light and satisfying meal or snack.

    Ingredients:

    – 1 pound cooked whitefish (such as cod or tilapia), flaked
    – 1 ripe avocado, diced
    – 1 pint cherry tomatoes, halved
    – 2 tablespoons freshly squeezed lemon juice
    – 1 tablespoon olive oil
    – Salt and pepper to taste
    – Fresh parsley or dill for garnish (optional)

    Instructions:

    1. In a medium bowl, combine the flaked whitefish, diced avocado, and halved cherry tomatoes.
    2. Squeeze the lemon juice over the mixture and toss gently to combine.
    3. Drizzle with olive oil and season with salt and pepper to taste.
    4. Cover and refrigerate for at least 30 minutes to allow flavors to meld.
    5. Just before serving, garnish with fresh parsley or dill if desired.

    Cooking Time: 5-10 minutes (prep time only)

    Whitefish Fritters with Spicy Aioli

    Whitefish Fritters with Spicy Aioli
    Elevate your appetizer game with these crispy whitefish fritters served with a tangy spicy aioli. This recipe combines the freshness of fish with the boldness of spices, making it perfect for any occasion.

    Ingredients:

    For the Fritters:

    – 1 pound whitefish (such as cod or tilapia), flaked
    – 1/2 cup all-purpose flour
    – 1/4 cup cornstarch
    – 1/4 cup panko breadcrumbs
    – 1 egg, lightly beaten
    – 1 tablespoon lemon juice
    – Salt and pepper to taste
    – Vegetable oil for frying

    For the Spicy Aioli:

    – 1/2 cup mayonnaise
    – 2 tablespoons sriracha sauce
    – 1 tablespoon lemon juice
    – Salt and pepper to taste

    Instructions:

    1. In a bowl, combine flaked fish, flour, cornstarch, panko breadcrumbs, egg, lemon juice, salt, and pepper. Mix until just combined.
    2. Heat about 1/2 inch of vegetable oil in a large skillet over medium-high heat. Using a spoon, drop small amounts of the fish mixture into the oil.
    3. Fry fritters for 2-3 minutes on each side, or until golden brown and crispy. Drain on paper towels.
    4. For the Spicy Aioli, mix all ingredients together in a bowl until smooth. Refrigerate until ready to serve.
    5. Serve warm fritters with chilled spicy aioli for dipping.

    Cooking Time: 15-20 minutes

    Whitefish Pasta with Garlic and Olive Oil

    Whitefish Pasta with Garlic and Olive Oil
    This simple yet flavorful pasta dish combines tender whitefish, aromatic garlic, and rich olive oil to create a delicious weeknight meal. Perfect for a quick dinner or lunch, this recipe is sure to become a staple in your kitchen.

    Ingredients:

    – 8 oz whitefish fillets (such as cod or tilapia)
    – 12 oz pasta of your choice
    – 3 cloves garlic, minced
    – 1/4 cup olive oil
    – Salt and pepper to taste
    – Fresh parsley, chopped (optional)

    Instructions:

    1. Bring a large pot of salted water to a boil. Cook pasta according to package instructions until al dente.
    2. In a separate pan, heat the olive oil over medium heat. Add minced garlic and cook for 1-2 minutes or until fragrant.
    3. Add whitefish fillets to the pan and cook for 3-4 minutes per side, or until cooked through.
    4. Combine cooked pasta and garlic-infused olive oil mixture in a large bowl.
    5. Serve hot, garnished with chopped parsley if desired.

    Cooking Time: 15-20 minutes

    Whitefish Soup with Fennel and Saffron

    Whitefish Soup with Fennel and Saffron
    This aromatic soup combines the delicate flavor of whitefish with the subtle sweetness of fennel and the warmth of saffron, making it a perfect comfort food for any occasion.

    Ingredients:

    – 1 pound whitefish fillets (such as cod or tilapia), cut into 1-inch pieces
    – 2 medium fennel bulbs, chopped
    – 4 cups fish stock
    – 1/2 cup heavy cream
    – 1/4 teaspoon saffron threads, soaked in 1 tablespoon hot water
    – Salt and pepper to taste
    – Fresh parsley or dill for garnish

    Instructions:

    1. In a large pot, combine fennel, fish pieces, and fish stock. Bring to a boil, then reduce heat and simmer for 10 minutes.
    2. Add heavy cream and saffron mixture; stir gently.
    3. Season with salt and pepper to taste.
    4. Simmer for an additional 5 minutes or until the soup has thickened slightly.
    5. Serve hot, garnished with fresh parsley or dill.

    Cooking Time: 20-25 minutes

    Summary

    Get ready to elevate your seafood game with these 18 mouth-watering whitefish recipes! From classic dishes like pan-seared whitefish with lemon butter sauce and garlic herb baked whitefish, to global-inspired flavors such as crispy whitefish tacos with mango salsa and whitefish curry with coconut milk. Whether you’re looking for a quick weeknight dinner or an impressive dinner party option, this collection has something for every occasion.

  • 20 Savory Chicken Apple Sausage Delicious Recipes

    20 Savory Chicken Apple Sausage Delicious Recipes

    Are you looking for a flavor combination that’s both familiar and excitingly new? Look no further than chicken apple sausage! This versatile ingredient can add a delicious twist to a wide range of dishes, from hearty skillets and casseroles to elegant pastries and quiches. In this article, we’ll explore 20 mouthwatering recipes that showcase the best of chicken apple sausage’s savory, sweet, and smoky flavors.

    Whether you’re in the mood for a quick weeknight dinner or a show-stopping brunch dish, these recipes are sure to inspire. From classic comfort food to innovative twists on old favorites, we’ve got you covered with our collection of 20 savory chicken apple sausage recipes…

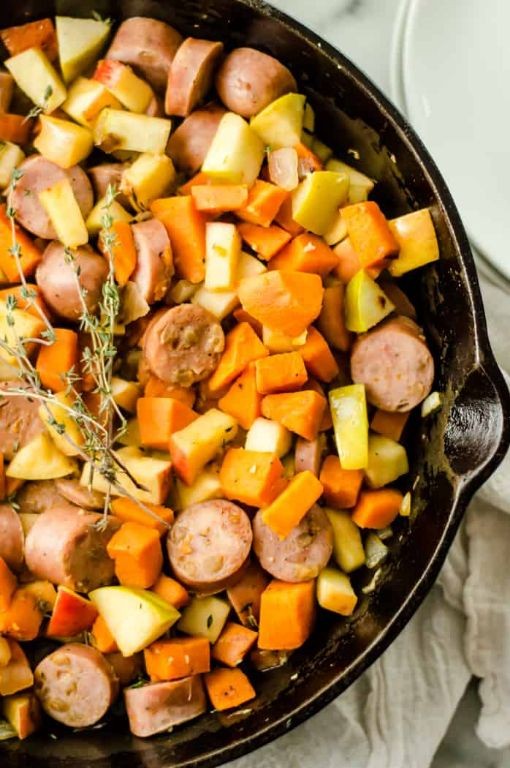
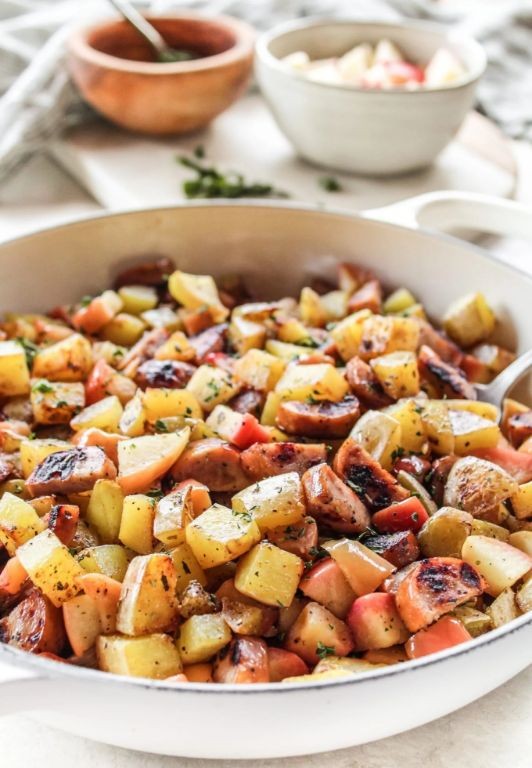
    Chicken Apple Sausage and Sweet Potato Skillet

    Chicken Apple Sausage and Sweet Potato Skillet
    A hearty and flavorful one-pot dish perfect for a cozy breakfast or brunch. This recipe combines the savory goodness of chicken apple sausage with sweet potatoes, onions, and bell peppers.

    Ingredients:

    – 1 lb chicken apple sausage, sliced
    – 2 large sweet potatoes, peeled and diced
    – 1 large onion, chopped
    – 2 bell peppers (any color), sliced
    – 2 cloves garlic, minced
    – Salt and pepper to taste
    – Cooking oil or butter

    Instructions:

    1. Preheat oven to 400°F (200°C).
    2. In a large skillet, heat 1-2 tablespoons of cooking oil over medium-high heat.
    3. Add sausage and cook until browned, about 5 minutes. Remove from skillet and set aside.
    4. Add onion and bell peppers to the skillet; cook until tender, about 5 minutes.
    5. Add diced sweet potatoes to the skillet; cook for an additional 10-12 minutes or until tender.
    6. Return sausage to the skillet; stir to combine with sweet potato mixture.
    7. Season with salt, pepper, and garlic powder (if desired).
    8. Serve hot and enjoy!

    Cooking Time: Approximately 25-30 minutes.

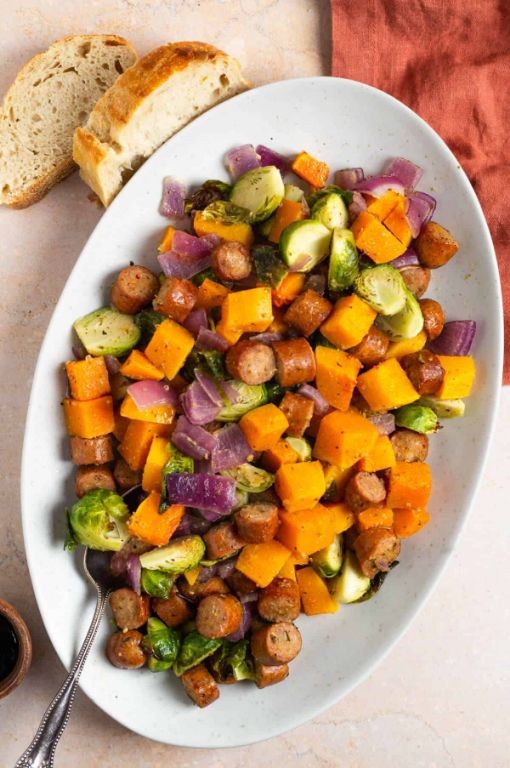
    One-Pan Chicken Apple Sausage with Brussels Sprouts

    One-Pan Chicken Apple Sausage with Brussels Sprouts
    This hearty one-pan dish combines the flavors of juicy chicken apple sausage, tender Brussels sprouts, and crispy onions for a satisfying meal that’s ready in under 30 minutes.

    Ingredients:

    – 1 lb boneless, skinless chicken breast or thighs
    – 1 large onion, sliced
    – 2 medium Brussels sprouts, trimmed and halved
    – 1 lb chicken apple sausage, sliced
    – 2 tbsp olive oil
    – 1 tsp salt
    – 1/4 tsp black pepper

    Instructions:

    1. Preheat oven to 400°F (200°C).
    2. In a large cast-iron skillet or Dutch oven, heat the olive oil over medium-high heat.
    3. Add the sliced onion and cook until caramelized, about 5 minutes.
    4. Add the Brussels sprouts, chicken sausage, salt, and pepper. Cook for an additional 5 minutes, stirring occasionally.
    5. Place the skillet in the preheated oven and bake for 15-20 minutes, or until the chicken is cooked through and the vegetables are tender.
    6. Remove from the oven and serve hot.

    Cooking Time: 25-30 minutes

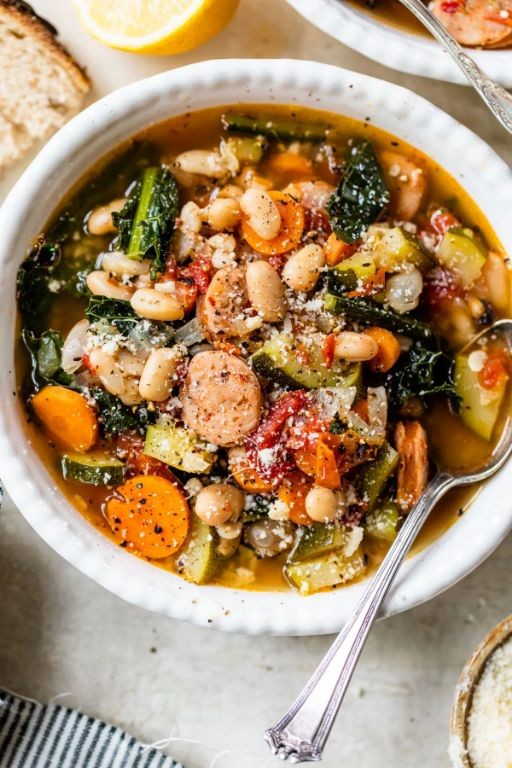
    Chicken Apple Sausage and Kale Soup

    Chicken Apple Sausage and Kale Soup
    Warm up with this hearty, comforting soup that combines the flavors of chicken apple sausage and kale.

    Ingredients:

    – 1 lb chicken apple sausage, sliced
    – 2 tbsp olive oil
    – 1 onion, chopped
    – 3 cloves garlic, minced
    – 4 cups kale leaves, stems removed
    – 4 cups chicken broth
    – 1 cup diced apples (such as Granny Smith)
    – 1 tsp dried thyme
    – Salt and pepper, to taste

    Instructions:

    1. In a large pot or Dutch oven, heat the olive oil over medium-high heat.
    2. Add the sliced sausage and cook until browned, about 5 minutes. Remove from pot and set aside.
    3. Add the chopped onion and minced garlic to the pot. Cook until the onion is translucent, about 5 minutes.
    4. Add the kale leaves, chicken broth, diced apples, thyme, salt, and pepper to the pot. Stir to combine.
    5. Return the cooked sausage to the pot and simmer, uncovered, for 20-25 minutes or until the soup has thickened slightly.
    6. Serve hot, garnished with additional chopped kale if desired.

    Cooking Time: 40-45 minutes

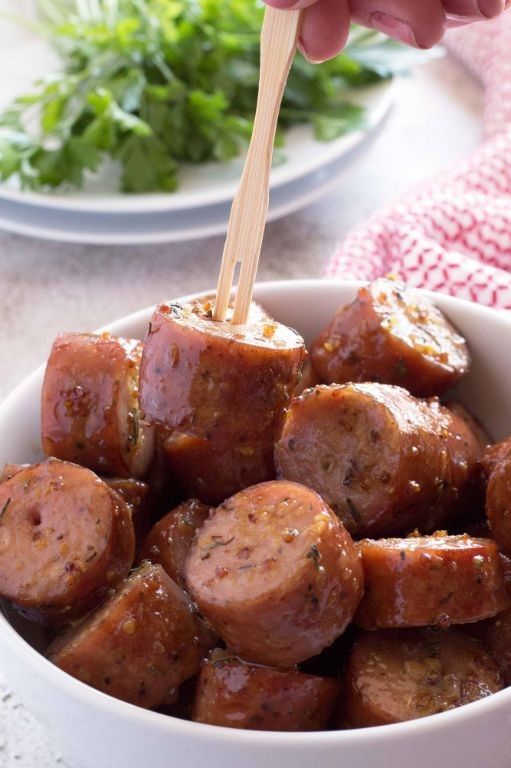
    Grilled Chicken Apple Sausage with Mustard Glaze

    Grilled Chicken Apple Sausage with Mustard Glaze
    Elevate your barbecue game with this sweet and savory recipe featuring juicy chicken apple sausage, caramelized onions, and a tangy mustard glaze.

    Ingredients:

    – 4 chicken apple sausages
    – 1 large onion, sliced
    – 2 tbsp olive oil
    – 1/4 cup Dijon mustard
    – 2 tbsp honey
    – Salt and pepper, to taste

    Instructions:

    1. Preheat grill to medium-high heat.
    2. Grill sausages for 5-7 minutes per side, or until cooked through.
    3. While sausages cook, caramelize onions in olive oil over low heat for 20-25 minutes, stirring occasionally.
    4. In a small bowl, whisk together mustard and honey.
    5. Brush glaze onto sausages during the last minute of grilling.
    6. Serve with caramelized onions and enjoy!

    Cooking Time: 15-20 minutes

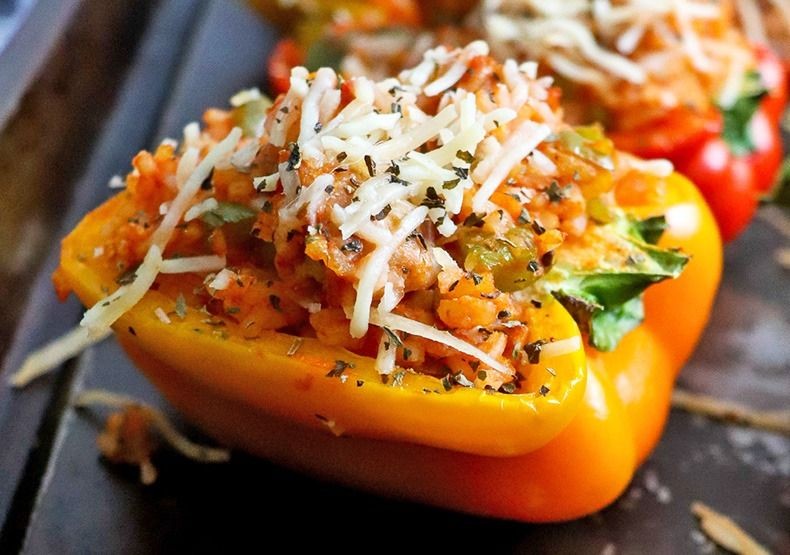
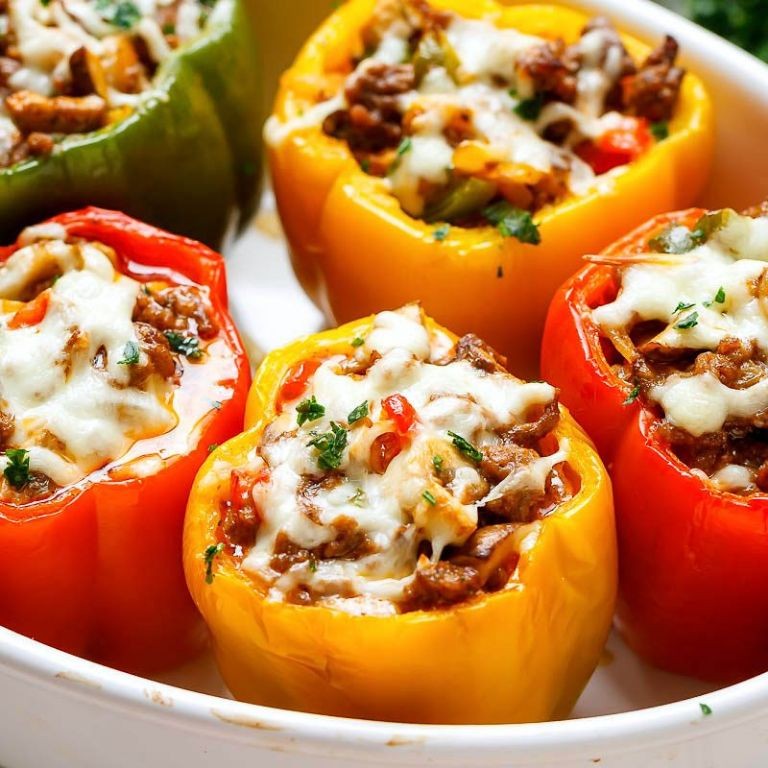
    Chicken Apple Sausage and Cheddar Stuffed Peppers

    Chicken Apple Sausage and Cheddar Stuffed Peppers
    These flavorful peppers are packed with juicy chicken apple sausage, melted cheddar cheese, and sweet bell peppers. Perfect for a weeknight dinner or game-day gathering.

    Ingredients:

    – 4 large bell peppers, any color
    – 1 lb chicken apple sausage, casings removed
    – 1 onion, finely chopped
    – 2 cloves garlic, minced
    – 1 cup shredded cheddar cheese
    – 1 tsp olive oil
    – Salt and pepper, to taste

    Instructions:

    1. Preheat oven to 375°F (190°C).
    2. Cut the tops off the peppers and remove seeds and membranes.
    3. In a large skillet, cook sausage over medium-high heat, breaking apart with spoon, until browned, about 5 minutes.
    4. Add chopped onion and minced garlic; cook until onion is translucent.
    5. Stuff each pepper with cooked sausage mixture and top with shredded cheddar cheese.
    6. Place peppers in a baking dish and drizzle with olive oil.
    7. Bake for 25-30 minutes or until peppers are tender.

    Cooking Time: 25-30 minutes

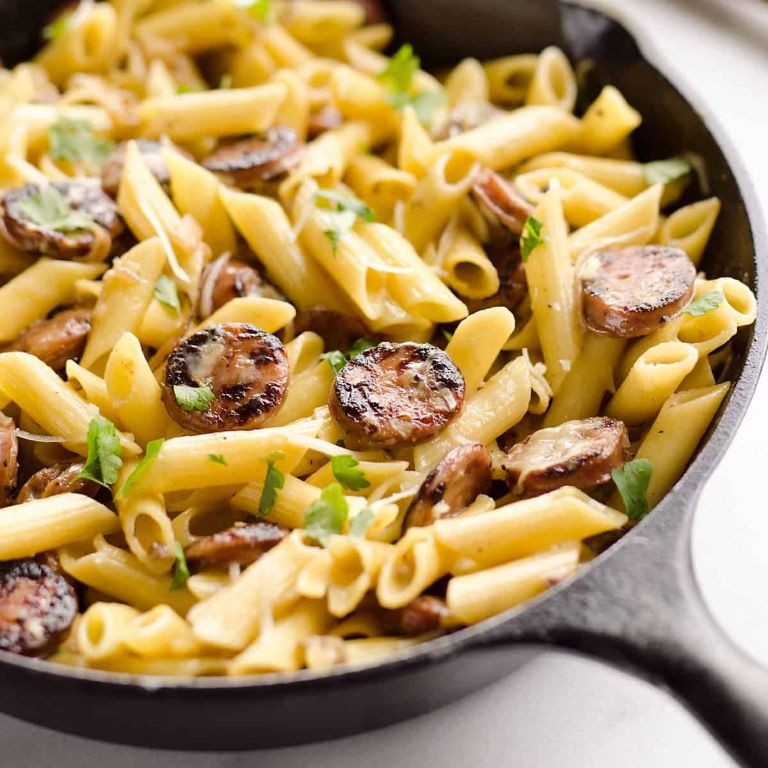
    Chicken Apple Sausage Pasta with Creamy Garlic Sauce

    Chicken Apple Sausage Pasta with Creamy Garlic Sauce
    Savor the sweet and savory flavors of chicken apple sausage, combined with the comforting warmth of pasta and a rich garlic sauce.

    Ingredients:

    – 1 pound pasta (such as penne or fusilli)
    – 2 chicken apple sausages, sliced
    – 2 cloves garlic, minced
    – 1/4 cup heavy cream
    – 1 tablespoon butter
    – Salt and pepper to taste
    – Fresh parsley, chopped (optional)

    Instructions:

    1. Bring a large pot of salted water to a boil. Cook pasta according to package instructions until al dente. Reserve 1 cup pasta water before draining.
    2. In a large skillet, melt butter over medium-high heat. Add sliced sausage and cook for 3-4 minutes on each side, or until browned and cooked through.
    3. Remove sausage from skillet and set aside. Reduce heat to medium and add minced garlic. Cook for 1 minute, or until fragrant.
    4. Pour in heavy cream and stir to combine with garlic. Bring sauce to a simmer and cook for an additional 2-3 minutes, or until slightly thickened.
    5. Add cooked pasta to skillet, tossing to coat with creamy garlic sauce. If necessary, add reserved pasta water to achieve desired consistency.
    6. Serve hot, topped with chopped parsley if desired.

    Cooking Time: Approximately 20-25 minutes.

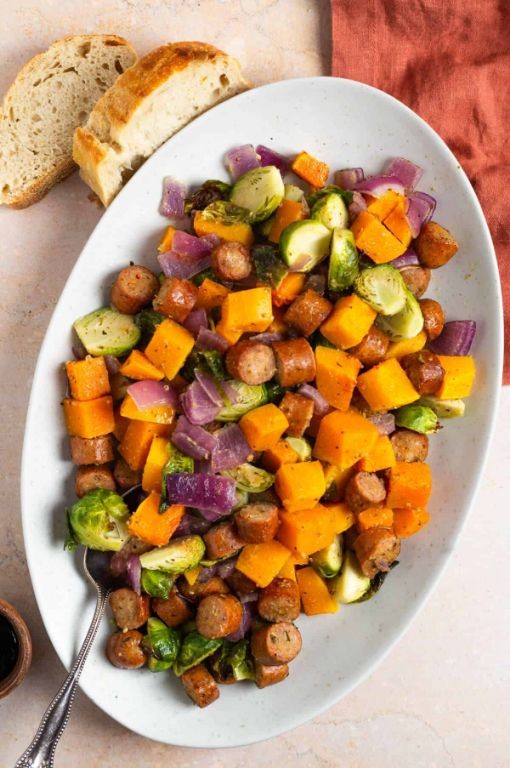
    Sheet Pan Chicken Apple Sausage with Root Vegetables

    Sheet Pan Chicken Apple Sausage with Root Vegetables
    This hearty recipe combines juicy chicken apple sausage with a colorful medley of root vegetables, all cooked to perfection on one sheet pan. Perfect for a weeknight dinner or special occasion.

    Ingredients:

    – 4-6 chicken apple sausages
    – 2 large carrots, peeled and chopped
    – 1 large parsnip, peeled and chopped
    – 1 large sweet potato, peeled and chopped
    – 2 tablespoons olive oil
    – Salt and pepper to taste

    Instructions:

    1. Preheat oven to 400°F (200°C).
    2. Line a large sheet pan with parchment paper.
    3. Place the chicken apple sausages on one half of the sheet pan.
    4. Toss the chopped carrots, parsnip, and sweet potato with olive oil, salt, and pepper. Spread them out on the other half of the sheet pan.
    5. Bake for 25-30 minutes or until the sausage is cooked through and the vegetables are tender.
    6. Serve hot and enjoy!

    Cooking Time: 25-30 minutes

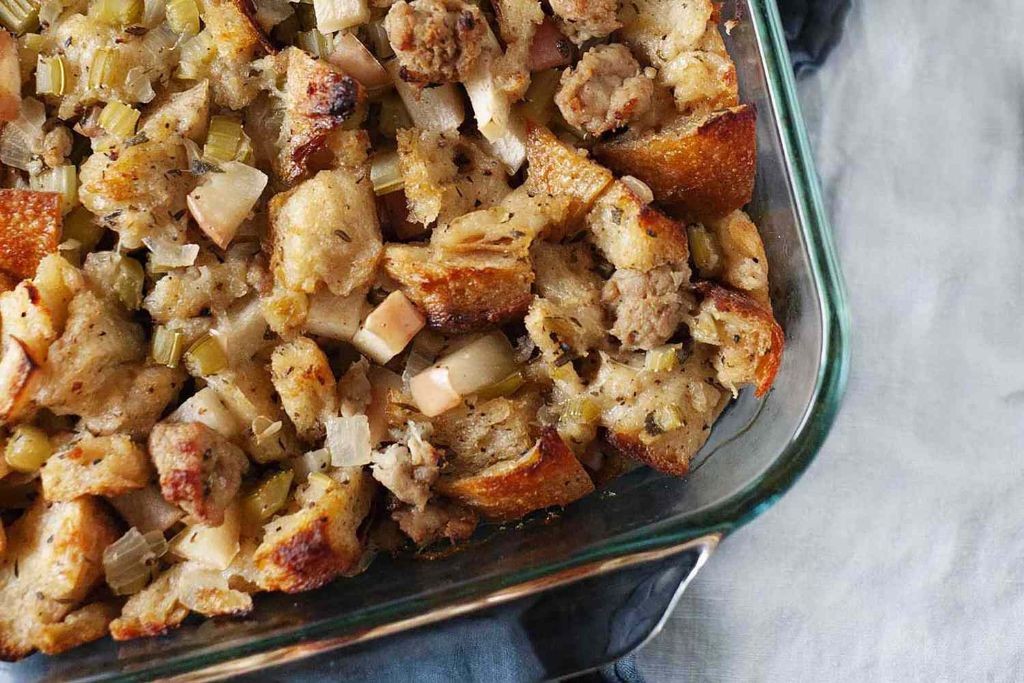
    Chicken Apple Sausage and Apple Stuffing Bake

    Chicken Apple Sausage and Apple Stuffing Bake
    A delicious twist on traditional stuffing, this recipe combines the savory flavor of chicken apple sausage with tender apples and crispy breadcrumbs.

    Ingredients:

    – 1 lb boneless, skinless chicken breast or thighs, cut into 1-inch pieces
    – 4-6 chicken apple sausages, sliced
    – 2 large apples, peeled and diced
    – 1 loaf of stale bread, cut into 1-inch cubes
    – 1/4 cup brown sugar
    – 1 tsp salt
    – 1/2 tsp black pepper
    – 2 tbsp butter, melted

    Instructions:

    1. Preheat oven to 375°F (190°C).
    2. In a large skillet, cook chicken and sausage over medium-high heat until browned.
    3. Add apples, bread, sugar, salt, and pepper to the skillet. Cook for 5 minutes, stirring occasionally.
    4. Transfer mixture to a 9×13-inch baking dish. Dot with melted butter.
    5. Bake for 30-40 minutes or until golden brown.

    Cooking Time: 30-40 minutes

    Chicken Apple Sausage Breakfast Hash

    Chicken Apple Sausage Breakfast Hash
    Start your day with a hearty and flavorful breakfast hash featuring chicken apple sausage, crispy potatoes, and caramelized onions. This recipe is perfect for a weekend brunch or a quick weeknight meal.

    Ingredients:

    – 1 lb chicken apple sausage, sliced
    – 2 large potatoes, peeled and diced
    – 1 large onion, thinly sliced
    – 2 cloves garlic, minced
    – 1 tablespoon olive oil
    – Salt and pepper to taste

    Instructions:

    1. Preheat oven to 400°F (200°C).
    2. Toss potatoes with 1/2 teaspoon salt and spread on a baking sheet. Roast for 20-25 minutes or until crispy.
    3. In a large skillet, cook sausage over medium-high heat until browned, about 5-7 minutes per side. Remove from heat and set aside.
    4. In the same skillet, add olive oil and sauté onions and garlic until caramelized, about 10-12 minutes.
    5. Add cooked potatoes to the skillet with onions and toss to combine. Season with salt and pepper to taste.
    6. Serve hash topped with cooked sausage and enjoy!

    Cooking Time: 45-50 minutes

    Chicken Apple Sausage and Spinach Quiche

    Chicken Apple Sausage and Spinach Quiche
    This quiche is a perfect combination of sweet, savory, and spicy flavors, packed with juicy chicken apple sausage, fresh spinach, and creamy eggs. It’s an excellent choice for a weekend brunch or a quick breakfast on-the-go.

    Ingredients:

    – 1 pie crust (homemade or store-bought)
    – 4 chicken apple sausages, sliced
    – 2 cups fresh spinach leaves
    – 2 large eggs
    – 1 cup heavy cream
    – 1/2 cup shredded cheddar cheese
    – Salt and pepper to taste

    Instructions:

    1. Preheat oven to 375°F (190°C).
    2. Roll out the pie crust and place it in a 9-inch tart pan.
    3. In a large skillet, cook the sausage slices until browned, about 5 minutes. Remove from heat and set aside.
    4. Add the fresh spinach leaves to the same skillet and wilt with a splash of water. Drain excess water.
    5. In a separate bowl, whisk together eggs, heavy cream, and shredded cheese. Season with salt and pepper.
    6. Arrange the cooked sausage slices on the pie crust, followed by the wilted spinach.
    7. Pour the egg mixture over the filling, spreading evenly.
    8. Bake for 35-40 minutes or until the quiche is set and golden brown.

    Cooking Time: 35-40 minutes

    Slow Cooker Chicken Apple Sausage and Lentil Stew

    Slow Cooker Chicken Apple Sausage and Lentil Stew
    This slow cooker stew combines tender chicken apple sausage, nutritious lentils, and aromatic spices for a comforting meal that’s perfect for a chilly evening.

    Ingredients:

    – 1 lb boneless, skinless chicken breast or thighs
    – 2 medium apples, peeled and chopped
    – 1 lb chicken apple sausage, sliced
    – 1 cup brown or green lentils, rinsed and drained
    – 1 large onion, chopped
    – 3 cloves garlic, minced
    – 1 tsp ground cumin
    – 1 tsp smoked paprika (optional)
    – Salt and pepper to taste
    – 4 cups low-sodium chicken broth

    Instructions:

    1. Add the chicken, apples, sausage, lentils, onion, garlic, cumin, smoked paprika (if using), salt, and pepper to a slow cooker.
    2. Pour in the chicken broth.
    3. Cook on LOW for 6-8 hours or HIGH for 3-4 hours.
    4. Serve hot, garnished with chopped fresh herbs like parsley or cilantro.

    Cooking Time: 6-8 hours (LOW) or 3-4 hours (HIGH)

    Chicken Apple Sausage and Caramelized Onion Flatbread

    Chicken Apple Sausage and Caramelized Onion Flatbread
    Savory and sweet, this Chicken Apple Sausage and Caramelized Onion Flatbread is a delicious twist on traditional flatbreads.

    Ingredients:

    – 1 flatbread crust (homemade or store-bought)
    – 1/2 cup chicken apple sausage, sliced
    – 1 large onion, thinly sliced
    – 2 tablespoons olive oil
    – 1 tablespoon honey
    – Salt and pepper to taste
    – Fresh thyme leaves for garnish (optional)

    Instructions:

    1. Preheat oven to 400°F (200°C).
    2. In a large skillet, cook the chicken apple sausage over medium-high heat until browned, about 5 minutes.
    3. In a separate pan, caramelize the onions over low heat with olive oil and honey for 20-25 minutes or until golden brown.
    4. Place the flatbread crust on a baking sheet.
    5. Top the flatbread with the cooked sausage, caramelized onions, and a pinch of salt and pepper to taste.
    6. Bake in preheated oven for 10-12 minutes or until the crust is crispy.
    7. Garnish with fresh thyme leaves if desired.

    Cooking Time: 30-35 minutes

    Chicken Apple Sausage and Butternut Squash Risotto

    Chicken Apple Sausage and Butternut Squash Risotto
    This hearty risotto combines the warmth of roasted butternut squash with the savory flavors of chicken apple sausage, creating a comforting autumnal dish perfect for chilly evenings.

    Ingredients:

    – 1 lb boneless, skinless chicken breast
    – 4 chicken apple sausages, sliced
    – 2 medium butternut squashes, peeled and cubed
    – 1 onion, chopped
    – 2 cloves garlic, minced
    – 1 cup Arborio rice
    – 4 cups vegetable broth, warmed
    – 2 tbsp olive oil
    – Salt and pepper, to taste
    – Grated Parmesan cheese, for serving (optional)

    Instructions:

    1. Preheat oven to 400°F (200°C).
    2. Toss butternut squash with olive oil, salt, and pepper on a baking sheet. Roast for 30-40 minutes, or until tender.
    3. Cook chicken apple sausage in a large skillet over medium-high heat, until browned. Remove from heat and set aside.
    4. In the same skillet, add chopped onion and cook until translucent. Add garlic and cook for an additional minute.
    5. Add Arborio rice to the skillet and cook for 1-2 minutes, stirring constantly.
    6. Gradually add warmed broth, stirring continuously, until rice is cooked and creamy.
    7. Stir in roasted butternut squash and chicken apple sausage. Season with salt and pepper to taste.
    8. Serve hot, topped with grated Parmesan cheese if desired.

    Cooking Time: 45-50 minutes

    Chicken Apple Sausage and White Bean Cassoulet

    Chicken Apple Sausage and White Bean Cassoulet
    A classic French-inspired dish with a twist, this casserole combines the rich flavors of chicken apple sausage, creamy white beans, and crispy breadcrumbs for a satisfying meal.

    Ingredients:

    – 1 lb chicken apple sausage, sliced
    – 1 can (15 oz) cannellini beans, drained and rinsed
    – 2 cloves garlic, minced
    – 1 onion, chopped
    – 1 cup chicken broth
    – 1 tsp dried thyme
    – 1/2 tsp paprika
    – Salt and pepper, to taste
    – 1/4 cup breadcrumbs
    – 2 tbsp olive oil

    Instructions:

    1. Preheat oven to 375°F (190°C).
    2. In a large skillet, cook sausage over medium-high heat until browned, about 5 minutes. Remove from heat.
    3. In the same skillet, add onion and garlic; cook until softened, about 3 minutes.
    4. Add cannellini beans, chicken broth, thyme, paprika, salt, and pepper to the skillet. Stir to combine.
    5. Arrange sausage slices on top of bean mixture in a 9×13 inch baking dish.
    6. Sprinkle breadcrumbs over sausage and drizzle with olive oil.
    7. Bake for 30-35 minutes or until golden brown.

    Cooking Time: 30-35 minutes

    Chicken Apple Sausage and Cornbread Casserole

    Chicken Apple Sausage and Cornbread Casserole
    A hearty casserole that combines the warmth of chicken, apples, and sausage with the comfort of cornbread. Perfect for a chilly fall evening or a cozy family dinner.

    Ingredients:

    – 1 lb boneless, skinless chicken breasts, cut into 1-inch pieces
    – 2 cups mixed apple chunks (Granny Smith and Gala)
    – 4 Chicken Apple Sausages, sliced
    – 1 cup cornbread mix
    – 1/2 cup heavy cream
    – 1/4 cup unsalted butter, melted
    – Salt and pepper to taste
    – Fresh thyme leaves for garnish

    Instructions:

    1. Preheat oven to 375°F.
    2. In a large skillet, cook chicken and sausage over medium-high heat until browned, about 5-7 minutes.
    3. Add apples to the skillet; cook until tender, about 3-4 minutes.
    4. In a separate bowl, mix cornbread mix with heavy cream and melted butter.
    5. Grease a 9×13-inch baking dish with butter or cooking spray.
    6. Layer chicken mixture, then cornbread mixture in the prepared dish.
    7. Bake for 35-40 minutes, or until cornbread is golden brown.

    Cooking Time: 35-40 minutes

    Chicken Apple Sausage and Mushroom Stroganoff

    Chicken Apple Sausage and Mushroom Stroganoff
    This hearty dish combines the flavors of chicken apple sausage, sautéed mushrooms, and creamy sauce for a satisfying meal. Perfect for a chilly evening or a quick weeknight dinner.

    Ingredients:

    – 1 lb chicken apple sausage, sliced
    – 2 cups mixed mushrooms (button, cremini, shiitake), sliced
    – 1 onion, finely chopped
    – 2 cloves garlic, minced
    – 1 cup heavy cream
    – 1 tsp Dijon mustard
    – 1 tsp paprika
    – Salt and pepper to taste
    – Cooked egg noodles, for serving

    Instructions:

    1. Cook sausage in a large skillet over medium-high heat until browned, about 5 minutes.
    2. Add mushrooms, onion, and garlic; cook until mushrooms release their liquid and start to brown, about 8 minutes.
    3. Stir in heavy cream, mustard, paprika, salt, and pepper.
    4. Simmer for 2-3 minutes or until sauce thickens slightly.
    5. Serve over cooked egg noodles.

    Cooking Time: 20-25 minutes

    Chicken Apple Sausage and Pear Salad with Balsamic Dressing

    Chicken Apple Sausage and Pear Salad with Balsamic Dressing
    This seasonal salad combines the flavors of juicy chicken apple sausage, crisp pears, and tangy balsamic dressing, perfect for a cozy fall evening.

    Ingredients:

    – 1 lb chicken apple sausage, sliced
    – 2 ripe pears (such as Bartlett or Anjou), diced
    – 4 cups mixed greens (arugula, spinach, lettuce)
    – 1/4 cup crumbled blue cheese (optional)
    – 1/4 cup chopped walnuts
    – 2 tbsp balsamic vinegar
    – 1 tsp olive oil
    – Salt and pepper to taste

    Instructions:

    1. Preheat oven to 400°F (200°C).
    2. Bake sausage for 12-15 minutes or until cooked through.
    3. In a large bowl, combine mixed greens, diced pears, crumbled blue cheese (if using), and chopped walnuts.
    4. In a small bowl, whisk together balsamic vinegar and olive oil.
    5. Slice cooked sausage into thin strips and add to the salad.
    6. Drizzle with balsamic dressing and season with salt and pepper to taste.

    Cooking Time: 15-20 minutes

    Chicken Apple Sausage and Gruyère Tart

    Chicken Apple Sausage and Gruyère Tart
    A sweet and savory tart that combines the flavors of chicken apple sausage, caramelized onions, and melted Gruyère cheese. Perfect for a cozy dinner or brunch.

    Ingredients:

    – 1 package chicken apple sausage, sliced
    – 1 large onion, thinly sliced
    – 2 tablespoons olive oil
    – 1 cup grated Gruyère cheese
    – 1 pie crust (homemade or store-bought)
    – Salt and pepper to taste
    – Fresh thyme leaves for garnish (optional)

    Instructions:

    1. Preheat oven to 375°F (190°C).
    2. In a large skillet, cook the sausage slices over medium-high heat until browned, about 5 minutes.
    3. Add the sliced onions to the skillet and cook until caramelized, stirring occasionally, about 20-25 minutes.
    4. Roll out the pie crust and place it in a 9-inch tart pan with a removable bottom.
    5. Arrange the cooked sausage and onion mixture in the tart shell.
    6. Sprinkle the grated Gruyère cheese evenly over the top.
    7. Bake for 25-30 minutes, or until the crust is golden brown and the cheese is melted and bubbly.
    8. Garnish with fresh thyme leaves, if desired.

    Cooking Time: 35-40 minutes

    Chicken Apple Sausage and Broccoli Stir-Fry

    Chicken Apple Sausage and Broccoli Stir-Fry
    In this quick and flavorful stir-fry, the sweetness of apples and the savory taste of chicken apple sausage combine with tender broccoli for a delicious one-pan meal.

    Ingredients:

    – 1 lb boneless, skinless chicken breast or thighs, cut into bite-sized pieces
    – 4 Chicken Apple Sausages (homemade or store-bought), sliced
    – 3 cups broccoli florets
    – 2 medium apples, peeled and diced
    – 2 cloves garlic, minced
    – 2 tbsp olive oil
    – Salt and pepper to taste

    Instructions:

    1. Heat 1 tablespoon of olive oil in a large skillet or wok over medium-high heat.
    2. Add chicken pieces and cook until browned, about 5 minutes. Remove from pan and set aside.
    3. Add remaining 1 tablespoon of olive oil. Add sliced sausage and cook until browned, about 3-4 minutes.
    4. Add broccoli, diced apples, and minced garlic to the pan. Cook until broccoli is tender-crisp, about 4-5 minutes.
    5. Return cooked chicken to the pan and stir to combine with sausage and vegetables.
    6. Season with salt and pepper to taste.
    7. Serve hot over rice or noodles.

    Cooking Time: 20-25 minutes

    Chicken Apple Sausage and Maple Glazed Carrots

    Chicken Apple Sausage and Maple Glazed Carrots
    This hearty fall-inspired dish combines the flavors of juicy chicken apple sausage with sweet and sticky maple glazed carrots, perfect for a cozy evening meal.

    Ingredients:

    – 1 lb Chicken Apple Sausage
    – 4 large carrots, peeled and chopped
    – 2 tbsp pure maple syrup
    – 1 tsp Dijon mustard
    – Salt and pepper to taste
    – 2 tbsp butter

    Instructions:

    1. Preheat oven to 400°F (200°C).
    2. Place the sausage on a baking sheet lined with parchment paper.
    3. Roast the sausage for 15-20 minutes, or until browned and cooked through.
    4. While the sausage is cooking, toss the chopped carrots with maple syrup, Dijon mustard, salt, and pepper in a separate bowl.
    5. Spread the carrot mixture on a baking sheet lined with parchment paper.
    6. Dot the top of the carrots with butter.
    7. Roast the carrots for 20-25 minutes, or until tender and caramelized.
    8. Serve the sausage alongside the maple glazed carrots.

    Cooking Time: 40-45 minutes

    Summary

    Get ready to spice up your meal routine with these mouthwatering chicken apple sausage recipes! From hearty skillets and soups to breakfast dishes and casseroles, this collection has something for everyone. Try making a Chicken Apple Sausage and Sweet Potato Skillet or One-Pan Chicken Apple Sausage with Brussels Sprouts for a quick and easy dinner. Or go gourmet with dishes like Chicken Apple Sausage and Gruyère Tart or Chicken Apple Sausage and Pear Salad with Balsamic Dressing. With 20 delicious recipes to choose from, you’re sure to find a new favorite!

  • 18 Spicy Shrimp and Bacon Recipes with a Twist

    18 Spicy Shrimp and Bacon Recipes with a Twist

    Get ready to ignite your taste buds! Spicy shrimp and crispy bacon are a match made in heaven, and when combined with creative twists, they become a culinary masterpiece. In this article, we’ll take you on a flavorful journey through 18 mouth-watering recipes that combine the succulent sweetness of shrimp with the smoky richness of bacon.

    From classic combinations like garlic butter shrimp and bacon skewers to innovative creations like spicy bacon-wrapped shrimp with honey glaze, these recipes will elevate your cooking game and satisfy your cravings. Whether you’re a seafood lover, a bacon enthusiast, or just looking for something new and exciting to add to your repertoire, we’ve got you covered.

    In the following pages, we’ll dive into each of these delicious recipes, sharing tips, tricks, and step-by-step instructions to ensure that every dish turns out perfectly. So go ahead, grab some shrimp and bacon, and get ready to spice up your cooking routine!

    Garlic Butter Shrimp and Bacon Skewers

    Garlic Butter Shrimp and Bacon Skewers
    Elevate your appetizer game with these succulent shrimp and crispy bacon skewers, smothered in a rich garlic butter sauce.

    Ingredients:

    – 12 large shrimp, peeled and deveined
    – 6 slices of thick-cut bacon, cut into 1-inch pieces
    – 2 cloves of garlic, minced
    – 2 tablespoons of unsalted butter, softened
    – 1 tablespoon of lemon juice
    – Salt and pepper to taste
    – Wooden skewers, soaked in water for at least 30 minutes

    Instructions:

    1. Preheat grill or grill pan to medium-high heat.
    2. In a small bowl, mix together garlic, butter, and lemon juice until well combined.
    3. Thread shrimp, bacon pieces, and garlic butter mixture onto skewers, leaving a small space between each piece.
    4. Season with salt and pepper to taste.
    5. Grill skewers for 8-10 minutes, turning occasionally, or until shrimp are pink and cooked through.
    6. Serve immediately, garnished with fresh parsley if desired.

    Cooking Time: 15-20 minutes

    Cajun Shrimp and Bacon Stuffed Peppers

    Cajun Shrimp and Bacon Stuffed Peppers
    Get ready to spice up your dinner routine with this flavorful and filling dish! This recipe combines succulent shrimp, crispy bacon, and vibrant bell peppers for a true taste of the Bayou.

    Ingredients:

    – 4 large bell peppers, any color
    – 1 pound large shrimp, peeled and deveined
    – 6 slices of thick-cut bacon, cooked and crumbled
    – 1/2 cup Cajun seasoning
    – 1/2 cup shredded cheddar cheese
    – 1/4 cup chopped fresh parsley
    – Salt and pepper to taste

    Instructions:

    1. Preheat oven to 375°F (190°C).
    2. Cut the tops off the bell peppers and remove seeds and membranes.
    3. In a large skillet, sauté shrimp in Cajun seasoning until pink and cooked through.
    4. Stuff each bell pepper with cooked shrimp mixture, crumbled bacon, and shredded cheese.
    5. Place stuffed peppers on a baking sheet and bake for 25-30 minutes or until peppers are tender.

    Cooking Time: 25-30 minutes

    Spicy Bacon-Wrapped Shrimp with Honey Glaze

    Spicy Bacon-Wrapped Shrimp with Honey Glaze
    Elevate your appetizer game with these succulent shrimp wrapped in spicy bacon and glazed with a sweet and sticky honey sauce. Perfect for any occasion, this dish is sure to impress!

    Ingredients:

    – 12 large shrimp, peeled and deveined
    – 6 slices of thick-cut bacon
    – 1/4 cup brown sugar
    – 2 tbsp honey
    – 1 tsp sriracha
    – 1/4 cup chopped fresh cilantro (optional)

    Instructions:

    1. Preheat oven to 400°F (200°C).
    2. In a small bowl, mix together brown sugar, honey, and sriracha.
    3. Wrap each shrimp with a slice of bacon, securing with a toothpick if needed.
    4. Place the wrapped shrimp on a baking sheet lined with parchment paper.
    5. Drizzle the honey glaze evenly over the shrimp.
    6. Bake for 12-15 minutes or until the bacon is crispy and the shrimp are cooked through.
    7. Garnish with chopped cilantro, if desired.

    Cooking Time: 12-15 minutes

    Creamy Shrimp and Bacon Pasta

    Creamy Shrimp and Bacon Pasta
    This rich and creamy pasta dish combines succulent shrimp, crispy bacon, and a velvety sauce, all tossed with linguine for a satisfying meal. Perfect for a weeknight dinner or a special occasion.

    Ingredients:

    – 12 oz linguine
    – 1 pound large shrimp, peeled and deveined
    – 6 slices of bacon, cooked and crumbled
    – 2 cloves of garlic, minced
    – 1/4 cup heavy cream
    – 1 tablespoon olive oil
    – Salt and pepper to taste
    – Fresh parsley, chopped (optional)

    Instructions:

    1. Cook linguine according to package instructions until al dente. Drain and set aside.
    2. In a large skillet, heat the olive oil over medium-high heat. Add garlic and sauté for 1 minute.
    3. Add shrimp and cook until pink and fully cooked, about 2-3 minutes per side. Remove from heat and set aside.
    4. In the same skillet, add heavy cream and stir to combine with any remaining garlic and oil. Bring to a simmer and cook for 2-3 minutes or until slightly thickened.
    5. Add cooked shrimp, bacon, salt, and pepper to the creamy sauce. Toss to combine with cooked linguine.
    6. Serve hot, garnished with chopped parsley if desired.

    Cooking Time: 15-20 minutes

    Shrimp and Bacon Fried Rice

    Shrimp and Bacon Fried Rice
    Elevate your fried rice game with this simple yet flavorful recipe combining succulent shrimp, crispy bacon, and savory vegetables.

    Ingredients:

    – 2 cups cooked rice (preferably day-old)
    – 1/2 cup diced bacon
    – 1/2 cup large shrimp, peeled and deveined
    – 1 tablespoon vegetable oil
    – 1 small onion, diced
    – 2 cloves garlic, minced
    – 1 teaspoon soy sauce
    – Salt and pepper to taste
    – Scallions, chopped (optional)

    Instructions:

    1. Heat the oil in a large skillet or wok over medium-high heat.
    2. Add the bacon and cook until crispy, about 3-4 minutes. Remove from pan and set aside.
    3. Add the onion and garlic to the pan and cook until softened, about 2 minutes.
    4. Add the shrimp and cook until pink and fully cooked, about 2-3 minutes.
    5. Stir in the cooked rice, soy sauce, salt, and pepper.
    6. Combine the cooked bacon with the rice mixture and stir-fry for an additional 1-2 minutes.
    7. Serve hot, garnished with chopped scallions if desired.

    Cooking Time: Approximately 10-12 minutes

    Grilled Shrimp and Bacon Tacos

    Grilled Shrimp and Bacon Tacos
    Get ready for a flavorful fiesta with these mouthwatering Grilled Shrimp and Bacon Tacos! Succulent shrimp, crispy bacon, and creamy toppings come together to create a taco that’s sure to impress.

    Ingredients:

    – 1 pound large shrimp, peeled and deveined
    – 6 slices of bacon
    – 8-10 corn tortillas
    – 1/4 cup chopped cilantro
    – 2 tablespoons lime juice
    – 1 tablespoon olive oil
    – Salt and pepper to taste
    – Optional toppings: diced avocado, sour cream, shredded cheese, diced tomatoes

    Instructions:

    1. Preheat grill or grill pan to medium-high heat.
    2. Season shrimp with salt and pepper. Grill for 2-3 minutes per side, until pink and cooked through.
    3. Cook bacon slices in a pan over medium heat until crispy. Drain on paper towels.
    4. Warm tortillas by wrapping them in a damp paper towel and microwaving for 20-30 seconds.
    5. Assemble tacos by placing grilled shrimp onto a warmed tortilla, topping with crispy bacon, cilantro, and a squeeze of lime juice.
    6. Add optional toppings to taste.

    Cooking Time: 10-12 minutes

    Bacon-Wrapped Shrimp with Sriracha Mayo

    Bacon-Wrapped Shrimp with Sriracha Mayo
    Elevate your seafood game with this mouthwatering recipe that combines the sweetness of shrimp with the smokiness of bacon and a kick of Sriracha. This flavorful dish is perfect for a quick weeknight dinner or a casual gathering with friends.

    Ingredients:

    – 12 large shrimp, peeled and deveined
    – 6 slices of thick-cut bacon, cut into thirds
    – 1/4 cup Sriracha mayonnaise (see note)
    – 2 cloves of garlic, minced
    – Salt and pepper to taste

    Instructions:

    1. Preheat oven to 400°F (200°C).
    2. Wrap each shrimp with a piece of bacon, securing it with a toothpick if needed.
    3. Place the bacon-wrapped shrimp on a baking sheet lined with parchment paper.
    4. Drizzle with Sriracha mayonnaise and sprinkle with minced garlic.
    5. Bake for 12-15 minutes or until the bacon is crispy and the shrimp are cooked through.
    6. Serve immediately, garnished with chopped green onions if desired.

    Note: To make Sriracha mayonnaise, mix 1/2 cup of mayonnaise with 1-2 tablespoons of Sriracha sauce to taste.

    Shrimp and Bacon Carbonara

    Shrimp and Bacon Carbonara
    A rich and indulgent Italian-inspired dish that combines the flavors of succulent shrimp, crispy bacon, and creamy eggs.

    Ingredients:

    – 12 large shrimp, peeled and deveined
    – 6 slices of bacon, diced
    – 3 large eggs
    – 1 cup heavy cream
    – 1/2 cup grated Parmesan cheese
    – Salt and black pepper to taste
    – Fresh parsley, chopped (optional)

    Instructions:

    1. Cook the bacon in a skillet over medium heat until crispy. Remove from heat and set aside.
    2. In the same skillet, add the shrimp and cook for 2-3 minutes per side, or until pink and cooked through. Remove from heat and set aside with the bacon.
    3. In a large bowl, whisk together the eggs, heavy cream, and Parmesan cheese.
    4. Add the cooked shrimp and bacon to the egg mixture, stirring gently to combine.
    5. Cook the mixture over low heat, stirring constantly, until the eggs are just set (about 3-4 minutes).
    6. Season with salt and black pepper to taste.
    7. Serve immediately, garnished with chopped parsley if desired.

    Cooking Time: 15-20 minutes

    Smoky Shrimp and Bacon Chowder

    Smoky Shrimp and Bacon Chowder
    This hearty soup combines succulent shrimp, crispy bacon, and smoky spices to create a deliciously comforting meal. With its rich flavors and tender texture, this chowder is perfect for a chilly evening or a quick weeknight dinner.

    Ingredients:

    – 1 pound large shrimp, peeled and deveined
    – 6 slices of bacon, diced
    – 2 medium onions, chopped
    – 3 cloves of garlic, minced
    – 1 can (14.5 oz) of diced tomatoes
    – 1 cup of chicken broth
    – 1/2 cup of heavy cream
    – 1 teaspoon smoked paprika
    – Salt and pepper to taste
    – Fresh parsley, chopped (optional)

    Instructions:

    1. Cook the bacon in a large pot over medium heat until crispy. Remove the bacon with a slotted spoon.
    2. Add the onions and garlic to the pot; cook until the onions are translucent.
    3. Add the shrimp, diced tomatoes, chicken broth, smoked paprika, salt, and pepper to the pot.
    4. Bring the mixture to a boil, then reduce heat and simmer for 8-10 minutes or until the shrimp is cooked through.
    5. Stir in the heavy cream; cook for an additional 2-3 minutes.
    6. Taste and adjust seasoning as needed.
    7. Serve hot, garnished with chopped parsley if desired.

    Cooking Time: 20-25 minutes

    Shrimp and Bacon Stuffed Mushrooms

    Shrimp and Bacon Stuffed Mushrooms
    Elevate your appetizer game with this savory and indulgent recipe, featuring succulent shrimp, crispy bacon, and earthy mushrooms.

    Ingredients:

    – 12 large mushroom caps (button or cremini work well)
    – 1 pound large shrimp, peeled and deveined
    – 6 slices of cooked bacon, crumbled
    – 2 cloves garlic, minced
    – 1 tablespoon olive oil
    – Salt and pepper to taste
    – Fresh parsley, chopped (optional)

    Instructions:

    1. Preheat oven to 375°F (190°C).
    2. In a skillet, sauté shrimp in olive oil until pink and cooked through.
    3. Add crumbled bacon, garlic, salt, and pepper; stir to combine.
    4. Wipe mushroom caps clean with a paper towel. Fill each cap with the shrimp-bacon mixture, mounding slightly.
    5. Place stuffed mushrooms on a baking sheet lined with parchment paper. Drizzle with olive oil.
    6. Bake for 15-20 minutes or until mushrooms are tender and filling is heated through.

    Cooking Time: 20 minutes

    Serve warm, garnished with chopped parsley if desired. Enjoy!

    Bacon and Shrimp Jambalaya

    Bacon and Shrimp Jambalaya
    This hearty one-pot dish combines the smoky flavor of bacon with succulent shrimp, savory rice, and a hint of spice. Perfect for a quick weeknight dinner or a weekend brunch.

    Ingredients:

    – 1 lb large shrimp, peeled and deveined
    – 6 slices of thick-cut bacon, diced
    – 1 medium onion, chopped
    – 2 cloves of garlic, minced
    – 1 cup uncooked white rice
    – 2 cups chicken broth
    – 1 tsp dried thyme
    – 1/2 tsp paprika
    – Salt and pepper to taste
    – 2 tbsp olive oil

    Instructions:

    1. Heat the olive oil in a large skillet over medium-high heat.
    2. Cook the bacon until crispy, then remove from the skillet.
    3. Add the onion and garlic; cook until the onion is translucent.
    4. Add the shrimp and cook until pink, about 2-3 minutes per side.
    5. Add the rice, chicken broth, thyme, paprika, salt, and pepper to the skillet.
    6. Bring to a boil, then reduce heat to low and simmer for 20-25 minutes or until the liquid is absorbed and the rice is tender.

    Cooking Time: 30-35 minutes

    Shrimp and Bacon Quesadillas

    Shrimp and Bacon Quesadillas
    This recipe combines the savory flavors of shrimp, bacon, and cheese with the convenience of a quesadilla. Perfect for a quick dinner or snack.

    Ingredients:

    – 1 pound large shrimp, peeled and deveined
    – 6 slices of bacon, cooked and crumbled
    – 2 tablespoons butter
    – 2 cups shredded Monterey Jack cheese
    – 4 large tortillas
    – Salt and pepper to taste
    – Optional toppings: diced tomatoes, avocado, sour cream, cilantro

    Instructions:

    1. Preheat a large skillet or griddle over medium-high heat.
    2. In a bowl, mix together shrimp, crumbled bacon, and butter until well combined.
    3. Place a tortilla in the skillet and sprinkle with cheese on half of the tortilla.
    4. Add the shrimp mixture on top of the cheese.
    5. Fold the tortilla in half to enclose the filling.
    6. Cook for 2-3 minutes or until the tortilla is crispy and the cheese is melted.
    7. Flip and cook for an additional 2 minutes or until the other side is also crispy.
    8. Repeat with remaining ingredients.

    Cooking Time: 10-12 minutes

    Spicy Shrimp and Bacon Pizza

    Spicy Shrimp and Bacon Pizza
    Add a spicy twist to your pizza night with this mouth-watering Spicy Shrimp and Bacon Pizza recipe!

    Ingredients:

    – 1 lb pizza dough
    – 12 large shrimp, peeled and deveined
    – 6 slices of bacon, cooked and crumbled
    – 1/2 cup arrabbiata sauce (or similar spicy tomato sauce)
    – 1 cup shredded mozzarella cheese
    – 1/4 cup chopped fresh parsley
    – Salt and pepper to taste
    – Red pepper flakes for added heat (optional)

    Instructions:

    1. Preheat oven to 425°F (220°C).
    2. Roll out the pizza dough to a thickness of about 1/8 inch.
    3. Spread the arrabbiata sauce over the dough, leaving a small border around the edges.
    4. Top with shrimp, crumbled bacon, and mozzarella cheese.
    5. Sprinkle chopped parsley and red pepper flakes (if using) over the top.
    6. Season with salt and pepper to taste.
    7. Bake for 15-18 minutes or until crust is golden brown and cheese is melted.

    Cooking Time: 15-18 minutes

    Shrimp and Bacon Grits

    Shrimp and Bacon Grits
    Shrimp and Bacon Grits: A Southern-Inspired Brunch Delight

    These creamy grits are packed with succulent shrimp, crispy bacon, and a hint of smoky flavor. Perfect for a weekend brunch or breakfast gathering.

    Ingredients:

    – 1 cup stone-ground grits
    – 4 cups water
    – 2 tablespoons butter
    – 6 slices cooked bacon, crumbled
    – 1 pound large shrimp, peeled and deveined
    – 1/2 teaspoon paprika
    – Salt and pepper to taste
    – 1 tablespoon chopped fresh parsley

    Instructions:

    1. Bring the water to a boil in a medium saucepan. Gradually whisk in the grits. Reduce heat to low; cover and cook for 20-25 minutes or until creamy.
    2. In a large skillet, melt butter over medium-high. Add shrimp and cook for 2-3 minutes per side, until pink and cooked through. Remove from heat.
    3. Stir crumbled bacon into the cooked grits. Add cooked shrimp, paprika, salt, and pepper to taste.
    4. Serve hot, garnished with parsley.

    Cooking Time: 35-40 minutes

    Bacon-Wrapped Shrimp with Maple Glaze

    Bacon-Wrapped Shrimp with Maple Glaze
    This sweet and savory recipe combines the flavors of crispy bacon, succulent shrimp, and a hint of maple syrup for a truly unforgettable dish. Perfect as an appetizer or main course, this recipe is sure to impress.

    Ingredients:

    – 12 large shrimp, peeled and deveined
    – 6 slices of bacon
    – 1/4 cup pure maple syrup
    – 2 tablespoons brown sugar
    – 1 tablespoon olive oil
    – Salt and pepper to taste

    Instructions:

    1. Preheat oven to 400°F (200°C).
    2. In a small bowl, mix together maple syrup, brown sugar, and salt.
    3. Wrap each shrimp with a slice of bacon, securing with a toothpick if needed.
    4. Place the bacon-wrapped shrimp on a baking sheet lined with parchment paper.
    5. Drizzle the maple glaze over the shrimp, making sure they’re evenly coated.
    6. Bake for 12-15 minutes or until the bacon is crispy and the shrimp are cooked through.

    Cooking Time: 12-15 minutes

    Shrimp and Bacon Caesar Salad

    Shrimp and Bacon Caesar Salad
    This decadent salad combines succulent shrimp, crispy bacon, and creamy Caesar dressing for a flavorful and filling meal.

    Ingredients:

    – 1 pound large shrimp, peeled and deveined
    – 6 slices of bacon, cooked and crumbled
    – 2 cups romaine lettuce, chopped
    – 1/2 cup homemade or store-bought Caesar dressing
    – 1/4 cup shaved Parmesan cheese
    – Salt and pepper to taste

    Instructions:

    1. Preheat oven to 400°F (200°C).
    2. Toss shrimp with salt, pepper, and 1 tablespoon of olive oil on a baking sheet. Roast for 8-10 minutes or until pink and cooked through.
    3. In a large bowl, combine chopped lettuce, crumbled bacon, and roasted shrimp.
    4. Drizzle Caesar dressing over the top and toss to coat.
    5. Sprinkle Parmesan cheese and serve immediately.

    Cooking Time: 20-25 minutes

    Shrimp and Bacon Deviled Eggs

    Shrimp and Bacon Deviled Eggs
    Elevate your deviled egg game with the addition of succulent shrimp and crispy bacon! These bite-sized treats are perfect for parties, potlucks, or even just a quick snack.

    Ingredients:

    – 6 large eggs, hard-boiled and peeled
    – 1/4 cup mayonnaise
    – 2 tablespoons Dijon mustard
    – 1 tablespoon chopped fresh chives
    – 12 large shrimp, cooked and diced
    – 6 slices of bacon, cooked and crumbled
    – Salt and pepper to taste
    – Paprika or chopped parsley for garnish (optional)

    Instructions:

    1. Cut the eggs in half lengthwise.
    2. Scoop out the yolks and place them in a bowl.
    3. Add mayonnaise, mustard, and chives to the yolks. Mix until smooth.
    4. Stir in the diced shrimp and crumbled bacon.
    5. Spoon the yolk mixture into the egg white halves.
    6. Sprinkle with salt and pepper to taste.
    7. Garnish with paprika or parsley if desired.

    Cooking Time: 15-20 minutes

    Bacon and Shrimp Stuffed Avocados

    Bacon and Shrimp Stuffed Avocados
    Elevate your snack game with this simple yet impressive recipe that combines the creaminess of avocados with the savory goodness of bacon and shrimp.

    Ingredients:

    – 4 ripe avocados
    – 6 slices of cooked bacon, crumbled
    – 1/2 cup of cooked and peeled shrimp
    – 1 tablespoon of freshly squeezed lime juice
    – Salt and pepper to taste
    – Optional: chopped cilantro for garnish

    Instructions:

    1. Cut the avocados in half and remove the pit.
    2. In a bowl, mix together the crumbled bacon, cooked shrimp, and lime juice.
    3. Spoon the mixture evenly into each avocado half.
    4. Season with salt and pepper to taste.
    5. Garnish with chopped cilantro if desired.

    Cooking Time: None! This recipe is ready in just 10 minutes.

    Summary

    Get ready to spice up your meals with these mouth-watering shrimp and bacon recipes! From skewers to pasta, tacos to pizza, this collection of 18 recipes adds a twist to traditional favorites. Try Garlic Butter Shrimp and Bacon Skewers, Cajun Shrimp and Bacon Stuffed Peppers, or Spicy Bacon-Wrapped Shrimp with Honey Glaze for a taste adventure like no other. Whether you’re in the mood for something classic or something new and exciting, these shrimp and bacon recipes have got you covered!

  • 20 Delicious Crescent Roll Pizza Recipes for Every Occasion

    20 Delicious Crescent Roll Pizza Recipes for Every Occasion

    The humble crescent roll – a staple in many a baker’s pantry. But why stop at just serving it with butter and jam when you can elevate it to pizza greatness? In this article, we’ll explore 20 delicious crescent roll pizza recipes that are perfect for any occasion. Whether you’re looking for a quick weeknight dinner, a party snack, or a special treat, we’ve got you covered.

    From classic combinations like pepperoni and cheese to more adventurous options like buffalo chicken and spinach and artichoke, there’s something for everyone in this list of scrumptious crescent roll pizzas. So go ahead, get creative, and see what kind of pizza magic you can whip up with just a few simple ingredients!

    Pepperoni and Cheese Crescent Roll Pizza

    Pepperoni and Cheese Crescent Roll Pizza
    A twist on traditional pizza, this recipe combines the flaky goodness of crescent roll dough with melted cheese and savory pepperoni for a deliciously easy meal.

    Ingredients:

    – 1 package of refrigerated crescent roll dough (8 rolls)
    – 12 slices of pepperoni
    – 1 cup shredded mozzarella cheese
    – 1/4 cup grated Parmesan cheese
    – 1 tablespoon olive oil

    Instructions:

    1. Preheat oven to 375°F (190°C).
    2. Unroll the crescent roll dough and separate into triangles.
    3. Place a slice of pepperoni at the base of each triangle, leaving a small border around the edges.
    4. Sprinkle shredded mozzarella cheese over the pepperoni, followed by a sprinkle of Parmesan cheese.
    5. Roll up each triangle, starting from the wide end, to form a crescent shape.
    6. Place the rolls on a baking sheet lined with parchment paper, seam-side down.
    7. Drizzle with olive oil and bake for 12-15 minutes or until golden brown.

    Cooking Time: 12-15 minutes

    BBQ Chicken Crescent Roll Pizza

    BBQ Chicken Crescent Roll Pizza
    Elevate your pizza game with this unique combination of BBQ chicken, crescent rolls, and gooey cheese. Perfect for a quick weeknight dinner or a fun gathering with friends.

    Ingredients:

    – 1 package of refrigerated crescent roll dough (8 count)
    – 1 lb boneless, skinless chicken breasts, cut into bite-sized pieces
    – 1/4 cup BBQ sauce
    – 1/2 cup shredded mozzarella cheese
    – 1/4 cup chopped fresh cilantro (optional)

    Instructions:

    1. Preheat oven to 375°F.
    2. Roll out crescent roll dough and separate into triangles.
    3. In a small bowl, mix chicken and BBQ sauce. Spoon onto dough, leaving a 1-inch border.
    4. Sprinkle mozzarella cheese evenly over the top of the chicken.
    5. Roll up dough, starting from wide end, to form a spiral shape.
    6. Place on baking sheet lined with parchment paper and bake for 15-20 minutes or until golden brown.
    7. Garnish with chopped cilantro, if desired.

    Cooking Time: 15-20 minutes

    Margherita Crescent Roll Pizza

    Margherita Crescent Roll Pizza
    A twist on the classic margherita pizza, this recipe uses crescent roll dough to create a flaky and buttery crust topped with fresh tomato sauce, mozzarella cheese, and basil.

    Ingredients:

    – 1 package of crescent roll dough (8-10 rolls)
    – 2 cups of marinara sauce
    – 1 cup of shredded mozzarella cheese
    – 1/4 cup of chopped fresh basil
    – Salt and pepper to taste

    Instructions:

    1. Preheat oven to 375°F.
    2. Unroll the crescent roll dough and separate into individual rolls.
    3. Roll out each roll into a thin sheet, about 1/8 inch thick.
    4. Spoon 1-2 tablespoons of marinara sauce onto one half of the dough, leaving a small border around the edges.
    5. Sprinkle shredded mozzarella cheese over the sauce.
    6. Fold the other half of the dough over the filling and press edges to seal.
    7. Place pizza on a baking sheet lined with parchment paper.
    8. Bake for 15-20 minutes or until golden brown.

    Cooking Time: 15-20 minutes

    Buffalo Chicken Crescent Roll Pizza

    Buffalo Chicken Crescent Roll Pizza
    Combine the comfort of pizza with the convenience of a crescent roll crust, all wrapped up in a spicy buffalo chicken package. This recipe is perfect for a quick and easy dinner or game-day snack.

    Ingredients:

    – 1 can of refrigerated crescent rolls
    – 1 cup cooked chicken, shredded
    – 1/2 cup buffalo wing sauce (such as Frank’s RedHot)
    – 1 cup shredded mozzarella cheese
    – 1/4 cup chopped green onions for garnish

    Instructions:

    1. Preheat oven to 375°F.
    2. Roll out the crescent roll dough and press into a pizza pan or baking sheet.
    3. Spread buffalo wing sauce over the dough, leaving a small border around edges.
    4. Top with shredded chicken, mozzarella cheese, and chopped green onions.
    5. Bake for 15-20 minutes or until crust is golden brown and cheese is melted.
    6. Remove from oven and let cool for a few minutes before serving.

    Cooking Time: 15-20 minutes

    Veggie Lover’s Crescent Roll Pizza

    Veggie Lover
    Veggie Lover’s Crescent Roll Pizza: A game-changing twist on traditional pizza! This recipe combines the convenience of crescent rolls with a flavorful veggie-packed topping, perfect for a quick and satisfying meal or snack.

    Ingredients:

    – 1 package of crescent roll dough (8-10 rolls)
    – 1/2 cup marinara sauce
    – 1 cup shredded mozzarella cheese
    – 1/2 cup sliced bell peppers
    – 1/2 cup sliced mushrooms
    – 1/4 cup chopped fresh parsley
    – Salt and pepper to taste

    Instructions:

    1. Preheat oven to 375°F (190°C).
    2. Unroll the crescent roll dough and separate into individual triangles.
    3. Spread a small amount of marinara sauce on each triangle, leaving a 1/2-inch border around the edges.
    4. Top with shredded mozzarella cheese, sliced bell peppers, mushrooms, and chopped parsley.
    5. Roll up the dough tightly and place seam-side down on a baking sheet lined with parchment paper.
    6. Bake for 12-15 minutes or until golden brown.

    Cooking Time: 12-15 minutes

    Supreme Crescent Roll Pizza

    Supreme Crescent Roll Pizza
    Elevate your pizza game with this unique and delicious Supreme Crescent Roll Pizza recipe, featuring flaky crescent rolls instead of traditional crust.

    Ingredients:
    – 1 package of crescent roll dough (8 rolls)
    – 1 cup of pizza sauce
    – 2 cups of shredded mozzarella cheese
    – 1 cup of shredded cheddar cheese
    – 1/4 cup of chopped fresh parsley
    – 12 slices of pepperoni
    – Salt and pepper to taste

    Instructions:
    1. Preheat your oven to 375°F (190°C).
    2. Roll out the crescent roll dough into a large rectangle, about 1/4 inch thick.
    3. Spread the pizza sauce evenly over the dough, leaving a 1-inch border around the edges.
    4. Sprinkle the mozzarella and cheddar cheese mixture over the sauce.
    5. Add the chopped parsley and pepperoni slices on top of the cheese.
    6. Roll up the dough into a tight log, starting from one long side. Cut into 8 equal pieces.
    7. Place each piece onto a baking sheet lined with parchment paper, seam-side down.
    8. Bake for 15-20 minutes or until golden brown.

    Cooking Time: 15-20 minutes

    Garlic Butter Crescent Roll Pizza

    Garlic Butter Crescent Roll Pizza
    Transform classic crescent roll dough into a savory pizza crust, infused with the richness of garlic butter and melted mozzarella cheese.

    Ingredients:

    – 1 package of refrigerated crescent roll dough (8 rolls)
    – 2 cloves of garlic, minced
    – 2 tablespoons of unsalted butter, softened
    – 1/4 cup of grated mozzarella cheese
    – Salt and pepper to taste

    Instructions:

    1. Preheat oven to 375°F (190°C).
    2. Roll out the crescent roll dough into a rectangle shape.
    3. In a small bowl, mix together minced garlic and softened butter until well combined.
    4. Spread the garlic butter mixture evenly over the dough, leaving a 1/2-inch border around the edges.
    5. Sprinkle mozzarella cheese over the garlic butter layer.
    6. Season with salt and pepper to taste.
    7. Roll the dough into a log shape and slice into 8-10 equal pieces.
    8. Place each piece on a baking sheet lined with parchment paper, leaving about 1 inch of space between each roll.
    9. Bake for 12-15 minutes or until golden brown.

    Cooking Time: 12-15 minutes

    Spinach and Artichoke Crescent Roll Pizza

    Spinach and Artichoke Crescent Roll Pizza
    This recipe combines the flaky goodness of crescent rolls with the creamy deliciousness of spinach and artichoke dip, creating a unique pizza that’s sure to please.

    Ingredients:

    – 1 package of crescent roll dough
    – 1 (14 oz) can of artichoke hearts, drained and chopped
    – 2 cups of fresh spinach leaves
    – 1 cup of cream cheese, softened
    – 1/2 cup of Parmesan cheese, shredded
    – 1/4 teaspoon of garlic powder
    – Salt and pepper to taste

    Instructions:

    1. Preheat oven to 375°F (190°C).
    2. Roll out the crescent dough to a thickness of about 1/8 inch.
    3. Spread the cream cheese mixture over the dough, leaving a 1-inch border around the edges.
    4. Top with chopped artichoke hearts and fresh spinach leaves.
    5. Sprinkle Parmesan cheese and garlic powder over the top.
    6. Roll up the dough into a log shape and place on a baking sheet lined with parchment paper.
    7. Bake for 20-25 minutes or until golden brown.

    Cooking Time: 20-25 minutes

    Taco Crescent Roll Pizza

    Taco Crescent Roll Pizza
    A twist on traditional pizza, this recipe combines the flavors of tacos with the convenience of crescent rolls.

    Ingredients:

    – 1 package of crescent roll dough (8-10 count)
    – 1 pound ground beef or ground turkey
    – 1 packet of taco seasoning
    – 1 cup shredded cheese (Cheddar or Monterey Jack work well)
    – 1/2 cup canned black beans, drained and rinsed
    – 1/4 cup diced onion
    – 1 jalapeño pepper, diced
    – Salt and pepper to taste
    – Optional toppings: sour cream, salsa, avocado, cilantro

    Instructions:

    1. Preheat oven to 375°F.
    2. Roll out crescent dough into a large rectangle.
    3. Cook ground beef or turkey in a skillet until browned, breaking into small pieces as it cooks.
    4. Add taco seasoning and stir to combine.
    5. Spread the meat mixture over the center of the dough, leaving a 1-inch border around edges.
    6. Top with shredded cheese, black beans, onion, and jalapeño.
    7. Roll up the dough, starting from one long side.
    8. Place seam-side down on a baking sheet and bake for 15-20 minutes, or until golden brown.

    Cooking Time: 15-20 minutes

    Hawaiian Crescent Roll Pizza

    Hawaiian Crescent Roll Pizza
    Transport yourself to a tropical paradise with this sweet and savory Hawaiian-inspired pizza, featuring crescent rolls as the crust!

    Ingredients:

    – 1 package of crescent roll dough (8-10 rolls)
    – 1 cup of pineapple rings
    – 1/2 cup of ham or Canadian bacon, diced
    – 1/4 cup of mozzarella cheese, shredded
    – 2 tablespoons of brown sugar
    – 1 tablespoon of soy sauce
    – 1 teaspoon of sesame oil
    – Salt and pepper to taste

    Instructions:

    1. Preheat oven to 375°F (190°C).
    2. Unroll the crescent roll dough and separate into triangles.
    3. Place a few pieces of pineapple, ham or Canadian bacon, and mozzarella cheese onto each triangle.
    4. Sprinkle brown sugar, soy sauce, and sesame oil over the toppings.
    5. Roll up each triangle, starting from the wide end, and curve into a crescent shape.
    6. Place the crescent rolls on a baking sheet lined with parchment paper, leaving about 1 inch of space between each roll.
    7. Bake for 15-20 minutes or until golden brown.

    Cooking Time: 15-20 minutes

    Philly Cheesesteak Crescent Roll Pizza

    Philly Cheesesteak Crescent Roll Pizza
    A twist on the classic Philly cheesesteak, this recipe combines tender steak and melted cheese with the flaky crust of a crescent roll, all on top of a crispy pizza base. Perfect for a satisfying meal or party appetizer.

    Ingredients:

    – 1 package of crescent rolls
    – 1 lb thinly sliced ribeye steak
    – 1/2 cup shredded mozzarella cheese
    – 1/4 cup shredded cheddar cheese
    – 1 tablespoon olive oil
    – Salt and pepper to taste
    – Pizza sauce (homemade or store-bought)

    Instructions:

    1. Preheat oven to 375°F.
    2. Roll out the crescent rolls into a large rectangle, about 1/8 inch thick.
    3. In a skillet, cook the steak over medium-high heat until browned and cooked through. Slice into thin strips.
    4. Place the pizza sauce on the rolled-out crescent dough, leaving a small border around the edges.
    5. Top with sliced steak, mozzarella cheese, and cheddar cheese.
    6. Roll up the crescent dough, starting from one long side. Pinch seam closed.
    7. Place seam-side down on a baking sheet and bake for 15-20 minutes, or until golden brown.

    Cooking Time: 15-20 minutes

    Pesto and Mozzarella Crescent Roll Pizza

    Pesto and Mozzarella Crescent Roll Pizza
    A twist on traditional pizza, this recipe combines the flavors of pesto, mozzarella, and crescent roll crust for a quick and easy meal.

    Ingredients:

    – 1 package crescent rolls
    – 1/2 cup pesto
    – 8 oz mozzarella cheese, sliced
    – Fresh basil leaves, chopped (optional)

    Instructions:

    1. Preheat oven to 375°F.
    2. Unroll the crescent roll dough and separate into triangles.
    3. Spread 1-2 teaspoons of pesto onto each triangle, leaving a small border around the edges.
    4. Top with sliced mozzarella cheese.
    5. Roll up the dough, starting from the wide end, and curve into a crescent shape.
    6. Place on a baking sheet lined with parchment paper.
    7. Bake for 12-15 minutes or until golden brown.
    8. Garnish with chopped fresh basil leaves, if desired.

    Cooking Time: 12-15 minutes

    Breakfast Crescent Roll Pizza

    Breakfast Crescent Roll Pizza
    Start your day with a twist on traditional pizza – Breakfast Crescent Roll Pizza! This sweet and savory treat combines the flaky goodness of crescent rolls with scrambled eggs, crispy bacon, and melted cheese.

    Ingredients:

    – 1 package of croissant-flavored crescent roll dough (8-10 pieces)
    – 4 large eggs
    – 6 slices of cooked bacon, crumbled
    – 1 cup shredded cheddar cheese
    – Salt and pepper to taste

    Instructions:

    1. Preheat oven to 375°F (190°C).
    2. Roll out the crescent roll dough into a rectangle shape.
    3. In a bowl, scramble the eggs and season with salt and pepper. Spread evenly over the dough, leaving a 1-inch border around the edges.
    4. Sprinkle crumbled bacon and shredded cheese over the egg mixture.
    5. Roll up the dough tightly, starting from one of the long sides.
    6. Cut into 8-10 slices, depending on desired size.
    7. Place slices on a baking sheet lined with parchment paper.
    8. Bake for 12-15 minutes or until golden brown.

    Cooking Time: 12-15 minutes

    Mac and Cheese Crescent Roll Pizza

    Mac and Cheese Crescent Roll Pizza
    A creative twist on classic macaroni and cheese, this recipe combines the comfort of a homemade pasta dish with the convenience of store-bought crescent rolls.

    Ingredients:

    – 1 package of refrigerated crescent rolls
    – 8 oz macaroni
    – 2 cups milk
    – 2 cups shredded cheddar cheese
    – 1/4 cup grated Parmesan cheese
    – 1/4 cup butter, melted
    – Salt and pepper to taste

    Instructions:

    1. Preheat oven to 375°F (190°C).
    2. Cook macaroni according to package instructions until al dente. Drain and set aside.
    3. In a large saucepan, combine milk, cheddar cheese, Parmesan cheese, and melted butter. Stir over medium heat until smooth and creamy.
    4. Add cooked macaroni to the cheese sauce and stir until coated.
    5. Unroll crescent rolls and separate into triangles.
    6. Spoon about 1/4 cup of macaroni and cheese mixture onto each triangle, leaving a 1-inch border around the edges.
    7. Roll up the crescent roll, starting from one end, to form a pizza-like shape. Place on a baking sheet lined with parchment paper.
    8. Bake for 15-20 minutes or until golden brown.

    Cooking Time: 15-20 minutes

    Reuben Crescent Roll Pizza

    Reuben Crescent Roll Pizza
    Transform your favorite Reuben sandwich into a pizza by using crescent rolls as the “crust” and topping it with corned beef, sauerkraut, Swiss cheese, and Thousand Island dressing.

    Ingredients:

    – 1 package of refrigerated crescent rolls
    – 8 oz corned beef, thinly sliced
    – 1/2 cup sauerkraut, drained
    – 1 cup shredded Swiss cheese
    – 2 tbsp Thousand Island dressing
    – Salt and pepper to taste

    Instructions:

    1. Preheat oven to 375°F (190°C).
    2. Roll out the crescent roll dough into a rectangle.
    3. Top with sliced corned beef, sauerkraut, and Swiss cheese.
    4. Drizzle with Thousand Island dressing.
    5. Fold the edges of the dough up over the filling to create a crust.
    6. Place on baking sheet and bake for 15-20 minutes or until golden brown.

    Cooking Time: 15-20 minutes

    Chicken Alfredo Crescent Roll Pizza

    Chicken Alfredo Crescent Roll Pizza
    A twist on traditional pizza, this recipe combines the flavors of chicken alfredo with crescent roll crust and melted mozzarella cheese. Perfect for a quick weeknight dinner or a special occasion.

    Ingredients:

    – 1 package of refrigerated crescent rolls
    – 1 lb boneless, skinless chicken breasts, cooked and diced
    – 1 cup alfredo sauce
    – 1 cup shredded mozzarella cheese
    – 1/4 cup chopped fresh parsley
    – Salt and pepper to taste

    Instructions:

    1. Preheat oven to 375°F (190°C).
    2. Roll out the crescent rolls on a floured surface.
    3. Top each roll with a spoonful of alfredo sauce, diced chicken, and shredded mozzarella cheese.
    4. Fold the dough over the filling, pressing edges to seal.
    5. Place the pizza rolls on a baking sheet lined with parchment paper.
    6. Bake for 15-20 minutes or until golden brown.
    7. Sprinkle with parsley and serve hot.

    Cooking Time: 15-20 minutes

    Greek Crescent Roll Pizza

    Greek Crescent Roll Pizza
    Elevate your pizza game with this creative take on classic pizza, featuring Greek-inspired flavors and flaky crescent roll crust. Perfect for a unique dinner party or family gathering.

    Ingredients:

    – 1 package of crescent rolls
    – 1 cup of tomato sauce
    – 1 cup of shredded mozzarella cheese
    – 1/2 cup of crumbled feta cheese
    – 1/4 cup of chopped kalamata olives
    – 1/4 cup of chopped artichoke hearts
    – 1 tablespoon of olive oil
    – Salt and pepper to taste

    Instructions:

    1. Preheat oven to 375°F (190°C).
    2. Roll out the crescent rolls and place on a baking sheet.
    3. Spread tomato sauce over the dough, leaving a small border around the edges.
    4. Top with mozzarella cheese, feta cheese, olives, and artichoke hearts.
    5. Drizzle with olive oil and season with salt and pepper.
    6. Bake for 15-20 minutes or until crust is golden brown.

    Cooking Time: 15-20 minutes

    Loaded Baked Potato Crescent Roll Pizza

    Loaded Baked Potato Crescent Roll Pizza
    A creative twist on traditional pizza, this recipe combines the comfort of a loaded baked potato with the flaky goodness of crescent roll crust. The result is a unique and delicious treat that’s perfect for a fun family dinner or game-day gathering.

    Ingredients:

    – 1 package of crescent rolls
    – 2 large baked potatoes, cooled
    – 1 cup shredded cheddar cheese
    – 1/2 cup diced cooked bacon
    – 1/4 cup chopped green onions
    – 1 tablespoon olive oil
    – Salt and pepper to taste

    Instructions:

    1. Preheat oven to 375°F.
    2. Roll out crescent rolls on a floured surface to desired thickness.
    3. Spread cooled baked potatoes over the dough, leaving a 1-inch border around edges.
    4. Top with shredded cheese, diced bacon, and chopped green onions.
    5. Drizzle with olive oil and season with salt and pepper to taste.
    6. Roll up the crescent roll tightly and place seam-side down on a baking sheet.
    7. Bake for 15-20 minutes or until golden brown.

    Cooking Time: 15-20 minutes

    Spicy Sausage Crescent Roll Pizza

    Spicy Sausage Crescent Roll Pizza
    This recipe combines the ease of crescent roll pizza with the bold flavor of spicy sausage and melted mozzarella cheese.

    Ingredients:

    – 1 package of crescent rolls (8-10 count)
    – 1 pound spicy Italian sausage, casings removed
    – 1/2 cup marinara sauce
    – 1 cup shredded mozzarella cheese
    – 1 tablespoon olive oil
    – Salt and pepper to taste

    Instructions:

    1. Preheat oven to 375°F.
    2. Roll out the crescent rolls on a floured surface to desired thickness.
    3. Cook the sausage in a skillet over medium-high heat, breaking apart with a spoon as it cooks, until browned.
    4. Spread marinara sauce evenly over the dough, leaving a small border around the edges.
    5. Top with cooked sausage and sprinkle mozzarella cheese.
    6. Fold the crescent roll dough up over the filling to form a crust, pressing gently to seal.
    7. Brush the top of the pizza with olive oil and season with salt and pepper.
    8. Bake for 15-20 minutes or until golden brown.

    Cooking Time: 15-20 minutes

    Four Cheese Crescent Roll Pizza

    Four Cheese Crescent Roll Pizza
    Elevate your pizza game with this unique and delicious combination of four cheeses wrapped in a buttery crescent roll crust.

    Ingredients:

    – 1 package of crescent rolls (8-count)
    – 2 tablespoons of unsalted butter, melted
    – 1 cup of shredded mozzarella cheese
    – 1/2 cup of grated Parmesan cheese
    – 1/4 cup of crumbled feta cheese
    – 1/4 cup of ricotta cheese
    – Fresh basil leaves for garnish (optional)

    Instructions:

    1. Preheat oven to 375°F (190°C).
    2. Roll out the crescent roll dough and separate into triangles.
    3. Place a spoonful of melted butter on each triangle, leaving a 1/4-inch border around the edges.
    4. Sprinkle mozzarella cheese over the butter, followed by Parmesan, feta, and ricotta cheese.
    5. Fold the dough in half to form a triangle and press edges together to seal.
    6. Bake for 18-20 minutes or until golden brown.
    7. Garnish with fresh basil leaves if desired.

    Cooking Time: 18-20 minutes

    Summary

    Get ready to revolutionize your pizza game with these 20 mouth-watering Crescent Roll Pizza recipes! From classic margherita to buffalo chicken, and from veggie lover’s to loaded baked potato, there’s something for every taste bud. Impress your friends and family with creative combinations like Philly cheesesteak, reuben, or Greek-inspired pizzas. Whether you’re a pizza newbie or a seasoned pro, these easy-to-make recipes are sure to satisfy any craving. So go ahead, get creative, and roll out the fun with these delectable Crescent Roll Pizzas!

  • 20 Delicious Beef Recipes for Every Occasion

    20 Delicious Beef Recipes for Every Occasion

    Whether you’re a seasoned chef or just starting to explore the world of cooking, there’s nothing quite like a perfectly cooked piece of beef to satisfy your hunger. From classic comfort foods to international flavors and bold twists on old favorites, we’ve got 20 mouth-watering beef recipes that are sure to please even the pickiest eaters.

    In this article, we’ll take you on a culinary journey around the world, featuring recipes that showcase the rich flavor and tender texture of beef. From slow-cooked stews and hearty burgers to flavorful stir-fries and international-inspired dishes, there’s something for everyone in this collection of delicious beef recipes.

    So grab your apron, fire up the stove, and get ready to dig in with our top 20 picks!

    Classic Beef Bourguignon

    Classic Beef Bourguignon
    This iconic dish from France is a rich and flavorful stew that simmers beef, vegetables, and mushrooms in red wine. Perfect for a special occasion or a cozy night in.

    Ingredients:

    – 2 pounds beef chuck, cut into 1-inch cubes
    – 2 tablespoons butter
    – 1 onion, chopped
    – 3 cloves garlic, minced
    – 2 cups mixed mushrooms (button, cremini, shiitake), sliced
    – 1 cup red wine (Burgundy or Merlot)
    – 1 cup beef broth
    – 1 teaspoon tomato paste
    – 1 bay leaf
    – Salt and pepper to taste
    – Fresh thyme, chopped (optional)

    Instructions:

    1. Heat butter in a large Dutch oven over medium-high heat.
    2. Brown beef cubes, then set aside.
    3. Add onion, garlic, and mushrooms; cook until softened.
    4. Add red wine, broth, tomato paste, bay leaf, salt, and pepper. Stir to combine.
    5. Return browned beef to pot, cover, and simmer for 2 hours or until meat is tender.
    6. Serve hot, garnished with chopped thyme if desired.

    Cooking Time: 2 hours

    Slow Cooker Beef Stew

    Slow Cooker Beef Stew
    A hearty and comforting meal that’s perfect for a busy day, this slow cooker beef stew is easy to prepare and tenderizes to perfection.

    Ingredients:

    – 2 pounds beef stew meat (chuck or round)
    – 1 large onion, chopped
    – 3 cloves garlic, minced
    – 2 medium carrots, peeled and sliced
    – 2 medium potatoes, peeled and cubed
    – 1 cup all-purpose flour
    – 1 teaspoon dried thyme
    – 1/2 teaspoon salt
    – 1/4 teaspoon black pepper
    – 1 can (14.5 oz) beef broth

    Instructions:

    1. In the slow cooker, combine beef, onion, garlic, carrots, potatoes, flour, thyme, salt, and pepper.
    2. Pour in the beef broth and stir until the meat is coated.
    3. Cook on Low for 8-10 hours or High for 4-6 hours.
    4. Serve hot, garnished with chopped fresh parsley if desired.

    Cooking Time: 4-10 hours

    Grilled Garlic Butter Steak

    Grilled Garlic Butter Steak
    Elevate your steak game with this simple yet flavorful recipe that combines the richness of garlic butter with a perfectly grilled crust.

    Ingredients:

    – 1.5-2 pounds flank steak or ribeye
    – 4 cloves garlic, minced
    – 2 tablespoons unsalted butter, softened
    – 1 teaspoon paprika
    – Salt and pepper to taste

    Instructions:

    1. Preheat grill to medium-high heat (400°F).
    2. In a small bowl, mix together garlic, butter, and paprika.
    3. Season the steak with salt and pepper on both sides.
    4. Place the steak on the grill and cook for 5-6 minutes per side, or until it reaches your desired level of doneness.
    5. During the last minute of cooking, spread the garlic butter mixture evenly over the steak.
    6. Remove from heat and let rest for 5 minutes before slicing and serving.

    Cooking Time: Approximately 15-20 minutes

    Beef and Broccoli Stir-Fry

    Beef and Broccoli Stir-Fry
    A classic Chinese-inspired dish that’s quick, easy, and packed with flavor.

    Ingredients:

    – 1 lb beef strips (sirloin or ribeye)
    – 2 cups broccoli florets
    – 2 tablespoons vegetable oil
    – 2 cloves garlic, minced
    – 1 tablespoon soy sauce
    – 1 tablespoon oyster sauce (optional)
    – Salt and pepper to taste
    – Cooked rice or noodles for serving

    Instructions:

    1. Heat 1 tablespoon of oil in a large skillet or wok over medium-high heat.
    2. Add the beef strips and cook until browned, about 3-4 minutes. Remove from pan and set aside.
    3. In the same pan, add the remaining 1 tablespoon of oil, then sauté the garlic for 30 seconds.
    4. Add the broccoli to the pan and cook until tender, about 2-3 minutes.
    5. Return the beef to the pan and stir in soy sauce and oyster sauce (if using).
    6. Season with salt and pepper to taste.
    7. Serve hot over cooked rice or noodles.

    Cooking Time: 15-20 minutes

    Spicy Korean Beef Bulgogi

    Spicy Korean Beef Bulgogi
    Bulgogi, which translates to “fire cooking,” is a popular Korean dish that typically features marinated beef short ribs cooked with a sweet and savory sauce. This spicy variation adds a bold kick of gochujang (Korean chili paste) for an extra layer of flavor.

    Ingredients:

    – 1 lb beef (thinly sliced), such as ribeye or sirloin
    – 2 tbsp soy sauce
    – 2 tbsp Korean chili flakes (gochugaru)
    – 2 tbsp brown sugar
    – 2 tbsp rice vinegar
    – 2 cloves garlic, minced
    – 1 tsp grated ginger
    – 2 tbsp gochujang (Korean chili paste)
    – 2 tbsp vegetable oil
    – Green onions and toasted sesame seeds for garnish (optional)

    Instructions:

    1. In a large bowl, whisk together soy sauce, chili flakes, brown sugar, rice vinegar, garlic, and ginger.
    2. Add the sliced beef to the marinade and let it sit for at least 30 minutes or up to 2 hours in the refrigerator.
    3. Heat 1 tablespoon of vegetable oil in a large skillet over medium-high heat. Remove the beef from the marinade, letting any excess liquid drip off.
    4. Cook the beef for 3-4 minutes per side, or until cooked to desired level of doneness.
    5. In a small bowl, whisk together gochujang and remaining 1 tablespoon vegetable oil.
    6. Add the gochujang mixture to the skillet with the cooked beef and stir to combine.
    7. Cook for an additional 2-3 minutes, allowing the flavors to meld.
    8. Serve hot, garnished with green onions and toasted sesame seeds if desired.

    Cooking Time: 20-25 minutes

    Beef Tacos with Fresh Salsa

    Beef Tacos with Fresh Salsa
    A flavorful and refreshing twist on traditional tacos, this recipe combines tender beef with a zesty fresh salsa. Perfect for a quick weeknight dinner or a weekend gathering.

    Ingredients:

    – 1 pound ground beef
    – 1/2 medium onion, finely chopped
    – 1 packet of taco seasoning
    – 8-10 corn tortillas
    – Fresh salsa ingredients (see below)
    – Optional toppings: shredded lettuce, diced tomatoes, shredded cheese, sour cream

    Fresh Salsa Ingredients:

    – 1 cup diced fresh tomatoes (such as Roma or cherry tomatoes)
    – 1/2 cup diced red onion
    – 1 jalapeño pepper, seeded and finely chopped
    – 1 tablespoon lime juice
    – Salt and pepper to taste
    – Fresh cilantro leaves for garnish

    Instructions:

    1. Preheat a large skillet over medium-high heat. Add the ground beef and cook until browned, breaking it up into small pieces as it cooks.
    2. Add the chopped onion and taco seasoning to the beef mixture. Cook until the onion is translucent.
    3. Warm the tortillas by wrapping them in a damp paper towel and microwaving for 20-30 seconds.
    4. Assemble the tacos by spooning the beef mixture onto a tortilla, followed by your desired toppings.
    5. Serve with fresh salsa on the side.

    Cook Time: 15-20 minutes

    Juicy Beef Burgers with Caramelized Onions

    Juicy Beef Burgers with Caramelized Onions
    Juicy Beef Burgers with Caramelized Onions: Elevate your burger game with this mouthwatering combination of tender beef and sweet, caramelized onions!

    Ingredients:

    – 4 beef patties (80/20 or 70/30 lean to fat ratio)
    – 1 large onion, thinly sliced
    – 2 tablespoons olive oil
    – 2 cloves garlic, minced
    – 1 teaspoon salt
    – 1/2 teaspoon black pepper
    – 4 hamburger buns
    – Optional toppings: lettuce, tomato, cheese, pickles, etc.

    Instructions:

    1. Preheat grill or grill pan to medium-high heat.
    2. Form beef patties and season with salt and pepper.
    3. Grill burgers for 4-5 minutes per side, or until cooked to desired doneness.
    4. While burgers cook, caramelize onions:
    – Heat olive oil in a large skillet over medium-low heat.
    – Add sliced onions and cook, stirring occasionally, for 20-25 minutes or until golden brown and caramelized.
    – Stir in minced garlic and season with salt to taste.
    5. Assemble burgers by spreading caramelized onions on the bottom bun, followed by a beef patty, and finishing with a top bun.

    Cooking Time: 15-20 minutes (including burger cooking time)

    Beef Wellington with Mushroom Duxelles

    Beef Wellington with Mushroom Duxelles
    Experience the richness of a classic Beef Wellington dish elevated by the earthy flavors of mushroom duxelles. This recipe combines tender beef filet, sautéed mushrooms, and flaky puff pastry for an unforgettable dinner.

    Ingredients:
    – 1 (1.5-2 pound) beef filet, tied with kitchen twine
    – 1/2 cup mushroom duxelles (see below)
    – 1/4 cup all-purpose flour
    – 1 teaspoon salt
    – 1/2 teaspoon black pepper
    – 1/2 cup puff pastry, thawed
    – 1 egg, beaten (for brushing pastry)

    Mushroom Duxelles:
    – 1/2 cup finely chopped mushrooms (button or cremini)
    – 2 tablespoons butter
    – 1 tablespoon all-purpose flour
    – Salt and pepper to taste

    Instructions:

    1. Preheat oven to 375°F.
    2. Season beef filet with salt, black pepper, and flour.
    3. Sear beef in a hot skillet for 1-2 minutes per side, then let cool.
    4. Spread mushroom duxelles over the cooled beef, leaving a 1-inch border around the edges.
    5. Roll out puff pastry to a large rectangle, about 1/8 inch thick.
    6. Place beef in center of pastry, brush edges with beaten egg, and fold pastry over beef, pressing gently to seal.
    7. Brush top of pastry with beaten egg and bake for 25-30 minutes or until golden brown.

    Cooking Time: 35-40 minutes

    Beef Pho Noodle Soup

    Beef Pho Noodle Soup
    A classic Vietnamese dish, Beef Pho Noodle Soup is a hearty and flavorful broth served with soft rice noodles and thinly sliced beef. This recipe makes 4-6 servings.

    Ingredients:

    – 1 pound beef bones (oxtail or beef neck bones)
    – 2 pounds beef brisket or chuck, sliced into thin strips
    – 2 tablespoons fish sauce
    – 2 tablespoons soy sauce
    – 1 onion, thinly sliced
    – 2 cloves garlic, minced
    – 1 tablespoon grated ginger
    – 4 cups beef broth
    – 2 cups water
    – 1 tablespoon sugar
    – 1 teaspoon ground cinnamon
    – 1/4 teaspoon ground cardamom
    – Salt and black pepper, to taste
    – 1 pound rice noodles
    – Fresh herbs (basil, mint, cilantro), for garnish

    Instructions:

    1. In a large stockpot, combine beef bones, fish sauce, soy sauce, onion, garlic, ginger, and water. Bring to a boil, then reduce heat and simmer for 1 hour.
    2. Add beef strips, sugar, cinnamon, cardamom, salt, and black pepper. Simmer for an additional 30 minutes or until the beef is tender.
    3. Cook rice noodles according to package instructions. Serve with hot broth and garnish with fresh herbs.

    Cooking Time: 1 hour 30 minutes

    Beef and Cheese Stuffed Peppers

    Beef and Cheese Stuffed Peppers
    A flavorful twist on traditional stuffed peppers, this recipe combines the savory flavors of beef and cheese with the sweetness of bell peppers.

    Ingredients:

    – 4 large bell peppers, any color
    – 1 lb ground beef
    – 1 onion, finely chopped
    – 2 cloves garlic, minced
    – 1 cup shredded cheddar cheese
    – 1/2 cup cooked rice
    – 1 tsp paprika
    – Salt and pepper to taste
    – 2 tbsp olive oil

    Instructions:

    1. Preheat oven to 375°F (190°C).
    2. Cut off the tops of the bell peppers and remove seeds and membranes.
    3. In a large skillet, cook the ground beef over medium-high heat until browned, breaking it up into small pieces as it cooks.
    4. Add the chopped onion, garlic, paprika, salt, and pepper to the skillet. Cook until the onion is translucent.
    5. Stuff each bell pepper with the beef mixture, then top with shredded cheese and cooked rice.
    6. Place the peppers in a baking dish, drizzle with olive oil, and cover with aluminum foil.
    7. Bake for 30 minutes, then remove the foil and bake an additional 15-20 minutes until the peppers are tender.

    Cooking Time: 45-50 minutes

    Beef Rendang with Coconut Milk

    Beef Rendang with Coconut Milk
    A classic Malaysian dish, Beef Rendang is a flavorful and aromatic curry made with slow-cooked beef in a rich coconut milk sauce. This recipe combines the tenderizing effects of slow cooking with the creamy goodness of coconut milk.

    Ingredients:

    – 1 pound beef brisket or chuck, cut into bite-sized pieces
    – 2 medium onions, chopped
    – 3 cloves garlic, minced
    – 1 tablespoon grated ginger
    – 1 teaspoon ground cumin
    – 1 teaspoon curry powder
    – 1/2 teaspoon turmeric
    – 1/4 teaspoon cayenne pepper
    – 1 can (14 oz) coconut milk
    – Salt and black pepper, to taste
    – Fresh cilantro leaves, for garnish

    Instructions:

    1. Heat oil in a large Dutch oven over medium heat. Add onions and cook until softened, about 5 minutes.
    2. Add garlic, ginger, cumin, curry powder, turmeric, and cayenne pepper. Cook for 1 minute, stirring constantly.
    3. Add beef and cook until browned on all sides, about 5-7 minutes.
    4. Pour in coconut milk and season with salt and black pepper. Bring to a simmer.
    5. Reduce heat to low and cook, covered, for 2 hours or until beef is tender.

    Cooking Time: 2 hours

    Beef and Guinness Pie

    Beef and Guinness Pie
    A rich and satisfying pie that combines tender beef with the deep flavors of Guinness stout, all wrapped up in a flaky pastry crust.

    Ingredients:

    – 1 lb beef chuck or brisket, cut into 2-inch cubes
    – 1 onion, diced
    – 2 cloves garlic, minced
    – 1 cup Guinness stout
    – 1 cup beef broth
    – 2 tbsp tomato paste
    – 1 tsp dried thyme
    – Salt and pepper to taste
    – 1 pie crust (homemade or store-bought)

    Instructions:

    1. Preheat oven to 375°F (190°C).
    2. In a large pan, brown the beef in small batches until browned on all sides.
    3. Add onion, garlic, Guinness, broth, tomato paste, and thyme to the pan. Bring to a boil, then reduce heat and simmer for 1 hour.
    4. Roll out pie crust to fit a 9-inch pie dish. Fill with the beef mixture and top with another pie crust or a pastry lid.
    5. Brush the top of the pie with egg wash (beaten egg mixed with water) and cut a few slits in the top.
    6. Bake for 30-40 minutes, or until golden brown.

    Cooking Time: 1 hour 10 minutes to 1 hour 20 minutes

    Beef Satay with Peanut Sauce

    Beef Satay with Peanut Sauce
    This classic Southeast Asian dish is a flavorful and aromatic street food favorite, perfect for any occasion. Thinly sliced beef skewers are grilled to perfection and served with a creamy peanut sauce.

    Ingredients:

    – 1 pound beef strips (sirloin or ribeye)
    – 1/2 cup coconut milk
    – 2 tablespoons fish sauce
    – 2 tablespoons lime juice
    – 2 cloves garlic, minced
    – 1 tablespoon grated ginger
    – 1/4 cup peanut butter
    – 1/4 cup soy sauce
    – 1/4 cup water
    – 1 tablespoon palm sugar (or brown sugar)
    – Salt and pepper to taste
    – Vegetable oil for grilling
    – Fresh cilantro leaves for garnish

    Instructions:

    1. In a blender or food processor, combine coconut milk, fish sauce, lime juice, garlic, and ginger. Blend until smooth.
    2. Thread beef strips onto skewers.
    3. Grill skewers over medium-high heat for 4-5 minutes per side, or until cooked to desired doneness.
    4. In a small bowl, mix peanut butter, soy sauce, water, palm sugar, salt, and pepper.
    5. Serve grilled beef satay with peanut sauce and garnish with cilantro leaves.

    Cooking Time: 15-20 minutes

    Beef and Mushroom Risotto

    Beef and Mushroom Risotto
    A hearty and flavorful Italian-inspired dish that combines tender beef, earthy mushrooms, and creamy risotto.

    Ingredients:

    – 1 pound beef strip loin or ribeye, sliced into thin strips
    – 2 cups mixed mushrooms (button, cremini, shiitake), sliced
    – 1 cup Arborio rice
    – 4 cups vegetable broth, warmed
    – 2 tablespoons olive oil
    – 1 onion, finely chopped
    – 2 cloves garlic, minced
    – 1/4 cup white wine (optional)
    – Salt and pepper to taste
    – Grated Parmesan cheese for serving (optional)

    Instructions:

    1. Heat the oil in a large skillet over medium-high heat. Add beef and cook until browned, about 3-4 minutes. Remove from heat.
    2. In the same skillet, add chopped onion and minced garlic; cook until softened, about 2 minutes.
    3. Add sliced mushrooms; cook until tender, about 5 minutes.
    4. Add Arborio rice; cook for 1 minute, stirring constantly.
    5. Add warmed broth, 1/2 cup at a time, stirring continuously until absorbed before adding more.
    6. After 20-25 minutes of cooking the risotto, add cooked beef and any remaining broth. Stir to combine.
    7. Serve immediately, topped with Parmesan cheese if desired.

    Cooking Time: Approximately 30-35 minutes

    Beef Fajitas with Bell Peppers

    Beef Fajitas with Bell Peppers
    Savor the flavors of a classic Tex-Mex dish with this simple and delicious recipe for Beef Fajitas with Bell Peppers. This flavorful and spicy dish is perfect for a quick weeknight dinner or a gathering with friends.

    Ingredients:

    – 1 lb beef fajita-cut strips (such as skirt steak or sirloin)
    – 2 large bell peppers (any color), sliced
    – 1 large onion, sliced
    – 2 cloves of garlic, minced
    – 1 tablespoon olive oil
    – 1 teaspoon ground cumin
    – 1/2 teaspoon chili powder
    – Salt and pepper to taste
    – 4 small flour tortillas
    – Optional toppings: avocado, sour cream, salsa, shredded cheese, cilantro

    Instructions:

    1. Heat the olive oil in a large skillet over medium-high heat.
    2. Add the beef and cook for 3-4 minutes per side, or until cooked to your desired level of doneness. Remove from heat and set aside.
    3. In the same skillet, add the bell peppers, onion, and garlic. Cook for 5-7 minutes, or until the vegetables are tender.
    4. Add the cumin and chili powder to the skillet and cook for an additional minute.
    5. Slice the cooked beef into thin strips and add it to the skillet with the vegetables. Season with salt and pepper to taste.
    6. Warm the tortillas by wrapping them in a damp paper towel and microwaving for 20-30 seconds.
    7. Assemble the fajitas by placing the beef and vegetable mixture onto the tortillas. Add your desired toppings and serve immediately.

    Cooking Time: 15-20 minutes

    Beef Stroganoff with Egg Noodles

    Beef Stroganoff with Egg Noodles
    This classic Russian dish is a staple of comfort food, featuring tender beef strips cooked in a rich and creamy sauce, served over egg noodles. With its simple yet satisfying flavor profile, Beef Stroganoff is a crowd-pleaser for any occasion.

    Ingredients:

    – 1 pound beef strips (sirloin or ribeye)
    – 2 tablespoons vegetable oil
    – 1 onion, finely chopped
    – 2 cloves garlic, minced
    – 1 cup mushrooms (button or cremini), sliced
    – 1 tablespoon tomato paste
    – 2 cups beef broth
    – 1 teaspoon Dijon mustard
    – 1/2 teaspoon paprika
    – Salt and pepper to taste
    – 8 ounces egg noodles
    – Chopped fresh parsley, for garnish

    Instructions:

    1. Cook egg noodles according to package instructions. Drain and set aside.
    2. In a large skillet, heat oil over medium-high. Add beef and cook until browned, about 3-4 minutes. Remove from heat and set aside.
    3. Reduce heat to medium. Add onion and garlic; cook until softened, about 2-3 minutes.
    4. Add mushrooms; cook until tender, about 3-4 minutes.
    5. Stir in tomato paste, beef broth, mustard, and paprika. Bring to a simmer.
    6. Return beef to skillet; stir to coat with sauce. Cook for an additional 1-2 minutes or until beef reaches desired tenderness.
    7. Serve beef and sauce over cooked egg noodles. Garnish with parsley.

    Cooking Time: 20-25 minutes

    Beef Kebabs with Tzatziki Sauce

    Beef Kebabs with Tzatziki Sauce
    Savor the flavors of Greece with this easy-to-make recipe that combines tender beef kebabs with a refreshing tzatziki sauce. Perfect for a quick and delicious meal or as an appetizer for your next gathering.

    Ingredients:

    – 1 pound beef cubes (such as sirloin or ribeye)
    – 1/2 cup plain Greek yogurt
    – 1/2 cup diced cucumber
    – 2 cloves garlic, minced
    – 1 tablespoon lemon juice
    – Salt and pepper to taste
    – Vegetable oil for brushing kebabs
    – Fresh parsley, chopped (optional)

    Instructions:

    1. Preheat grill or grill pan to medium-high heat.
    2. Thread beef cubes onto skewers, leaving a small space between each piece.
    3. Brush with vegetable oil and season with salt and pepper.
    4. Grill kebabs for 8-10 minutes, turning occasionally, until cooked through.
    5. Meanwhile, mix yogurt, cucumber, garlic, lemon juice, salt, and pepper in a bowl to make tzatziki sauce.
    6. Serve grilled kebabs with tzatziki sauce and garnish with chopped parsley if desired.

    Cooking Time: 12-15 minutes

    Beef and Barley Soup

    Beef and Barley Soup
    Warm up with this comforting soup that combines tender beef, nutty barley, and rich flavors. This recipe is perfect for a chilly day or a satisfying meal.

    Ingredients:
    – 1 pound beef stew meat
    – 2 tablespoons olive oil
    – 1 onion, chopped
    – 3 cloves garlic, minced
    – 2 cups beef broth
    – 1 cup pearled barley
    – 1 teaspoon dried thyme
    – Salt and pepper to taste

    Instructions:

    1. Heat the oil in a large pot over medium-high heat. Add the beef and cook until browned, about 5 minutes.
    2. Add the onion and garlic; cook until the onion is translucent, about 3-4 minutes.
    3. Add the broth, barley, thyme, salt, and pepper. Bring to a boil, then reduce the heat to low and simmer for 1 hour or until the barley is tender.
    4. Serve hot, garnished with chopped fresh parsley if desired.

    Cooking Time: About 1 hour

    Beef Empanadas with Chimichurri

    Beef Empanadas with Chimichurri
    Savory beef empanadas filled with tender ground beef and onions, wrapped in flaky pastry, served with a zesty Argentinean-style chimichurri sauce.

    Ingredients:

    – 1 pound ground beef
    – 1 medium onion, finely chopped
    – 1 egg, beaten
    – 1 tablespoon olive oil
    – 2 cups all-purpose flour
    – 1 teaspoon salt
    – 1/4 cup warm water
    – Chimichurri Sauce (see below)
    – Pastry dough for empanadas

    Chimichurri Sauce:

    – 1 cup fresh parsley, chopped
    – 1 cup fresh oregano, chopped
    – 2 cloves garlic, minced
    – 1/2 cup red wine vinegar
    – 1/4 cup olive oil
    – Salt and pepper to taste

    Instructions:

    1. Preheat oven to 375°F (190°C).
    2. In a large skillet, cook ground beef and onion over medium-high heat until browned.
    3. Add beaten egg and mix well.
    4. Wrap empanada dough around filling, sealing edges with fork.
    5. Brush tops with olive oil and bake for 20-25 minutes or until golden.
    6. Serve warm with Chimichurri Sauce.

    Cooking Time: 25-30 minutes

    Beef Carpaccio with Arugula and Parmesan

    Beef Carpaccio with Arugula and Parmesan
    This classic Italian appetizer is a masterclass in simplicity and flavor. Thinly sliced raw beef, crispy arugula, and salty Parmesan come together to create a dish that’s both elegant and easy to prepare.

    Ingredients:

    – 1 pound high-quality beef tenderloin or strip loin
    – 4 cups arugula
    – 1/2 cup shaved Parmesan cheese
    – 2 tablespoons extra-virgin olive oil
    – Salt, to taste

    Instructions:

    1. Slice the beef into thin sheets (about 1/16 inch thick).
    2. Arrange the arugula on a large plate or platter.
    3. Place the beef slices on top of the arugula in a single layer.
    4. Sprinkle the Parmesan cheese over the beef.
    5. Drizzle with olive oil and season with salt to taste.
    6. Serve immediately, garnished with lemon wedges if desired.

    Cooking Time: None! This dish is served raw.

    Summary

    Get ready to indulge in a mouth-watering collection of 20 beef recipes that cater to every occasion! From classic comfort food to international flavors, this list has something for everyone. Savor the rich flavor of Beef Bourguignon, slow-cooked to perfection or enjoy the bold spices of Korean Beef Bulgogi. Whether you’re in the mood for a hearty stew, juicy burgers, or exotic satay, these recipes are sure to satisfy your cravings. Treat yourself and your loved ones to a culinary journey with these 20 delectable beef dishes.

  • 20 Delicious Blackberry Pie Recipes Irresistible

    20 Delicious Blackberry Pie Recipes Irresistible

    There’s something undeniably charming about a warm, flaky pie crust filled with sweet and tangy blackberries. Whether you’re a seasoned baker or just looking for a new dessert to impress your friends and family, we’ve got you covered. In this article, we’ll be diving into the world of blackberry pies, exploring classic recipes and innovative twists alike. From traditional fillings to creative combinations with other fruits, nuts, and spices, we’ll showcase 20 mouthwatering blackberry pie recipes that are sure to satisfy your sweet tooth.

    Classic Blackberry Pie with Flaky Crust

    Classic Blackberry Pie with Flaky Crust
    Classic Blackberry Pie with Flaky Crust Recipe

    This classic blackberry pie recipe yields a sweet and tangy filling nestled within a flaky, buttery crust. Perfect for warm weather gatherings or cozy night-ins.

    Ingredients:

    – 2 cups fresh or frozen blackberries
    – 1 cup granulated sugar
    – 1/4 cup all-purpose flour
    – 1/2 teaspoon salt
    – 1/2 cup cold unsalted butter, cut into small pieces
    – 1/4 cup ice-cold water
    – 1 egg, beaten (for egg wash)

    Instructions:

    1. Preheat oven to 375°F (190°C).
    2. In a large bowl, combine blackberries, sugar, flour, and salt. Let it sit for about 15 minutes, until the berries start to release their juice.
    3. Roll out the pie crust dough on a floured surface to a thickness of about 1/8 inch. Place into a 9-inch pie dish, trimming edges as needed.
    4. Pour the blackberry mixture into the pie crust.
    5. Roll out remaining dough to a thickness of about 1/8 inch. Use to cover the pie and crimp edges to seal.
    6. Brush egg wash over the top crust and cut a few slits for steam release.
    7. Bake for 40-50 minutes, or until the crust is golden brown and filling bubbles.

    Cooking Time: 40-50 minutes

    Blackberry and Apple Crumble Pie

    Blackberry and Apple Crumble Pie
    Experience the perfect blend of sweet and tangy with this Blackberry and Apple Crumble Pie, featuring a delicious combination of juicy fruit and crunchy oat topping.

    Ingredients:

    • 1 cup fresh blackberries
    • 2 cups sliced apples (Granny Smith or your favorite variety)
    • 1/2 cup granulated sugar
    • 2 tablespoons cornstarch
    • 1 teaspoon ground cinnamon
    • 1/4 teaspoon salt
    • 1/2 cup rolled oats
    • 1/2 cup brown sugar
    • 1/2 cup cold unsalted butter, cut into small pieces
    • 1 egg, beaten (for egg wash)

    Instructions:

    1. Mix blackberries and apples in a bowl. Add granulated sugar, cornstarch, cinnamon, and salt; toss until fruit is evenly coated.
    2. Roll out pie crust to fit a 9-inch pie dish. Fill with fruit mixture.
    3. In a separate bowl, combine rolled oats, brown sugar, and cold butter. Use your fingers or a pastry blender to work the butter into the dry ingredients until crumbly.
    4. Sprinkle oat topping evenly over the fruit filling.
    5. Brush egg wash around the crust edges.
    6. Bake at 375°F (190°C) for 40-45 minutes, or until crust is golden and filling bubbles up through slits.

    Cooking Time: 40-45 minutes

    Lattice-Topped Blackberry Pie

    Lattice-Topped Blackberry Pie
    Experience the sweet and tangy taste of blackberries with this classic lattice-topped pie recipe, featuring a flaky crust and a delicate topping. Perfect for any occasion or as a simple dessert to impress your loved ones.

    Ingredients:

    – 2 cups fresh blackberries
    – 1 cup granulated sugar
    – 2 tablespoons cornstarch
    – 1/4 teaspoon salt
    – 1/2 cup cold unsalted butter, cut into small pieces
    – 1 egg, beaten (for egg wash)
    – 1 pie crust (homemade or store-bought)

    Instructions:

    1. Preheat oven to 375°F (190°C).
    2. In a large bowl, combine blackberries, sugar, cornstarch, and salt. Let it sit for 15 minutes.
    3. Roll out the pie crust to fit a 9-inch pie dish. Place the filling in the center of the dough, leaving a 1-inch border around the edges.
    4. Roll out remaining dough to create lattice strips (about 1/2 inch wide). Place the strips on top of the filling, weaving them into a lattice pattern.
    5. Brush the lattice with beaten egg for a golden glaze.
    6. Bake for 45-50 minutes or until crust is golden brown and filling bubbles up.

    Cooking Time: 45-50 minutes

    Blackberry Cream Cheese Pie

    Blackberry Cream Cheese Pie
    This Blackberry Cream Cheese Pie is a refreshing dessert perfect for warm weather gatherings. A tangy cream cheese filling, topped with a sweet and tart blackberry compote, all wrapped up in a flaky pastry crust.

    Ingredients:

    – 1 cup heavy cream
    – 8 ounces cream cheese, softened
    – 1/2 cup granulated sugar
    – 1/4 cup confectioners’ sugar
    – 2 tablespoons unsalted butter, melted
    – 2 cups fresh or frozen blackberries
    – 1 tablespoon cornstarch
    – 1/4 teaspoon salt
    – 1 pie crust (homemade or store-bought)

    Instructions:

    1. Preheat oven to 375°F.
    2. In a medium bowl, beat cream cheese and sugars until smooth.
    3. Stir in melted butter and vanilla extract.
    4. Roll out pie crust and place in a 9-inch tart pan with a removable bottom.
    5. Pour cream cheese mixture into the pie crust.
    6. Mix blackberries, cornstarch, and salt in a separate bowl.
    7. Spoon blackberry compote over the cream cheese filling.
    8. Bake for 40-45 minutes or until crust is golden brown.

    Cooking Time: 40-45 minutes

    Vegan Blackberry Pie with Coconut Crust

    Vegan Blackberry Pie with Coconut Crust
    A sweet and tangy blackberry filling is perfectly balanced by a crunchy coconut crust, making this vegan pie a delightful treat.

    Ingredients:

    For the crust:
    – 1 cup unsweetened shredded coconut
    – 1/4 cup maple syrup
    – 1 tablespoon lemon juice
    – 1/4 teaspoon salt
    – 1/2 cup unsalted cashews

    For the filling:
    – 2 cups fresh or frozen blackberries
    – 1/2 cup granulated sugar
    – 2 tablespoons cornstarch
    – 2 tablespoons lemon juice
    – 1 tablespoon vanilla extract

    Instructions:

    1. Preheat oven to 375°F (190°C).
    2. In a food processor, combine coconut, maple syrup, lemon juice, and salt. Process until well combined.
    3. Add cashews and process until the mixture resembles coarse crumbs.
    4. Press crust mixture into a 9-inch pie dish.
    5. In a separate bowl, mix blackberries, sugar, cornstarch, lemon juice, and vanilla extract.
    6. Pour filling into the prepared crust.
    7. Bake for 40-45 minutes or until the filling is set.

    Cooking Time: 40-45 minutes

    Blackberry and Peach Galette

    Blackberry and Peach Galette
    This refreshing galette combines the sweetness of peaches and blackberries with a crumbly crust, perfect for warm weather gatherings. With minimal prep and baking time, this dessert is sure to impress.

    Ingredients:

    – 1 sheet puff pastry, thawed
    – 2 ripe peaches, sliced
    – 1 cup fresh blackberries
    – 2 tbsp granulated sugar
    – 1 tsp vanilla extract
    – 1/4 cup confectioners’ sugar
    – 1/4 cup unsalted butter, melted

    Instructions:

    1. Preheat oven to 375°F (190°C). Line a baking sheet with parchment paper.
    2. Roll out puff pastry on a lightly floured surface to a thickness of about 1/8 inch. Transfer to the prepared baking sheet.
    3. Arrange peach slices on one half of the pastry, leaving a 1-inch border. Sprinkle with granulated sugar and vanilla extract.
    4. Top peaches with blackberries. Fold the other half of the pastry over the filling, pressing edges to seal.
    5. Brush melted butter over the crust and sprinkle with confectioners’ sugar.
    6. Bake for 35-40 minutes or until golden brown.

    Cooking Time: 35-40 minutes

    Gluten-Free Blackberry Pie

    Gluten-Free Blackberry Pie
    Savor the sweet and tangy flavor of this classic dessert, made easily gluten-free for everyone to enjoy!

    Ingredients:

    – 1 cup fresh or frozen blackberries
    – 1/2 cup granulated sugar
    – 2 tablespoons cornstarch
    – 1/4 teaspoon salt
    – 1/2 cup unsalted butter, melted
    – 1/2 cup gluten-free all-purpose flour
    – 1 egg, beaten
    – 1 tablespoon lemon juice

    Instructions:

    1. Preheat oven to 375°F (190°C).
    2. In a large bowl, combine blackberries, sugar, cornstarch, and salt. Let it sit for 15 minutes, allowing the berries to release their juices.
    3. Roll out gluten-free flour to fit a 9-inch pie dish. Place the dough in the dish and trim edges to fit.
    4. Pour the blackberry mixture into the pie crust.
    5. Dot the top with melted butter and sprinkle with beaten egg and lemon juice.
    6. Bake for 40-45 minutes, or until the crust is golden brown and the filling is bubbly.

    Cooking Time: 40-45 minutes

    Enjoy your delicious gluten-free blackberry pie!

    Blackberry and Lemon Meringue Pie

    Blackberry and Lemon Meringue Pie
    Combine the sweetness of blackberries with the tanginess of lemon in this classic pie recipe. This show-stopping dessert is perfect for special occasions or a cozy evening treat.

    Ingredients:

    – 1 cup fresh blackberries
    – 1/2 cup granulated sugar
    – 1/4 cup all-purpose flour
    – 1/2 teaspoon salt
    – 1/2 cup unsalted butter, melted
    – 1 large egg
    – 1 tablespoon freshly squeezed lemon juice
    – 1 pie crust (homemade or store-bought)
    – Meringue topping (see below)

    Instructions:

    1. Preheat oven to 375°F (190°C).
    2. In a bowl, mix blackberries, sugar, flour, and salt.
    3. Roll out pie crust and fill with the blackberry mixture.
    4. Drizzle melted butter and lemon juice over the filling.
    5. Roll out remaining pie crust for the top crust or use a lattice design.
    6. Crimp edges to seal the pie.
    7. Bake for 45-50 minutes or until the crust is golden brown.

    Meringue Topping:

    1. Beat egg whites and granulated sugar until stiff peaks form.
    2. Spread over the pie during the last 10 minutes of baking.

    Deep-Dish Blackberry Pie

    Deep-Dish Blackberry Pie
    Experience the sweet and tangy flavors of blackberries in a classic deep-dish pie crust. This recipe yields a rich and satisfying dessert perfect for any occasion.

    Ingredients:

    – 2 cups fresh or frozen blackberries
    – 1 cup granulated sugar
    – 1/4 cup all-purpose flour
    – 1/2 teaspoon salt
    – 1/2 cup cold unsalted butter, cut into small pieces
    – 1/2 cup ice water
    – 1 egg, beaten (for egg wash)

    Instructions:

    1. Preheat oven to 375°F.
    2. In a large bowl, combine blackberries, sugar, flour, and salt; let stand for 15 minutes.
    3. Roll out the pie crust dough on a floured surface to a thickness of about 1/8 inch. Place into a 9-inch deep-dish pie dish.
    4. Fill the pie crust with the blackberry mixture and dot with butter pieces.
    5. Roll out remaining pie crust dough to fit the top of the pie. Crimp edges to seal.
    6. Brush egg wash over the crust and cut a few slits in the top for steam to escape.
    7. Bake for 50-60 minutes or until crust is golden brown.

    Cooking Time: 50-60 minutes

    Blackberry and Rhubarb Pie

    Blackberry and Rhubarb Pie
    This classic pie combines the natural sweetness of blackberries with the tanginess of rhubarb, all wrapped up in a flaky crust.

    Ingredients:

    – 2 cups fresh or frozen blackberries
    – 1 cup sliced fresh rhubarb
    – 1/2 cup granulated sugar
    – 2 tablespoons cornstarch
    – 1/4 teaspoon salt
    – 1/2 cup cold unsalted butter, cut into small pieces
    – 1 egg, beaten (for egg wash)
    – 1 pie crust (homemade or store-bought)

    Instructions:

    1. Preheat oven to 375°F (190°C).
    2. In a large bowl, mix together blackberries and rhubarb.
    3. Add sugar, cornstarch, and salt; toss until fruit is evenly coated.
    4. Roll out pie crust and place in a 9-inch pie dish.
    5. Fill with the fruit mixture and dot with butter pieces.
    6. Roll out remaining pie crust to fit top of pie.
    7. Crimp edges to seal and cut a few slits for steam to escape.
    8. Brush egg wash over the crust and bake for 40-45 minutes, or until crust is golden brown.

    Cooking Time: 40-45 minutes

    Mini Blackberry Hand Pies

    Mini Blackberry Hand Pies
    Mini Blackberry Hand Pies

    These bite-sized treats are perfect for snacking on-the-go or as a sweet addition to your next gathering. With a flaky crust and a burst of juicy blackberries, you’ll be hooked from the first bite!

    Ingredients:

    – 2 cups all-purpose flour
    – 1/2 cup cold unsalted butter, cut into small pieces
    – 1/4 cup ice-cold water
    – 1 cup fresh or frozen blackberries
    – 2 tablespoons granulated sugar
    – 1 egg, beaten (for egg wash)

    Instructions:

    1. Preheat oven to 375°F (190°C). Line a baking sheet with parchment paper.
    2. In a large bowl, whisk together flour and salt. Add cold butter and use a pastry blender or fingers to work into pea-sized pieces.
    3. Gradually add ice-cold water, stirring until dough forms. Divide into 6-8 equal pieces.
    4. Roll out each piece into a thin circle, about 1/8 inch thick.
    5. Spoon 1-2 blackberries onto one half of the circle, leaving a 1/4 inch border. Fold other half over and press edges to seal. Use fork to crimp edges.
    6. Brush tops with egg wash and sprinkle with sugar.
    7. Place on prepared baking sheet and bake for 20-25 minutes or until golden brown.

    Blackberry and Chocolate Tart

    Blackberry and Chocolate Tart
    Combine the sweetness of blackberries with the richness of chocolate in this indulgent tart that’s perfect for a special occasion or a sweet treat any time of the year.

    Ingredients:

    – 1 cup fresh blackberries
    – 1/2 cup granulated sugar
    – 1/4 cup all-purpose flour
    – 1/2 teaspoon salt
    – 1/2 cup unsalted butter, melted
    – 2 large eggs
    – 1 cup semisweet chocolate chips
    – 1 pie crust (homemade or store-bought)
    – Confectioners’ sugar, for dusting

    Instructions:

    1. Preheat oven to 375°F (190°C).
    2. Roll out the pie crust and place it in a 9-inch tart pan with a removable bottom.
    3. In a bowl, mix together blackberries, granulated sugar, flour, and salt. Let it sit for 15 minutes, until the berries release their juice and the mixture becomes syrupy.
    4. Pour the blackberry mixture into the pie crust, leaving a 1-inch border around the edges.
    5. Drizzle the melted butter over the blackberries.
    6. Bake for 40-45 minutes or until the crust is golden brown and the filling is bubbly.
    7. Melt the chocolate chips in a microwave-safe bowl in 30-second increments, stirring between each interval, until smooth.
    8. Pour the melted chocolate over the warm tart.
    9. Dust with confectioners’ sugar before serving.

    Cooking Time: 40-45 minutes

    Blackberry and Almond Frangipane Pie

    Blackberry and Almond Frangipane Pie
    This rich and indulgent pie combines the sweetness of blackberries with the nutty flavor of almonds, all wrapped up in a flaky pastry crust. Perfect for a special occasion or as a show-stopping dessert for your next dinner party.

    Ingredients:

    – 1 1/2 cups all-purpose flour
    – 1/4 cup confectioners’ sugar
    – 1/2 cup unsalted butter, chilled and cut into small pieces
    – 1/2 cup granulated sugar
    – 1/4 cup ground almonds
    – 1/2 cup blackberry jam or preserves
    – 2 cups fresh blackberries
    – 1 egg, beaten (for egg wash)
    – Salt to taste

    Instructions:

    1. Preheat oven to 375°F (190°C).
    2. In a large bowl, combine flour, confectioners’ sugar, and salt.
    3. Add butter and mix until a dough forms.
    4. Roll out dough on a floured surface to a thickness of about 1/8 inch.
    5. Spread jam and blackberries over the center of the dough, leaving a 1-inch border around edges.
    6. Sprinkle ground almonds over the fruit.
    7. Fold edges of crust up over filling, pressing gently to seal.
    8. Brush with egg wash and sprinkle with sugar.
    9. Bake for 40-45 minutes or until crust is golden brown.

    Blackberry and Custard Pie

    Blackberry and Custard Pie
    This classic dessert combines the sweetness of blackberries with the creamy richness of custard, all wrapped up in a flaky pie crust. Perfect for warm weather gatherings or cozying up on a chilly evening.

    Ingredients:

    – 2 cups fresh blackberries
    – 1 cup granulated sugar
    – 1/4 cup all-purpose flour
    – 1/2 teaspoon salt
    – 1/2 cup unsalted butter, melted
    – 2 large egg yolks
    – 1 cup heavy cream
    – 1 pie crust (homemade or store-bought)

    Instructions:

    1. Preheat oven to 375°F.
    2. In a bowl, mix blackberries, sugar, flour, and salt.
    3. Roll out the pie crust and place in a 9-inch pie dish.
    4. Fill with blackberry mixture and dot with melted butter.
    5. Whisk together egg yolks and heavy cream. Pour into the pie crust.
    6. Bake for 40-50 minutes or until the custard is set and the crust is golden brown.

    Cooking Time: 40-50 minutes

    Blackberry and Lime Pie with Graham Cracker Crust

    Blackberry and Lime Pie with Graham Cracker Crust
    This refreshing pie combines the sweetness of blackberries with the brightness of lime, all nestled in a crunchy graham cracker crust. Perfect for warm weather gatherings or a sweet treat any time.

    Ingredients:

    – 1 cup graham cracker crumbs
    – 1/4 cup granulated sugar
    – 6 tablespoons unsalted butter, melted
    – 2 cups fresh blackberries
    – 1 cup heavy cream
    – 2 large egg yolks
    – 2 tablespoons freshly squeezed lime juice
    – 1 tablespoon honey

    Instructions:

    1. Preheat oven to 350°F (180°C).
    2. In a medium bowl, mix crumbs and sugar. Stir in melted butter until well combined.
    3. Press mixture into a 9-inch pie dish.
    4. In a separate bowl, combine blackberries, heavy cream, egg yolks, lime juice, and honey. Mix until smooth.
    5. Pour filling over crust and bake for 40-45 minutes or until filling is set.
    6. Let cool completely before serving.

    Cooking Time: 40-45 minutes

    Blackberry and Ginger Spiced Pie

    Blackberry and Ginger Spiced Pie
    This pie combines the sweetness of blackberries with the warmth of ginger, creating a unique flavor profile that’s perfect for fall and winter.

    Ingredients:

    – 2 cups fresh or frozen blackberries
    – 1 cup granulated sugar
    – 2 tablespoons cornstarch
    – 1 tablespoon grated fresh ginger
    – 1/4 teaspoon ground cinnamon
    – 1/4 teaspoon ground nutmeg
    – 1/4 teaspoon salt
    – 1/2 cup cold unsalted butter, cut into small pieces
    – 1 egg, beaten (for egg wash)
    – 1 pie crust (homemade or store-bought)

    Instructions:

    1. Preheat oven to 375°F (190°C).
    2. In a large bowl, mix together blackberries, sugar, cornstarch, ginger, cinnamon, nutmeg, and salt.
    3. Roll out the pie crust and place it in a 9-inch pie dish. Fill with the blackberry mixture.
    4. Dot the top of the filling with butter pieces.
    5. Roll out the remaining pie crust and use to cover the pie. Crimp edges to seal.
    6. Brush egg wash over the top crust.
    7. Bake for 40-45 minutes, or until the crust is golden brown.

    Cooking Time: 40-45 minutes

    Blackberry and White Chocolate Pie

    Blackberry and White Chocolate Pie
    Elevate your dessert game with this luscious blackberry and white chocolate pie, featuring a velvety crust and a sweet-tart filling.

    Ingredients:

    For the Crust:
    – 1 cup all-purpose flour
    – 1/2 cup cold unsalted butter, cut into small pieces
    – 1/4 cup ice water

    For the Filling:
    – 2 cups fresh blackberries
    – 1 cup granulated sugar
    – 1/2 cup white chocolate chips
    – 1 tablespoon cornstarch
    – 1/4 teaspoon salt
    – 1/2 cup heavy cream

    Instructions:

    1. Preheat oven to 375°F (190°C). In a bowl, combine flour and butter; gradually add ice water until dough forms.
    2. Roll out crust to fit a 9-inch pie dish. Trim edges and crimp.
    3. In a separate bowl, mix blackberries, sugar, and cornstarch. Pour into the prepared pie crust.
    4. Melt white chocolate chips in a double boiler or microwave (10-15 seconds). Stir until smooth. Pour over the filling.
    5. Bake for 40-45 minutes, or until crust is golden brown and filling is bubbly.

    Cooking Time: 40-45 minutes

    Enjoy your delicious Blackberry and White Chocolate Pie!

    Blackberry and Coconut Cream Pie

    Blackberry and Coconut Cream Pie
    This sweet and tangy pie combines the flavors of blackberries and coconut cream for a unique dessert experience. With a crumbly crust, a velvety filling, and a sprinkle of toasted coconut flakes, this pie is sure to be a hit at any gathering.

    Ingredients:

    – 1 1/2 cups all-purpose flour
    – 1/4 cup granulated sugar
    – 1/2 cup unsalted butter, chilled and cut into small pieces
    – 2 cups blackberries, fresh or frozen
    – 1 cup heavy cream
    – 1/2 cup shredded coconut
    – 2 large egg yolks
    – 1 teaspoon vanilla extract

    Instructions:

    1. Preheat oven to 375°F (190°C).
    2. Make the crust by combining flour and sugar in a bowl, then add butter and mix until crumbly.
    3. Press mixture into a pie dish and bake for 20 minutes, or until lightly browned.
    4. In a separate bowl, whip heavy cream until stiff peaks form, then set aside.
    5. In another bowl, combine blackberries, shredded coconut, egg yolks, and vanilla extract.
    6. Pour filling into the baked crust and top with whipped cream.
    7. Sprinkle toasted coconut flakes on top (optional).
    8. Bake for an additional 20-25 minutes, or until filling is set.

    Cooking Time: 40-45 minutes

    Blackberry and Maple Syrup Pie

    Blackberry and Maple Syrup Pie
    Savor the sweet and tangy flavors of summer with this classic pie recipe that combines fresh blackberries with the richness of maple syrup. This simple yet impressive dessert is perfect for warm weather gatherings or cozy night-ins.

    Ingredients:

    – 2 cups fresh blackberries
    – 1 cup granulated sugar
    – 2 tablespoons cornstarch
    – 1/4 cup pure maple syrup
    – 1/4 cup cold unsalted butter, cut into small pieces
    – 1 egg, beaten (for egg wash)
    – 1 pie crust (homemade or store-bought)

    Instructions:

    1. Preheat oven to 375°F (190°C).
    2. In a large bowl, combine blackberries, sugar, and cornstarch. Let it sit for 15 minutes to allow the berries to release their juice.
    3. Roll out pie crust to fit a 9-inch pie dish. Fill with the blackberry mixture and dot with butter pieces.
    4. Roll out remaining pie crust to create a lattice-top crust. Place on top of filling, weaving strips across the surface.
    5. Brush egg wash over the crust and bake for 45-50 minutes, or until crust is golden brown.

    Cooking Time: 45-50 minutes

    Blackberry and Bourbon Pie with Pecan Streusel

    Blackberry and Bourbon Pie with Pecan Streusel
    A sweet and tangy pie that combines the flavors of blackberries, bourbon, and pecans.

    Ingredients:

    For the filling:

    – 2 cups fresh or frozen blackberries
    – 1/4 cup granulated sugar
    – 2 tablespoons cornstarch
    – 1 tablespoon bourbon whiskey
    – 1 tablespoon lemon juice

    For the streusel topping:

    – 1/2 cup chopped pecans
    – 2 tablespoons brown sugar
    – 1/4 cup all-purpose flour
    – 1/2 teaspoon cinnamon
    – 1/4 teaspoon salt
    – 1/4 cup unsalted butter, melted

    Instructions:

    1. Preheat oven to 375°F (190°C).
    2. In a large bowl, combine blackberries, sugar, cornstarch, bourbon, and lemon juice. Mix until well combined.
    3. Roll out pie crust to fit a 9-inch pie dish. Fill with the blackberry mixture.
    4. To make streusel topping, mix together pecans, brown sugar, flour, cinnamon, and salt. Add melted butter and mix until crumbly.
    5. Spread streusel topping evenly over the filling.
    6. Bake for 45-50 minutes or until crust is golden brown.

    Cooking Time: 45-50 minutes

    Summary

    Get ready to indulge in the sweet taste of blackberries! This article presents 20 mouthwatering blackberry pie recipes that will satisfy your cravings. From classic pies with flaky crusts to innovative creations like vegan and gluten-free options, there’s something for everyone. Discover unique flavor combinations like blackberry and peach galette, or add a twist to traditional flavors with lemon meringue and ginger spiced pies. Whether you’re looking for a show-stopping dessert for special occasions or a sweet treat for everyday indulgence, these irresistible recipes are sure to please.

  • 18 Essential Wow Classic Blacksmithing Recipes for Master Crafters

    18 Essential Wow Classic Blacksmithing Recipes for Master Crafters

    For any serious WoW Classic player, leveling up your blacksmithing skills can be a game-changer. Not only does it allow you to craft essential items like armor and tools, but it also opens up new possibilities for your character’s development. Whether you’re looking to boost your character’s stats or simply want to create something truly unique, having a solid understanding of the best blacksmithing recipes is crucial.

    In this article, we’ll be sharing 18 essential Wow Classic Blacksmithing recipes that every master crafter should know. From basic tools like sharpening stones and weightstones to more complex items like armor sets and trinkets, these recipes will give you the skills you need to take your blacksmithing to the next level.

    So, without further ado, let’s dive in and explore some of the most important blacksmithing recipes for Wow Classic players!

    Rough Sharpening Stone

    Rough Sharpening Stone
    Keep your knives sharp and ready for action with this simple recipe for rough sharpening stone.

    Ingredients:

    – 1 rough sharpening stone ( Arkansas or Novaculite)
    – 1 knife to be sharpened
    – Water or oil (optional)

    Instructions:

    1. Hold the sharpening stone at a 20-degree angle against the knife’s edge.
    2. Slowly draw the knife across the stone, applying gentle pressure.
    3. Repeat steps 1-2 for 2-5 strokes on each side of the blade.
    4. Flip the knife over and repeat steps 1-3 for the opposite side.
    5. Wipe away any metal shavings or debris with a soft cloth.
    6. Inspect the knife’s edge to ensure it is sharp.

    Cooking Time: N/A

    Tips:

    – Use water or oil to lubricate the stone if desired, but be cautious not to over-saturate.
    – Maintain a consistent angle and pressure for best results.
    – Avoid applying too much pressure, as this can damage the knife’s edge.

    Coarse Sharpening Stone

    Coarse Sharpening Stone
    A well-maintained cutting tool is essential for any kitchen or workshop. This recipe shows you how to sharpen your knife using a coarse sharpening stone, ideal for heavy-duty tasks or restoring a dull blade.

    Ingredients:

    – 1 x Coarse Sharpening Stone ( Arkansas stone or Novaculite)
    – 1 x Knife (preferably with a straight or slightly curved edge)

    Instructions:

    1. Hold the sharpening stone at a 20-degree angle to the knife’s edge.
    2. Place the knife on the stone, starting from the heel (back) and moving towards the tip.
    3. Apply gentle pressure and draw the knife across the stone in a smooth, consistent motion.
    4. Repeat steps 1-3 for approximately 10-15 strokes or until you achieve the desired sharpness.
    5. Flip the knife over and repeat the process to sharpen both sides of the blade.

    Cooking Time: N/A (This recipe is for sharpening, not cooking!)

    Heavy Sharpening Stone

    Heavy Sharpening Stone
    Elevate your cooking experience by maintaining sharp knives with this easy-to-follow recipe using a heavy sharpening stone. Perfect for home cooks and professionals alike, this method ensures a razor-sharp edge every time.
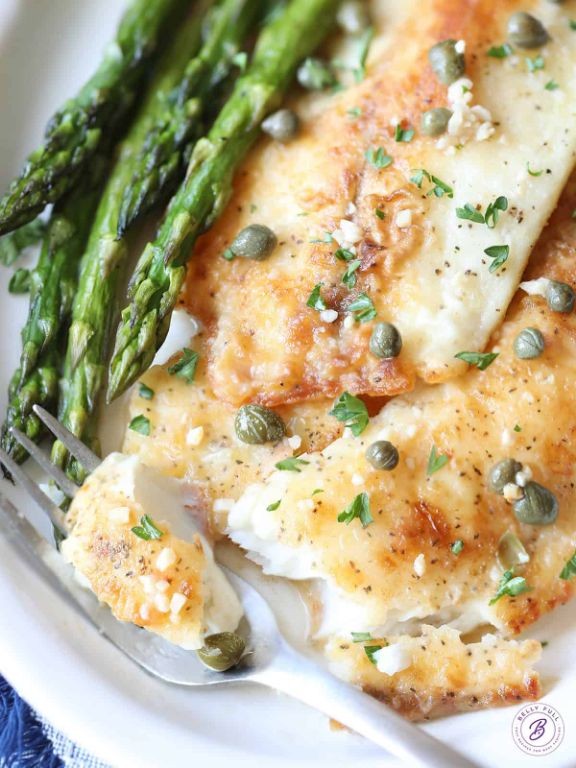
    Ingredients:

    – 1 heavy sharpening stone
    – 1 knife to be sharpened

    Instructions:

    1. Hold the sharpening stone firmly on a stable surface.
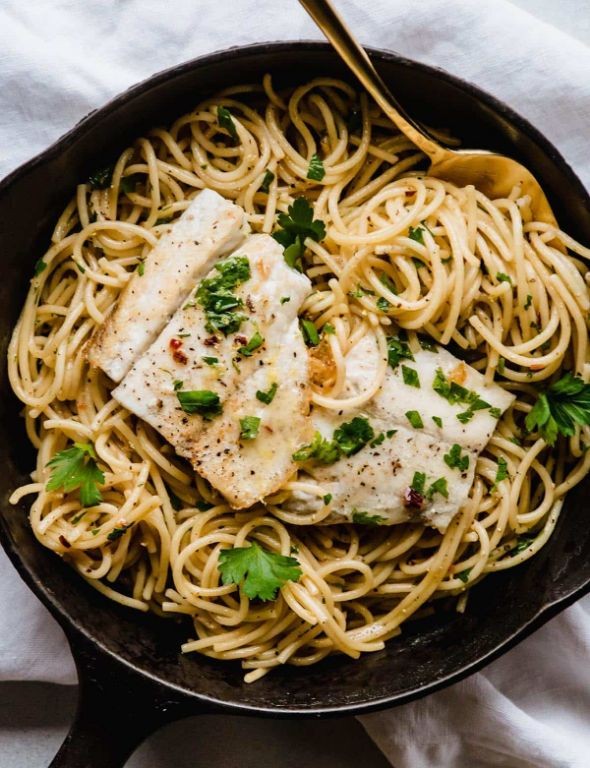
    2. Position the heel (thickest part) of the knife at a 20-degree angle against the stone.

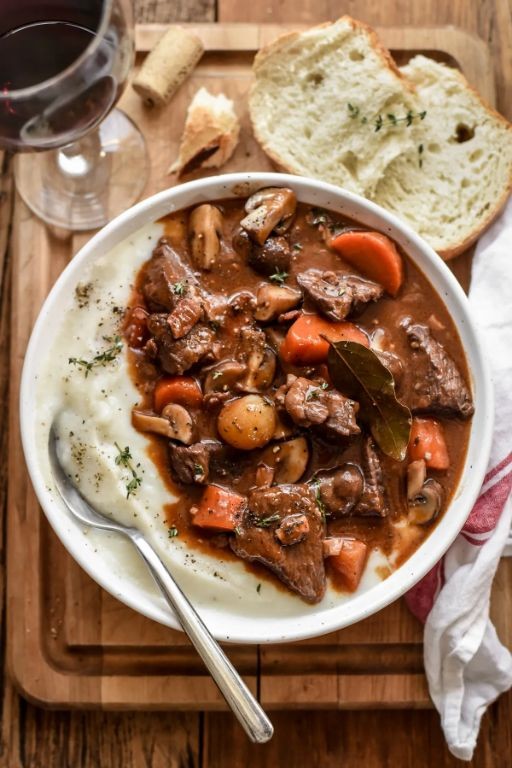
    3. Slowly draw the knife across the stone, applying light pressure, moving from the heel to the tip.
    4. Repeat steps 2-3 for 3-5 strokes on each side of the blade.
    5. Flip the knife over and repeat the process on the other side.
    6. Continue sharpening until you achieve the desired sharpness.

    Cooking Time: N/A

    Tips:

    – Use a light touch to avoid applying too much pressure, which can damage the stone or dull the knife.
    – Maintain consistent strokes to ensure even sharpening.
    – Store your sharpening stone in a dry place to prolong its lifespan.

    Rough Weightstone

    Rough Weightstone
    Get ready to discover the unique flavor and texture of this uncommon ingredient.

    Ingredients:

    – 1 cup Rough Weightstone (or substitute with a similar ingredient)
    – 2 tablespoons olive oil
    – Salt, to taste

    Instructions:

    1. Preheat your oven to 375°F (190°C).
    2. Rinse the Rough Weightstone under cold water and pat it dry.
    3. Drizzle the olive oil over the Rough Weightstone and sprinkle with salt.
    4. Place the Rough Weightstone on a baking sheet lined with parchment paper.
    5. Bake for 10-15 minutes, or until the desired texture is achieved.

    Cooking Time: 10-15 minutes

    Coarse Weightstone

    Coarse Weightstone
    A classic favorite, these cookies are perfect for satisfying your sweet tooth. With just the right amount of crunch and chewiness, they’re sure to please!

    Ingredients:

    – 2 cups all-purpose flour
    – 1 tsp baking soda
    – 1 tsp salt
    – 1 cup coarse sugar (yes, you read that right!)
    – 1/2 cup unsalted butter, softened
    – 1/2 cup granulated sugar
    – 1 egg
    – 1 tsp vanilla extract

    Instructions:

    1. Preheat oven to 375°F (190°C). Line a baking sheet with parchment paper.
    2. In a large bowl, whisk together flour, baking soda, and salt.
    3. In another bowl, cream butter and sugars until light and fluffy. Beat in egg and vanilla.
    4. Gradually add dry ingredients to wet mixture, mixing until just combined.
    5. Roll out dough on a floured surface to about 1/4 inch thickness. Cut into desired shapes.
    6. Bake for 10-12 minutes or until lightly golden.

    Cooking Time: 10-12 minutes

    Heavy Weightstone

    Heavy Weightstone
    Heavy Weightstone is a unique dish that combines rich flavors and textures in a single bite. This hearty appetizer is perfect for satisfying your hunger before a big meal.

    Runed Copper Breastplate

    Runed Copper Breastplate
    Enhance your combat prowess with this ancient recipe, passed down through the ages. The Runed Copper Breastplate is a powerful piece of armor that will grant you increased strength and agility in battle.

    Ingredients:

    – 1 lb copper wire
    – 5 small gemstones (ruby, sapphire, emerald, topaz, and amethyst)
    – 1/4 cup pure silver dust
    – 2 drops dragon’s breath oil
    – 1 vial of enchanted water

    Instructions:

    1. Begin by wrapping the copper wire around your breastplate, creating a sturdy foundation.
    2. Place one gemstone at the center of the breastplate, followed by another on either side. Repeat this pattern until all five gemstones are placed.
    3. Sprinkle the pure silver dust evenly across the surface of the breastplate.
    4. Drizzle the dragon’s breath oil over the silver dust, allowing it to spread and mingle with the copper wire.
    5. Douse the breastplate in the enchanted water, visualizing your increased strength and agility.
    6. Allow the breastplate to dry completely before donning.

    Cooking Time: 30 minutes

    Serve: Immediately, as you prepare for battle!

    Silvered Bronze Shoulders

    Silvered Bronze Shoulders
    Transform humble chicken shoulders into a dish fit for royalty with this quick and easy recipe.

    Ingredients:

    – 2 boneless, skinless chicken shoulders
    – 1/4 cup olive oil
    – 2 cloves garlic, minced
    – 1 tablespoon honey
    – 1 teaspoon paprika
    – Salt and pepper to taste
    – Fresh parsley, chopped (optional)

    Instructions:

    1. Preheat oven to 400°F (200°C).
    2. In a small bowl, mix together olive oil, garlic, honey, paprika, salt, and pepper.
    3. Place chicken shoulders in a shallow baking dish and brush with the mixture.
    4. Roast for 30-40 minutes or until cooked through.
    5. Garnish with chopped parsley, if desired.

    Cooking Time: 30-40 minutes

    Green Iron Shoulders

    Green Iron Shoulders
    This vibrant and flavorful dish is a perfect representation of Asian-inspired cuisine, with a harmonious balance of sweet, sour, and savory notes. Green Iron Shoulders is a refreshing twist on traditional stir-fries.

    Ingredients:

    – 1 pound boneless chicken breasts, cut into bite-sized pieces
    – 2 tablespoons vegetable oil
    – 1 onion, thinly sliced
    – 2 cloves garlic, minced
    – 1 cup snow peas, sliced
    – 1 cup mushrooms, sliced
    – 2 cups mixed greens (bok choy, spinach, and green onions)
    – 2 tablespoons soy sauce
    – 1 tablespoon honey
    – Salt and pepper to taste

    Instructions:

    1. Heat oil in a large skillet or wok over medium-high heat.
    2. Add chicken and cook until browned, about 5 minutes. Remove from pan and set aside.
    3. Add onion and garlic; stir-fry for 2-3 minutes until softened.
    4. Add snow peas and mushrooms; stir-fry for an additional 2-3 minutes.
    5. Stir in mixed greens, soy sauce, and honey. Cook for 1 minute.
    6. Return chicken to the pan and stir-fry for another 2-3 minutes until coated with the green mixture.
    7. Season with salt and pepper to taste.

    Cooking Time: 15-20 minutes

    Golden Scale Shoulders

    Golden Scale Shoulders
    Elevate your meals with this aromatic and flavorful dish, featuring tender chicken shoulders smothered in a rich golden sauce.

    Ingredients:

    – 4 bone-in, skin-on chicken shoulders
    – 2 tbsp olive oil
    – 1 onion, diced
    – 3 cloves garlic, minced
    – 1 cup golden honey
    – 1/2 cup apple cider vinegar
    – 1 tsp Dijon mustard
    – Salt and pepper to taste

    Instructions:

    1. Preheat oven to 375°F (190°C).
    2. In a large skillet, heat olive oil over medium-high heat. Add chicken shoulders and cook for 5 minutes on each side, or until browned.
    3. Remove chicken from skillet and set aside. Reduce heat to medium, then add diced onion and cook until softened.
    4. Add minced garlic and cook for an additional minute.
    5. In a small bowl, whisk together golden honey, apple cider vinegar, Dijon mustard, salt, and pepper.
    6. Pour the sauce over the chicken shoulders in the skillet. Return chicken to the oven and bake for 30-40 minutes or until cooked through.

    Cooking Time: 45-50 minutes

    Steel Plate Helm

    Steel Plate Helm
    A robust and savory dish perfect for satisfying your hunger after a long day of adventuring.

    Ingredients:

    – 1 lb beef strip loin, sliced into thin strips
    – 2 tbsp olive oil
    – 1 onion, diced
    – 3 cloves garlic, minced
    – 1 cup beef broth
    – 1 tsp soy sauce
    – 1 tsp Worcestershire sauce
    – Salt and pepper to taste

    Instructions:

    1. Heat the olive oil in a large skillet over medium-high heat.
    2. Add the sliced beef and cook for 3-4 minutes, or until browned and cooked through.
    3. Remove the beef from the skillet and set aside.
    4. Reduce heat to medium and add the diced onion to the skillet. Cook until caramelized, about 5 minutes.
    5. Add the minced garlic and cook for an additional minute.
    6. Stir in the beef broth, soy sauce, and Worcestershire sauce.
    7. Return the cooked beef to the skillet and stir to coat with the sauce.
    8. Season with salt and pepper to taste.

    Cooking Time: 20-25 minutes

    Dark Iron Plate

    Dark Iron Plate
    A flavorful and satisfying dish inspired by the fiery depths of the Dark Iron mines. This recipe yields a crispy exterior with a tender, savory interior that’s sure to please even the most discerning palate.

    Ingredients:

    – 4-6 Dark Iron Mine Ore
    – 1/2 cup of Unrefined Iron Powder
    – 1 tablespoon of Molten Ash
    – 1 teaspoon of Smoldering Ember Dust
    – Salt and pepper, to taste

    Instructions:

    1. Preheat your cooking surface to a medium-high heat.
    2. Combine the Dark Iron Mine Ore, Unrefined Iron Powder, and Molten Ash in a small bowl.
    3. Add the Smoldering Ember Dust and mix until the ingredients are well combined.
    4. Form into desired plate shape (e.g., disk or sheet).
    5. Place on cooking surface and cook for 10-15 minutes per side, or until crispy and golden brown.
    6. Season with salt and pepper to taste.

    Cooking Time: 20-30 minutes

    Blacksmith Hammer

    Blacksmith Hammer
    Quench your thirst with this energizing drink, inspired by the fiery passion of blacksmithing.

    Ingredients:
    • 2 cups strong brewed coffee
    • 1 cup coconut water
    • 1/4 cup honey syrup (1:1 honey and water)
    • Ice cubes

    Instructions:

    1. Brew a pot of strong coffee and let it cool.
    2. Mix the cooled coffee with coconut water and honey syrup in a large glass.
    3. Stir well to combine.
    4. Serve over ice and garnish with a blacksmith-inspired design (e.g., a hammer-shaped ice cube or a sprinkle of edible gold dust).

    Cooking Time: 5 minutes

    Blacksmith Tongs

    Blacksmith Tongs
    Get ready to shape your own metalworking tools with this simple recipe for Blacksmith Tongs. With these basic tongs, you’ll be able to grasp and manipulate hot metal like a pro.

    Ingredients:

    – 1 lb of mild steel rod (3/16″ or 5mm)
    – 1/4 lb of high-carbon steel wire (0.030″ or 0.76mm)
    – Sandpaper
    – File
    – Quenching oil

    Instructions:

    1. Cut the mild steel rod into two equal pieces, each about 6 inches long.
    2. Use sandpaper to smooth out any rough edges and then file both ends of each piece.
    3. Wrap one end of each piece with the high-carbon steel wire, leaving a small gap in the middle.
    4. Use a hammer or mallet to shape the wire into a comfortable grip.
    5. Quench the tongs in oil to harden the metal.

    Cooking Time: None required! (Just be careful when handling hot metal)

    Golden Rod

    Golden Rod
    A sweet and savory twist on traditional roasted vegetables, Golden Rod is a flavorful side dish that’s perfect for any meal.

    Ingredients:

    – 1 pound golden beets
    – 2 tablespoons olive oil
    – 1 onion, peeled and chopped
    – 2 cloves garlic, minced
    – 1 teaspoon ground cumin
    – Salt and pepper to taste
    – Fresh parsley, chopped (optional)

    Instructions:

    1. Preheat oven to 425°F (220°C).
    2. Wrap the golden beets in foil and roast for 45-50 minutes, or until tender.
    3. In a large skillet, heat olive oil over medium-high heat. Add onion and garlic; cook until softened, about 5 minutes.
    4. Remove roasted beets from foil and slice into wedges. Add to skillet with onion mixture; toss to combine.
    5. Sprinkle cumin and season with salt and pepper to taste.
    6. Garnish with chopped parsley, if desired.

    Cooking Time: 55-60 minutes

    Truesilver Rod

    Truesilver Rod
    In this recipe, we’ll guide you through the process of crafting a valuable Truesilver Rod, a sought-after item that’s perfect for adventurers and treasure hunters. With just a few simple ingredients and steps, you’ll be able to create your own Truesilver Rod.

    Ingredients:
    – 1 piece of Truesteel
    – 2 Moonstones
    – 1 vial of Celestial Essence
    – 5 units of Starlight Crystals

    Instructions:

    1. Preheat your crafting station by adding the Celestial Essence.
    2. Combine the Truesteel and Starlight Crystals on the crafting grid.
    3. Place the Moonstones at the center of the grid, ensuring they’re perfectly aligned.
    4. Allow the mixture to simmer for 10 minutes, allowing the energies to combine.
    5. Once complete, your Truesilver Rod is ready for use.

    Cooking Time: 10 minutes

    Arcanite Rod

    Arcanite Rod
    A mystical dish that harnesses the power of the arcane, the Arcanite Rod is a flavorful and potent concoction perfect for fueling your magical pursuits. This recipe yields a delectable treat that will satisfy both body and mind.

    Ingredients:
    • 1 pound of rare, starlight-infused mushrooms
    • 1/2 cup of enchanted oil
    • 1/4 teaspoon of powdered Arcanite
    • 1 tablespoon of moonstone dust
    • 1/2 teaspoon of sugar
    • 1/4 teaspoon of salt

    Instructions:

    1. Preheat your crucible to 350°F.
    2. In a small bowl, mix the mushrooms, enchanted oil, and powdered Arcanite until well combined.
    3. Add the moonstone dust and stir counterclockwise for 7 times, then clockwise for 3 times.
    4. Fold in the sugar and salt until fully incorporated.
    5. Pour the mixture into the preheated crucible and cook for 20 minutes.
    6. Remove from heat and let cool.

    Cooking Time: 20 minutes

    Dark Iron Bracers

    Dark Iron Bracers
    Arm yourself with these robust bracers, infused with the fiery essence of dark iron. Perfect for adventurers seeking protection and strength on their perilous journeys.

    Ingredients:

    – 2 pieces of dark iron plate (obtained through smelting or mining)
    – 1 vial of enchanted oil
    – 3 pieces of leather strap (enchanted or regular)

    Instructions:

    1. Begin by preparing the dark iron plates by cleaning and polishing them to remove any impurities.
    2. Apply a thin layer of enchanted oil to each plate, ensuring they are evenly coated.
    3. Place one piece of leather strap on each plate, securing it with a small amount of enchanted oil or regular binding material.
    4. Repeat this process for the second plate, creating two identical bracers.
    5. Allow the bracers to dry and absorb the properties of the dark iron before donning them.

    Cooking Time: 30 minutes (prep time) + 2 hours (absorption time)

    Summary

    The article presents 18 essential blacksmithing recipes for master crafters in WoW Classic. From basic tools like Rough Sharpening Stones and Coarse Weightstones to high-end armor sets like Runed Copper Breastplates and Golden Scale Shoulders, these recipes are designed to help master craftsmen create the best equipment for their characters. The article provides a comprehensive list of recipes, making it a valuable resource for players looking to upgrade their characters’ gear.

  • 18 Vibrant Purple Cauliflower Recipes for Every Occasion

    18 Vibrant Purple Cauliflower Recipes for Every Occasion

    When it comes to adding a pop of color to your plate, few ingredients are as effective as vibrant purple cauliflower. This stunning vegetable has been gaining popularity in recent years, and for good reason – its deep purple hue adds a touch of drama to any dish, while its slightly sweet flavor and versatile texture make it a joy to cook with.

    Whether you’re looking for a show-stopping side dish or a creative way to add some excitement to your meals, we’ve got you covered. In this article, we’ll be sharing 18 vibrant purple cauliflower recipes that are perfect for every occasion. From comforting pasta dishes to flavorful international-inspired meals, there’s something on this list for everyone.

    Stay tuned for our top picks and get ready to elevate your cooking game with the power of purple cauliflower!

    Roasted Purple Cauliflower with Garlic and Parmesan

    Roasted Purple Cauliflower with Garlic and Parmesan
    Roasted Purple Cauliflower with Garlic and Parmesan: A flavorful and vibrant side dish that’s perfect for any occasion.

    Ingredients:

    – 1 head of purple cauliflower, broken into florets
    – 2 cloves of garlic, minced
    – 2 tablespoons olive oil
    – 1/4 cup grated Parmesan cheese
    – Salt and pepper to taste
    – Fresh parsley, chopped (optional)

    Instructions:

    1. Preheat the oven to 425°F (220°C).
    2. In a large bowl, toss cauliflower florets with olive oil, garlic, salt, and pepper until evenly coated.
    3. Spread the cauliflower mixture on a baking sheet in a single layer.
    4. Roast in the preheated oven for 20-25 minutes, or until tender and caramelized.
    5. Sprinkle Parmesan cheese over the roasted cauliflower and return to the oven for an additional 2-3 minutes, or until melted and bubbly.
    6. Garnish with chopped parsley, if desired.

    Cooking Time: 22-28 minutes

    Purple Cauliflower and Chickpea Curry

    Purple Cauliflower and Chickpea Curry
    Elevate your curry game with this vibrant and aromatic Purple Cauliflower and Chickpea Curry recipe. The deep purple hue of the cauliflower adds a pop of color to this nutritious and delicious dish.

    Ingredients:

    – 1 head of purple cauliflower, broken into florets
    – 1 can chickpeas (14 oz), drained and rinsed
    – 2 medium onions, diced
    – 3 cloves garlic, minced
    – 1 tablespoon curry powder
    – 1 teaspoon ground cumin
    – 1/2 teaspoon turmeric
    – 1/4 teaspoon cayenne pepper (optional)
    – 1 can coconut milk (14 oz)
    – Salt and pepper to taste
    – Fresh cilantro leaves for garnish

    Instructions:

    1. Heat oil in a large saucepan over medium heat.
    2. Add onions and cook until softened, about 5 minutes.
    3. Add garlic and cook for an additional minute.
    4. Add curry powder, cumin, turmeric, and cayenne pepper (if using). Cook for 1-2 minutes, stirring constantly.
    5. Add cauliflower, chickpeas, and coconut milk. Season with salt and pepper to taste.
    6. Simmer for 20-25 minutes or until the cauliflower is tender.
    7. Garnish with cilantro leaves and serve over rice or with naan bread.

    Cooking Time: 30-40 minutes

    Grilled Purple Cauliflower Steaks with Herb Drizzle

    Grilled Purple Cauliflower Steaks with Herb Drizzle
    Elevate your cauliflower game with this simple and flavorful recipe that showcases the natural sweetness of purple cauliflower.

    Ingredients:

    – 1 large head of purple cauliflower
    – 2 tbsp olive oil
    – 1 tsp garlic powder
    – Salt and pepper, to taste
    – 1/4 cup fresh parsley, chopped
    – 1/4 cup fresh dill, chopped
    – 2 tbsp lemon juice
    – 1 tsp honey

    Instructions:

    1. Preheat grill to medium-high heat.
    2. Rinse the cauliflower and remove the leaves and stem. Cut into 1-inch thick slices (steaks).
    3. In a large bowl, whisk together olive oil, garlic powder, salt, and pepper. Add the cauliflower steaks and toss to coat evenly.
    4. Grill the cauliflower for 5-7 minutes per side, or until tender and slightly charred.
    5. Meanwhile, combine parsley, dill, lemon juice, and honey in a small bowl. Stir until well combined.
    6. Brush the herb drizzle over the grilled cauliflower steaks during the last minute of cooking.
    7. Serve hot and enjoy!

    Cooking Time: 15-20 minutes

    Creamy Purple Cauliflower Soup with Crispy Bacon

    Creamy Purple Cauliflower Soup with Crispy Bacon
    This vibrant soup is a flavorful celebration of spring’s arrival, combining the natural sweetness of purple cauliflower with the savory delight of crispy bacon. Perfect for a chilly evening or as a starter for a special occasion.

    Ingredients:

    – 1 head of purple cauliflower, broken into florets
    – 6 slices of thick-cut bacon, diced
    – 2 tablespoons of unsalted butter
    – 1 onion, chopped
    – 4 cups of chicken broth
    – 1/2 cup of heavy cream
    – Salt and pepper to taste
    – Fresh parsley or chives for garnish (optional)

    Instructions:

    1. Preheat oven to 425°F (220°C).
    2. Toss cauliflower florets with 1 tablespoon of butter, salt, and pepper on a baking sheet. Roast for 20-25 minutes, or until tender.
    3. In a large pot, cook diced bacon over medium heat until crispy. Remove from heat and set aside.
    4. Add remaining butter to the pot, then sauté chopped onion until softened.
    5. Add roasted cauliflower, chicken broth, and heavy cream to the pot. Bring to a simmer and puree with an immersion blender or regular blender.
    6. Stir in cooked bacon and season to taste.
    7. Serve warm, garnished with fresh parsley or chives if desired.

    Cooking Time: 40-45 minutes

    Purple Cauliflower Rice Stir-Fry with Vegetables

    Purple Cauliflower Rice Stir-Fry with Vegetables
    A vibrant and nutritious twist on traditional stir-fries, this recipe combines the earthy sweetness of purple cauliflower rice with a colorful medley of vegetables.

    Ingredients:

    – 1 head of purple cauliflower
    – 2 tablespoons of vegetable oil
    – 1 onion, thinly sliced
    – 2 cloves of garlic, minced
    – 1 cup of mixed bell peppers (any color), sliced
    – 1 cup of snow peas, trimmed
    – 1 teaspoon of soy sauce
    – Salt and pepper to taste
    – Fresh cilantro leaves for garnish (optional)

    Instructions:

    1. Preheat a large skillet or wok over medium-high heat.
    2. Pulse the purple cauliflower in a food processor until it resembles rice.
    3. Heat the oil in the skillet, then add the onion and garlic. Cook until the onion is translucent.
    4. Add the mixed bell peppers and snow peas. Cook for 3-4 minutes, or until the vegetables are tender-crisp.
    5. Stir in the cooked cauliflower “rice” and soy sauce. Season with salt and pepper to taste.
    6. Serve hot, garnished with fresh cilantro leaves if desired.

    Cooking Time: 15-20 minutes

    Purple Cauliflower and Kale Salad with Lemon Tahini Dressing

    Purple Cauliflower and Kale Salad with Lemon Tahini Dressing
    This vibrant salad combines the sweetness of purple cauliflower with the earthiness of kale, all tied together with a tangy and creamy lemon tahini dressing.

    Ingredients:

    – 1 head of purple cauliflower, broken into florets
    – 2 cups of curly kale, stems removed and chopped
    – 1/4 cup of freshly squeezed lemon juice
    – 1/4 cup of tahini
    – 2 cloves of garlic, minced
    – Salt and pepper to taste
    – 2 tablespoons of olive oil

    Instructions:

    1. Preheat oven to 425°F (220°C). Toss cauliflower florets with 1 tablespoon of olive oil, salt, and pepper on a baking sheet. Roast for 20-25 minutes or until tender.
    2. In a large bowl, massage chopped kale with 1 tablespoon of lemon juice and a pinch of salt until wilted.
    3. In a small bowl, whisk together remaining lemon juice, tahini, garlic, salt, and pepper to make the dressing.
    4. Combine roasted cauliflower, massaged kale, and dressing in the bowl. Toss to combine.
    5. Serve immediately and enjoy!

    Cooking Time: 25 minutes

    Baked Purple Cauliflower Mac and Cheese

    Baked Purple Cauliflower Mac and Cheese
    Elevate your macaroni and cheese game with the addition of vibrant purple cauliflower! This comforting dish combines creamy pasta, roasted cauliflower, and a crispy breadcrumb topping for a delightful twist on a classic.

    Ingredients:

    – 1 head of purple cauliflower, broken into florets
    – 8 oz macaroni
    – 2 cups grated cheddar cheese
    – 1 cup grated mozzarella cheese
    – 1/4 cup all-purpose flour
    – 1 tsp paprika
    – Salt and pepper, to taste
    – 1/4 cup panko breadcrumbs
    – 2 tbsp unsalted butter
    – 1/2 cup whole milk

    Instructions:

    1. Preheat oven to 375°F (190°C).
    2. Cook macaroni according to package instructions; set aside.
    3. Toss cauliflower with paprika, salt, and pepper on a baking sheet. Roast for 20-25 minutes, or until tender.
    4. In a large saucepan, melt butter over medium heat. Whisk in flour to make a roux, cooking for 1 minute.
    5. Gradually add milk, whisking constantly; bring to a simmer. Remove from heat and stir in cheddar and mozzarella cheese until melted.
    6. Combine cooked macaroni, roasted cauliflower, and cheesy sauce in a baking dish.
    7. Top with panko breadcrumbs and bake for 20-25 minutes, or until golden brown.

    Cooking Time: 40-50 minutes

    Purple Cauliflower Pizza Crust with Fresh Toppings

    Purple Cauliflower Pizza Crust with Fresh Toppings
    Elevate your pizza game with this unique and flavorful cauliflower crust, infused with the natural sweetness of purple cauliflower. This recipe is perfect for a healthy twist on a classic favorite.

    Ingredients:

    – 1 head of purple cauliflower
    – 1/2 cup grated Parmesan cheese
    – 1/4 cup almond flour
    – 1 egg
    – 1 tablespoon olive oil
    – Salt, to taste
    – Fresh toppings of your choice (e.g., cherry tomatoes, mozzarella cheese, basil leaves)

    Instructions:

    1. Preheat oven to 425°F (220°C).
    2. Rinse the purple cauliflower and remove the leaves and stem. Cut into florets.
    3. Pulse the cauliflower in a food processor until it resembles rice.
    4. In a bowl, combine the processed cauliflower, Parmesan cheese, almond flour, egg, and olive oil. Mix well.
    5. Transfer the mixture to a baking sheet lined with parchment paper. Shape into a circle or rectangle.
    6. Bake for 15-20 minutes, or until the crust is golden brown and set.
    7. Top with your desired toppings and return to the oven for an additional 3-5 minutes.

    Cooking Time: Approximately 20-25 minutes

    Spicy Purple Cauliflower Tacos with Avocado Crema

    Spicy Purple Cauliflower Tacos with Avocado Crema
    Elevate your taco game with this vibrant and flavorful recipe featuring purple cauliflower, a spicy kick, and creamy avocado crema. Perfect for a quick weeknight dinner or a weekend brunch.

    Ingredients:

    – 1 head of purple cauliflower, broken into florets
    – 2 tablespoons olive oil
    – 1 teaspoon ground cumin
    – 1/2 teaspoon smoked paprika
    – 1/4 teaspoon cayenne pepper (or more to taste)
    – 8-10 corn tortillas
    – Salt and pepper, to taste
    – Avocado crema (see below for recipe)

    Instructions:

    1. Preheat oven to 425°F (220°C). Toss cauliflower with olive oil, cumin, smoked paprika, and cayenne pepper. Spread on a baking sheet and roast for 20-25 minutes, or until tender and slightly caramelized.
    2. Warm tortillas by wrapping them in a damp paper towel and microwaving for 20-30 seconds.
    3. Assemble tacos by placing roasted cauliflower onto warmed tortillas, seasoning with salt and pepper to taste.

    Avocado Crema:

    – 1 ripe avocado, diced
    – 1/2 lime, juiced
    – 1/4 cup plain Greek yogurt
    – Salt, to taste

    Combine all ingredients in a bowl and mix until smooth. Use as a topping for your tacos!

    Cooking time: 25-30 minutes

    Purple Cauliflower Mash with Roasted Garlic

    Purple Cauliflower Mash with Roasted Garlic
    Elevate your side dish game with this vibrant and flavorful recipe that combines the natural sweetness of purple cauliflower with the deep, nutty taste of roasted garlic. Perfect for accompanying a variety of main courses.

    Ingredients:

    – 1 head of purple cauliflower
    – 2 cloves of garlic
    – 2 tablespoons olive oil
    – Salt and pepper to taste
    – 1/4 cup chicken or vegetable broth (optional)

    Instructions:

    1. Preheat oven to 425°F (220°C).
    2. Cut the purple cauliflower into florets and place on a baking sheet lined with parchment paper.
    3. Drizzle with olive oil, sprinkle with salt and pepper, and toss to coat.
    4. Roast in the preheated oven for 20-25 minutes or until tender and lightly caramelized.
    5. While the cauliflower is roasting, slice the garlic cloves in half lengthwise and place on a piece of aluminum foil.
    6. Drizzle with olive oil and fold the foil to create a little package.
    7. Roast in the preheated oven for 15-20 minutes or until the garlic is tender and mashed.
    8. Remove the cauliflower from the oven and let it cool slightly.
    9. Add the roasted garlic, broth (if using), and mash with a fork until smooth.

    Cooking Time: 35-40 minutes

    Purple Cauliflower and Lentil Stew

    Purple Cauliflower and Lentil Stew
    A hearty and nutritious stew that combines the sweet flavor of purple cauliflower with the earthy taste of lentils, all wrapped up in a rich and aromatic broth.

    Ingredients:

    – 1 head of purple cauliflower, broken into florets
    – 1 cup brown or green lentils, rinsed and drained
    – 2 tablespoons olive oil
    – 1 onion, chopped
    – 3 cloves garlic, minced
    – 1 teaspoon ground cumin
    – 1 teaspoon smoked paprika
    – 1 can (14.5 oz) diced tomatoes
    – 4 cups vegetable broth
    – Salt and pepper, to taste
    – Fresh parsley or cilantro, for garnish (optional)

    Instructions:

    1. Heat the olive oil in a large pot over medium heat.
    2. Add the onion and garlic; cook until softened, about 5 minutes.
    3. Add the lentils, cumin, smoked paprika, and diced tomatoes; stir to combine.
    4. Pour in the vegetable broth; bring to a boil, then reduce the heat and simmer for 30-40 minutes, or until the lentils are tender.
    5. Add the purple cauliflower; cook for an additional 10-15 minutes, or until the cauliflower is tender.
    6. Season with salt and pepper to taste.
    7. Garnish with fresh parsley or cilantro, if desired.

    Cooking Time: 45-55 minutes

    Pickled Purple Cauliflower with Turmeric and Mustard Seeds

    Pickled Purple Cauliflower with Turmeric and Mustard Seeds
    This vibrant pickling recipe adds a pop of color and flavor to your meals, perfect for topping salads, sandwiches, or serving as a side dish. With the warmth of turmeric and the tanginess of mustard seeds, this cauliflower pickle is sure to become a favorite!

    Ingredients:

    – 1 head of purple cauliflower, broken into florets
    – 1 cup (250 ml) white vinegar
    – 1/2 cup (125 ml) water
    – 2 tbsp (30 g) granulated sugar
    – 1 tsp ground turmeric
    – 1/4 tsp yellow mustard seeds
    – Salt and pepper to taste

    Instructions:

    1. In a large bowl, combine the cauliflower florets, vinegar, water, sugar, turmeric, and mustard seeds.
    2. Let it sit at room temperature for 24 hours, shaking occasionally.
    3. After 24 hours, refrigerate the mixture until chilled (at least 30 minutes).
    4. Strain the pickles through a fine-mesh sieve to remove excess liquid.

    Cooking Time:

    – None! Just let it sit and pickle!

    Purple Cauliflower and Broccoli Gratin

    Purple Cauliflower and Broccoli Gratin
    Elevate your comfort food game with this vibrant, flavorful gratin that combines the natural sweetness of purple cauliflower and broccoli with creamy cheese. This recipe is perfect for a cozy dinner party or a quick weeknight meal.

    Ingredients:

    – 1 head of purple cauliflower, broken into florets
    – 3 cups of broccoli florets
    – 2 tablespoons of olive oil
    – 1/2 cup of grated cheddar cheese
    – 1/4 cup of grated Parmesan cheese
    – 1/2 cup of heavy cream
    – Salt and pepper to taste
    – Fresh thyme leaves for garnish (optional)

    Instructions:

    1. Preheat oven to 375°F (190°C).
    2. In a large bowl, toss cauliflower and broccoli with olive oil, salt, and pepper until evenly coated.
    3. Transfer the vegetable mixture to a 9×13-inch baking dish.
    4. Sprinkle cheddar and Parmesan cheese over the top.
    5. Pour in heavy cream and toss gently to combine.
    6. Bake for 25-30 minutes or until the vegetables are tender and the top is golden brown.
    7. Garnish with thyme leaves, if desired.

    Cooking Time: 25-30 minutes

    Purple Cauliflower Hummus with Pita Chips

    Purple Cauliflower Hummus with Pita Chips
    Transform your snack time with this vibrant and flavorful Purple Cauliflower Hummus, served with crispy pita chips.

    Ingredients:

    – 1 head of purple cauliflower, broken into florets
    – 1/4 cup chickpeas
    – 2 cloves garlic, minced
    – 1/4 cup tahini
    – 2 tablespoons lemon juice
    – 1 tablespoon olive oil
    – Salt and pepper to taste
    – 1 bag pita chips

    Instructions:

    1. Preheat oven to 400°F (200°C). Toss cauliflower florets with 1 tablespoon olive oil, salt, and pepper on a baking sheet. Roast for 20-25 minutes or until tender.
    2. In a blender or food processor, combine roasted cauliflower, chickpeas, garlic, tahini, lemon juice, and remaining olive oil. Blend until smooth.
    3. Transfer the hummus to a serving bowl. Serve with pita chips.

    Cooking Time: 20-25 minutes (roasting cauliflower) + 5-7 minutes (blending hummus)

    Enjoy your delicious and healthy Purple Cauliflower Hummus with Pita Chips!

    Purple Cauliflower and Sweet Potato Hash

    Purple Cauliflower and Sweet Potato Hash
    This vibrant side dish is a stunning addition to any meal. Roasting brings out the natural sweetness of the sweet potatoes, while the purple cauliflower adds a pop of color and earthy flavor.

    Ingredients:

    – 1 large purple cauliflower, broken into florets
    – 2 large sweet potatoes, peeled and cubed
    – 2 tablespoons olive oil
    – 1 tablespoon honey
    – Salt and pepper to taste
    – Optional: chopped fresh herbs (such as parsley or thyme) for garnish

    Instructions:

    1. Preheat oven to 425°F (220°C).
    2. Toss cauliflower and sweet potatoes with olive oil, honey, salt, and pepper on a baking sheet.
    3. Roast for 25-30 minutes, or until the vegetables are tender and caramelized.
    4. Remove from oven and let cool slightly.
    5. Serve warm, garnished with chopped fresh herbs if desired.

    Cooking Time: 25-30 minutes

    Purple Cauliflower Alfredo Pasta

    Purple Cauliflower Alfredo Pasta
    Elevate your pasta game with this creamy and vibrant Purple Cauliflower Alfredo Pasta recipe, featuring the stunning color of purple cauliflower. This dish is perfect for a quick weeknight dinner or a special occasion.

    Ingredients:

    – 8 oz fettuccine pasta
    – 1 head of purple cauliflower, broken into florets
    – 2 tablespoons unsalted butter
    – 1 cup heavy cream
    – 1/2 cup grated Parmesan cheese
    – 1 teaspoon garlic powder
    – Salt and pepper to taste
    – Fresh parsley leaves for garnish

    Instructions:

    1. Preheat oven to 425°F (220°C).
    2. Cook pasta according to package instructions until al dente.
    3. In a large skillet, melt butter over medium heat. Add purple cauliflower and cook until tender, about 5-7 minutes.
    4. In a separate saucepan, combine heavy cream, Parmesan cheese, garlic powder, salt, and pepper. Whisk until smooth.
    5. Combine cooked pasta, cauliflower mixture, and creamy sauce. Toss to coat.
    6. Serve immediately, garnished with fresh parsley leaves.

    Cooking Time: 20-25 minutes

    Purple Cauliflower and Quinoa Buddha Bowl

    Purple Cauliflower and Quinoa Buddha Bowl
    A vibrant and nutritious bowl filled with roasted purple cauliflower, quinoa, and a variety of flavors and textures.

    Ingredients:

    – 1 head of purple cauliflower, broken into florets
    – 1 cup of cooked quinoa
    – 2 tablespoons of olive oil
    – 1 tablespoon of soy sauce
    – 1 teaspoon of honey
    – 1/4 teaspoon of garlic powder
    – Salt and pepper to taste
    – Chopped scallions and toasted almonds for garnish (optional)

    Instructions:

    1. Preheat the oven to 425°F (220°C).
    2. Toss the cauliflower florets with olive oil, soy sauce, honey, garlic powder, salt, and pepper on a baking sheet.
    3. Roast the cauliflower in the preheated oven for 20-25 minutes, or until tender and caramelized.
    4. Cook the quinoa according to package instructions.
    5. To assemble the bowls, place the cooked quinoa at the base, followed by the roasted cauliflower, and garnish with chopped scallions and toasted almonds if desired.

    Cooking Time: 30-35 minutes

    Purple Cauliflower Fritters with Yogurt Dip

    Purple Cauliflower Fritters with Yogurt Dip
    Transform humble cauliflower into a vibrant purple masterpiece, served with a refreshing yogurt dip.

    Ingredients:
    • 1 head of purple cauliflower, broken into florets
    • 1 cup all-purpose flour
    • 1/2 cup cornstarch
    • 1/4 cup grated Parmesan cheese
    • 1/2 teaspoon salt
    • 1/4 teaspoon black pepper
    • 1/2 cup plain Greek yogurt
    • 1 tablespoon lemon juice
    • 1/4 cup chopped fresh parsley

    Instructions:

    1. Preheat the oven to 375°F (190°C). Line a baking sheet with parchment paper.
    2. Pulse cauliflower florets in a food processor until coarsely chopped.
    3. In a bowl, whisk together flour, cornstarch, Parmesan cheese, salt, and pepper.
    4. Add the dry mixture to the processor and pulse until well combined.
    5. Using your hands, shape the mixture into small patties (about 12).
    6. Place patties on the prepared baking sheet, leaving space between each.
    7. Bake for 20-22 minutes or until golden brown and crispy.
    8. Meanwhile, mix together yogurt, lemon juice, and parsley in a bowl.
    9. Serve warm fritters with chilled yogurt dip.

    Cooking Time: 20-22 minutes

    Summary

    Get ready to elevate your culinary game with these 18 vibrant purple cauliflower recipes! From classic roasted dishes to creative twists like pizza crust and tacos, there’s something for every occasion. Indulge in creamy soups, crunchy salads, and savory curries, or try your hand at making a show-stopping mac and cheese or alfredo pasta. Whether you’re a seasoned chef or a culinary newbie, these recipes are sure to inspire your inner foodie and leave everyone wanting more!